| View previous topic :: View next topic |
| Author |
Message |
Scheimpflug


Joined: 06 Feb 2010
Posts: 1888
Location: New Zealand / USA
Expire: 2011-11-18
|
 Posted: Thu Aug 26, 2010 2:43 pm Post subject: How-To: Pentax P50 Shutter Button Repair Guide Posted: Thu Aug 26, 2010 2:43 pm Post subject: How-To: Pentax P50 Shutter Button Repair Guide |
 |
|
Scheimpflug wrote:
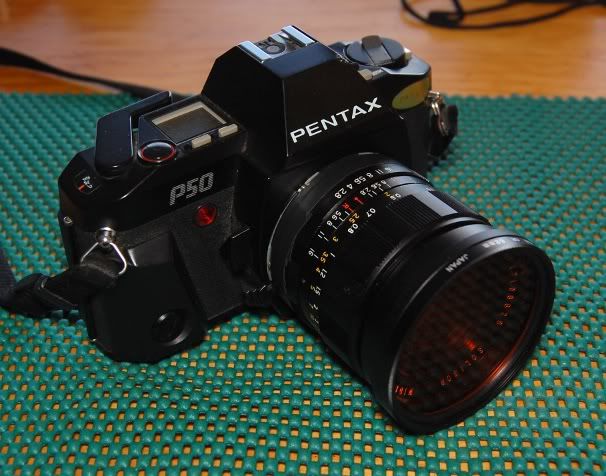
So I had been having a problem with my Pentax P50... where sometimes, you would half-press the shutter button, but the meter would not turn on.  It could sometimes be activated by repeatedly pressing the button, but of course it was easy to accidentally fire the shutter by accident when doing this. It could sometimes be activated by repeatedly pressing the button, but of course it was easy to accidentally fire the shutter by accident when doing this. 
Searching for information, it sounds like this is a somewhat common problem, and one that very few people take the time to repair.  I was encouraged by a cleaning success story from member Flor27, which can be found here, so I decided to give it a shot and document the process as a How-To Guide in case anyone else needs to perform the operation. I was encouraged by a cleaning success story from member Flor27, which can be found here, so I decided to give it a shot and document the process as a How-To Guide in case anyone else needs to perform the operation. 
Step 1: Place your camera on a suitable workspace. Lately I have come to prefer these non-slip kitchen cabinet liners, as they are soft, grippy, cushioned, and very good at catching those tiny little screws that you will undoubtedly drop. 
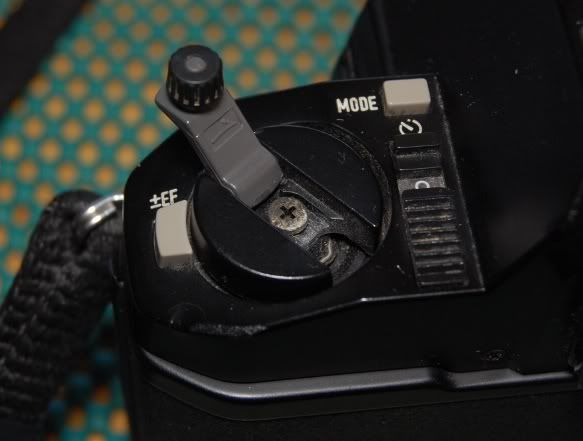
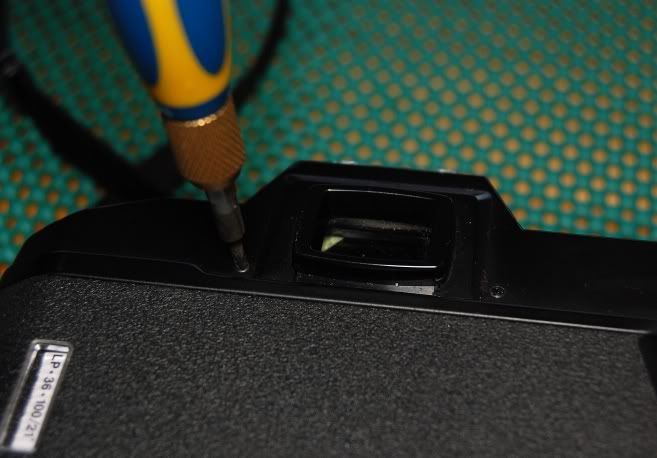
Step 2: Remove the plastic cover for the advance lever. This is done by removing a single screw, which is visible on the underside of the lever when the camera is upside down.
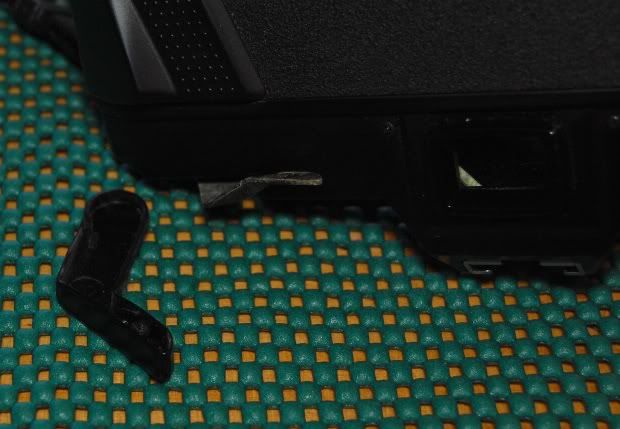
Note: Unless removed in pairs, almost all of the screws you will remove are DIFFERENT! It is therefore important that you find a good way to organize the screws as you take them out.
Step 3: Remove the advance lever by removing the big screw holding it on. Note that this screw has "left-hand" threads! This means that you will have to turn your screwdriver clockwise when viewed from the top to loosen it. Also note that it has a very short screw head, so be careful not to let the screwdriver slip.
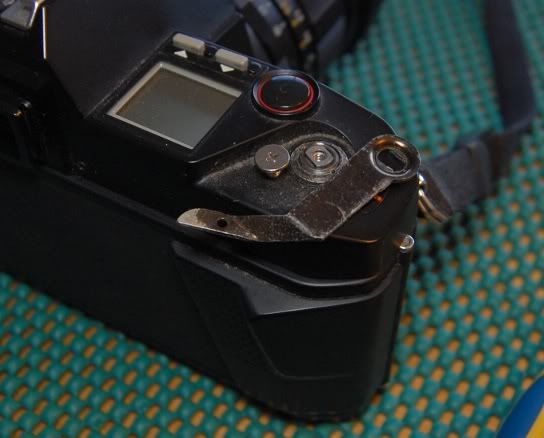
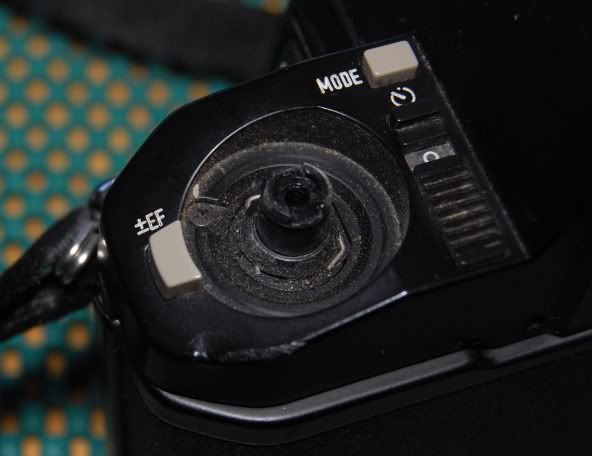
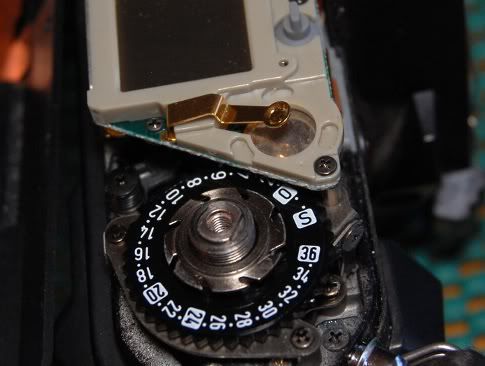
Step 4: Remove the retaining nut around the advance shaft, which holds the top cover to the camera body.
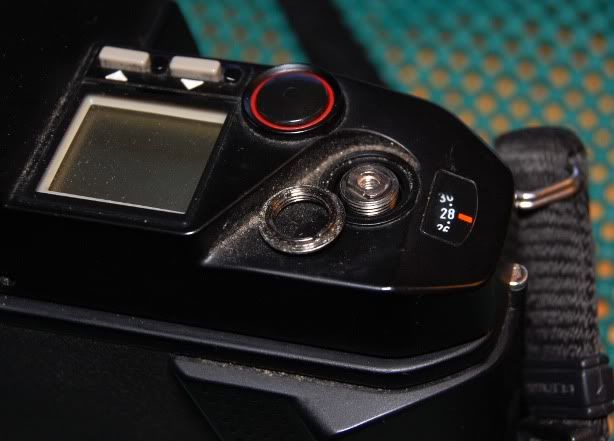
Step 5: Remove the rewind crank. The easiest way to do this is to pop open the back cover and put a screwdriver through the slot in the bottom of the shaft to hold it still. For what it is worth, I had a half-exposed roll of film in the camera, and successfully did this without removing the film OR opening the back. The key is to hold the base of the crank (the large round part) while unscrewing the screw. If necessary, you can pull up on the shaft just a bit and it will pop up enough to grab the shaft. Just don't pull it up past this first catch, or it will open the film door!
Step 6: With the rewind crank removed, we can now see another screw that was hiding beneath. Remove this screw.
Step 7: Moving to the front, we now must remove the thin plastic trim piece. Using a thin screwdriver, carefully pry up the cover. It is only held on by double-sided tape, so if you are careful with the removal, you can stick it back on without requiring new tape.
Step 8: Remove the two screws that were hiding behind the front trim plate.
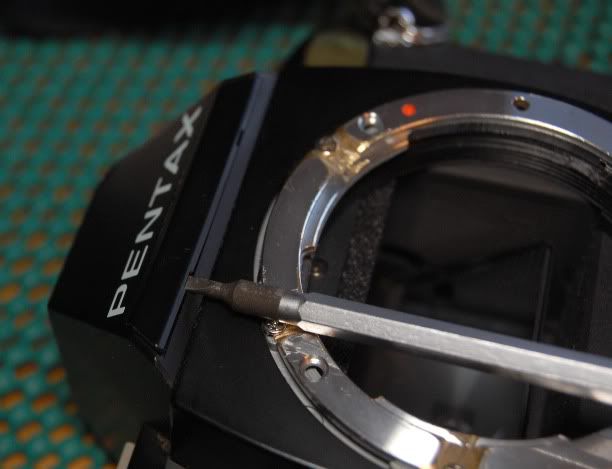
Step 9: Remove the two screws on either side of the viewfinder.
Step 10: Carefully lift the top cover off of the body. Note that the three grey buttons (exposure compensation, and the two adjust buttons on the right side) are all loose, and will fall out. Don't worry too much about catching them, you can put them back later. Also note that the top cover is NOT free - it is still held on by the wires to the hotshoe! There is a bit of slack on these wires, but not a lot, and it would be quite easy to damage the wires or the circuits if you pull on them.
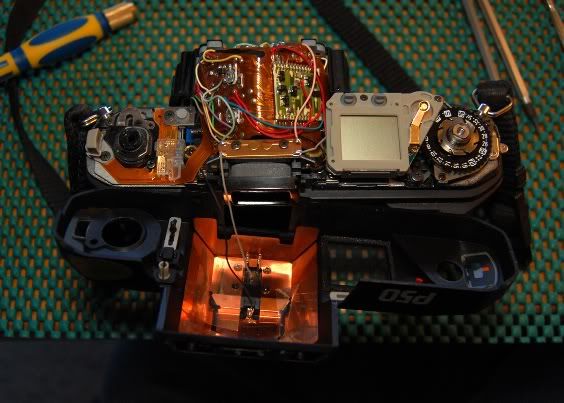
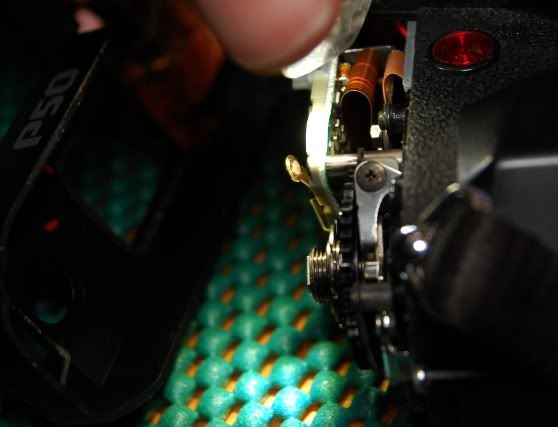
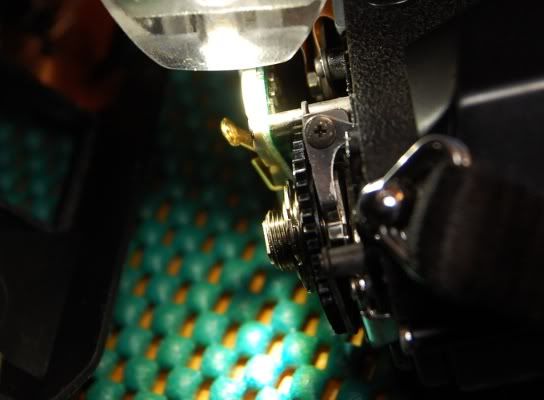
Step 11: Here we have the shutter button. The way it works is that the half-press brings the gold piece down until it contacts the silver piece, and the full-press pushes down on the silver piece activating a switch underneath.
Step 12: Using a bright LED flashlight, we can see right away why this wasn't making very good contact. The white-colored patch is a mixture of dust and oxidation.
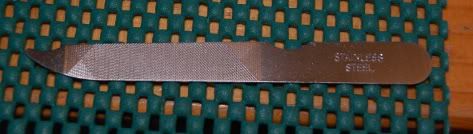
Step 13: You may be able to get away with just a simple cleaning. However, since I had everything apart, I decided to do a full "mechanical cleaning", by filing away the top layer of the oxidized metal. Note that you should always use metal files for filing electrical contacts, as "sandpaper" type files can leave little bits of non-conductive grit embedded in the metal surface! This file is a simple stainless steel nail file, easy to find at any corner convenience store.
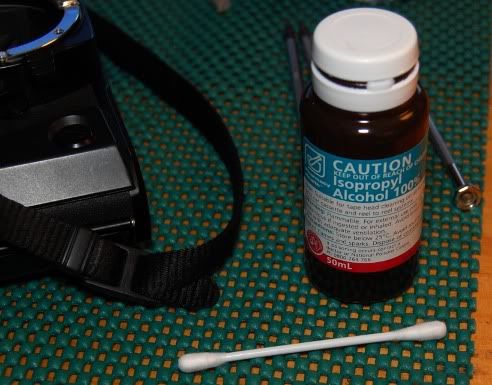
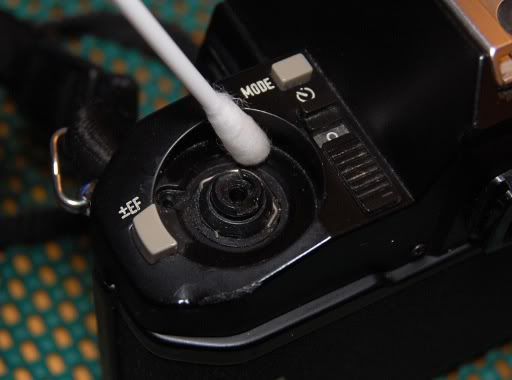
Step 14: After filing the gold-colored contact, we give it a quick wipe-down with a cotton swab and alcohol, being sure to clean the silver colored contact as well.
Step 15: Ta-Da! A nice shine on the contact lets us know that the oxidation is gone.
Step 16: Re-assemble in the reverse order, taking note of putting the correct screws into the correct places, as they are almost all different. When placing the cover back on the top, it is a bit difficult as there is nothing to hold the grey buttons in place. To get around this, the easiest way to re-assemble is to hold the top cover upside down and place the grey buttons in it, then put the camera body down into the cover while you are still holding everything upside down. Once the cover is in place, you can then flip it back over to put the screws in.
There are no pictures for Step 16, as I needed both hands to put the cover on while holding the camera upside-down.
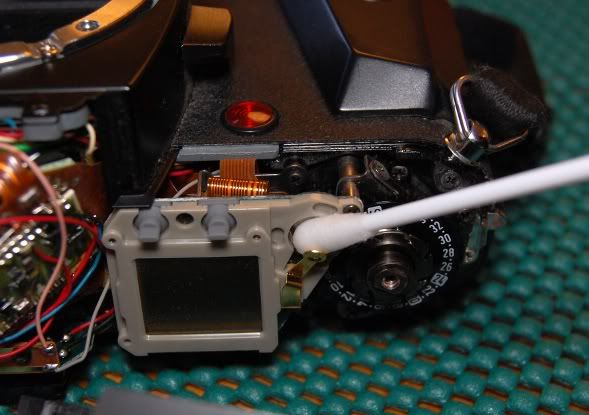
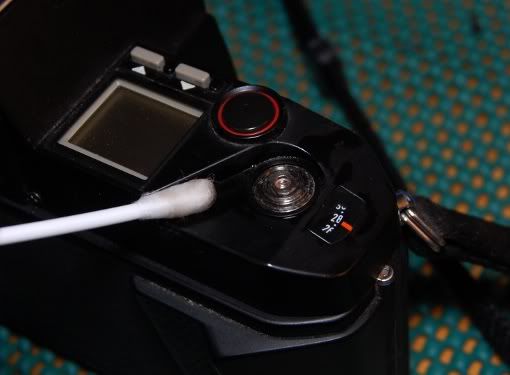
Step 17: While you still have some things apart, don't forget to take the opportunity to clean some of those "hard to reach" areas.
That's it! Pretty simple, really- about 15 minutes of work if you have everything in front of you. Hopefully this can help save a few more P50's from the rubbish bins.
_________________
Sigma DP1, Nikon D40 (hers ), Polaroid x530, Pentax P30t, Pentax P50, (P30t/P50 K-A to Nikon F body mount conversion)
Nikon: 18-55/3.5-5.6 "G ED II DX" (F) Soligor: 28/2.8 (FL->F converted), 135/3.5 (F), 3x TC (F, modified) Kalimar: 28-85/3.5 (F)
Vivitar: 70-210/2.8-4.0 Version 3 (F), Tele 500/6.3 Preset (F), 19/3.8 (F) Minolta: 300/5.6 (SR/MC/MD pending F conversion)
Tamron: 28/2.8 (Adaptall) Panagor: 28/2.5 (FD) Aetna: 300/5.6 (F) Osawa: MC 28/2.8 (F)
Vintage Lenses: Dallmeyer: 1940s A.M. 14in 356mm f4 (ULF->M42) 1930s Adon Telephoto Taylor, Taylor & Hobson: 1880s Rapid Rectilinear 8 1/2 x 6 1/2 11.31in f/8 (LF->?)
Parts Lenses: Nikon 35-135/3.5-4.5 (F), Sigma 70-210/4.5 (F), Nikon 50/1.8 Series E (F) |
|
| Back to top |
|
 |
pickles

Joined: 17 Jul 2010
Posts: 132
Location: melbourne
|
| Posted: Thu Aug 26, 2010 11:39 pm Post subject: |
|
|
pickles wrote:
What a SENSATIONAL post.
I don't have a P50, but I found "the story", well written, interesteing, & beautifully photographed.
The only thing I don't agree with, is that it's "simple"! I would suggest the only "simple" thing about it is that you "simply" have a great deal of skill, or a gift for doing this stuff....and "15 mins"....wow.
If I had a problem with my SP 11, & you lived near me, I'd be knocking on your door!
Great post....Thank You.
Cheers, Pickles.
_________________
Love my black SP11, ES11, and my SMCs.... 15mm f3.5 (asph), 17mm f4, 28mm 3.5, 35mm F2, 50mm 1.4, 85 mm 1.8, 105 2.8, 120 2.8, 135 2.5(v2), 200F4, 300 f4, 400 f5.6, 45/125 & 85/210 zoom, 50mmF4 macro, 100mm F4 macro...and looking for more "loves"! |
|
| Back to top |
|
|
Attila


Joined: 24 Feb 2007
Posts: 57849
Location: Hungary
Expire: 2025-11-18
|
| Posted: Fri Aug 27, 2010 12:07 am Post subject: |
|
|
Attila wrote:
Many thanks for this detailed guide!!
_________________
-------------------------------
Items on sale on Ebay
Sony NEX-7 Carl Zeiss Planar 85mm f1.4, Minolta MD 35mm f1.8, Konica 135mm f2.5, Minolta MD 50mm f1.2, Minolta MD 250mm f5.6, Carl Zeiss Sonnar 180mm f2.8
|
|
| Back to top |
|
|
Jesito

Joined: 24 Aug 2007
Posts: 5745
Location: Olivella, Catalonia, (Spain)
Expire: 2015-01-07
|
| Posted: Fri Aug 27, 2010 9:20 am Post subject: |
|
|
Jesito wrote:
Bright tutorial, thanks for sharing it!
Regards,
Jes.
_________________
Jesito, Moderator 
Jesito's backsack:
Zooms Sigma 70-300, Tamron 35-135 and 70-210 short, 70-210 long, 28-70 CF Macro, 35-70, 35-80, Vivitar 70-210 KA, Tamron 70-250.
Fixed Industar-50, , Tamron 24mm, Tamron 135mm, Sands Hunter 135mm, Pancolar 50mm, Volna-3, many Exakta lenses
DSLR SIGMA SD9 & SD14, EOS 5D, Sony A700 and NEXF3, Oly E-330, E-400, E-450, E-1
TLR/6x6/645 YashicaMat, Petri 6x45, Nettar, Franka Solida, Brilliant
SLR Minolta X300, Fuji STX II, Praktica VLC3, Pentax P30t, EXA500, EXA 1A, Spotmatic(2), Chinon CM-4S, Ricoh, Contax, Konica TC-X , Minolta 5000, 7000i, 3Sxi, EOS 500 and CX
Rangefinders Chinon 35EE, Konica C35 auto, Canonet 28, Yashica Lynx, FED-2, Yashica electro 35, Argus C3 & C4, Regula Cita III, Voigtlander Vitoret (many), Welta Welti-I, Kodak Signette 35, Zorki-4, Bessa-R & L, Minolta Weathermatic, olympus XA2
Compact Film Konica C35V, Voigtlander Vitorets, Canon Prima Super 105, Olympus XA2 and XA3
Compact Digital Olympus C-5050, Aiptek Slim 3000, Canon Powershot A540, Nikon 5200, SIGMA DP1s, Polaroid X530, IXUS55, Kodak 6490, Powershot G9 and G10
CSCCanon EOS-M, Samsung NX100 and NX210, Lumix G5, NEX-F3 |
|
| Back to top |
|
|
Scheimpflug
Joined: 06 Feb 2010
Posts: 1888
Location: New Zealand / USA
Expire: 2011-11-18
|
| Posted: Sun Aug 29, 2010 6:17 am Post subject: |
|
|
Scheimpflug wrote:
Thanks everyone for the kind words.  
I just find it a shame when good equipment gets a bad reputation for reliability, or when I read about people throwing cameras away because they "aren't worth repairing" or even the postage to let someone else repair them.... all for extremely minor problems. I think there are only three or four people here with P50s (that I can tell), but if even just one can be saved it is worth it.
| pickles wrote: |
The only thing I don't agree with, is that it's "simple"! I would suggest the only "simple" thing about it is that you "simply" have a great deal of skill, or a gift for doing this stuff....and "15 mins"....wow.
If I had a problem with my SP 11, & you lived near me, I'd be knocking on your door! |
It genuinely is simple! Really, I haven't had my P50 for very long, but I wish I would have fixed this a long time ago. It took longer to write the guide than it did to fix the camera, and most of the time fixing the camera was taking the pictures.
The hardest part in the whole process is that retaining nut around the advance shaft, which either needs a small lens spanner, or a good grip with two small flatblade screwdrivers (my method). But if you can get past that, it is all downhill. If you have a newish Pentax that develops this problem, even intermittently, I would definitely encourage anyone to give it a shot to clean it up.
_________________
Sigma DP1, Nikon D40 (hers ), Polaroid x530, Pentax P30t, Pentax P50, (P30t/P50 K-A to Nikon F body mount conversion)
Nikon: 18-55/3.5-5.6 "G ED II DX" (F) Soligor: 28/2.8 (FL->F converted), 135/3.5 (F), 3x TC (F, modified) Kalimar: 28-85/3.5 (F)
Vivitar: 70-210/2.8-4.0 Version 3 (F), Tele 500/6.3 Preset (F), 19/3.8 (F) Minolta: 300/5.6 (SR/MC/MD pending F conversion)
Tamron: 28/2.8 (Adaptall) Panagor: 28/2.5 (FD) Aetna: 300/5.6 (F) Osawa: MC 28/2.8 (F)
Vintage Lenses: Dallmeyer: 1940s A.M. 14in 356mm f4 (ULF->M42) 1930s Adon Telephoto Taylor, Taylor & Hobson: 1880s Rapid Rectilinear 8 1/2 x 6 1/2 11.31in f/8 (LF->?)
Parts Lenses: Nikon 35-135/3.5-4.5 (F), Sigma 70-210/4.5 (F), Nikon 50/1.8 Series E (F) |
|
| Back to top |
|
|
Nesster

Joined: 24 Apr 2008
Posts: 5883
Location: NJ, USA
Expire: 2014-02-20
|
| Posted: Sun Aug 29, 2010 12:08 pm Post subject: |
|
|
Nesster wrote:
Amazing, like doing open heart surgery while the patient is still awake, your accomplishing this with film still in camera.
You give me courage to at some point open up my ZX-10 whose left/right toggle switch (the one around the shutter button) only works in one direction and not the other
_________________
-Jussi
Camera photos
Print Photographica
|
|
| Back to top |
|
|
danson
Joined: 29 May 2012
Posts: 1
Location: Ireland
|
| Posted: Tue May 29, 2012 3:16 pm Post subject: retaining nut around the advance shaft |
|
|
danson wrote:
Thanks for great help - all was going well until it came to removing the retaining nut around the advance shaft - it is stuck. Is there any special technique or more information you can give to help me.
Much appreciated! |
|
| Back to top |
|
|
|
|
|
You cannot post new topics in this forum
You cannot reply to topics in this forum
You cannot edit your posts in this forum
You cannot delete your posts in this forum
You cannot vote in polls in this forum
|


