| View previous topic :: View next topic |
| Author |
Message |
cardiff_gareth

Joined: 21 Jun 2010
Posts: 136
Location: Vale of Glamorgan
|
 Posted: Thu Jul 08, 2010 10:42 pm Post subject: DIY Beauty Dish Posted: Thu Jul 08, 2010 10:42 pm Post subject: DIY Beauty Dish |
 |
|
cardiff_gareth wrote:
It needs more doing to it and I don't think its finished yet but here's what I have done so far for starters
total cost so far = £0 nothing 
So in the kitchen I found a clear plastic dish that I think came from a Tesco Paella ready meal!

I was going to use the white dish next to it for the cone but its was melamine and too hard to Stanley knife 
Next I marked up where the flash gun was going to go:

And cut it out and tried the flash in it

I was wondering what to use for the cone and kept looking around the house but all I could find was:


So off came the lid, cleaned it first  cut the outter part off and made some hole in it. Then off to the garage I went! First I sprayed the rear black as I think it looked better and I wanted to deflect as much light forward as possible. Then when dries I applied 2 coats of clear lacquer. One that was dried I painted the inside and also my makeshift cone with some silver Hammerite. Once that was dry I then cable tied then together. cut the outter part off and made some hole in it. Then off to the garage I went! First I sprayed the rear black as I think it looked better and I wanted to deflect as much light forward as possible. Then when dries I applied 2 coats of clear lacquer. One that was dried I painted the inside and also my makeshift cone with some silver Hammerite. Once that was dry I then cable tied then together.
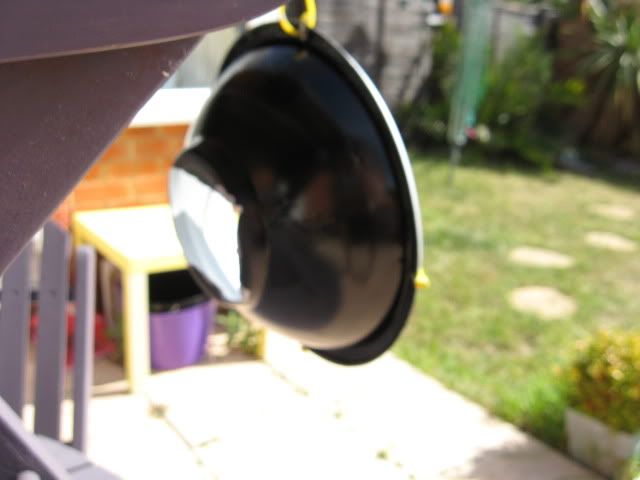


Here are some results, taken about 30 mins ago so its fairly dark here.
All shot as RAW and apart from resizing there have been no PP on them so this is what came out of the camera 
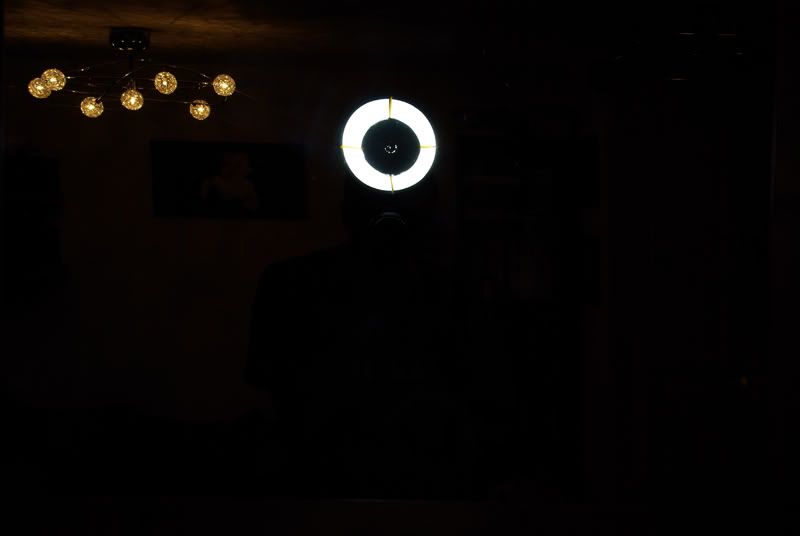

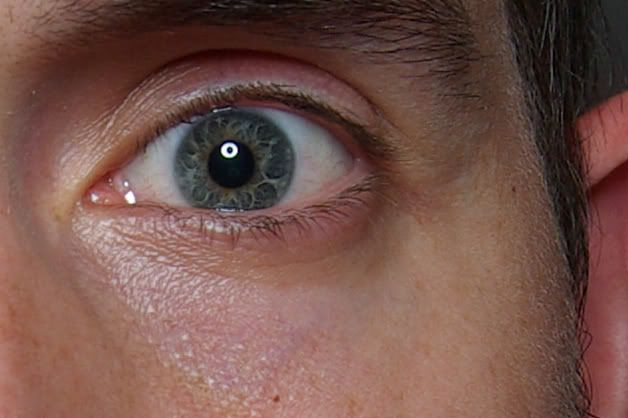
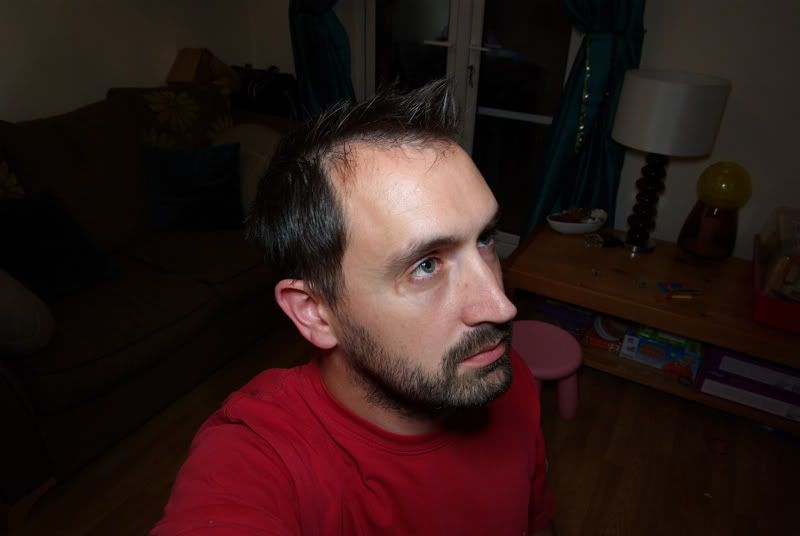
I'll be interested in what its like in daylight conditions 
_________________
Gareth
My outfit: K5 gripped - Sigma 17-70mm - Sigma 105mm - Pentax 18-55mm WR - Pentax 50-200mm WR - Pentax F 50mm f1.7 - Sigma 10-20mm f3.5
Tamron AD2 300mm 54B - Metz 48 AF1 - Fully portable mobile studio and some mobile strobist studio stuff !
My Flickr
500px |
|
| Back to top |
|
 |
lulalake


Joined: 22 Apr 2007
Posts: 1191
Location: Near Austin Texas
Expire: 2011-11-18
|
 Posted: Thu Jul 08, 2010 10:50 pm Post subject: Posted: Thu Jul 08, 2010 10:50 pm Post subject: |
 |
|
lulalake wrote:
Very nice! |
|
| Back to top |
|
 |
indianadinos


Joined: 06 Jul 2008
Posts: 1310
Location: Toulouse, France
Expire: 2011-12-05
|
 Posted: Thu Jul 08, 2010 10:57 pm Post subject: Posted: Thu Jul 08, 2010 10:57 pm Post subject: |
 |
|
indianadinos wrote:
Hi, thanks for sharing ...
_________________
Please visit my blogs Shooting with a Pentax K10D / FF Visions
Takumar: 24/3.5, 28/3.5, 35/2, 35/3.5, 50/1.4, 55/1.8, 85/1.8, 105/2.8, 120/2.8, 135/3.5, 150/4, 200/4
Pentax-K: M28/2.8, K28/3.5, M50/1.4, A50/1.7, M50/4 Macro, K85/1.8, K105/2.8, K135/2.5, M200/4, M70-150/4
Zeiss: Flektogon 20/2.8, 20/4, 35/2.4, 35/2.8, Tessar 50/2.8, Pancolar 50/1.8, Biotar 58/2, Sonnar 135/3.5, Sonnar 180/2.8
Meyer: Primagon 35/4.5, Domiplan 50/2.8, Oreston 50/1.8, Primoplan 58/1.9, Trioplan 100/2.8, Orestor 100/2.8, Orestor 135/2.8
Schacht/Steinheil: Travenar 90/2.8, Travenon 135/4.5, Quinar 135/2.8, Quinar 135/3.5
Russian: MIR 37B, Industar 50/3.5, Helios 44M & 44M-2, Jupiter 37A
P6: Flektogon 50/4, Biometar 80/2.8, Orestor 300/4
Nikkor: Nikkor-O 35/2, Micro 55/3.5, Nikkor-S 50/1.4, Nikkor-Q 135/2.8
Fuji: EBC 28/3.5, EBC 55/3.5 Macro, EBC 135/2.5
Misc Lenses: Kiron 105/2.8 Macro, Tamron SP90/2.5
... and a few other Vivitar, Tamron, Sigma and Soligor lenses ...
|
|
| Back to top |
|
 |
Farside


Joined: 01 Sep 2007
Posts: 6557
Location: Ireland
Expire: 2013-12-27
|
 Posted: Fri Jul 09, 2010 12:43 am Post subject: Posted: Fri Jul 09, 2010 12:43 am Post subject: |
 |
|
Farside wrote:
Very effective, too.
Mealworms... mmmm....
_________________
Dave - Moderator
Camera Fiend and Biograph Operator
If I wanted soot and whitewash I'd be a chimney sweep and house painter.
The Lenses of Farside (click)
BUY FRESH FOMAPAN TO HELP KEEP THE FACTORY ALIVE ---
Foma Campaign topic -
http://forum.mflenses.com/foma-campaign-t55443.html
FOMAPAN on forum -
http://www.mflenses.com/fs.php?sw=Fomapan
Webshop Norway
http://www.fomafoto.com/
Webshop Czech
https://fomaobchod.cz/inshop/scripts/shop.aspx?action=DoChangeLanguage&LangID=4 |
|
| Back to top |
|
 |
my_photography

Joined: 03 Nov 2008
Posts: 2772
Location: Pearl of the Orient
Expire: 2016-12-25
|
 Posted: Fri Jul 09, 2010 3:44 am Post subject: Posted: Fri Jul 09, 2010 3:44 am Post subject: |
 |
|
my_photography wrote:
So that is the worm inside his eyes? 
Nice shot and thanks for sharing. Looks like this will be my next project.
_________________
Zeiss: CJZ Flektogon 20/2.8, CJZ Flektogon 20/4, , CJZ Pentacon 29/2.8, CJZ Flektogon 35/2.4, CJZ Pancolar 50/1.8, Tessar 50/2.8, Biotar 7.5cm/1.5, CJZ Pancolar 80/1.8, CJZ Sonnar 135/3.5, CJZ Pentacon 135/2.8 CJZ Sonnar 200/2.8
Other Germany: Meyer Primoplan 50/1.8, Meyer Trioplan 100/2.8
Takumar: SMC 50/1.4 Super Tak 55/2, Super Tak 85/1.9, S-M-C 135/3.5, Super Tak 150/4
Russian: Zenith 16/2.8, Mir-24M 2/35, Volna-9 50/2.8, Helios 44M (58/2), Helios 44M-3 MC (58/2), Helios 40 (85/1.5), Tair 11A (135/2.8 )
Others: Sears 28/2.8, Sankor 35/2.8, Enna M�nchen Tele-Ennalyt 135/3.5
Zoom Sigma Zoom 28-85/3.5-4.5
Last edited by my_photography on Fri Jul 09, 2010 7:38 am; edited 1 time in total |
|
| Back to top |
|
 |
cardiff_gareth

Joined: 21 Jun 2010
Posts: 136
Location: Vale of Glamorgan
|
 Posted: Fri Jul 09, 2010 7:07 am Post subject: Posted: Fri Jul 09, 2010 7:07 am Post subject: |
 |
|
cardiff_gareth wrote:
Thanks all, I'd like to point out that the mealworms were for the local wildlife ....... honest 
_________________
Gareth
My outfit: K5 gripped - Sigma 17-70mm - Sigma 105mm - Pentax 18-55mm WR - Pentax 50-200mm WR - Pentax F 50mm f1.7 - Sigma 10-20mm f3.5
Tamron AD2 300mm 54B - Metz 48 AF1 - Fully portable mobile studio and some mobile strobist studio stuff !
My Flickr
500px |
|
| Back to top |
|
 |
symphonic


Joined: 23 May 2010
Posts: 550
Location: SE Europe, Croatia
|
 Posted: Sun Jul 11, 2010 6:51 pm Post subject: Posted: Sun Jul 11, 2010 6:51 pm Post subject: |
 |
|
symphonic wrote:
Thanks for sharing, awesome result! 
_________________
Toni,
EOS 450D
CZJ Sonnar 135/3.5 MC | Pancolar 50/1.8 MC
Contax Planar 50/1.4 AEJ | Contax Sonnar 135/2.8 AEJ
Yashica ML 28/2.8 | Zuiko 28/3.5
Vivitar Series1 105/2.5 OM
AF: Tokina 12-24 |
|
| Back to top |
|
 |
cooltouch


Joined: 15 Jan 2009
Posts: 9096
Location: Houston, Texas
|
 Posted: Mon Jul 12, 2010 12:31 am Post subject: Posted: Mon Jul 12, 2010 12:31 am Post subject: |
 |
|
cooltouch wrote:
Wow nice!
Now's my chance. We're bound to have something similar stashed away in one of our kitchen cabinets. The wifey is at the store and won't miss a couple pieces of her reusable/disposable stash. I hope.
_________________
Michael
My Gear List: http://michaelmcbroom.com/photo/gear.html
My Gallery: http://michaelmcbroom.com/gallery3/index.php/
My Flickr Page: https://www.flickr.com/photos/11308754@N08/albums
My Music: https://soundcloud.com/michaelmcbroom/albums
My Blog: http://michaelmcbroom.com/blogistan/ |
|
| Back to top |
|
 |
cardiff_gareth

Joined: 21 Jun 2010
Posts: 136
Location: Vale of Glamorgan
|
 Posted: Mon Jul 12, 2010 8:50 am Post subject: Posted: Mon Jul 12, 2010 8:50 am Post subject: |
 |
|
cardiff_gareth wrote:
| cooltouch wrote: |
Wow nice!
Now's my chance. We're bound to have something similar stashed away in one of our kitchen cabinets. The wifey is at the store and won't miss a couple pieces of her reusable/disposable stash. I hope. |
I know the feling, I now examine everything for any photographic use 
I have updated the beauty dish to a Mk3 finished version
Materials bought.
Not all were used so they'll be used later on for next project! Note the yellow bowl. The lid is missing as I had started doing something with it !

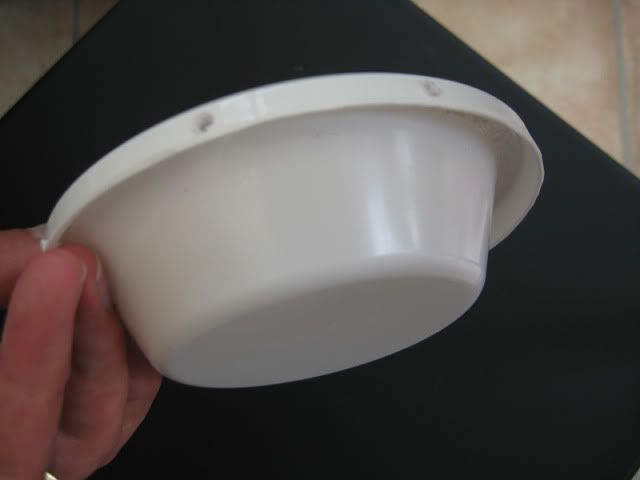
Using one of the plastic bowls (left of top pic!) I cut the bottom off to make a shallow dish. The using the lid of the yellow bowl I cut the push fit ends off to make a circle with a rim. These were then glued together and holes made for the cable ties. Its important to do the holes first as otherwise the lid flexs and they come apart 

With the dome now made and drying I turned my attention to the actual dish part. First I took off the silver flat part and got one of the Bacofoil foil dishes. I then cut strips into this so when put in the dish it wouldn't bend and could be a perfect fit:

Going in!

and finally in, glued down and the excess trimmed off the edges:

I'm actually impressed how well it looks !
This was left to dry also.
When both parts were dry I then cable ties them together

I tried this set up out but the light flashes through the white dome and acted as a diffuser rather than a beauty light.
Taking the old silver flat part I drew around it and cut out a slightly larger circle than the one marked out, then this was glues down and allowed to dry.
END RESULT !!


And here is the result from the finished article

_________________
Gareth
My outfit: K5 gripped - Sigma 17-70mm - Sigma 105mm - Pentax 18-55mm WR - Pentax 50-200mm WR - Pentax F 50mm f1.7 - Sigma 10-20mm f3.5
Tamron AD2 300mm 54B - Metz 48 AF1 - Fully portable mobile studio and some mobile strobist studio stuff !
My Flickr
500px |
|
| Back to top |
|
 |
|
|
|
You cannot post new topics in this forum
You cannot reply to topics in this forum
You cannot edit your posts in this forum
You cannot delete your posts in this forum
You cannot vote in polls in this forum
|
