| View previous topic :: View next topic |
| Author |
Message |
casualcollector


Joined: 01 Aug 2008
Posts: 749
Location: Spaced out on Florida's Space Coast
|
 Posted: Sat Jun 27, 2009 11:14 pm Post subject: Quick makeover Posted: Sat Jun 27, 2009 11:14 pm Post subject: Quick makeover |
 |
|
casualcollector wrote:
My first attempt at replacing deteriorated leatherette. The recovered camera was worse than the camera shown on the right. I'm happy with it as a first effort. I'll do it again to improve the fit and use a more secure glue.

_________________
In Search Of "R" Serial Soligors
Found: 135/2.8 #R407660, 200/4 #R405526, 300/5.5 #R411127 |
|
| Back to top |
|
 |
Attila


Joined: 24 Feb 2007
Posts: 57865
Location: Hungary
Expire: 2025-11-18
|
| Posted: Sat Jun 27, 2009 11:28 pm Post subject: |
|
|
Attila wrote:
Looks nice really on picture. You made great job!
_________________
-------------------------------
Items on sale on Ebay
Sony NEX-7 Carl Zeiss Planar 85mm f1.4, Minolta MD 35mm f1.8, Konica 135mm f2.5, Minolta MD 50mm f1.2, Minolta MD 250mm f5.6, Carl Zeiss Sonnar 180mm f2.8
|
|
| Back to top |
|
|
Xpres

Joined: 11 Dec 2007
Posts: 964
Location: UK
Expire: 2014-10-28
|
| Posted: Sun Jun 28, 2009 12:08 am Post subject: |
|
|
Xpres wrote:
Does look good. Was it a kit or did you cut it yourself?
_________________
Film... and sometimes SD14, 5D2 and some other suff! |
|
| Back to top |
|
|
casualcollector
Joined: 01 Aug 2008
Posts: 749
Location: Spaced out on Florida's Space Coast
|
| Posted: Sun Jun 28, 2009 2:04 pm Post subject: |
|
|
casualcollector wrote:
All hand cut from a ladies shoulder bag bought for 50 cents! The old stuff peeled off quite gracefully and I was able to use it as a pattern. There's enough material left to do several more cameras. I'm doing the second one now. Perhaps I'll get some pictures and post a "how to".
_________________
In Search Of "R" Serial Soligors
Found: 135/2.8 #R407660, 200/4 #R405526, 300/5.5 #R411127 |
|
| Back to top |
|
|
Xpres
Joined: 11 Dec 2007
Posts: 964
Location: UK
Expire: 2014-10-28
|
| Posted: Sun Jun 28, 2009 4:00 pm Post subject: |
|
|
Xpres wrote:
Good idea...
I've done a couple, one with a kit and one with a desk diary and have a couple of handbags from charity shops which I've cut up ready, but worry that the leather is too 'stretchy' to cut to the right size... it changes shape as I cut!
Did you have any trouble? Maybe if it were fixed to some card first and then cut...?
_________________
Film... and sometimes SD14, 5D2 and some other suff! |
|
| Back to top |
|
|
Seele
Joined: 17 Apr 2009
Posts: 742
Location: Sydney Australia
|
| Posted: Sun Jun 28, 2009 4:32 pm Post subject: |
|
|
Seele wrote:
Xpres,
Sorry for coming in late.
Although I use pre-cut replacement coverings, I have done a bit of very precise cutting of stretchy materials.
The key is not to use a normal blade, as it cuts it pulls the material as well, stretching it along the way; you want the cutting edge to fall straight down, cutting through the material without up-down stretching too.
The cutting tool you need would be a roller cutter; a common brand is "Olfa", which is a handle holding free-spinning steel cutting wheel, which gives the straight-down cutting action. To prevent vertical stretching, do not use a rubber cutting mat, use a sheet of glass instead. If you are cutting a straight line, also use a good straight edge to hold the material down securely too. |
|
| Back to top |
|
|
Xpres
Joined: 11 Dec 2007
Posts: 964
Location: UK
Expire: 2014-10-28
|
| Posted: Sun Jun 28, 2009 6:02 pm Post subject: |
|
|
Xpres wrote:
Fantastic advice - thank you! 
_________________
Film... and sometimes SD14, 5D2 and some other suff! |
|
| Back to top |
|
|
Rusty


Joined: 06 Nov 2008
Posts: 435
Location: Mosselbay, South Africa
|
| Posted: Sun Jun 28, 2009 7:17 pm Post subject: |
|
|
Rusty wrote:
Nice job !
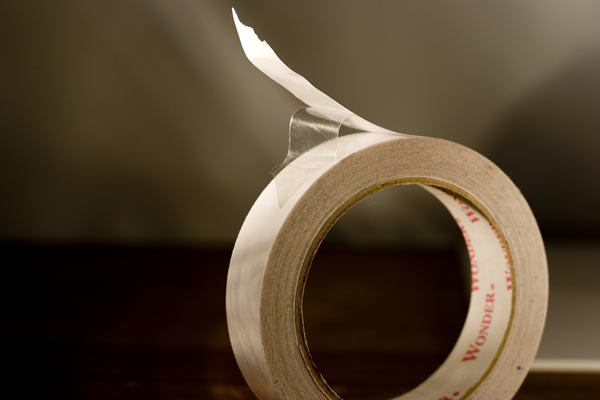
ihave done quite a few and found the best to use is this pressure sensitive transparent doublesided tape it is very thin and sticks like crazy
just pull it of the roll and cover the whole inside of the leatherette then pull of the backing and apply the whole letherette like a sticker
it is very close to the original stuff they use in the factory and when you pull it of again it leaves nothing on the camera
_________________
Daniel |
|
| Back to top |
|
|
Farside

Joined: 01 Sep 2007
Posts: 6557
Location: Ireland
Expire: 2013-12-27
|
| Posted: Sun Jun 28, 2009 7:42 pm Post subject: Re: Quick makeover |
|
|
Farside wrote:
| casualcollector wrote: |
| My first attempt at replacing deteriorated leatherette. |
Nice job.
_________________
Dave - Moderator
Camera Fiend and Biograph Operator
If I wanted soot and whitewash I'd be a chimney sweep and house painter.
The Lenses of Farside (click)
BUY FRESH FOMAPAN TO HELP KEEP THE FACTORY ALIVE ---
Foma Campaign topic -
http://forum.mflenses.com/foma-campaign-t55443.html
FOMAPAN on forum -
http://www.mflenses.com/fs.php?sw=Fomapan
Webshop Norway
http://www.fomafoto.com/
Webshop Czech
https://fomaobchod.cz/inshop/scripts/shop.aspx?action=DoChangeLanguage&LangID=4 |
|
| Back to top |
|
|
casualcollector
Joined: 01 Aug 2008
Posts: 749
Location: Spaced out on Florida's Space Coast
|
| Posted: Sun Jun 28, 2009 9:52 pm Post subject: |
|
|
casualcollector wrote:
I've used the double sided sticky tape to replace original leatherette once. It worked well. I haven't found similar product locally, yet. I used Elmer's brand rubber cement for this project. It's a fairly tame, craft style material that's intended to be easy to remove. Not good enough. I've not found Pliobond, locally, either. Have to go to the next bigger town and look!
The material I used has a loosely woven backing and is stretchy. I cut it with an X-Acto hobby knife with a fresh blade. I also used a steel scale for all of the straight cuts. It worked well enough. The roller cutter would work better for straight cuts.
Here's the details...

The small screwdriver was used to lift the corner of the leatherette. The plastic pen cap was used to gently scrape up the end. Pulling up from both corners minimizes distortion of the covering.

As the covering was still sticky I pressed it down onto some stiff, thin cardstock to make patterns. The patterns were cut from the paper with the hobby knife.

Several light cuts were made with the hobby knife to minimize stretching of the new material. I'm going to wait until I have some better adhesive to finish the second camera.
_________________
In Search Of "R" Serial Soligors
Found: 135/2.8 #R407660, 200/4 #R405526, 300/5.5 #R411127 |
|
| Back to top |
|
|
|
|
|
You cannot post new topics in this forum
You cannot reply to topics in this forum
You cannot edit your posts in this forum
You cannot delete your posts in this forum
You cannot vote in polls in this forum
|


