| View previous topic :: View next topic |
| Author |
Message |
Lloydy


Joined: 02 Sep 2009
Posts: 7788
Location: Ironbridge. UK.
Expire: 2022-01-01
|
 Posted: Tue Jan 13, 2015 6:13 pm Post subject: Posted: Tue Jan 13, 2015 6:13 pm Post subject: |
 |
|
Lloydy wrote:
Marcus, is the softness due to the raft moving and a slowish shutter speed? the water looks calm, but there might be enough movement to lose sharpness.
_________________
LENSES & CAMERAS FOR SALE.....
I have loads of stuff that I have to get rid of, if you see me commenting about something I have got and you want one, ask me.
My Flickr https://www.flickr.com/photos/mudplugga/
My ipernity -
http://www.ipernity.com/home/294337 |
|
| Back to top |
|
 |
marcusBMG

Joined: 07 Dec 2012
Posts: 1316
Location: Conwy N Wales
|
| Posted: Tue Jan 13, 2015 6:25 pm Post subject: |
|
|
marcusBMG wrote:
1/400th, 1/320th, 1/200th, plus some exposure comp (typical pentax + adaptall inconsistencies - and f4.5 was showing f4 so that affected things).
Raft wasn't moving, if its being pushed around by the strong currents that flow up and down the estuary with the tides you can usually see the ripples.
_________________
pentax ME super (retired)
Pentax K3-ii; pentax K-S2; Samsung NX 20; Lumix G1 + adapters;
Adaptall collection (proliferating!) inc 200-500mm 31A, 300mm f2.8, 400mm f4.
Primes: takumar 55mm; smc 28mm, 50mm; kino/komine 28mm f2's, helios 58mm, Tamron Nestar 400mm, novoflex 400mm, Vivitar 135mm close focus, 105mm macro; Jupiter 11A; CZJ 135mm.
A classic zoom or two: VS1 (komine), Kiron Zoomlock... |
|
| Back to top |
|
|
biggles3


Joined: 09 Nov 2009
Posts: 61
Location: Crickhowell, Wales
|
| Posted: Tue Jan 13, 2015 6:39 pm Post subject: |
|
|
biggles3 wrote:
I wonder if a CLA might help. Given the lens is over 40 years old and contains a lot of heavy glass, if it was used a lot, especially under extreme weather conditions, the fine tolerances of the components may have been compromised. It might be worth contacting Eddie Houston (thelensdoctor.co.uk) who is a Tamron specialist for his thoughts - I can recommend him as he's brought a few of my lenses back from the brink.
| marcusBMG wrote: |
1/400th, 1/320th, 1/200th, plus some exposure comp (typical pentax + adaptall inconsistencies - and f4.5 was showing f4 so that affected things).
Raft wasn't moving, if its being pushed around by the strong currents that flow up and down the estuary with the tides you can usually see the ripples. |
_________________
Contax RTS/Zeiss lens fan and constant user along with my Mamiya RZ67 ProII. Favourite lens: Zeiss Planar 55 f1.2. |
|
| Back to top |
|
|
Rense


Joined: 12 Sep 2008
Posts: 250
Location: Arnhem, The Netherlands
Expire: 2016-12-25
|
| Posted: Tue Jan 13, 2015 7:19 pm Post subject: |
|
|
Rense wrote:
Yes Edde is the man!
| biggles3 wrote: |
I wonder if a CLA might help. Given the lens is over 40 years old and contains a lot of heavy glass, if it was used a lot, especially under extreme weather conditions, the fine tolerances of the components may have been compromised. It might be worth contacting Eddie Houston (thelensdoctor.co.uk) who is a Tamron specialist for his thoughts - I can recommend him as he's brought a few of my lenses back from the brink.
| marcusBMG wrote: |
1/400th, 1/320th, 1/200th, plus some exposure comp (typical pentax + adaptall inconsistencies - and f4.5 was showing f4 so that affected things).
Raft wasn't moving, if its being pushed around by the strong currents that flow up and down the estuary with the tides you can usually see the ripples. |
|
_________________
[5D][20D][50D][70D][EOS-M][Tamron Adaptall lenses][M42 lenses]
for complete gearlist, click here. |
|
| Back to top |
|
|
bychance
Joined: 24 Apr 2013
Posts: 347
Location: Kent, England
|
| Posted: Fri Jan 16, 2015 12:18 am Post subject: |
|
|
bychance wrote:
Well,Ive now got seven okayish lenses...
02B 28-2.5
58A 70-210
44A 28-70
22A 35-135
17A 35-70
03A 80-210 x2
I cleaned up one of the 28-210 and the 28-70 both of which were quite dusty and had a lot of fungus and was suprised how easy this job was.
Happy days 
_________________
I got where I am by avoiding where I was going.
Now where was I? |
|
| Back to top |
|
|
biggles3
Joined: 09 Nov 2009
Posts: 61
Location: Crickhowell, Wales
|
| Posted: Fri Jan 16, 2015 3:27 am Post subject: |
|
|
biggles3 wrote:
I wish I had your knowledge.
I've cleaned up a number of Zeiss 50mm 1.4 and 1.7 Planars that have had fungus or oiled aperture blades but have never had the guts to try a zoom - just the thought of all those cams...and then trying to reassemble them!
I have a lovely old Tamron 26A - the SP 35-210 - with a bloom of fungus on one element in a centre group; I've been tempted to have a go but where do you start - at the front or the rear; do you have to take the whole lens apart; how do you re-collimate a lens with so many groups/elements...etc etc... My mind boggles!
Well done you - I'm most impressed!
| bychance wrote: |
Well,Ive now got seven okayish lenses...
02B 28-2.5
58A 70-210
44A 28-70
22A 35-135
17A 35-70
03A 80-210 x2
I cleaned up one of the 28-210 and the 28-70 both of which were quite dusty and had a lot of fungus and was suprised how easy this job was.
Happy days |
_________________
Contax RTS/Zeiss lens fan and constant user along with my Mamiya RZ67 ProII. Favourite lens: Zeiss Planar 55 f1.2. |
|
| Back to top |
|
|
PhantomLord

Joined: 08 Apr 2013
Posts: 472
Location: Szczecin, Poland
|
| Posted: Fri Jan 16, 2015 7:06 am Post subject: |
|
|
PhantomLord wrote:
| biggles3 wrote: |
I wish I had your knowledge.
I've cleaned up a number of Zeiss 50mm 1.4 and 1.7 Planars that have had fungus or oiled aperture blades but have never had the guts to try a zoom - just the thought of all those cams...and then trying to reassemble them!
I have a lovely old Tamron 26A - the SP 35-210 - with a bloom of fungus on one element in a centre group; I've been tempted to have a go but where do you start - at the front or the rear; do you have to take the whole lens apart; how do you re-collimate a lens with so many groups/elements...etc etc... My mind boggles!
Well done you - I'm most impressed!
|
I've never completely disassembled Tamron lens, however I cleaned a few of them from fungus (103A, 03A, 46A) by accessing the central group of lens from the front. I don't know if it's that easy in 26A, but I have only unscrewed the front group of lenses and using two ball-pens I unscrew the central group, disassemble it and cleaned. It was half-hour job for one lens and since I've put everything just like it was - no colimating was required, although I'm Civil Engineer not an Optical Engineer so I might be wrong.
I've disassembled completely a few zooms: Kiron (28-85, 70-150) and two Vivitar Series 1 70-210/3.5 (Kiron and Tokina versions), and I must agree that without any instructions or at least an 'exploded parts diagram' it is not an easy task. The most complicated for me was Vivitar S1 70-210 (Kiron ver.), but I followed instruction I found and it ended up well.
What I've learned is that when you have a lot of tools, a basic manual skills and a parts diagram, there is a chance of success  . .
However, doesn't matter how many primes/zooms I've disassembled I'm pretty always end up loosing ball from aperture ring and forget to scribe the matching point of helicoids .
Mateusz |
|
| Back to top |
|
|
bychance
Joined: 24 Apr 2013
Posts: 347
Location: Kent, England
|
| Posted: Fri Jan 16, 2015 2:29 pm Post subject: |
|
|
bychance wrote:
This was pretty much my first go at cleaning a lens and I didn't strip it down completely I just removed the front and rear elements and de-fungussed them and everything else I could reach.
I did however completely strip down a minolta rokkor 55/1.8 last night  It took me about five hours to clean an incredible amount of what appeared to be dark grey silt form the inside which had made the focus ring impossible to move. What a game I had re-assmbling it! I had one screw and the bloody ball bearing and spring left over when I finished It took me about five hours to clean an incredible amount of what appeared to be dark grey silt form the inside which had made the focus ring impossible to move. What a game I had re-assmbling it! I had one screw and the bloody ball bearing and spring left over when I finished  I decided that I had de-clicked it on purpose I decided that I had de-clicked it on purpose 
It's as smoothe as you like now and seems fine.
_________________
I got where I am by avoiding where I was going.
Now where was I? |
|
| Back to top |
|
|
cooltouch

Joined: 15 Jan 2009
Posts: 9096
Location: Houston, Texas
|
| Posted: Sat Jan 17, 2015 3:54 pm Post subject: |
|
|
cooltouch wrote:
I find the dis-assembly of a lens to be one of those tasks that I wish I could pawn off on others, but seldom can I afford to do so, or more to the point, seldom does it make economic sense to have a professional do the work. I've been repairing cameras and lenses since about 1990, so I've picked up a few tips and tricks, although they still too often desert me in my hour of need.
As for dealing with a lens's complexity, the easiest way these days is to take many pics during the disassembly process. I have found, through much trial and error, that it is not always necessary to completely dismantle a lens to get to a particular area that needs attention. This is especially true with zooms. All too often though it will require separation of sections where a helical is undone. I have tried on many occasions placing marks so that it is easier to reassemble the lens later, but usually there is something about the way the pieces come apart that prevent me from making precise location marks. So it seems as if I'm always having to do a trial-and-error refitting of the helical before I've got it set right again. It's not that big of an ordeal, really. Most important is having a scene in which you can set the lens to infinity on, because that's how you determine if the helical is set back properly, the infinity setting.
I also try to arrange the small parts -- typically screws of various sizes -- together in the order in which they were removed. I also like to lay out a towel or some sort of cloth over the working area. Pieces that like to bounce and disappear into infinity are less likely to bounce as far if they hit cloth as opposed to a hard table or desk surface. It's also a good idea to set a towel or carpet at your feet. Inevitably it seems with me, when it comes time to do things like re-insert that little ball bearing that provides the clicks for the aperture ring, that pesky little thing will drop from my tweezers and bounce its way into a parallel dimension, never to be seen again. I mean, I have taken a powerful rare-earth magnet and swept every square inch of floor before, looking for one of these tiny balls, for naught. But if I had the foresight to lay out a towel at my feet first, the ball will not have gone far, and can usually be recovered.
Typically we need to get into a lens for one of three reasons: oil on the aperture blades, fungus or haze, etc., on an interior element, or the helical needs to be relubricated. Each will require its own disassembly strategy.
I usually try to get to the inner group of elements, whether to clean fungus/haze or to reach the aperture iris, from the rear of a lens first. It depends somewhat on what type of lens it is. If it's a prime, that's the approach I use. If it's a zoom, however, often I'll start by removing the rubber focusing and/or zoom collar grip. With a two-ring zoom, under the zoom collar grip is where the cam action for the zoom is, and under the focusing collar are often found the stops for the focusing collar rotation, which may need to be removed, depending on what the job is. With a one-ring zoom, the cams and stops are combined under the single collar grip.
One of the most common reasons for dismantling a lens is to clean the aperture iris blades of oil. If it is a lens with an auto aperture, the blades must be totally dry to work properly. I always try to reach this assembly without having to disturb the blades' positions. Usually this can be done with a barrel-type lens. With a lens-shutter type, this is usually not the case, and I wind up having to deal with resetting each blade. But in a barrel they're usually held in an assembly which doesn't require disassembly. To clean them, I've used a variety of different things: alcohol, naphtha, and even acetone (fingernail polish remover). Oil will dissolve in all three. Probably the worst of the lot is alcohol, simply because the alcohol you buy at the drug store is only about half alcohol; the rest is water. So, the alcohol will evaporate from the blades rather quickly, leaving behind residual water. You can use a hair dryer to evaporate the water, though, so it's not that big of a deal. Naphtha, aka lighter fluid, is a good solvent. Oil dissolves into it easily and it evaporates fairly quickly. Acetone can be rather harsh on things it comes into contact with. It can melt certain plastics and will dissolve paint as well as oil. So you have to be a little more careful with it, but it is also a good cleaner. Now, to actually remove the oil, I just use Q-tip cotton swabs. Easy does it -- you don't want to push on the blades too aggressively, just lightly wipe the swab across the blade's surface. Sometimes I'll fluff up the swab a bit to soften things even more. You'll want to repeadedly actuate the iris mechanism while you're doing this. The oil tends to collect in the blade pivot points. By repeatedly actuating the mechanism, you're drawing the oil out from the pivot points, but it will usually require quite a few actuations before the pivot points are free from residual oil.
Fungus can make its home on any number of surfaces. For inner surfaces, often a lens spanner will be needed to get to it. Sometimes, if you're lucky, it will be found on the outer element of a group, so it can be gotten to easily enough. Fungus tends to be rather stubborn stuff. It will not wipe off easily. I've found that wiping it very firmly with my thumb (clean, of course) is a good way to remove it. It works well because a thumb is soft yet a good deal of direct pressure can be applied. I follow up by using a lens tissue with lens cleaning fluid to remove any oils or other substances my thumb may have left behind.
To relube the helicals, the lens will usually have to be completely dismantled. I remove all the old lubricant first. One can do this chemically, but grease-cutting chemicals can often be quite toxic such that you don't even want them to contact your skin. Sometimes it's necessary to go this route, but most of the time it isn't. What I typically do is wipe down the helical threads with paper towels and follow up with a toothbrush. You can get them pretty clean this way. For replacement lube, I turn to the auto parts store. They've usually got a variety of lubes to chose from. I prefer the molybdenum sulfide grease. It's either white or gray in color. You can buy it in a tub -- about a pint or a half-liter or so -- for a few bucks. Chances are this will last you for a good twenty years or more. I know -- I still have a tub that's mostly full that I bought 20 years ago. Also, one of the good things about the moly grease is it doesn't tend to harden or coagulate the way some lens lubes have over the years. I'm thinking specifically of the lube that Kern-Paillard used in its 16mm camera lenses, like the Switars, Yvars, etc. In lenses that were manufactured back in the 60s or 70s, that grease has turned into stuff the consistency of crayons now. That is, it's turned into a wax-like substance. The moly grease won't do this -- ever. So to re-apply, I will lightly smear grease across the threads, distributing it evenly. Often that toothbrush I used earlier to remove the old grease works well to distribute the new grease. Next, reconnect the helical pieces and try them out. Too much grease will result it a heavy feel. Too little and you will feel and hear metal-to-metal contact as you rotate the collar or zoom in and out.
Back to the subject of Tamrons, one thing that has been common to all Tamron lenses I've dismantled so far (all zooms) is the use of tape to hold main sections of the lens together with. This is often how infinity focus is arrived at, by positioning the sections where they're supposed to be, then applying tape. Sounds weird, but it works.
Looking back over what I've just written, I can see that it may appear to be a bit much to take on. But really if you just take your time and stay focused on your goal, it's not so bad. And hey, if you feel like you need to take a break and do something else, that's not a problem. I've done this before, many times. If it looks like the break may last more than a few hours, however, I will get out some plastic sandwich-size bags and place the component parts separately in bags, labeling each as to its contents. Keeping in mind that I've documented what I've done so far with my camera, it won't be difficult picking back up where I left off at a different time or date.
_________________
Michael
My Gear List: http://michaelmcbroom.com/photo/gear.html
My Gallery: http://michaelmcbroom.com/gallery3/index.php/
My Flickr Page: https://www.flickr.com/photos/11308754@N08/albums
My Music: https://soundcloud.com/michaelmcbroom/albums
My Blog: http://michaelmcbroom.com/blogistan/ |
|
| Back to top |
|
|
marcusBMG
Joined: 07 Dec 2012
Posts: 1316
Location: Conwy N Wales
|
| Posted: Sat Jan 17, 2015 4:06 pm Post subject: |
|
|
marcusBMG wrote:
Thats a great summary cooltouch, thanks for taking the time to write it, +1 to all your points from my own experience. Should go in the DIY section too, in one of the sticky's/as a sticky.
_________________
pentax ME super (retired)
Pentax K3-ii; pentax K-S2; Samsung NX 20; Lumix G1 + adapters;
Adaptall collection (proliferating!) inc 200-500mm 31A, 300mm f2.8, 400mm f4.
Primes: takumar 55mm; smc 28mm, 50mm; kino/komine 28mm f2's, helios 58mm, Tamron Nestar 400mm, novoflex 400mm, Vivitar 135mm close focus, 105mm macro; Jupiter 11A; CZJ 135mm.
A classic zoom or two: VS1 (komine), Kiron Zoomlock... |
|
| Back to top |
|
|
biggles3
Joined: 09 Nov 2009
Posts: 61
Location: Crickhowell, Wales
|
| Posted: Sat Jan 17, 2015 5:47 pm Post subject: |
|
|
biggles3 wrote:
Thank you Michael for taking the trouble to respond so comprehensively - much appreciated. I think I'll have a bash at that pesky Tamron zoom; at least, even if I fail, I'll learn along the way and a replacement won't be too costly...
_________________
Contax RTS/Zeiss lens fan and constant user along with my Mamiya RZ67 ProII. Favourite lens: Zeiss Planar 55 f1.2. |
|
| Back to top |
|
|
cooltouch
Joined: 15 Jan 2009
Posts: 9096
Location: Houston, Texas
|
| Posted: Sat Jan 17, 2015 7:28 pm Post subject: |
|
|
cooltouch wrote:
| biggles3 wrote: |
| Thank you Michael for taking the trouble to respond so comprehensively - much appreciated. I think I'll have a bash at that pesky Tamron zoom; at least, even if I fail, I'll learn along the way and a replacement won't be too costly... |
That's exactly the way I've looked at it on more than one occasion.
_________________
Michael
My Gear List: http://michaelmcbroom.com/photo/gear.html
My Gallery: http://michaelmcbroom.com/gallery3/index.php/
My Flickr Page: https://www.flickr.com/photos/11308754@N08/albums
My Music: https://soundcloud.com/michaelmcbroom/albums
My Blog: http://michaelmcbroom.com/blogistan/ |
|
| Back to top |
|
|
marcusBMG
Joined: 07 Dec 2012
Posts: 1316
Location: Conwy N Wales
|
| Posted: Sat Jan 17, 2015 8:36 pm Post subject: 05A test pics |
|
|
marcusBMG wrote:
I've been taking some more test pics with my 05A, this time with my recently acquired K5.
350mm

crops: f4.5; f5.6; f8
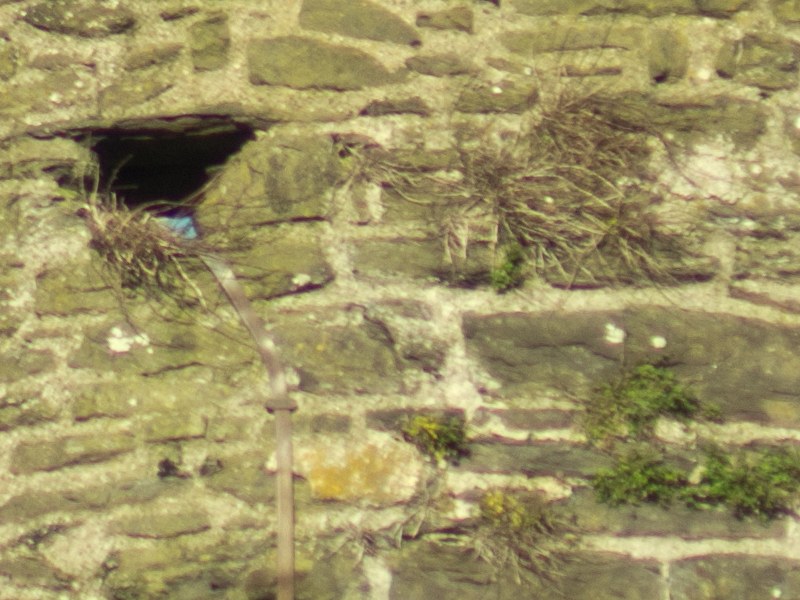
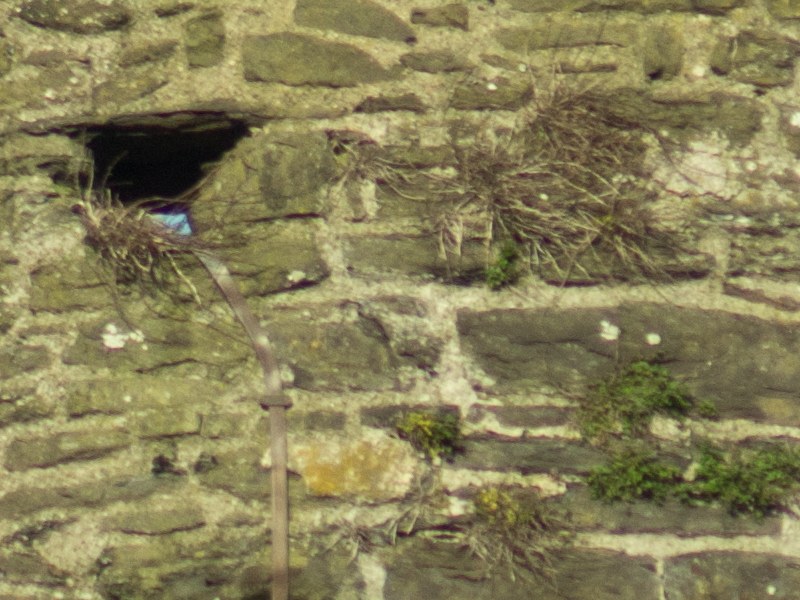

At f8 I have to say there isn't too much to complain about, just that it's, IMO, not that great either, I feel I am getting better from eg 31A. Wide open the image is significantly softer.
This swan isn't so bad either, f7.1, iso 400, 1/400th, particularly resized. Certainly I am realising that I have to focus hard on technique with this lens at 350mm, focus particularly is quite twitchy.

_________________
pentax ME super (retired)
Pentax K3-ii; pentax K-S2; Samsung NX 20; Lumix G1 + adapters;
Adaptall collection (proliferating!) inc 200-500mm 31A, 300mm f2.8, 400mm f4.
Primes: takumar 55mm; smc 28mm, 50mm; kino/komine 28mm f2's, helios 58mm, Tamron Nestar 400mm, novoflex 400mm, Vivitar 135mm close focus, 105mm macro; Jupiter 11A; CZJ 135mm.
A classic zoom or two: VS1 (komine), Kiron Zoomlock... |
|
| Back to top |
|
|
biggles3
Joined: 09 Nov 2009
Posts: 61
Location: Crickhowell, Wales
|
| Posted: Sun Jan 18, 2015 12:09 am Post subject: |
|
|
biggles3 wrote:
Hi marcusBMG,
The image of the swan looks pretty good - I see what you mean about the softness at f4.5; it appears our lenses give slightly different results. I wonder if your lens has taken a slight knock at some stage in its long life...
One thing I noted was that when I shot with a m4/3 body, the images appeared a tiny bit softer and after using the amazing EVF on the Fuji, I am wondering whether critical focusing was an issue - my Olympus E-M5 was a lovely camera but I've found the X-T1 make focusing, especially when wide-open and with a more shallow dof, much more precise.
Using a remote shutter release with the tripod was also a big factor in getting sharp images for me. It's a massive piece of glass and is superbly built but has limitations because of its size and weight; I think it's worth persevering with it as to date, at least with the Fuji, I'm very pleased with the results. I'd love to try it on a full sensor camera - wish I'd still got my Contax N-1D...
_________________
Contax RTS/Zeiss lens fan and constant user along with my Mamiya RZ67 ProII. Favourite lens: Zeiss Planar 55 f1.2. |
|
| Back to top |
|
|
jbrooksII
Joined: 31 Jan 2014
Posts: 33
Location: Philippines
|
| Posted: Sun Jan 18, 2015 6:55 am Post subject: |
|
|
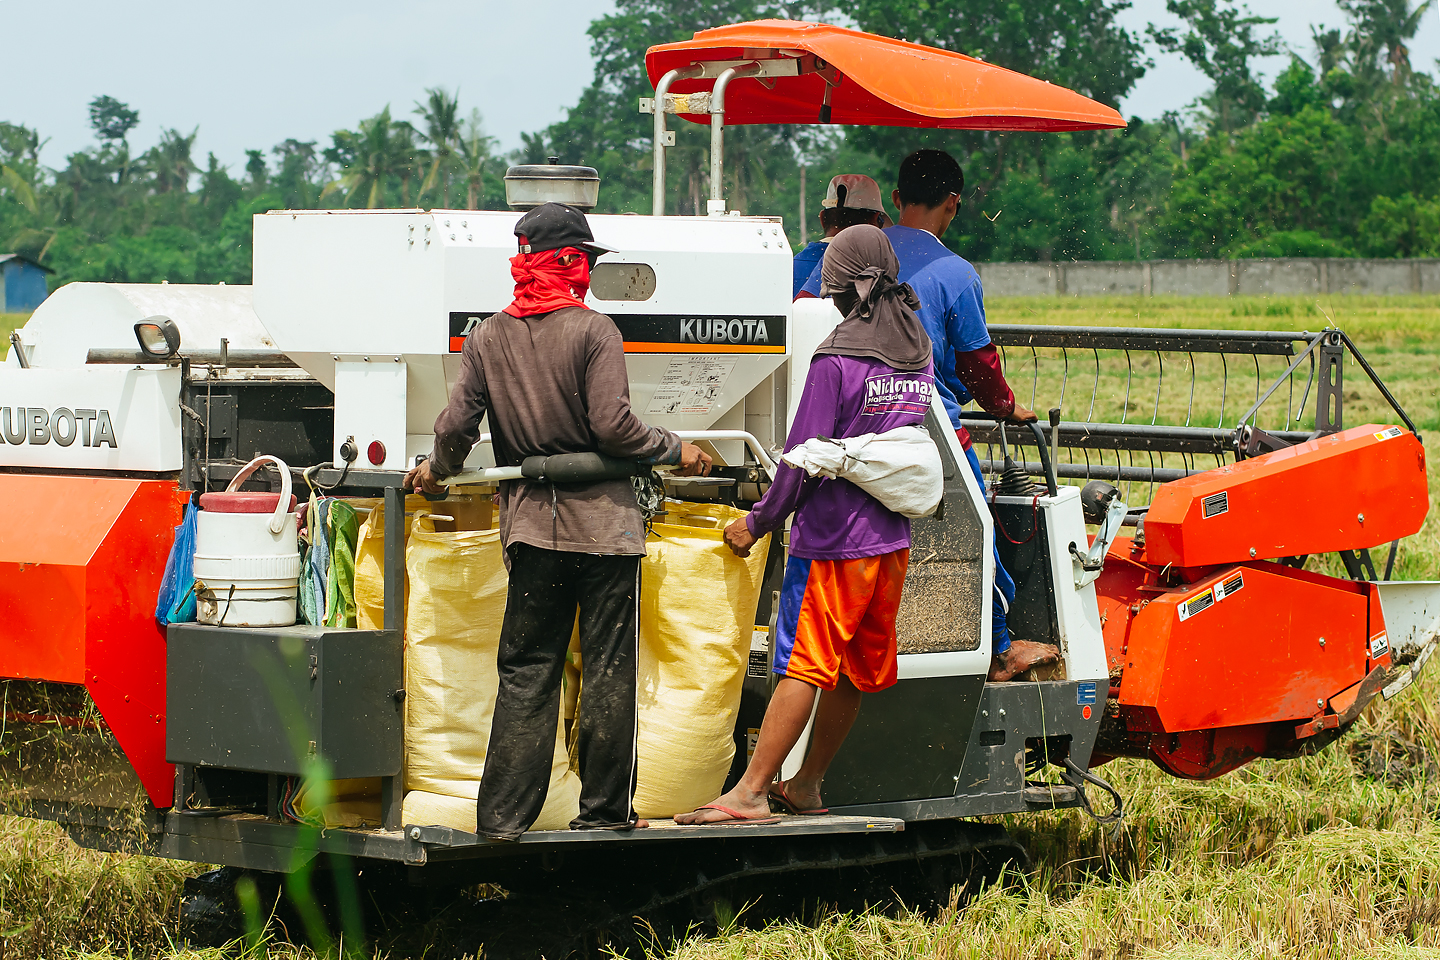
jbrooksII wrote:
Sample from big and heavy SP 80-200mm 2.8
 |
|
| Back to top |
|
|
cooltouch
Joined: 15 Jan 2009
Posts: 9096
Location: Houston, Texas
|
| Posted: Sun Jan 18, 2015 10:05 am Post subject: |
|
|
cooltouch wrote:
I guess I can add a few to the thread. Some of you may have seen some of these images before.
Rosebud, Tamron 90mm f/2.5 macro:

A crop of the above image:

P38 Lightning, scanned slide, Tamron 300mm f/2.8 LDIF

F7F Tigercat, Tamron 300mm f/2.8 LDIF

Dove, Tamron 80-200mm f/2.8 LD:

Grackle, Tamron 80-200mm f/2.8 LD"

_________________
Michael
My Gear List: http://michaelmcbroom.com/photo/gear.html
My Gallery: http://michaelmcbroom.com/gallery3/index.php/
My Flickr Page: https://www.flickr.com/photos/11308754@N08/albums
My Music: https://soundcloud.com/michaelmcbroom/albums
My Blog: http://michaelmcbroom.com/blogistan/ |
|
| Back to top |
|
|
Kei

Joined: 08 Jan 2015
Posts: 142
Location: S. Wales UK
|
| Posted: Sun Jan 18, 2015 10:49 am Post subject: |
|
|
Kei wrote:
Really wanted that 80-200mm f2.8 for a long time, along with the very rare 400mm f4 and the 70-150mm f2.8 soft. Prices have risen too much since i bought all of my lenses.
I spent some time playing with my 17mm f3.5 51B with built in filters. I reckon there is something not quite right with my sample as the right hand side on landscape shots is definitely worse than the left. Although it seems to be somewhat varied as the last on seems ok at both borders. (My guess is because it was focussed closer) All shots were ~F8
 IMG_6841 by --Kei--, on Flickr IMG_6841 by --Kei--, on Flickr
 IMG_6835 by --Kei--, on Flickr IMG_6835 by --Kei--, on Flickr
 IMG_6840 by --Kei--, on Flickr IMG_6840 by --Kei--, on Flickr
_________________
Contax Zeiss Distagon 35mm f1.4, Zeiss Planar 85mm f1.4, Zeiss Vario-sonnar 35-70mm f3.4
Mamiya RB/RZ67 RZ67 Pro II, 65mm f4 L-A, 75mm f4.5 Shift, 127mm f3.5 K/L
Mamiya m645 645 1000S, 645J, 645AFD M 35mm f3.5 C, 55mm f2.8 AF, 80mm f1.9 N, 80mm f2.8 C, 120mm f4 macro, 150mm f2.8 A, 210mm f4 ULD, 210mm f4 C
Tamron Primes 17mm f3.5, 24mm f2.5, 90mm f2.8, 135mm f2.5, 180mm f2.5, 300mm f5.6
Tamron Zooms 24-48mm f3.5-3.8, 28-80 f3.5-4.2, 35-80 f2.8-3.8, 70-210mm f3.5, 75-250mm f3.5-5.6
Olympus OM Zuiko 24mm f2.8, Zuiko 28mm f2.8, Zuiko 50mm f1.8, Sigma 600mm f8
Nikon MF 24mm f2.8 N.C, 28mm f2 AI-s, 35mm f1.4 AI-s, 50mm f1.2 AI-s, 50mm f1.8 AI-s, 135mm f2.8 AI, 300mm f2.8 AI-s
Nikon AF F5, D810 16mm f2.8 AF-D, 20mm f1.8 AF-S, 55mm f2.8 AF micro, Tokina 100mm f2.8 macro, 80-200mm f2.8 AF-D
Canon FD T90, T50, AT-1, 50mm f1.8, 135mm f3.5
|
|
| Back to top |
|
|
cooltouch
Joined: 15 Jan 2009
Posts: 9096
Location: Houston, Texas
|
| Posted: Sun Jan 18, 2015 2:30 pm Post subject: |
|
|
cooltouch wrote:
Hey, Kei, like you, I've also wanted the 80-200/2.8 and the 400/4. I also wanted the 180/2.5 too. I rationalized not buying two of the three thusly. I already own a Tamron 300/2.8 with 1.4x tc and the 80-2002,8. Well, employing the 1.4x with the 300/2.8 gives me a 420m f/4, so that takes care of the 400/4, and the 80-200/2.8's resolution and contrast numbers at 200mm are so close to the 180/2.5's as to not make any significant difference.
I also sometimes forget just how useful the 80-200/2.8 is at replacing other focal lengths. I don't need a 135mm f/2.8 anymore because I've got it covered with the 80-200mm f/2.8. And I don't need a 70-150mm anymore since I've got almost all of that range covered as well. And most all 70-150s I've seen have a maximum aperture of f/3.5, so the 80-200 has them beat by half a stop to boot. Plus, it's got the 85/2.8 and 105/2.8 prime focal lengths covered as well. Its only significant drawback is its weight. And possibly the fact that it doesn't have a macro -- or even a close focus -- mode. But if I just gotta have it for macro work, I can always couple it with extension tubes or my Vivitar macro focusing teleconverter, and I'm there.
_________________
Michael
My Gear List: http://michaelmcbroom.com/photo/gear.html
My Gallery: http://michaelmcbroom.com/gallery3/index.php/
My Flickr Page: https://www.flickr.com/photos/11308754@N08/albums
My Music: https://soundcloud.com/michaelmcbroom/albums
My Blog: http://michaelmcbroom.com/blogistan/ |
|
| Back to top |
|
|
marcusBMG
Joined: 07 Dec 2012
Posts: 1316
Location: Conwy N Wales
|
| Posted: Sun Jan 18, 2015 2:53 pm Post subject: |
|
|
marcusBMG wrote:
| biggles3 wrote: |
Hi marcusBMG,
The image of the swan looks pretty good - I see what you mean about the softness at f4.5; it appears our lenses give slightly different results. I wonder if your lens has taken a slight knock at some stage in its long life...
One thing I noted was that when I shot with a m4/3 body, the images appeared a tiny bit softer and after using the amazing EVF on the Fuji, I am wondering whether critical focusing was an issue - my Olympus E-M5 was a lovely camera but I've found the X-T1 make focusing, especially when wide-open and with a more shallow dof, much more precise.
Using a remote shutter release with the tripod was also a big factor in getting sharp images for me. It's a massive piece of glass and is superbly built but has limitations because of its size and weight; I think it's worth persevering with it as to date, at least with the Fuji, I'm very pleased with the results. I'd love to try it on a full sensor camera - wish I'd still got my Contax N-1D... |
My experience with my M43 lumix G1 is the same - IQ just a little behind that of my apsc pentaxes, which I attribute to the sensor primarily, and perhaps to the higher pixel density being more demanding on the lens. I find focus with the evf very precise, more so with magnified focus assist in fact than live view on the pentax. I use a 1.36x magnifier on the pentax. On the K5 I am still trying to figure out if the the visual focus is exactly callibrated - certainly only off if at all by a small amount, when I switch to LV to check its pretty much there - but maybe a sufficient discrepancy to contribute to focus errors with long tp..
But I'm pretty happy to have the G1, I acquired it for a relatively bargain price 2 yrs ago from a cash converters listing on ebay and recouped most of the bid by selling the 14-45mm it came with (though I later spent on a 14-42mm). I use it to check out and play with the range of vintage lenses, the only adapter I'm missing at the mo is OM. I tried a g2 too but IQ wise that was no better for me so I sold it.
Those test shots of the castl were tripod mounted, 2 secs MLU.
My 05A looks in great condition externally, no signs of any knock or even of much useage. The only fault is a somewhat rough, squeaky zoom movement - aged lubricant? TBH I would tend to attribute IQ differences between our lenses to inherent lens variability. That's what puts me off soliciting Eddie - the notion that it's going to come back no better. You asked why this is not an SP? My thought on looking at my first pics from this lens "thats why!"
_________________
pentax ME super (retired)
Pentax K3-ii; pentax K-S2; Samsung NX 20; Lumix G1 + adapters;
Adaptall collection (proliferating!) inc 200-500mm 31A, 300mm f2.8, 400mm f4.
Primes: takumar 55mm; smc 28mm, 50mm; kino/komine 28mm f2's, helios 58mm, Tamron Nestar 400mm, novoflex 400mm, Vivitar 135mm close focus, 105mm macro; Jupiter 11A; CZJ 135mm.
A classic zoom or two: VS1 (komine), Kiron Zoomlock... |
|
| Back to top |
|
|
bychance
Joined: 24 Apr 2013
Posts: 347
Location: Kent, England
|
| Posted: Sun Jan 18, 2015 3:47 pm Post subject: |
|
|
bychance wrote:
| cooltouch wrote: |
I find the dis-assembly of a lens to be one of those tasks that I wish I could pawn off on others, but seldom can I afford to do so, or more to the point, seldom does it make economic sense to have a professional do the work. I've been repairing cameras and lenses since about 1990, so I've picked up a few tips and tricks, although they still too often desert me in my hour of need.
As for dealing with a lens's complexity, the easiest way these days is to take many pics during the disassembly process. I have found, through much trial and error, that it is not always necessary to completely dismantle a lens to get to a particular area that needs attention. This is especially true with zooms. All too often though it will require separation of sections where a helical is undone. I have tried on many occasions placing marks so that it is easier to reassemble the lens later, but usually there is something about the way the pieces come apart that prevent me from making precise location marks. So it seems as if I'm always having to do a trial-and-error refitting of the helical before I've got it set right again. It's not that big of an ordeal, really. Most important is having a scene in which you can set the lens to infinity on, because that's how you determine if the helical is set back properly, the infinity setting.
I also try to arrange the small parts -- typically screws of various sizes -- together in the order in which they were removed. I also like to lay out a towel or some sort of cloth over the working area. Pieces that like to bounce and disappear into infinity are less likely to bounce as far if they hit cloth as opposed to a hard table or desk surface. It's also a good idea to set a towel or carpet at your feet. Inevitably it seems with me, when it comes time to do things like re-insert that little ball bearing that provides the clicks for the aperture ring, that pesky little thing will drop from my tweezers and bounce its way into a parallel dimension, never to be seen again. I mean, I have taken a powerful rare-earth magnet and swept every square inch of floor before, looking for one of these tiny balls, for naught. But if I had the foresight to lay out a towel at my feet first, the ball will not have gone far, and can usually be recovered.
Typically we need to get into a lens for one of three reasons: oil on the aperture blades, fungus or haze, etc., on an interior element, or the helical needs to be relubricated. Each will require its own disassembly strategy.
I usually try to get to the inner group of elements, whether to clean fungus/haze or to reach the aperture iris, from the rear of a lens first. It depends somewhat on what type of lens it is. If it's a prime, that's the approach I use. If it's a zoom, however, often I'll start by removing the rubber focusing and/or zoom collar grip. With a two-ring zoom, under the zoom collar grip is where the cam action for the zoom is, and under the focusing collar are often found the stops for the focusing collar rotation, which may need to be removed, depending on what the job is. With a one-ring zoom, the cams and stops are combined under the single collar grip.
One of the most common reasons for dismantling a lens is to clean the aperture iris blades of oil. If it is a lens with an auto aperture, the blades must be totally dry to work properly. I always try to reach this assembly without having to disturb the blades' positions. Usually this can be done with a barrel-type lens. With a lens-shutter type, this is usually not the case, and I wind up having to deal with resetting each blade. But in a barrel they're usually held in an assembly which doesn't require disassembly. To clean them, I've used a variety of different things: alcohol, naphtha, and even acetone (fingernail polish remover). Oil will dissolve in all three. Probably the worst of the lot is alcohol, simply because the alcohol you buy at the drug store is only about half alcohol; the rest is water. So, the alcohol will evaporate from the blades rather quickly, leaving behind residual water. You can use a hair dryer to evaporate the water, though, so it's not that big of a deal. Naphtha, aka lighter fluid, is a good solvent. Oil dissolves into it easily and it evaporates fairly quickly. Acetone can be rather harsh on things it comes into contact with. It can melt certain plastics and will dissolve paint as well as oil. So you have to be a little more careful with it, but it is also a good cleaner. Now, to actually remove the oil, I just use Q-tip cotton swabs. Easy does it -- you don't want to push on the blades too aggressively, just lightly wipe the swab across the blade's surface. Sometimes I'll fluff up the swab a bit to soften things even more. You'll want to repeadedly actuate the iris mechanism while you're doing this. The oil tends to collect in the blade pivot points. By repeatedly actuating the mechanism, you're drawing the oil out from the pivot points, but it will usually require quite a few actuations before the pivot points are free from residual oil.
Fungus can make its home on any number of surfaces. For inner surfaces, often a lens spanner will be needed to get to it. Sometimes, if you're lucky, it will be found on the outer element of a group, so it can be gotten to easily enough. Fungus tends to be rather stubborn stuff. It will not wipe off easily. I've found that wiping it very firmly with my thumb (clean, of course) is a good way to remove it. It works well because a thumb is soft yet a good deal of direct pressure can be applied. I follow up by using a lens tissue with lens cleaning fluid to remove any oils or other substances my thumb may have left behind.
To relube the helicals, the lens will usually have to be completely dismantled. I remove all the old lubricant first. One can do this chemically, but grease-cutting chemicals can often be quite toxic such that you don't even want them to contact your skin. Sometimes it's necessary to go this route, but most of the time it isn't. What I typically do is wipe down the helical threads with paper towels and follow up with a toothbrush. You can get them pretty clean this way. For replacement lube, I turn to the auto parts store. They've usually got a variety of lubes to chose from. I prefer the molybdenum sulfide grease. It's either white or gray in color. You can buy it in a tub -- about a pint or a half-liter or so -- for a few bucks. Chances are this will last you for a good twenty years or more. I know -- I still have a tub that's mostly full that I bought 20 years ago. Also, one of the good things about the moly grease is it doesn't tend to harden or coagulate the way some lens lubes have over the years. I'm thinking specifically of the lube that Kern-Paillard used in its 16mm camera lenses, like the Switars, Yvars, etc. In lenses that were manufactured back in the 60s or 70s, that grease has turned into stuff the consistency of crayons now. That is, it's turned into a wax-like substance. The moly grease won't do this -- ever. So to re-apply, I will lightly smear grease across the threads, distributing it evenly. Often that toothbrush I used earlier to remove the old grease works well to distribute the new grease. Next, reconnect the helical pieces and try them out. Too much grease will result it a heavy feel. Too little and you will feel and hear metal-to-metal contact as you rotate the collar or zoom in and out.
Back to the subject of Tamrons, one thing that has been common to all Tamron lenses I've dismantled so far (all zooms) is the use of tape to hold main sections of the lens together with. This is often how infinity focus is arrived at, by positioning the sections where they're supposed to be, then applying tape. Sounds weird, but it works.
Looking back over what I've just written, I can see that it may appear to be a bit much to take on. But really if you just take your time and stay focused on your goal, it's not so bad. And hey, if you feel like you need to take a break and do something else, that's not a problem. I've done this before, many times. If it looks like the break may last more than a few hours, however, I will get out some plastic sandwich-size bags and place the component parts separately in bags, labeling each as to its contents. Keeping in mind that I've documented what I've done so far with my camera, it won't be difficult picking back up where I left off at a different time or date. |
Michael, that excellent post is going into my repair bible!
Steve.
_________________
I got where I am by avoiding where I was going.
Now where was I? |
|
| Back to top |
|
|
cooltouch
Joined: 15 Jan 2009
Posts: 9096
Location: Houston, Texas
|
| Posted: Sun Jan 18, 2015 8:30 pm Post subject: |
|
|
cooltouch wrote:
Glad I could help out in a field, where unfortunately, not a lot of DIY help is available. I was fortunate enough to take two semesters of a camera repair class offered at a local community college back in about 1990. Really, two semesters worth was only enough for me just to get my feet wet, but instead of continuing further, I opted for a machining class instead, which was a good deal more rigorous and time consuming.
On the subject of repairing Tamrons, I was able to successfully complete a repair on my 30A 80-200/2.8 last night, and I have another mostly dismantled 27A 28-80/3.5-4.5 waiting in the wings for me to get to it.
The 30A had an inner group of elements come loose -- literally -- which was knocking around the inside the lens when I moved it. First noticed it had a problem when it would no longer focus to infinity. But since it would still forcus properly at 200mm, I still used it. Until the inner group came loose, of course.
Fortunately it was an easy process getting to the problem. Going from the front of the lens inward this time, which I normally would prefer not to do, but this time it was obvious, just by looking into the lens, which approach was needed. The front group is held in place by a single slotted ring, which came loose easily enough using a spanner. This gave access to a second group, which is a single element, and which was also held in place by a slotted ring. Removing this second element gave me access to the problem. The loose piece was a small, five element group that threaded into the zoom assembly, moving in and out. All that was needed was for the loose group to be threaded back into its carrier and reassembly of the other two groups. The biggest challenge with reassembly is making sure to keep the surfaces absolutely clean as they go back together. No need for re-collimation, since each element/group sits back into a carrier in which it is held securely, with no possibility of lateral movement.
The entire repair took about a half hour and resulted in a 30A that was once again, good as new. Now, if only I could say the same about the 27A that is sitting on a shelf, in baggies, waiting for me to turn my attention back to it. This lens has a problem with the zoom collar not quite reaching 80mm and the focusing collar not quite reaching infinity. I was hoping I could spot the problem without having to uncouple the helicals, but that doesn't seem likely at this point. Oh well. I have too much other stuff to do at the moment, so its gotten set aside temporarily -- with proper documentation and storage, of course.
_________________
Michael
My Gear List: http://michaelmcbroom.com/photo/gear.html
My Gallery: http://michaelmcbroom.com/gallery3/index.php/
My Flickr Page: https://www.flickr.com/photos/11308754@N08/albums
My Music: https://soundcloud.com/michaelmcbroom/albums
My Blog: http://michaelmcbroom.com/blogistan/ |
|
| Back to top |
|
|
|
|