| View previous topic :: View next topic |
| Author |
Message |
jamaeolus


Joined: 19 Mar 2014
Posts: 2964
Location: Eugene
Expire: 2015-08-20
|
 Posted: Sat Feb 26, 2022 9:12 pm Post subject: Lens surface rehab. Posted: Sat Feb 26, 2022 9:12 pm Post subject: Lens surface rehab. |
 |
|
jamaeolus wrote:
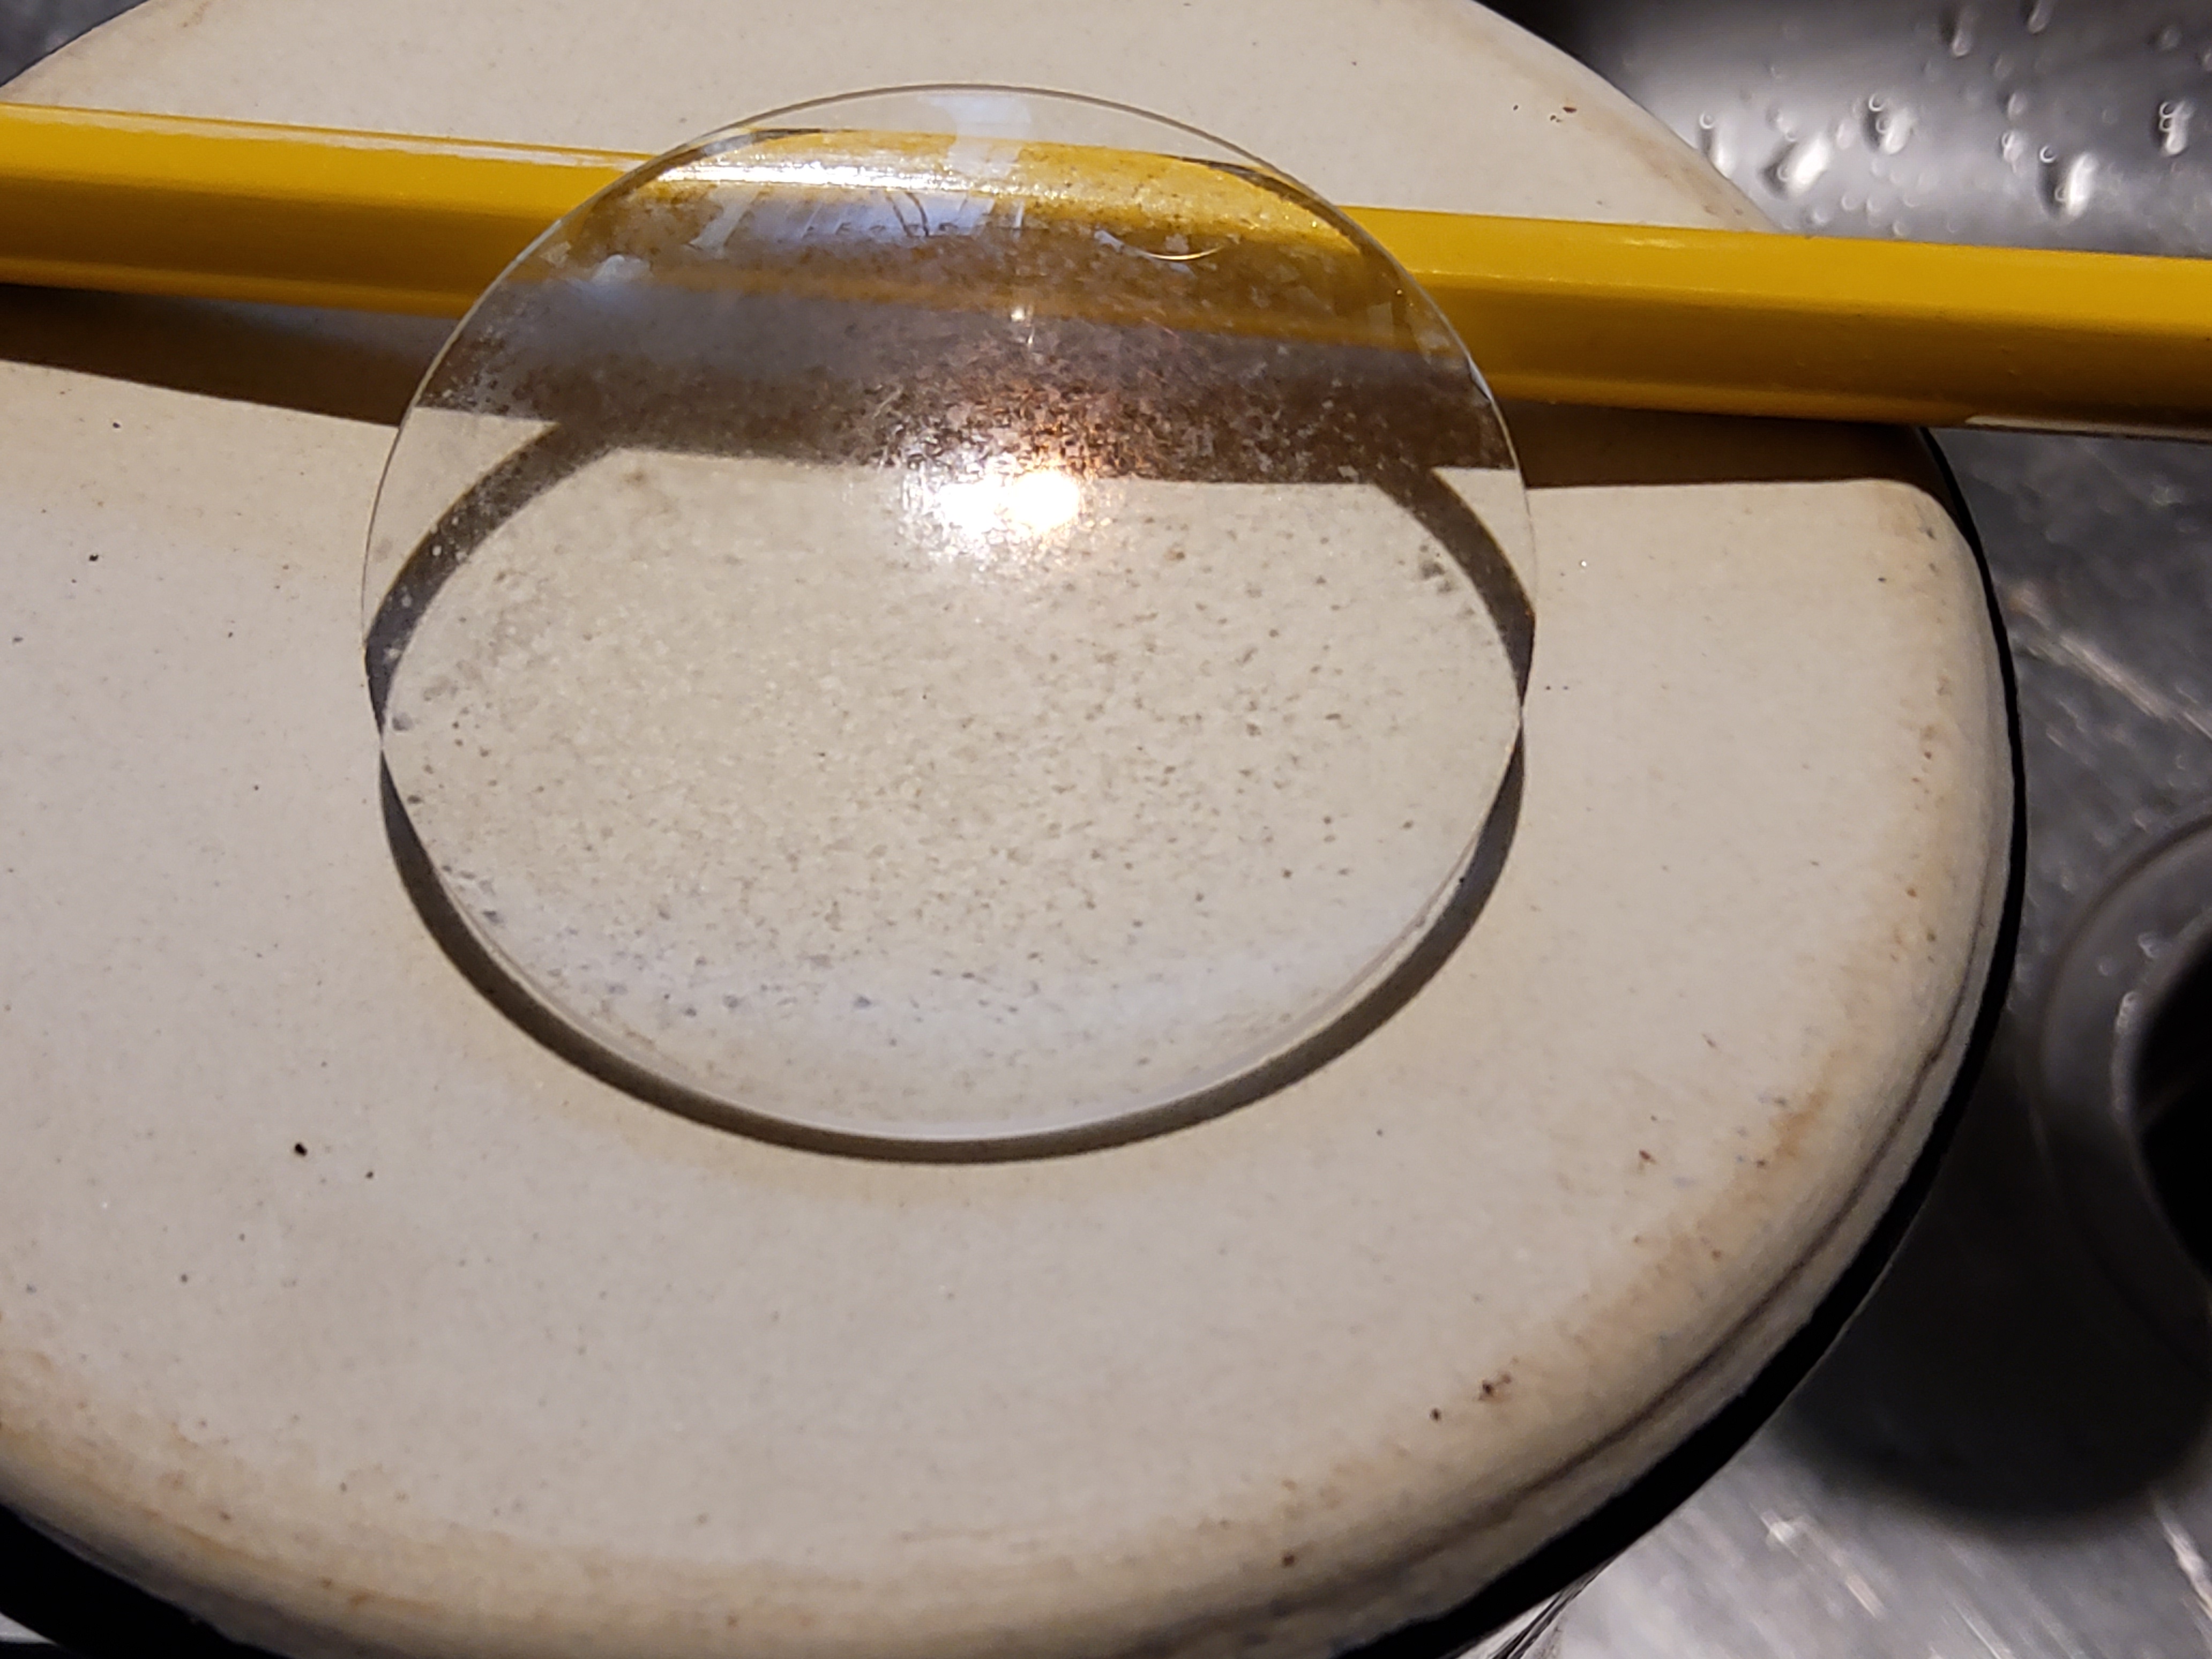
I mentioned in a previous thread on the aperture rebuild, I would discuss my "as-is" xenotar objective surface issues. I bought it with the thought that the surface just looked dirty . A good cleaning and I d have a usable copy of a rare and legendary optic. Nope. The surface is pretty bad. It appears the coating is etched. I did my usual wash with isopropyl to no avail. Then scrubbed with vinegar, nope. Mild bleach? Nope. Tried lighter fluid. Even acetone. Finally I tried automotive rubbing compound on one edge. No noticeable improvement. At this point I'm willing to sacrifice the coating for a usable lens. Ideas?
_________________
photos are moments frozen in time |
|
| Back to top |
|
 |
jamaeolus
Joined: 19 Mar 2014
Posts: 2964
Location: Eugene
Expire: 2015-08-20
|
| Posted: Sat Feb 26, 2022 9:17 pm Post subject: |
|
|
jamaeolus wrote:

_________________
photos are moments frozen in time |
|
| Back to top |
|
|
lumens pixel

Joined: 27 Feb 2019
Posts: 868
Expire: 2021-06-25
|
| Posted: Sat Feb 26, 2022 10:25 pm Post subject: |
|
|
lumens pixel wrote:
Following this thread with interest. I have the same problem with a Minolta mc 50 1,4 PG.
_________________
Lumens Pixel
-------------
Minolta SR mount: 16 2,8; Sigma SuperWide 24 2,8; 28 2,5; 28 2,8; 28 3,5; 35 2,8; 45 2,0; 50 1,4; 50 1,7; 50 2,0; 58 1,4; 85 2,0; 100 2,5; 100 4 Macro; 135 3,5; 135 2,8; 200 4; RF 250 5,6; 24-35 3,5; 35-70 3,5; 75-150 4; 70-210 4
Canon FD mount: Tokina RMC 17 3,5; 28 2,8; 35 2,8; 50 1,8; 50 3,5 Macro; 55 1,2; 135 3,5; 135 2,5; 200 4,0; 300 5,6; 28-55 3,5 4,5; Tokina SZ-X SD 270; 70-150 4,5; 70-210 f4; 80-200 4L; Tokina SZ-X 845
Tamron Adaptall: 28-80 3,5-4,2 (27A); 70-210 3,8-4 (46A); 60-300 (23A); 90 2,5 (52B); 35-135 3,5-4,5 (40A)
Tamron SP: 20-40 2,7-3,5 (266D) |
|
| Back to top |
|
|
kiddo
Joined: 29 Jun 2018
Posts: 1224
|
| Posted: Sun Feb 27, 2022 12:22 pm Post subject: |
|
|
kiddo wrote:
I understand cerium oxide would remove coating and good for polishing glass , there are different qualities never tried it though |
|
| Back to top |
|
|
RokkorDoctor

Joined: 27 Nov 2021
Posts: 1406
Location: Kent, UK
Expire: 2025-05-01
|
| Posted: Mon Feb 28, 2022 1:42 pm Post subject: |
|
|
RokkorDoctor wrote:
| kiddo wrote: |
| I understand cerium oxide would remove coating and good for polishing glass , there are different qualities never tried it though |
You would first need to make a polisher though; you would want to maintain the correct curvature of the glass surface, which would easily be destroyed by polishing off the coating freehand.
In the optics industry they used to press the lens into pitch to create a polisher, and then score it for the polishing slurry. Quite a bit of experience required to do that.
Personally, I would consider this lens beyond DIY improvement.
_________________
Mark
SONY A7S, A7RII + dust-sealed modded Novoflex/Fotodiox/Rayqual MD-NEX adapters
Minolta SR-1, SRT-101/303, XD7/XD11, XGM, X700
Bronica SQAi
Ricoh GX100
Minolta majority of all Rokkor SR/AR/MC/MD models made
Sigma 14mm/3.5 for SR mount
Tamron SP 60B 300mm/2.8 (Adaptall)
Samyang T-S 24mm/3.5 (Nikon mount, DIY converted to SR mount)
Schneider-Kreuznach PC-Super-Angulon 28mm/2.8 (SR mount)
Bronica PS 35/40/50/65/80/110/135/150/180/200/250mm |
|
| Back to top |
|
|
jamaeolus
Joined: 19 Mar 2014
Posts: 2964
Location: Eugene
Expire: 2015-08-20
|
| Posted: Mon Feb 28, 2022 4:28 pm Post subject: |
|
|
jamaeolus wrote:
I have nothing to lose but time at this point.
_________________
photos are moments frozen in time |
|
| Back to top |
|
|
JMC

Joined: 29 May 2018
Posts: 178
Location: London, UK
|
| Posted: Mon Feb 28, 2022 4:43 pm Post subject: |
|
|
JMC wrote:
I use cerium oxide paste on filters which have 'oxidized' after exposure to air for too long. I got mine from UVIRoptics - https://www.ebay.com/usr/uviroptics - as apparently there are different grades of it. This should be able to remove the coating and not damage the glass (in theory at least).
It's not listed on his ebay site at the moment, but it is worth contacting to see if he has any. |
|
| Back to top |
|
|
Ray Parkhurst

Joined: 04 Jul 2011
Posts: 504
Location: Santa Clara, CA, USA
|
| Posted: Tue Mar 01, 2022 3:45 am Post subject: |
|
|
Ray Parkhurst wrote:
I've had excellent results by spraying the lens with a clear lacquer coat. Just a quick, thin coating spray and it fills-in all the gaps in the coating and leaves a smooth surface. The surface won't hold up to much cleaning, as the lacquer is quite soft and scratches easily, but it is easy to re-apply. Plus, if you get it on too thick, it's easy to clean off with acetone or lacquer thinner and try again. Has worked on some high power / high NA objectives with good results as well. Low hanging fruit.
Additive, and reversible, vs subtractive, and non-reversible.
_________________
...See my Numismatic Photography website at: http://www.macrocoins.com
...Primary Studio Cameras: Sony A7Rm4 and Canon HRT2i
...Go-To studio lenses: Nikon 95mm and 105mm Printing-Nikkors; Schneider 85mm Macro-Varon; Nikon 5x, 10x, and 20x Measuring Microscope Objectives; Mitutoyo BD Plan Apo 50x Microscope Objective
...My Go-To Walkaround Lenses: Laowa 60mm Super Macro; Nikon 28-105D (in manual mode for macro); |
|
| Back to top |
|
|
caspert79

Joined: 31 Oct 2010
Posts: 3135
Location: The Netherlands
|
| Posted: Tue Mar 01, 2022 5:36 am Post subject: |
|
|
caspert79 wrote:
Just curious: how’s the image quality with this bad front lens? |
|
| Back to top |
|
|
RokkorDoctor
Joined: 27 Nov 2021
Posts: 1406
Location: Kent, UK
Expire: 2025-05-01
|
| Posted: Tue Mar 01, 2022 10:50 am Post subject: |
|
|
RokkorDoctor wrote:
| Ray Parkhurst wrote: |
I've had excellent results by spraying the lens with a clear lacquer coat. Just a quick, thin coating spray and it fills-in all the gaps in the coating and leaves a smooth surface. The surface won't hold up to much cleaning, as the lacquer is quite soft and scratches easily, but it is easy to re-apply. Plus, if you get it on too thick, it's easy to clean off with acetone or lacquer thinner and try again. Has worked on some high power / high NA objectives with good results as well. Low hanging fruit.
Additive, and reversible, vs subtractive, and non-reversible. |
An interesting option. If it does result in a usable lens then a clear/UV filter will sort out the required protection.
_________________
Mark
SONY A7S, A7RII + dust-sealed modded Novoflex/Fotodiox/Rayqual MD-NEX adapters
Minolta SR-1, SRT-101/303, XD7/XD11, XGM, X700
Bronica SQAi
Ricoh GX100
Minolta majority of all Rokkor SR/AR/MC/MD models made
Sigma 14mm/3.5 for SR mount
Tamron SP 60B 300mm/2.8 (Adaptall)
Samyang T-S 24mm/3.5 (Nikon mount, DIY converted to SR mount)
Schneider-Kreuznach PC-Super-Angulon 28mm/2.8 (SR mount)
Bronica PS 35/40/50/65/80/110/135/150/180/200/250mm |
|
| Back to top |
|
|
jamaeolus
Joined: 19 Mar 2014
Posts: 2964
Location: Eugene
Expire: 2015-08-20
|
| Posted: Tue Mar 01, 2022 6:38 pm Post subject: |
|
|
jamaeolus wrote:
| Ray Parkhurst wrote: |
I've had excellent results by spraying the lens with a clear lacquer coat. Just a quick, thin coating spray and it fills-in all the gaps in the coating and leaves a smooth surface. The surface won't hold up to much cleaning, as the lacquer is quite soft and scratches easily, but it is easy to re-apply. Plus, if you get it on too thick, it's easy to clean off with acetone or lacquer thinner and try again. Has worked on some high power / high NA objectives with good results as well. Low hanging fruit.
Additive, and reversible, vs subtractive, and non-reversible. |
I thought of trying something like this as a friend of mine used Johnson wax and buffed out degraded surfaces of vintage CD's for gaming. I will try it and report back.
_________________
photos are moments frozen in time |
|
| Back to top |
|
|
visualopsins

Joined: 05 Mar 2009
Posts: 10959
Location: California
Expire: 2025-04-11
|
| Posted: Tue Mar 01, 2022 7:19 pm Post subject: |
|
|
visualopsins wrote:
Sounds like a plan!
For reference, Zeiss uses cigarette ash instead of fine cerium oxide. Ref:
http://forum.mflenses.com/ash-polishing-glass-t16384.html
http://forum.mflenses.com/hazy-lens-element-not-responding-to-normal-cleaning-methods-t66075.html
_________________
☮☮☮☮☮☮☮☮☮☮☮☮☮☮☮☮☮☮☮☮☮☮☮☮☮☮☮☮☮☮☮☮ like attracts like! ☮☮☮☮☮☮☮☮☮☮☮☮☮☮☮☮☮☮☮☮☮☮☮☮☮☮☮☮☮☮☮☮
Cameras: Sony ILCE-7RM2, Spotmatics II, F, and ESII, Nikon P4
Lenses:
M42 Asahi Optical Co., Takumar 1:4 f=35mm, 1:2 f=58mm (Sonnar), 1:2.4 f=58mm (Heliar), 1:2.2 f=55mm (Gaussian), 1:2.8 f=105mm (Model I), 1:2.8/105 (Model II), 1:5.6/200, Tele-Takumar 1:5.6/200, 1:6.3/300, Macro-Takumar 1:4/50, Auto-Takumar 1:2.3 f=35, 1:1.8 f=55mm, 1:2.2 f=55mm, Super-TAKUMAR 1:3.5/28 (fat), 1:2/35 (Fat), 1:1.4/50 (8-element), Super-Multi-Coated Fisheye-TAKUMAR 1:4/17, Super-Multi-Coated TAKUMAR 1:4.5/20, 1:3.5/24, 1:3.5/28, 1:2/35, 1:3.5/35, 1:1.8/85, 1:1.9/85 1:2.8/105, 1:3.5/135, 1:2.5/135 (II), 1:4/150, 1:4/200, 1:4/300, 1:4.5/500, Super-Multi-Coated Macro-TAKUMAR 1:4/50, 1:4/100, Super-Multi-Coated Bellows-TAKUMAR 1:4/100, SMC TAKUMAR 1:1.4/50, 1:1.8/55
M42 Carl Zeiss Jena Flektogon 2.4/35
Contax Carl Zeiss Vario-Sonnar T* 28-70mm F3.5-4.5
Pentax K-mount SMC PENTAX-A ZOOM 1:3.5 35~105mm, SMC PENTAX ZOOM 1:4 45~125mm
Nikon Micro-NIKKOR-P-C Auto 1:3.5 f=55mm, NIKKOR-P Auto 105mm f/2.5 Pre-AI (Sonnar), Micro-NIKKOR 105mm 1:4 AI, NIKKOR AI-S 35-135mm f/3,5-4,5
Tamron SP 17mm f/3.5 (51B), Tamron SP 17mm f/3.5 (151B), SP 500mm f/8 (55BB), SP 70-210mm f/3.5 (19AH)
Vivitar 100mm 1:2.8 MC 1:1 Macro Telephoto (Kiron)
|
|
| Back to top |
|
|
RokkorDoctor
Joined: 27 Nov 2021
Posts: 1406
Location: Kent, UK
Expire: 2025-05-01
|
| Posted: Tue Mar 01, 2022 9:10 pm Post subject: |
|
|
RokkorDoctor wrote:
It may well be true, but does anyone have an actual reference to such statement by Zeiss themselves?
The only historic supposed link I could find is now dead.
I would like to know what they really said about it.
_________________
Mark
SONY A7S, A7RII + dust-sealed modded Novoflex/Fotodiox/Rayqual MD-NEX adapters
Minolta SR-1, SRT-101/303, XD7/XD11, XGM, X700
Bronica SQAi
Ricoh GX100
Minolta majority of all Rokkor SR/AR/MC/MD models made
Sigma 14mm/3.5 for SR mount
Tamron SP 60B 300mm/2.8 (Adaptall)
Samyang T-S 24mm/3.5 (Nikon mount, DIY converted to SR mount)
Schneider-Kreuznach PC-Super-Angulon 28mm/2.8 (SR mount)
Bronica PS 35/40/50/65/80/110/135/150/180/200/250mm |
|
| Back to top |
|
|
Lightshow

Joined: 04 Nov 2011
Posts: 3666
Location: Calgary
|
| Posted: Tue Mar 01, 2022 10:26 pm Post subject: |
|
|
Lightshow wrote:
There are some great YouTube videos covering the making of optics for astronomy telescopes, the making of a polishing lap and the process involved, I'm sure some of the astronomy DIY'ers would help direct you in the right direction to get a nice smooth and correct(or close to correct) surface geometry.
YT Channels I've watched that had some info:
Gordon Waite
Huygens Optics - Why is this space telescope so tiny?
I do know that you can cast a mold of an optic that's not too damaged to make a lap for polishing that optic, cover/stretch cling wrap over the lens and press it into silicon or other curable compound that doesn't get hot. It may take 2-3 attempts to get a clean lap with no distortion or raised lip on the rim. Then comes the slow and tedious polishing part... Your lens didn't look too far gone, still looked shiny in spots, that means it shouldn't take too much effort to restore the surface and you won't have to be as aggressive.
This will get you an uncoated lens surface, one surface shouldn't have too big of an impact unless it's a critical surface(some lens designs have some surfaces that will transmit reflections more than with other designs(mostly in wider angle lenses), for example Canon's nano coating is only on these critical surfaces and use SSC on other surfaces, this is probably because the nano coating is so delicate in comparison.
_________________
A Manual Focus Junky...
One photographers junk lens is an artists favorite tool.
My lens list
http://www.flickr.com/photos/lightshow-photography/ |
|
| Back to top |
|
|
visualopsins
Joined: 05 Mar 2009
Posts: 10959
Location: California
Expire: 2025-04-11
|
| Posted: Tue Mar 01, 2022 11:50 pm Post subject: |
|
|
visualopsins wrote:
| RokkorDoctor wrote: |
It may well be true, but does anyone have an actual reference to such statement by Zeiss themselves?
The only historic supposed link I could find is now dead.
I would like to know what they really said about it. |
What is the historic link you have, please?
Used to be on this page iirc: https://www.zeiss.com/consumer-products/us/service/content/fungus-on-lenses.html
Somebody else saw it too: http://forum.mflenses.com/canon-fd-15mm-f2-8-fisheye-ssc-heavy-problem-t25320,highlight,canon.html
| Quote: |
| ... the Carl Zeiss page, and there said i could use cigar ash to polish it. I was polishing it with ash and cotton (as the page said)... |
_________________
☮☮☮☮☮☮☮☮☮☮☮☮☮☮☮☮☮☮☮☮☮☮☮☮☮☮☮☮☮☮☮☮ like attracts like! ☮☮☮☮☮☮☮☮☮☮☮☮☮☮☮☮☮☮☮☮☮☮☮☮☮☮☮☮☮☮☮☮
Cameras: Sony ILCE-7RM2, Spotmatics II, F, and ESII, Nikon P4
Lenses:
M42 Asahi Optical Co., Takumar 1:4 f=35mm, 1:2 f=58mm (Sonnar), 1:2.4 f=58mm (Heliar), 1:2.2 f=55mm (Gaussian), 1:2.8 f=105mm (Model I), 1:2.8/105 (Model II), 1:5.6/200, Tele-Takumar 1:5.6/200, 1:6.3/300, Macro-Takumar 1:4/50, Auto-Takumar 1:2.3 f=35, 1:1.8 f=55mm, 1:2.2 f=55mm, Super-TAKUMAR 1:3.5/28 (fat), 1:2/35 (Fat), 1:1.4/50 (8-element), Super-Multi-Coated Fisheye-TAKUMAR 1:4/17, Super-Multi-Coated TAKUMAR 1:4.5/20, 1:3.5/24, 1:3.5/28, 1:2/35, 1:3.5/35, 1:1.8/85, 1:1.9/85 1:2.8/105, 1:3.5/135, 1:2.5/135 (II), 1:4/150, 1:4/200, 1:4/300, 1:4.5/500, Super-Multi-Coated Macro-TAKUMAR 1:4/50, 1:4/100, Super-Multi-Coated Bellows-TAKUMAR 1:4/100, SMC TAKUMAR 1:1.4/50, 1:1.8/55
M42 Carl Zeiss Jena Flektogon 2.4/35
Contax Carl Zeiss Vario-Sonnar T* 28-70mm F3.5-4.5
Pentax K-mount SMC PENTAX-A ZOOM 1:3.5 35~105mm, SMC PENTAX ZOOM 1:4 45~125mm
Nikon Micro-NIKKOR-P-C Auto 1:3.5 f=55mm, NIKKOR-P Auto 105mm f/2.5 Pre-AI (Sonnar), Micro-NIKKOR 105mm 1:4 AI, NIKKOR AI-S 35-135mm f/3,5-4,5
Tamron SP 17mm f/3.5 (51B), Tamron SP 17mm f/3.5 (151B), SP 500mm f/8 (55BB), SP 70-210mm f/3.5 (19AH)
Vivitar 100mm 1:2.8 MC 1:1 Macro Telephoto (Kiron)
|
|
| Back to top |
|
|
RokkorDoctor
Joined: 27 Nov 2021
Posts: 1406
Location: Kent, UK
Expire: 2025-05-01
|
| Posted: Wed Mar 02, 2022 9:35 am Post subject: |
|
|
RokkorDoctor wrote:
That is the same link I saw, but Zeiss seem to have removed that page. Shame, would have liked to have seen the suggested procedure.
A bigger issue is that I don't smoke, so would be good to know if there is something special about cigarette ash, or whether e.g. wood ash would also work.
_________________
Mark
SONY A7S, A7RII + dust-sealed modded Novoflex/Fotodiox/Rayqual MD-NEX adapters
Minolta SR-1, SRT-101/303, XD7/XD11, XGM, X700
Bronica SQAi
Ricoh GX100
Minolta majority of all Rokkor SR/AR/MC/MD models made
Sigma 14mm/3.5 for SR mount
Tamron SP 60B 300mm/2.8 (Adaptall)
Samyang T-S 24mm/3.5 (Nikon mount, DIY converted to SR mount)
Schneider-Kreuznach PC-Super-Angulon 28mm/2.8 (SR mount)
Bronica PS 35/40/50/65/80/110/135/150/180/200/250mm |
|
| Back to top |
|
|
tb_a

Joined: 26 Jan 2010
Posts: 3678
Location: Austria
Expire: 2019-08-28
|
| Posted: Wed Mar 02, 2022 10:48 am Post subject: |
|
|
tb_a wrote:
| RokkorDoctor wrote: |
| I don't smoke, so would be good to know if there is something special about cigarette ash, or whether e.g. wood ash would also work. |
The most obvious difference is that cigarette ash doesn't contain any bigger pieces whereas normal wood ash may contain bigger and hard ones which may again scratch the surface.
_________________
Thomas Bernardy
Manual focus lenses mainly from Minolta, Pentax, Voigtlaender, Leitz, Topcon and from Russia (too many to be listed here). |
|
| Back to top |
|
|
Lightshow
Joined: 04 Nov 2011
Posts: 3666
Location: Calgary
|
| Posted: Wed Mar 02, 2022 1:03 pm Post subject: |
|
|
Lightshow wrote:
Sadly the earliest save here is Aug 2020: https://web.archive.org/web/2021*/https://www.zeiss.com/consumer-products/us/service/content/fungus-on-lenses.html
And the forum post is 11 years earlier, my guess is someone following their directions and demanded they fix or replace their lens which was perfect prior to "Polishing" it.
As to the process?
From this link: http://forum.mflenses.com/ash-polishing-glass-t16384.html
| Quote: |
| Smoke a cigarette, drop the ashes on a clean tray (and don't let the cigarette rest in there, or a puddle of tar will deposit), dab a clean polishing cloth into the ashes, and polish the lens with light pressure and circular movements. Try on some damaged or useless lens first, to get a feeling for the right pressure and even movements. |
Seems fairly descriptive to me, basically dab the ash on a cloth like you are applying makeup and loading up a sponge, the ash should crush down to a soft powder between your fingers, it should not feel gritty!!!!
You probably have a few options to try, look for the softest cloth you can find, microfibre cloth should be safe after testing it first on something similar(bare fingers may also work, you would feel any grit instantly) , preferably a bit softer, test the cloth by its selfie a marked off quadrant, then with just the ash, then you can try some different lubricants, alcohol, water, and oil, see which one works best, does how wet the slurry is effect the results? And pressure?
Test first, then go slow and light till you can judge how soft the lens is and how abrasive the ash is, as the abrasive breaks down it will become softer/finer. I'd rather spend 10x as long using 1/5th the pressure to get a 10% improvement vs. too much pressure and over do it.
When polishing, try to avoid prolonged repetitive motions, mix it up a bit, for example do a motion a few times then rotate the element by 80 degrees do the same number of motions, another 80 degrees repeat.... then change the motion and rotate by 50 degrees... and then a different motion and a different rotation amount that doesn't divide equally into 360 degrees. This will help eliminate any bias to your polishing technique, keep in mind the centre will likely get too much attention so the first motion is a strait line in the centre front to back3 times then rotate, 3 times then rotate, repeat 6-8 times then move the centre line to the right, half way between the centre and edge, do that 6-8 times, then move to the right and do the edge 6-8 times, then clean the lens and inspect the damage, look for any abrasive patterns in the lens.
_________________
A Manual Focus Junky...
One photographers junk lens is an artists favorite tool.
My lens list
http://www.flickr.com/photos/lightshow-photography/ |
|
| Back to top |
|
|
jamaeolus
Joined: 19 Mar 2014
Posts: 2964
Location: Eugene
Expire: 2015-08-20
|
| Posted: Wed Mar 02, 2022 6:17 pm Post subject: |
|
|
jamaeolus wrote:
I will try the lacquer or wax thing first but if that fails I have purchased some cerium oxide optical powder. I have a silicone mold that should be cured by now. (Lens; saran wrap; silicone puddle; dremel bit) I will report back at each attempt.
_________________
photos are moments frozen in time |
|
| Back to top |
|
|
ZoneV
Joined: 09 Nov 2009
Posts: 1632
Location: Germany
Expire: 2011-12-02
|
| Posted: Tue Apr 19, 2022 12:36 pm Post subject: |
|
|
ZoneV wrote:
I did test the Zeiss recommendation, without a good result on an Canon nFD lens.
Later I made som experiments with a car window polsih paste, whiich works quite good, even on relative modern lenses:
http://www.4photos.de/camera-diy/Lens-Coating-Removal.html
http://www.4photos.de/camera-diy/Photo-Lens-Scratch-Repair.html
But as a warining, better don´t use that, when there culd be radioactive ingediens in the lens or coating. And the lens is without coating, and will have at least a little bit different surface form and quality.
_________________
Camera modification, repair and DIY - some links to look through: http://www.4photos.de/camera-diy/index-en.html
I AM A LENS NERD!
Epis, Elmaron, Emerald, Ernostar, Helioplan and Heidosmat.
Epiotar, Kameraobjektiv, Anastigmat, Epis, Meganast, Magnagon, Quinar, Culmigon, Novotrinast, Novflexar, Colorplan, Sekor, Kinon, Talon, Telemegor, Xenon, Xenar, Ultra, Ultra Star. Tessar, Janar, Visionar, Kiptar, Kipronar and Rotelar.
|
|
| Back to top |
|
|
Lloydy

Joined: 02 Sep 2009
Posts: 7787
Location: Ironbridge. UK.
Expire: 2022-01-01
|
| Posted: Tue Apr 19, 2022 8:34 pm Post subject: |
|
|
Lloydy wrote:
| jamaeolus wrote: |
| I will try the lacquer or wax thing first but if that fails I have purchased some cerium oxide optical powder. I have a silicone mold that should be cured by now. (Lens; saran wrap; silicone puddle; dremel bit) I will report back at each attempt. |
I plan to try something like this to remove a damaged / hazed coating. I have got 3 grades of cerium oxide, I don't know what they are, I was given then by someone who makes glass jewellery.
For a mould I thought I would try Sugru mouldable silicone, or maybe a two part epoxy putty like Milliput.
https://sugru.com/
https://www.milliput.com/
The Sugru would be more flexible than the Milliput, maybe one will be better than the other? I don't know, I haven't had a chance to experiment yet.
_________________
LENSES & CAMERAS FOR SALE.....
I have loads of stuff that I have to get rid of, if you see me commenting about something I have got and you want one, ask me.
My Flickr https://www.flickr.com/photos/mudplugga/
My ipernity -
http://www.ipernity.com/home/294337 |
|
| Back to top |
|
|
|
|