| View previous topic :: View next topic |
| Author |
Message |
Orio

Joined: 24 Feb 2007
Posts: 29545
Location: West Emilia
Expire: 2012-12-04
|
 Posted: Wed Nov 03, 2010 12:51 am Post subject: Color Checker Passport comparison files Posted: Wed Nov 03, 2010 12:51 am Post subject: Color Checker Passport comparison files |
 |
|
Orio wrote:
This is a short report of the use of Color Checker Passport tool and software in my photo session with Elisa.
What I show here are screen grabs taken from Adobe Lightroom window.
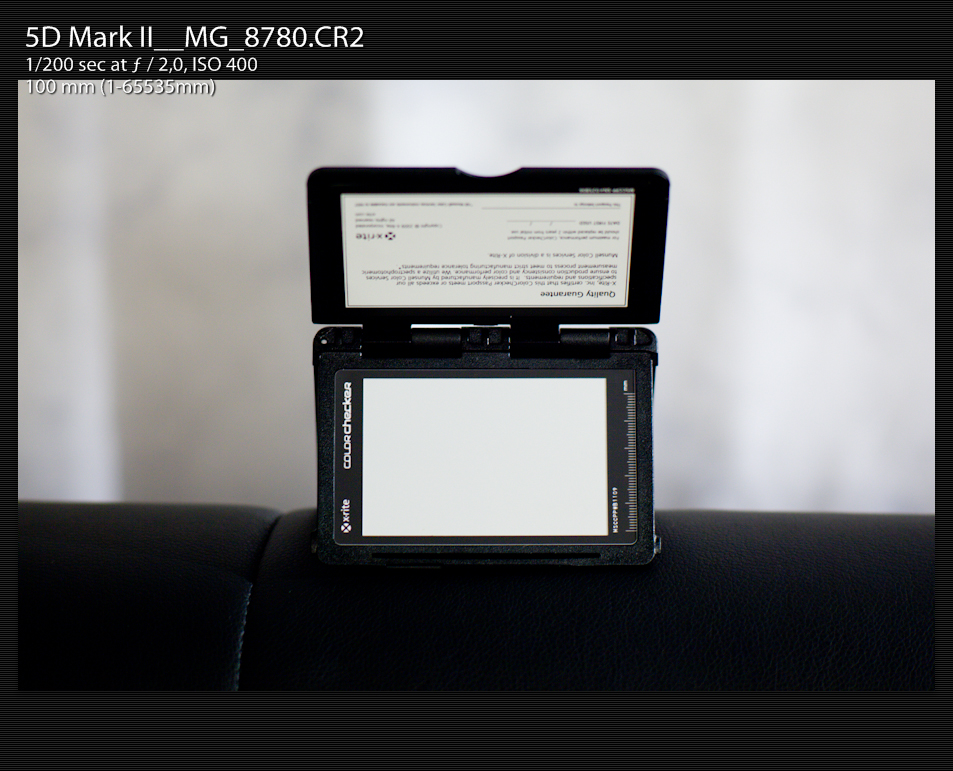
On the set, as first thing after placing lights, I took a picture of the checker board. I previously quickly white-calibrated the camera (not that it would probably matter anything, but just to be completely safe):
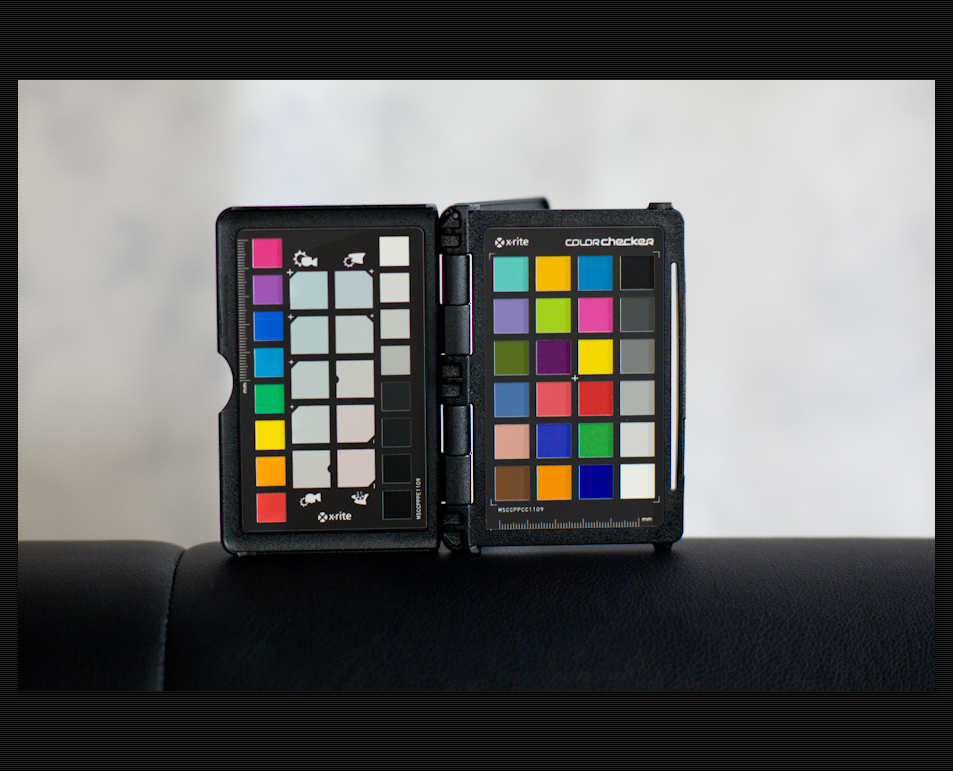
I then took a picture of the white calibrated board, to set totally accurate WB later in Lightroom:
What I am going to show now is one of the pre-session photos, while we were talking just to "break the ice". It is an unedited file except for two things: 1) the exposure was slightly corrected (about one third of a stop push) and 2) the image was white balanced in Lightroom using the white board photo above. Just for the record, it didn't show difference: 3000K was the temperature after I balanced the camera on set, and 3000K stayed after I rebalanced using the board photo. This at least shows that the 5DII custom white balance works perfectly when it's "fed" with a balanced white source. In any case, what we have now are pictures with a perfect white balance. The differences in colour that you will see, are only due to the different camera profiles. The WB is identical in the two samples.
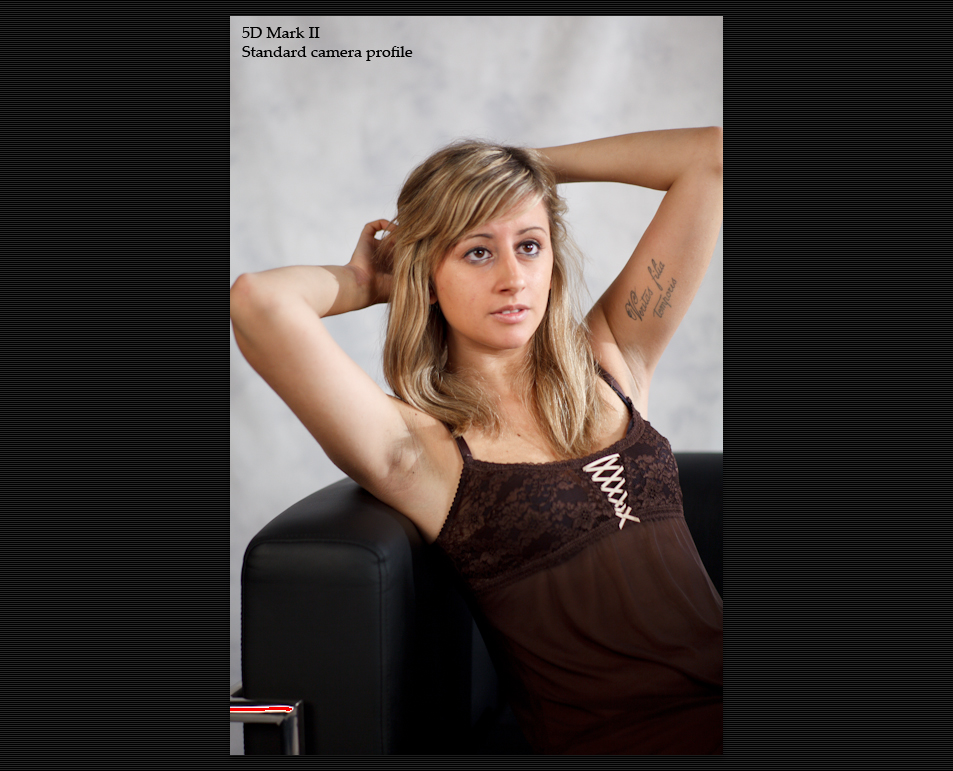
Here is the image with the Standard (Default) camera setting. Like I said before, the temperature is 3000K, only 100K more than Canon's default "Tungsten" setting (2900), so virtually identical to it. The small difference is due to the fact that not all tungsten lamps have the same exact temperature, there is always a shift, and also on the set there were three lamps, different from each other.
As you can see, although the file is perfectly white-balanced, that thing alone is not enough to produce perfect colours. Applying a perfect white balance to a generic colour profile may fix the black, whites and greys reasonably well, but it's no guarantee that the other colours will not shift also significantly from what you see in reality:

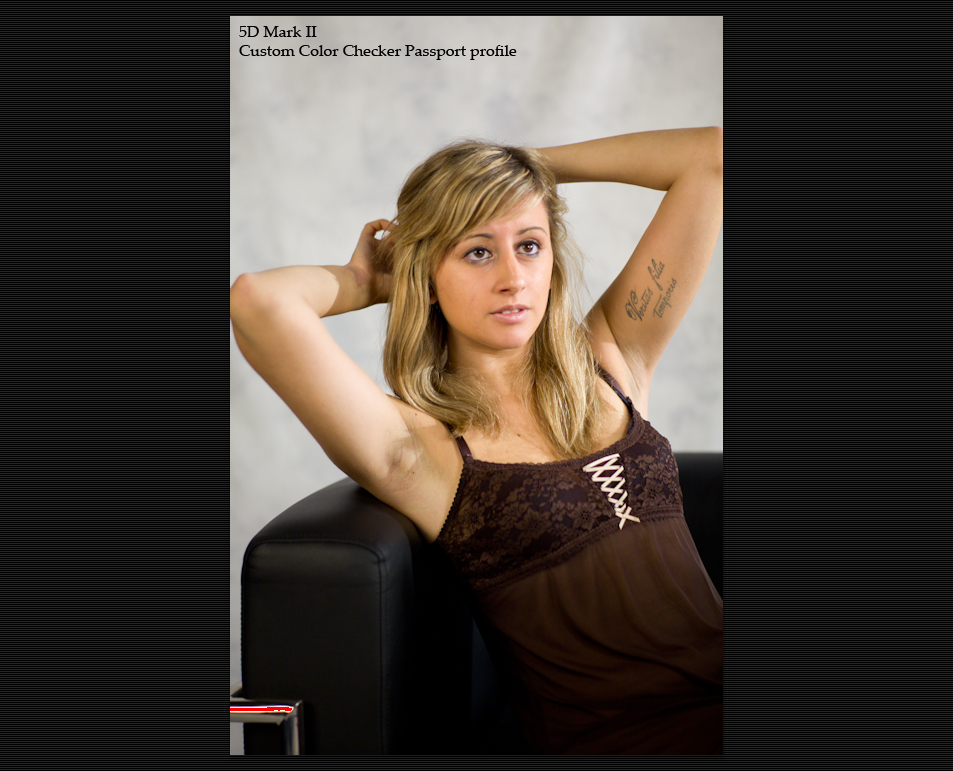
And now, here's the very same photo with the custom Color Checker profile created using the picture shown first above:

I don't think that further words are necessary. Your eyes can see!
_________________
Orio, Administrator
T*
NE CEDE MALIS AUDENTIOR ITO
Ferrania film is reborn! http://www.filmferrania.it/
Support the Ornano film chemicals company and help them survive!
http://forum.mflenses.com/ornano-chemical-products-t55525.html |
|
| Back to top |
|
 |
Himself

Joined: 01 Mar 2007
Posts: 3242
Location: Montreal
Expire: 2013-05-30
|
| Posted: Wed Nov 03, 2010 1:06 am Post subject: |
|
|
Himself wrote:
Hmm, I don't know Orio.
On my screen, the one taken with the Color Checker has a yellowish tinge.
The standard camera looks better, humanly in terms of colors.
_________________
Moderator Himself |
|
| Back to top |
|
|
Orio
Joined: 24 Feb 2007
Posts: 29545
Location: West Emilia
Expire: 2012-12-04
|
| Posted: Wed Nov 03, 2010 1:21 am Post subject: |
|
|
Orio wrote:
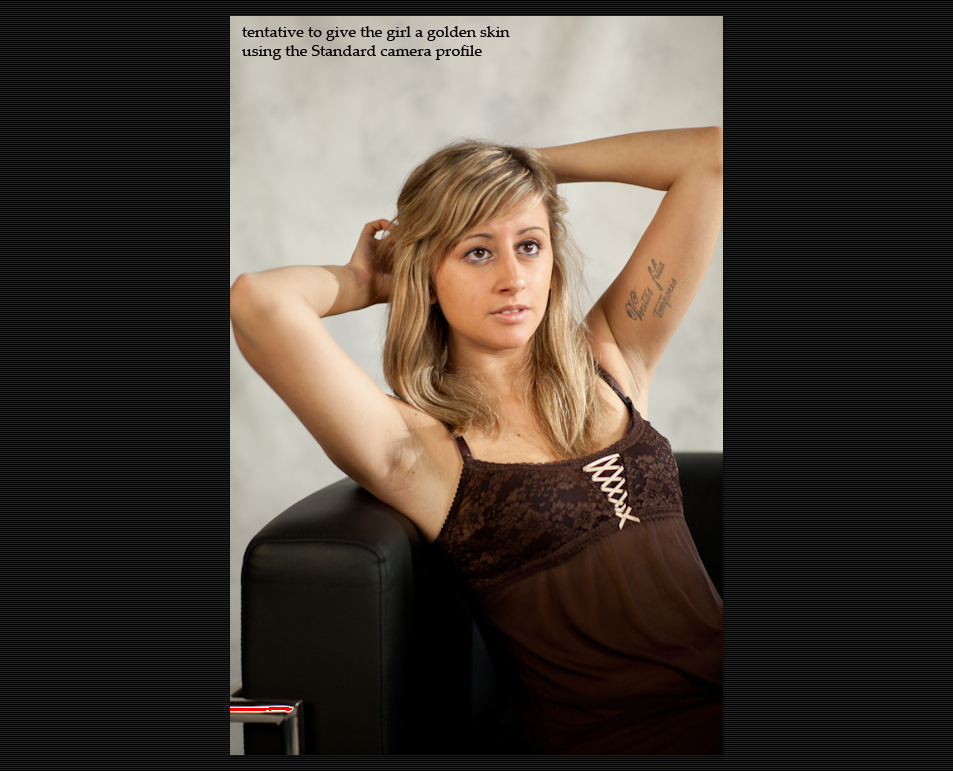
Well, I don't know if my monitor is completely off (that could be possible), but... Elisa skin is golden, just like in the custom profile. It doesn't have the "vomited aubergine" colour of the standard profile.
I made an attempt to give the girl a golden skin tone by staying with the standard profile and accomplishing by altering the "tone" slider (the one that fades from magenta to yellow/green):

As you can see, not only I could not even get close to the nice golden skin tone of the custom profile, but the background cloth and the black sofa have become greenish-yellow-tinted
_________________
Orio, Administrator
T*
NE CEDE MALIS AUDENTIOR ITO
Ferrania film is reborn! http://www.filmferrania.it/
Support the Ornano film chemicals company and help them survive!
http://forum.mflenses.com/ornano-chemical-products-t55525.html |
|
| Back to top |
|
|
Orio
Joined: 24 Feb 2007
Posts: 29545
Location: West Emilia
Expire: 2012-12-04
|
| Posted: Wed Nov 03, 2010 1:34 am Post subject: |
|
|
Orio wrote:
Here I provide side by side the custom profile and the attempt at golden skin made using the standard profile:
 
_________________
Orio, Administrator
T*
NE CEDE MALIS AUDENTIOR ITO
Ferrania film is reborn! http://www.filmferrania.it/
Support the Ornano film chemicals company and help them survive!
http://forum.mflenses.com/ornano-chemical-products-t55525.html |
|
| Back to top |
|
|
Katastrofo
Joined: 26 Feb 2007
Posts: 10405
Location: USA
Expire: 2013-11-19
|
| Posted: Wed Nov 03, 2010 2:02 am Post subject: |
|
|
Katastrofo wrote:
Last example looks very similar on my monitor. But you save time with
Color Checker, right? So this does a custom color profile of your camera's
RAW output, interesting. Bibble has something like this, but is cruder in
execution. |
|
| Back to top |
|
|
Orio
Joined: 24 Feb 2007
Posts: 29545
Location: West Emilia
Expire: 2012-12-04
|
| Posted: Wed Nov 03, 2010 2:33 am Post subject: |
|
|
Orio wrote:
| Katastrofo wrote: |
Last example looks very similar on my monitor. But you save time with
Color Checker, right? |
Well, yes of course, you "do it once and use for all", but, if you look carefully, you will see that while the skin in the "tentative" may look similar to the custom profile, there are subtle but important differences, that you can notice better if you download the two images and then open them in an image viewing program like Xnview (free), and switch fast from one to the other.
One of the differences is that the skin highlights (I mean the point where the skin reflects the light of the lamps) are naturally white, while in the "tentative" picture they have turned yellow.
And the same goes for the background.
Another important difference is that in the custom profile image, the yellow of the hair is one thing, and the orange of the skin is a different thing, while in the "tentative" picture, they look much like the same colour. Place your gaze in the mid point between the model's cheek and the hair, then do the fast switch between the two pictures in the image viewer: you will see very clearly what I mean, and that in the tentative picture the two colours look practically the same, while in the custom profile picture they are clearly different.
The consequence of these changes is that even they might not be immediately apparent to a distract view, they do make the tentative picture "heavier" and "muddier" while the custom profile picture maintains a fresher look, due to the separation of the colour shades.
| Katastrofo wrote: |
So this does a custom color profile of your camera's
RAW output, interesting. Bibble has something like this, but is cruder in
execution. |
Yes. With digital cameras usually you have a series of presets, like "daylight", "cloudy", "tungsten", "fluorescent", etc., but they are fakes. The cameras usually sport what is a double profile, that is, two profiles embedded in one. Typically, these are the daylight profile (usually 5200K) and the tungsten profile (usually at 2900K).
The other presets are not real profiles, they are computed interpolations between the two profiles.
With the Color Checker Passport you can create your own profiles and save them to reuse later. You can proceed as follows:
1- in a given situation, calibrate the in camera WB using the white board. This will set your camera to a given temperature. Not all cameras show the temperature obtained with a custom WB calibration, but a program like Lightroom does, so you can retrieve the info later.
2- take a picture of the color board and one of the white board
3- at home, look at the picture you took to calibrate the camera onboard WB, and take note of the kelvin value. Say it says for instance 4900K. now you know how to name your profile, and what is the original light situation youwere into.
4- now in lightroom select the color board picture and start the ColorChecker plugin. It will create and save a profile automatically. As profile name, in this case, you can use "4900K outdoors" (if you were outdoors when you took the photo of course)
5- restart Lightroom and now the profile is selectable for any photos taken with the camera you used (and only with that camera). So if another day you shoot again in a 4900K situation, you will not have to repeat the profile creation, you can just use the profile that you already created and saved.
_________________
Orio, Administrator
T*
NE CEDE MALIS AUDENTIOR ITO
Ferrania film is reborn! http://www.filmferrania.it/
Support the Ornano film chemicals company and help them survive!
http://forum.mflenses.com/ornano-chemical-products-t55525.html |
|
| Back to top |
|
|
Katastrofo
Joined: 26 Feb 2007
Posts: 10405
Location: USA
Expire: 2013-11-19
|
| Posted: Wed Nov 03, 2010 3:19 am Post subject: |
|
|
Katastrofo wrote:
I see what you mean by the light reflecting off the skin. Overall, the 'tentative' is more jaundiced to the 'custom'.
Thanks for the tips and can now see where LR would be a helpful companion
to this. |
|
| Back to top |
|
|
poilu
Joined: 26 Aug 2007
Posts: 10472
Location: Greece
Expire: 2019-08-29
|
| Posted: Wed Nov 03, 2010 8:32 am Post subject: |
|
|
poilu wrote:
the skin and hair color are completely different between the 2 profiles
personally I prefer the standard camera profile
_________________
T* |
|
| Back to top |
|
|
axer

Joined: 21 Feb 2010
Posts: 242
Location: where I lay my head is home
|
| Posted: Wed Nov 03, 2010 9:57 pm Post subject: |
|
|
axer wrote:
ColorChecker Passport did great job, colors are natural, yet saturated. Those of you, who prefer standard camera profile may have uncalibrated displays.
I am curently working on using CCP to create profiles for scanning purposes. I will compare it to IT8.1 targets. |
|
| Back to top |
|
|
|
|
|
You cannot post new topics in this forum
You cannot reply to topics in this forum
You cannot edit your posts in this forum
You cannot delete your posts in this forum
You cannot vote in polls in this forum
|