| View previous topic :: View next topic |
| Author |
Message |
Attila


Joined: 24 Feb 2007
Posts: 57865
Location: Hungary
Expire: 2025-11-18
|
 Posted: Sat Jan 17, 2009 8:57 pm Post subject: Colors in B&W Posted: Sat Jan 17, 2009 8:57 pm Post subject: Colors in B&W |
 |
|
Attila wrote:
I love really this solution, better than simple B&W portrait.
_________________
-------------------------------
Items on sale on Ebay
Sony NEX-7 Carl Zeiss Planar 85mm f1.4, Minolta MD 35mm f1.8, Konica 135mm f2.5, Minolta MD 50mm f1.2, Minolta MD 250mm f5.6, Carl Zeiss Sonnar 180mm f2.8
|
|
| Back to top |
|
 |
martinsmith99

Joined: 31 Aug 2008
Posts: 6950
Location: S Glos, UK
Expire: 2013-11-18
|
| Posted: Fri Jan 23, 2009 7:35 am Post subject: |
|
|
martinsmith99 wrote:
Nice shot!
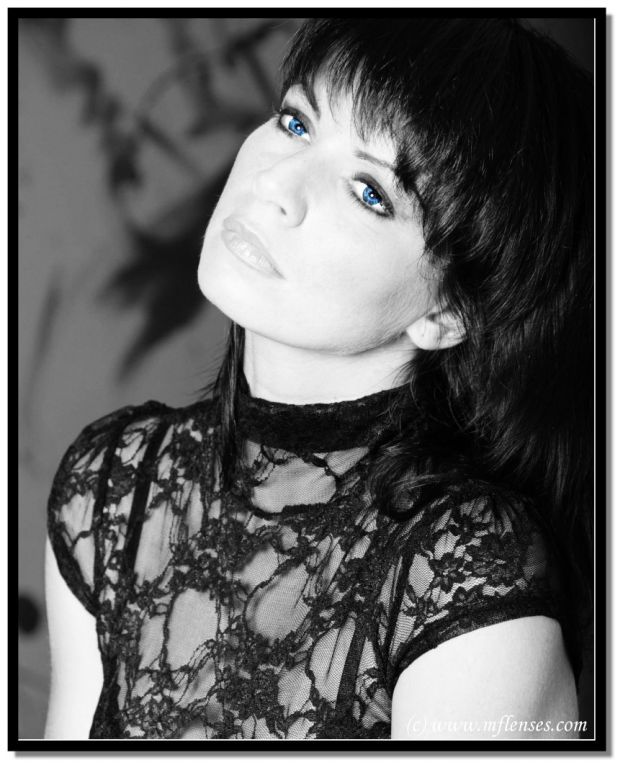
Yes, I've done similar, then took it a little further with this shot of my favourite model, Lucy (that's her eye in my avatar). It's far from perfect, but an experiment. I have overdone the eyes and need to revisit it when time permits.

_________________
Casual attendance these days |
|
| Back to top |
|
|
Attila
Joined: 24 Feb 2007
Posts: 57865
Location: Hungary
Expire: 2025-11-18
|
| Posted: Fri Jan 23, 2009 8:32 am Post subject: |
|
|
Attila wrote:
Overdone eyes is no problem in this style I think.
_________________
-------------------------------
Items on sale on Ebay
Sony NEX-7 Carl Zeiss Planar 85mm f1.4, Minolta MD 35mm f1.8, Konica 135mm f2.5, Minolta MD 50mm f1.2, Minolta MD 250mm f5.6, Carl Zeiss Sonnar 180mm f2.8
|
|
| Back to top |
|
|
estudleon

Joined: 15 May 2008
Posts: 3754
Location: Argentina
|
| Posted: Fri Jan 23, 2009 2:02 pm Post subject: |
|
|
estudleon wrote:
Very nice way.
The pics remind me the olds pics that the parks photogtaphers took in B&W and retouched with pastels colors. Lovely.
The actualls are better, of course.
Rino.
_________________
Konica 2,8/100
CZJ: 4/20, 2,4/35, 1,8/50 aus jena, 3,5/135MC, Pentacon 1,8/50
Pentax S-M-C-1,4/50
Helios 44-3
Mamiya 2,8/135
Misc. : jupiter 9
Stuff used:
A) SRL
Alpa 10 D - kern macro Switar 1,9/50 -black, Kilffit apochromat 2/100.
Asahi pentax spotmatic super takumar 1,4/50
Contaflex super B tessar 2,8/50 Pro-tessar 115
Leica R3 electronic summicron 2/50 elmarit 2,8/35
Konica Autoreflex 3 (2 black and chrome one), TC, T4. 2,8/24, 3,5/28 not MC and MC, 1,8/40, 1,4/50, 1,7/50 MC and not MC, 1,8/85, 3,2/135, 3,5/135, 4/200
Minolta XG9 2,8/35, 2/45, 3,5/135
Nikkormat FTn 1,4/50, 2,8/135
Fujica ST 801, 605, 705n. 3,5/19, 1,4/50, 1,8/55, 4/85, 3,5/135.
Praktica MTL 5 and a lot of M42 lenses.
Voigtlander. Bessamatic m, bessamatix de luxe, bessamatic cs, ultramatic and ultramatic cs.
Skoparex 3,5/35, skopagon 2/40, skopar 2,8/50, skopar X 2,8/50, super lanthar (out of catalogue) 2,8/50, dinarex 3,4/90, dinarex 4,8/100, super dinarex 4/135, super dinarex 4/200, zoomar 2,8/36-83, portrait lens 0, 1 and 2. Curtagon 4/28 and 2,8/35
Canon AV1, 1,8/50
Rolleiflex SL35 and SL35 E. 2,8/35 angulon, 2,8/35 distagon, 1,4/55 rolleinar, 1,8/50 planar, 4/135 tessar, 2,8/135 rolleinar, x2 rollei, M42 to rollei adap.
Etc.
RF
Yashica Minister III
Voightlander Vito, vitomatic I, Vito C, etc.
Leica M. M2, M3 (d.s.) and M4. Schenider 3,4/21, 2/35 summaron 2,8/35 (with eyes). Summicron 2/35 (8 elements with eyes), 2/35 chrome, 2/35 black, 1,4/35 pre asph and aspheric - old -, 2/40 summicron, 2,8/50 elmar, 2/50 7 elements, 2/50 DR, 2/50 - minolta version, 1,4/50 summilux 1966 version, 1,4/75 summilux, 2/90 large version, 2/90 reduced version of 1987, 2,8/90 elmarit large version, 4/135 elmar. |
|
| Back to top |
|
|
kansalliskala

Joined: 19 Jul 2007
Posts: 5039
Location: Southern Finland countryside
Expire: 2016-12-30
|
| Posted: Sat Jan 24, 2009 12:07 pm Post subject: |
|
|
kansalliskala wrote:
Agfa 400 + Porst TL + Polaris Zoom
_________________
MF: Kodak DCS SLR/c; Samsung NX10; OM-10; Canon T50
Zuiko 28/3.5, Distagon 35/2.8; Yashica ML 50/2;
Zuiko 50/1.4; S-M-C 120/2.8; Zuiko 135/3.5; 200/5;
Tamron AD1 135/2.8, Soligor 180/3.5; Tamron AD1 300/5.6
Tamron zooms: 01A, Z-210
Yashicaflex C; Київ 4 + Юпитер 8, 11; Polaroid 100; Olympus XA; Yashica T3
Museum stuff: Certo-Phot; Tele-Edixon 135; Polaris 90-190; Asahi Bellows; Ixus IIs
Projects: Agfa Isolette III (no shutter), Canon AE-1D (no sensor),
Nikon D80 (dead), The "Peace Camera"
AF: Canon, Tokina, Sigma Video: JVC GZ-MG275E |
|
| Back to top |
|
|
Jieffe


Joined: 04 Nov 2007
Posts: 754
Location: Belgium
|
| Posted: Sat Jan 24, 2009 1:05 pm Post subject: |
|
|
Jieffe wrote:
Same here ...
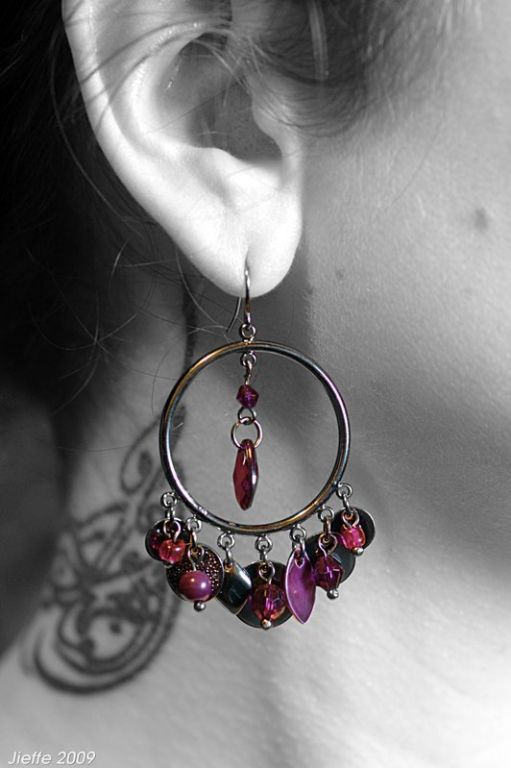
(Tamron 90mm) |
|
| Back to top |
|
|
themoleman342

Joined: 21 Oct 2007
Posts: 2190
Location: East Coast (CT), U.S.A.
Expire: 2013-01-24
|
| Posted: Fri Jan 30, 2009 6:21 pm Post subject: |
|
|
themoleman342 wrote:
I was never much for this effect. It always seemed to be a cliche way of bringing emphasis to a particular point of the photo while this should be done with focus, contrast, and composition. I certainly don't mean to insult these photographs, in fact they are quite nice, I only think their effectiveness should not be determined by some software based feature. |
|
| Back to top |
|
|
Attila
Joined: 24 Feb 2007
Posts: 57865
Location: Hungary
Expire: 2025-11-18
|
| Posted: Fri Jan 30, 2009 6:35 pm Post subject: |
|
|
Attila wrote:
Nice ones! I like all of them.
_________________
-------------------------------
Items on sale on Ebay
Sony NEX-7 Carl Zeiss Planar 85mm f1.4, Minolta MD 35mm f1.8, Konica 135mm f2.5, Minolta MD 50mm f1.2, Minolta MD 250mm f5.6, Carl Zeiss Sonnar 180mm f2.8
|
|
| Back to top |
|
|
indianadinos

Joined: 06 Jul 2008
Posts: 1310
Location: Toulouse, France
Expire: 2011-12-05
|
| Posted: Fri Jan 30, 2009 9:06 pm Post subject: |
|
|
indianadinos wrote:
Hello,
My contribution to this excellent thread ...

Just a question: how did you processed your pictures to get these results ? For mine i used GIMP, converting the original image in B+W, then adding a layer with the water drops cut out from the original picture ... Did you use another way to achieve this ?
Best regards
_________________
Please visit my blogs Shooting with a Pentax K10D / FF Visions
Takumar: 24/3.5, 28/3.5, 35/2, 35/3.5, 50/1.4, 55/1.8, 85/1.8, 105/2.8, 120/2.8, 135/3.5, 150/4, 200/4
Pentax-K: M28/2.8, K28/3.5, M50/1.4, A50/1.7, M50/4 Macro, K85/1.8, K105/2.8, K135/2.5, M200/4, M70-150/4
Zeiss: Flektogon 20/2.8, 20/4, 35/2.4, 35/2.8, Tessar 50/2.8, Pancolar 50/1.8, Biotar 58/2, Sonnar 135/3.5, Sonnar 180/2.8
Meyer: Primagon 35/4.5, Domiplan 50/2.8, Oreston 50/1.8, Primoplan 58/1.9, Trioplan 100/2.8, Orestor 100/2.8, Orestor 135/2.8
Schacht/Steinheil: Travenar 90/2.8, Travenon 135/4.5, Quinar 135/2.8, Quinar 135/3.5
Russian: MIR 37B, Industar 50/3.5, Helios 44M & 44M-2, Jupiter 37A
P6: Flektogon 50/4, Biometar 80/2.8, Orestor 300/4
Nikkor: Nikkor-O 35/2, Micro 55/3.5, Nikkor-S 50/1.4, Nikkor-Q 135/2.8
Fuji: EBC 28/3.5, EBC 55/3.5 Macro, EBC 135/2.5
Misc Lenses: Kiron 105/2.8 Macro, Tamron SP90/2.5
... and a few other Vivitar, Tamron, Sigma and Soligor lenses ...
|
|
| Back to top |
|
|
Attila
Joined: 24 Feb 2007
Posts: 57865
Location: Hungary
Expire: 2025-11-18
|
| Posted: Fri Jan 30, 2009 9:49 pm Post subject: |
|
|
Attila wrote:
Wow! Excellent!!
_________________
-------------------------------
Items on sale on Ebay
Sony NEX-7 Carl Zeiss Planar 85mm f1.4, Minolta MD 35mm f1.8, Konica 135mm f2.5, Minolta MD 50mm f1.2, Minolta MD 250mm f5.6, Carl Zeiss Sonnar 180mm f2.8
|
|
| Back to top |
|
|
Orio

Joined: 24 Feb 2007
Posts: 29545
Location: West Emilia
Expire: 2012-12-04
|
| Posted: Fri Jan 30, 2009 11:18 pm Post subject: |
|
|
Orio wrote:
| themoleman342 wrote: |
| I was never much for this effect. It always seemed to be a cliche way of bringing emphasis to a particular point of the photo while this should be done with focus, contrast, and composition. |
Agreed.
_________________
Orio, Administrator
T*
NE CEDE MALIS AUDENTIOR ITO
Ferrania film is reborn! http://www.filmferrania.it/
Support the Ornano film chemicals company and help them survive!
http://forum.mflenses.com/ornano-chemical-products-t55525.html |
|
| Back to top |
|
|
ChrisLilley

Joined: 01 Jan 2008
Posts: 1767
Location: Nice, France
|
| Posted: Sat Jan 31, 2009 1:37 pm Post subject: |
|
|
ChrisLilley wrote:
I think that the effect can look good if done well. The ones that I have seen in the past mostly used muted, subtle colours so that the 'collage' effect was avoided.
_________________
Camera (ˈkæ mə rə), n. Device for taking pictures in bright light
There are 10 kinds of people in the world: those who understand binary, and those who don’t. Key: Ai-P, Ai, Ai'ed, AiS
Camera: Nikon D90, D40, DK-21M eyepiece, ML-3 remote MF lenses: Nikkor 20mm f/4 K, AI'ed | N.K. Nikkor-N 24mm f/2.8 | Nikkor-N.C 24mm f/2.8 | Nikkor 28mm f/2.8 AiS late model | Арсенал (Arsenal) Мир-24Н (Mir-24N) 35mm f/2 | Cosina Voigtländer Ultron SL II 40mm f/2.0 | Micro-Nikkor 55mm f/2.8 AiS | Zoom-Nikkor 80-200 f/4.5 Ai | ЛЗОС (LZOS) Юпитер-9 (Jupiter-9) 85mm f/2 | Cosina Voigtländer APO-Lanthar 90mm f/3.5 SL | Nikkor-P 105mm f/2.5 pre-Ai, Ai'ed | Micro-Nikkor 105mm f/4 | Schneider Kreuznach Componon 105mm f/5.6 | Nikkor 135mm f/2.8, Ai'ed 1976 model | Nikkor 180mm f/2.8 ED AiS | Арсенал (Arsenal) ТЕЛЕАР-Н (Telear-n) 200mm f/3.5 | Nikkor 300 mm f/4.5 Ai (full equipment list) |
|
| Back to top |
|
|
martinsmith99
Joined: 31 Aug 2008
Posts: 6950
Location: S Glos, UK
Expire: 2013-11-18
|
| Posted: Mon Feb 02, 2009 6:37 pm Post subject: |
|
|
martinsmith99 wrote:
| indianadinos wrote: |
Just a question: how did you processed your pictures to get these results ? For mine i used GIMP, converting the original image in B+W, then adding a layer with the water drops cut out from the original picture ... Did you use another way to achieve this ? |
I used Photoshop.
My workflow was to convert the image to B+W whichever way suits, then add a hue & saturation layer for each colour and use layer masks to get colour where I needed it.
_________________
Casual attendance these days |
|
| Back to top |
|
|
kansalliskala
Joined: 19 Jul 2007
Posts: 5039
Location: Southern Finland countryside
Expire: 2016-12-30
|
| Posted: Tue Feb 03, 2009 9:29 am Post subject: |
|
|
kansalliskala wrote:
| indianadinos wrote: |
Hello,
Just a question: how did you processed your pictures to get these results ? For mine i used GIMP, converting the original image in B+W, then adding a layer with the water drops cut out from the original picture ... Did you use another way to achieve this ?
Best regards |
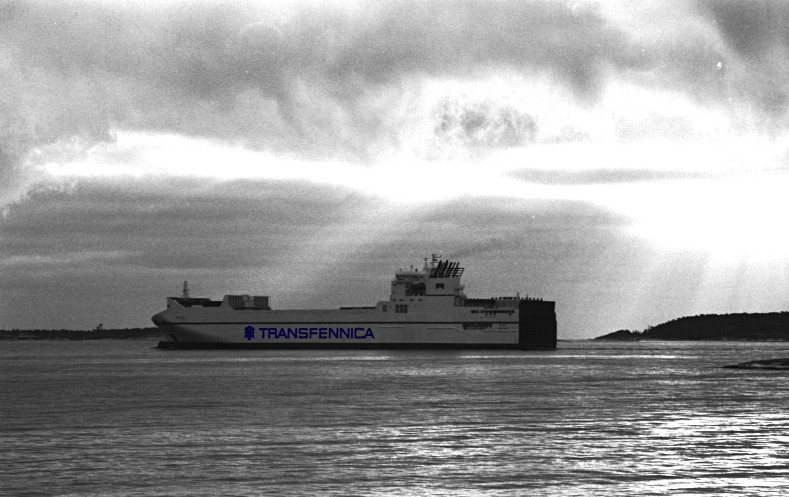
I scanned a b&w negative, then selected the text, made it lighter and added saturation. Then I chose the right hue that it supposed to be.
_________________
MF: Kodak DCS SLR/c; Samsung NX10; OM-10; Canon T50
Zuiko 28/3.5, Distagon 35/2.8; Yashica ML 50/2;
Zuiko 50/1.4; S-M-C 120/2.8; Zuiko 135/3.5; 200/5;
Tamron AD1 135/2.8, Soligor 180/3.5; Tamron AD1 300/5.6
Tamron zooms: 01A, Z-210
Yashicaflex C; Київ 4 + Юпитер 8, 11; Polaroid 100; Olympus XA; Yashica T3
Museum stuff: Certo-Phot; Tele-Edixon 135; Polaris 90-190; Asahi Bellows; Ixus IIs
Projects: Agfa Isolette III (no shutter), Canon AE-1D (no sensor),
Nikon D80 (dead), The "Peace Camera"
AF: Canon, Tokina, Sigma Video: JVC GZ-MG275E |
|
| Back to top |
|
|
indianadinos
Joined: 06 Jul 2008
Posts: 1310
Location: Toulouse, France
Expire: 2011-12-05
|
| Posted: Wed Feb 04, 2009 9:47 pm Post subject: |
|
|
indianadinos wrote:
Hello,
Thanks for sharing your "secrets" ...
Best regards
_________________
Please visit my blogs Shooting with a Pentax K10D / FF Visions
Takumar: 24/3.5, 28/3.5, 35/2, 35/3.5, 50/1.4, 55/1.8, 85/1.8, 105/2.8, 120/2.8, 135/3.5, 150/4, 200/4
Pentax-K: M28/2.8, K28/3.5, M50/1.4, A50/1.7, M50/4 Macro, K85/1.8, K105/2.8, K135/2.5, M200/4, M70-150/4
Zeiss: Flektogon 20/2.8, 20/4, 35/2.4, 35/2.8, Tessar 50/2.8, Pancolar 50/1.8, Biotar 58/2, Sonnar 135/3.5, Sonnar 180/2.8
Meyer: Primagon 35/4.5, Domiplan 50/2.8, Oreston 50/1.8, Primoplan 58/1.9, Trioplan 100/2.8, Orestor 100/2.8, Orestor 135/2.8
Schacht/Steinheil: Travenar 90/2.8, Travenon 135/4.5, Quinar 135/2.8, Quinar 135/3.5
Russian: MIR 37B, Industar 50/3.5, Helios 44M & 44M-2, Jupiter 37A
P6: Flektogon 50/4, Biometar 80/2.8, Orestor 300/4
Nikkor: Nikkor-O 35/2, Micro 55/3.5, Nikkor-S 50/1.4, Nikkor-Q 135/2.8
Fuji: EBC 28/3.5, EBC 55/3.5 Macro, EBC 135/2.5
Misc Lenses: Kiron 105/2.8 Macro, Tamron SP90/2.5
... and a few other Vivitar, Tamron, Sigma and Soligor lenses ...
|
|
| Back to top |
|
|
WolverineX

Joined: 19 Apr 2009
Posts: 1693
Location: Zagreb , Croatia , Europe
|
| Posted: Mon Apr 20, 2009 8:32 am Post subject: |
|
|
WolverineX wrote:
| martinsmith99 wrote: |
| indianadinos wrote: |
Just a question: how did you processed your pictures to get these results ? For mine i used GIMP, converting the original image in B+W, then adding a layer with the water drops cut out from the original picture ... Did you use another way to achieve this ? |
I used Photoshop.
My workflow was to convert the image to B+W whichever way suits, then add a hue & saturation layer for each colour and use layer masks to get colour where I needed it. |
Isn't it easier to first make a copy layer of the image then turn that layer b+w and use eraser on that layer in the places you want to have an original color from the background image (for example eyes in color rest black and white)?
_________________
my tools:Oly E-M5 + 45mm/1.8 + Oly E-520 + 12-60 + 14-42 + 70-300 + Sigma 105mm + FL-50R + EC20 + SRF-11 ring flash
http://forum.mflenses.com/wolverinex-testing-my-lenses-series-link-list-t39524.html |
|
| Back to top |
|
|
zewrak
Joined: 12 Apr 2008
Posts: 1212
|
| Posted: Mon Apr 20, 2009 8:48 am Post subject: |
|
|
zewrak wrote:
| WolverineX wrote: |
Isn't it easier to first make a copy layer of the image then turn that layer b+w and use eraser on that layer in the places you want to have an original color from the background image (for example eyes in color rest black and white)? |
In photoshop, using eraser is a no-no. You use adjustmentlayers there. Or masking out a layer placed ontop. GIMP lack adjustmentlayers, but afaik, you can use masks. So make one black and white version of your coloured layer and then with a small soft brush and preferably something like 20% opacity and mask out the parts you want in colour. The opacity makes you have to do several strokes where you want 100% opacity, but it will make it look better and you will have more control.
Why not use eraser? Well, using eraser is nonreversable. Using layermasks, means you can store the changes in the image file and completly redo and undo the layermask. Meaning you leave the image untouched. Eraser will... well, erase in the image. As much as you can, avoid destructive editing to your images.
_________________
My homepage, all manual shots |
|
| Back to top |
|
|
WolverineX
Joined: 19 Apr 2009
Posts: 1693
Location: Zagreb , Croatia , Europe
|
| Posted: Mon Apr 20, 2009 9:29 am Post subject: |
|
|
WolverineX wrote:
| zewrak wrote: |
| WolverineX wrote: |
Isn't it easier to first make a copy layer of the image then turn that layer b+w and use eraser on that layer in the places you want to have an original color from the background image (for example eyes in color rest black and white)? |
Why not use eraser? Well, using eraser is nonreversable. Using layermasks, means you can store the changes in the image file and completly redo and undo the layermask. Meaning you leave the image untouched. Eraser will... well, erase in the image. As much as you can, avoid destructive editing to your images. |
that's why i said to make a layer that is a copy of original, all the work is done on that layer. Iif you mess up , just delete that layer and original photo is safe and untouched
_________________
my tools:Oly E-M5 + 45mm/1.8 + Oly E-520 + 12-60 + 14-42 + 70-300 + Sigma 105mm + FL-50R + EC20 + SRF-11 ring flash
http://forum.mflenses.com/wolverinex-testing-my-lenses-series-link-list-t39524.html |
|
| Back to top |
|
|
zewrak
Joined: 12 Apr 2008
Posts: 1212
|
| Posted: Mon Apr 20, 2009 9:36 am Post subject: |
|
|
zewrak wrote:
| WolverineX wrote: |
| zewrak wrote: |
| WolverineX wrote: |
Isn't it easier to first make a copy layer of the image then turn that layer b+w and use eraser on that layer in the places you want to have an original color from the background image (for example eyes in color rest black and white)? |
Why not use eraser? Well, using eraser is nonreversable. Using layermasks, means you can store the changes in the image file and completly redo and undo the layermask. Meaning you leave the image untouched. Eraser will... well, erase in the image. As much as you can, avoid destructive editing to your images. |
that's why i said to make a layer that is a copy of original, all the work is done on that layer. Iif you mess up , just delete that layer and original photo is safe and untouched |
Using masks, you do not have to delete anything if you mess up though. 
_________________
My homepage, all manual shots |
|
| Back to top |
|
|
cledry


Joined: 22 Dec 2008
Posts: 142
Location: Orlando, FL USA
|
| Posted: Mon Apr 20, 2009 12:43 pm Post subject: |
|
|
cledry wrote:
I think I have only used this effect once, and then it is so subtle you can't even tell.
 |
|
| Back to top |
|
|
no-X

Joined: 19 Jul 2008
Posts: 2495
Location: Budejky, Czech Republic
|
| Posted: Mon Apr 20, 2009 4:13 pm Post subject: |
|
|
no-X wrote:
Very nice
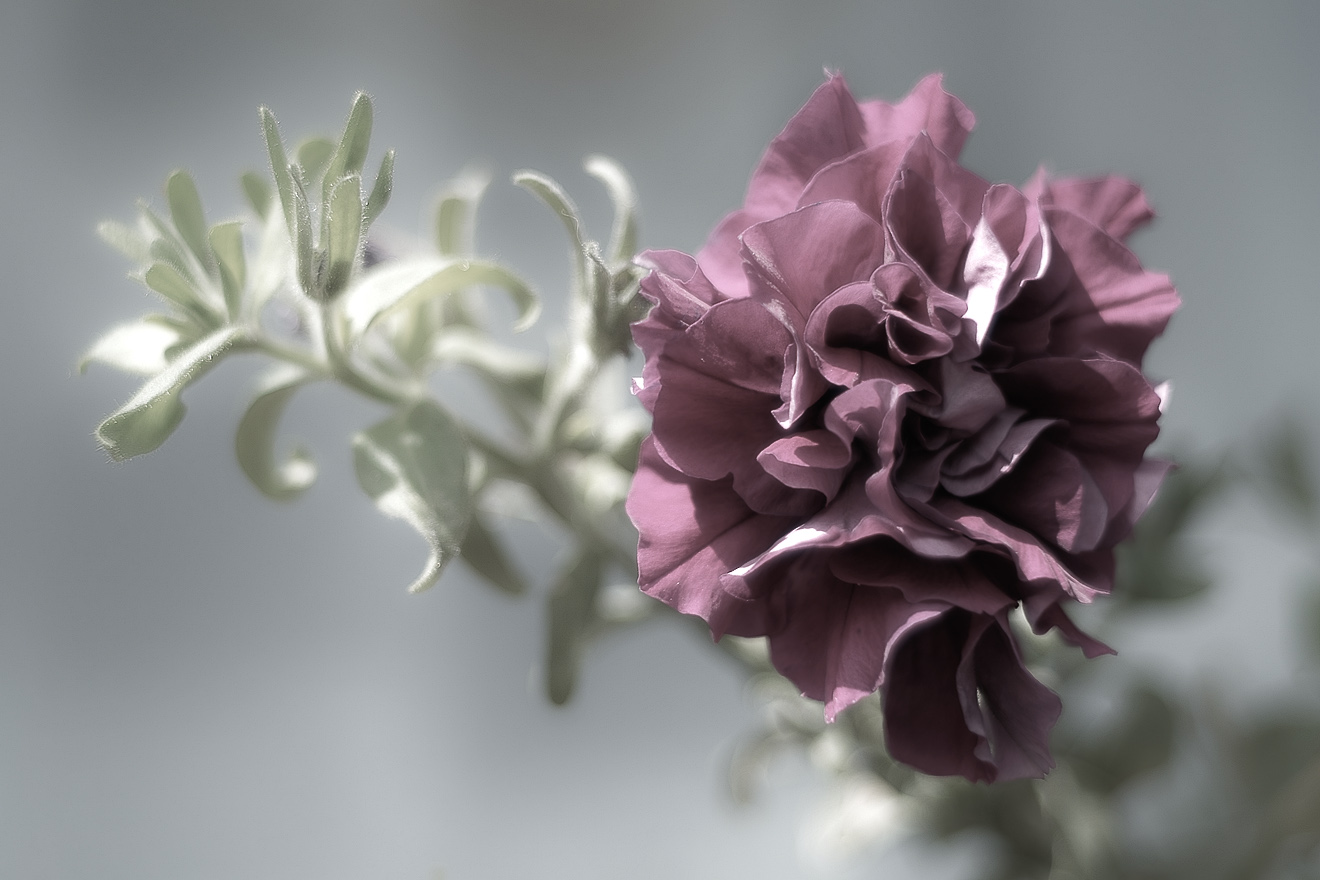
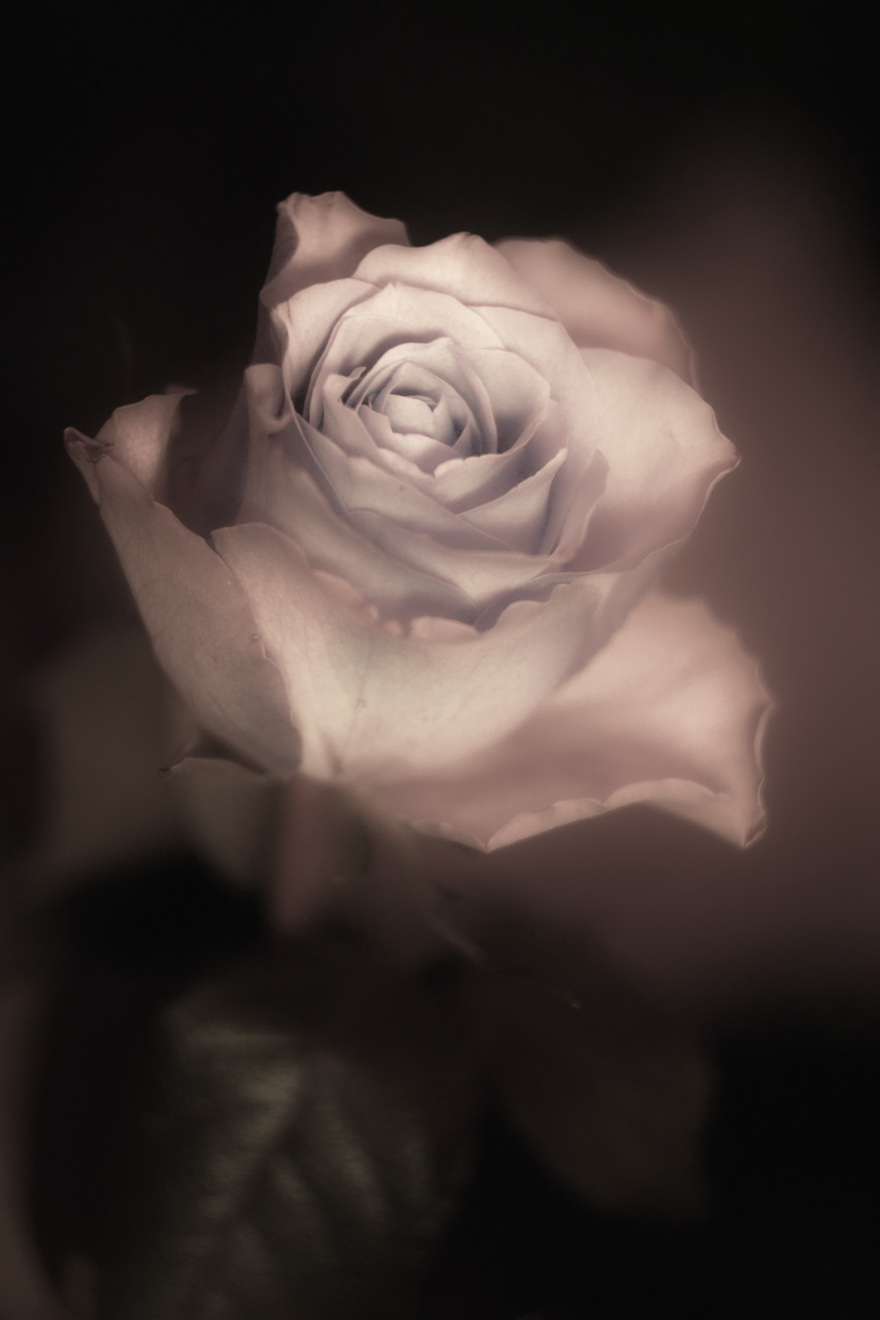
I don't use exactly this technique (selective saturation/desaturation), but I used something slightly different - adjusting of color balance and saturation to create picture targeted to a specific tint (almost monochromatic), but with perceptible remains of the original color. I'm not sure, if it's good, but I like it
  
_________________
(almost) complete list of Helios lenses |
|
| Back to top |
|
|
Attila
Joined: 24 Feb 2007
Posts: 57865
Location: Hungary
Expire: 2025-11-18
|
| Posted: Mon Apr 20, 2009 4:23 pm Post subject: |
|
|
Attila wrote:
Really nice ones! Congrats!
_________________
-------------------------------
Items on sale on Ebay
Sony NEX-7 Carl Zeiss Planar 85mm f1.4, Minolta MD 35mm f1.8, Konica 135mm f2.5, Minolta MD 50mm f1.2, Minolta MD 250mm f5.6, Carl Zeiss Sonnar 180mm f2.8
|
|
| Back to top |
|
|
naplam


Joined: 22 Mar 2007
Posts: 469
Location: Spain
Expire: 2013-11-30
|
| Posted: Mon Apr 20, 2009 4:39 pm Post subject: |
|
|
naplam wrote:
| no-X wrote: |
| I used something slightly different - adjusting of color balance and saturation to create picture targeted to a specific tint (almost monochromatic), but with perceptible remains of the original color. I'm not sure, if it's good, but I like it |
I like the effect in your first photo, with some subtle color left. |
|
| Back to top |
|
|
martinsmith99
Joined: 31 Aug 2008
Posts: 6950
Location: S Glos, UK
Expire: 2013-11-18
|
| Posted: Tue Apr 21, 2009 9:51 am Post subject: |
|
|
martinsmith99 wrote:
| WolverineX wrote: |
| martinsmith99 wrote: |
| indianadinos wrote: |
Just a question: how did you processed your pictures to get these results ? For mine i used GIMP, converting the original image in B+W, then adding a layer with the water drops cut out from the original picture ... Did you use another way to achieve this ? |
I used Photoshop.
My workflow was to convert the image to B+W whichever way suits, then add a hue & saturation layer for each colour and use layer masks to get colour where I needed it. |
Isn't it easier to first make a copy layer of the image then turn that layer b+w and use eraser on that layer in the places you want to have an original color from the background image (for example eyes in color rest black and white)? |
The colours I used in my example were not the original colours. I have coloured the b&w pic.
_________________
Casual attendance these days |
|
| Back to top |
|
|
|
|