| View previous topic :: View next topic |
| Author |
Message |
NikonAIS


Joined: 23 Mar 2014
Posts: 227
Location: Pawleys Island, SC, US
|
 Posted: Tue Apr 08, 2014 11:09 pm Post subject: DIY light tent Posted: Tue Apr 08, 2014 11:09 pm Post subject: DIY light tent |
 |
|
NikonAIS wrote:
When I was looking around for commercially available light tents I was amazed not only at the prices but at the somewhat limited sizes available. I have a fair amount of experienced working with PVC piping from my days doing industrial water and waste treatment so I decide to build one myself. It is 31" cubed and uses a "twin" white bed sheet folded in half and sewn together for diffusion material. I cut pieces of PVC pipe 2" long and then cut out about a 100º section out of them to act as clips. My total expenditure for this project, including the bed sheet, was under $25. It slips together and takes only about 5 minutes to set up or take down.
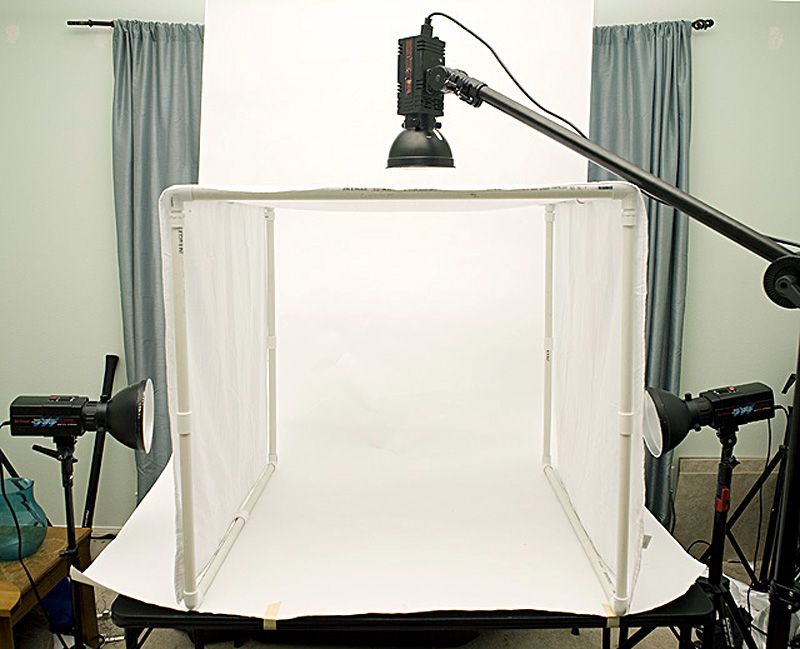
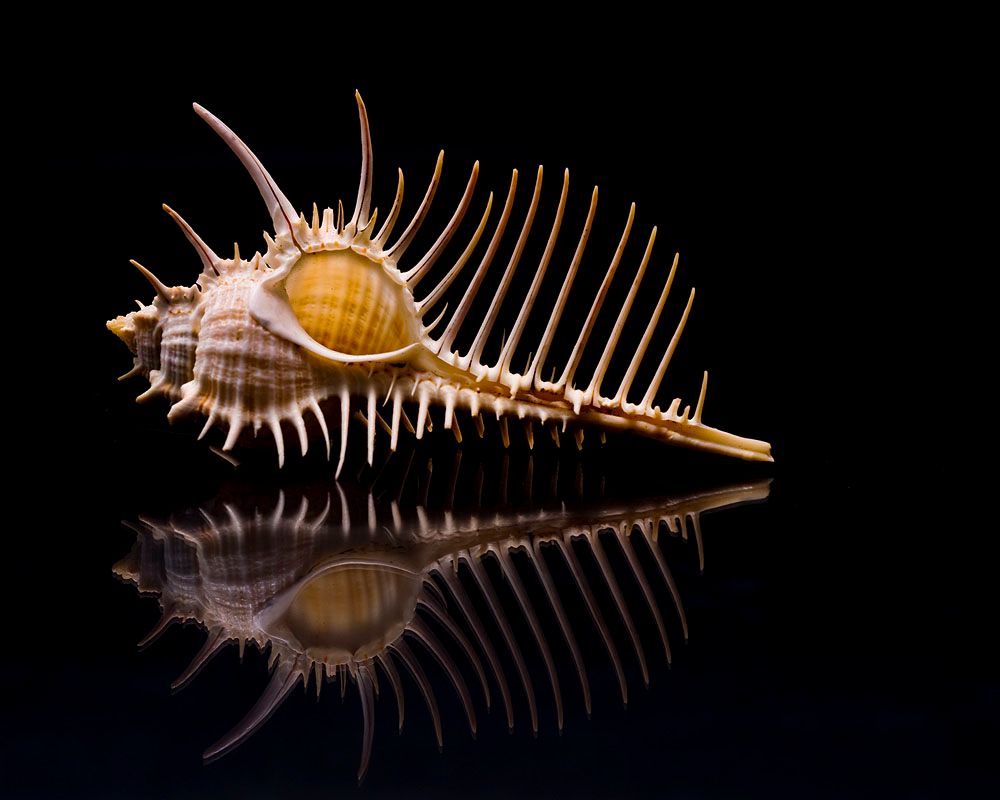
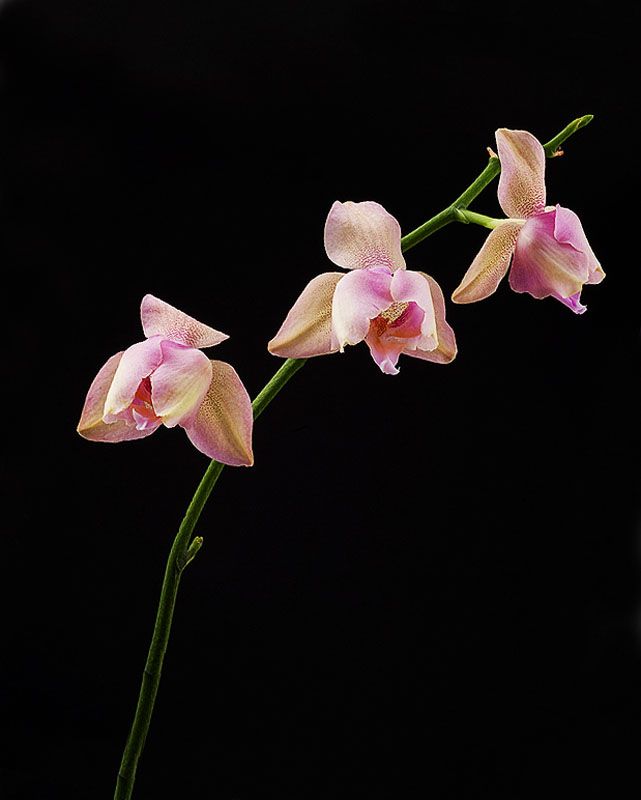
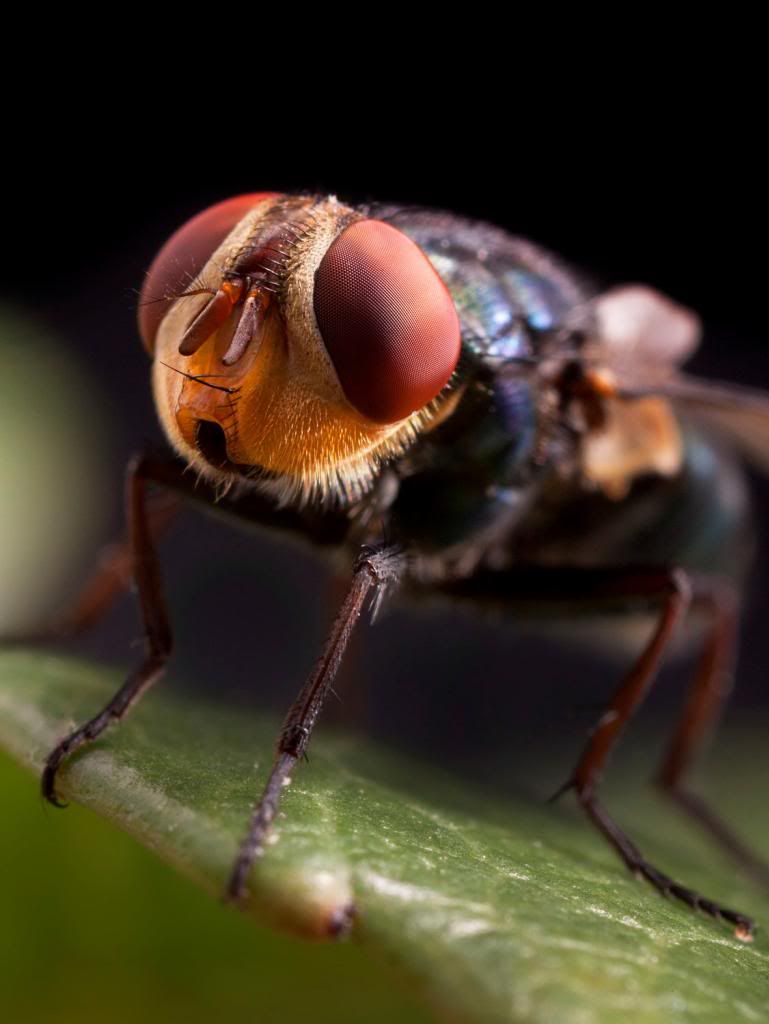
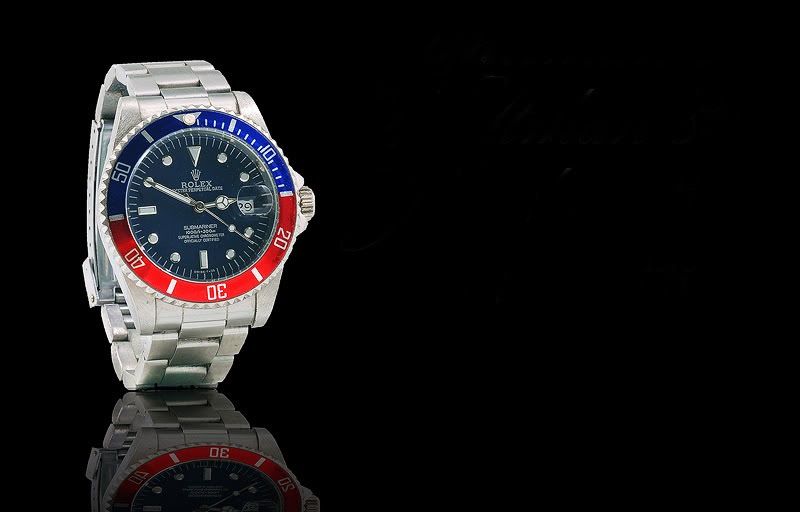
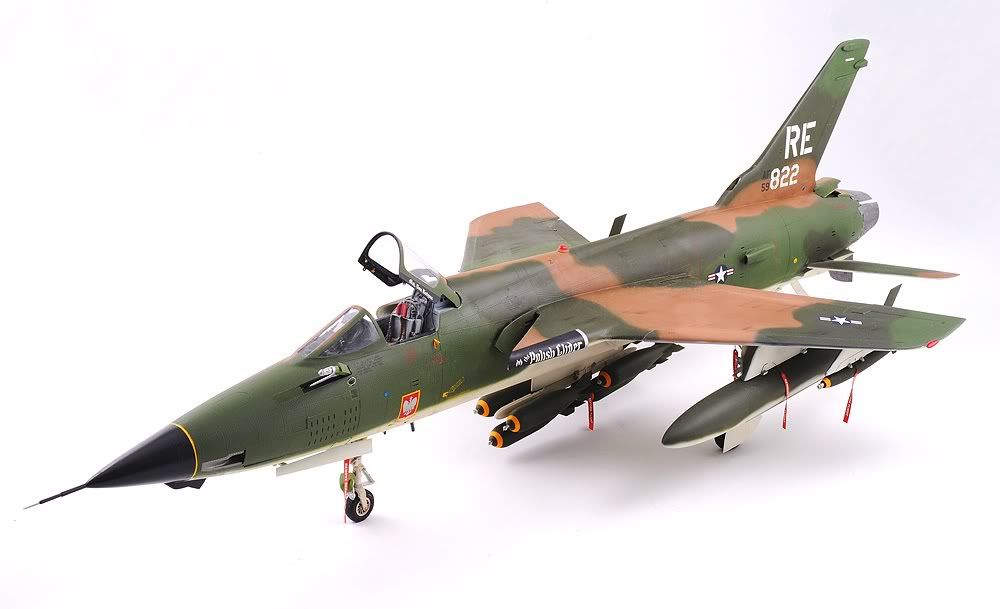
I have taken many images in this light tent, some of which have been published
_________________
Nikon FTn, F2A, F3HP, F4E, F5, Nikkormat FT2, Nikon FE-2, Nikonos V, D850, D500 and D750. 8mm f/2.8 AIS, 16mm f/2.8 Fisheye AIS, 15mm f/3.5 AIS, 18mm f/3.5 AIS, 24mm f/2 AIS, 28mm f/2 AIS, 28mm f/3.5 Nikkor H non-AI, 25-50mm f/4 AIS, 28mm f/3.5 and 35mm f/2.8 UW-Nikkors, 35mm f/1.4 AIS, 50mm f/1.4 AIS, 50mm f/1.4 Nikkor-S, 50-135mm f/3.5 AIS, 55mm f/2.8 AIS Micro w/ PK-13, 80-200mm f/4 AIS, 85mm f/1.4 AIS, 105mm f/1.8 AIS, 10.5 cm f/2.5 non-AI, 105mm f/2.8 AIS Micro, 135mm f/2 AIS, 180mm f/2.8 ED AIS, 200mm f/4 Micro AIS and PN-11, 200mm f/2 ED-IF AIS, 300mm f/2.8 ED-IF AIS, 400mm f/2.8 ED-IF AIS, 500mm f/8 Reflex, 600mm f/4 ED-IF AIS, TC14B and TC300.
Hasselblad 500CM with PM-90 eye level finder and assorted A12 and A16 backs, Carl Zeiss C and CF T* 40mm f/4. 60mm f/3.5. 80mm f/2.8, 150mm f/4 and 250mm f/5.6
AF lenses are for sissies! |
|
| Back to top |
|
 |
Lloydy


Joined: 02 Sep 2009
Posts: 7798
Location: Ironbridge. UK.
Expire: 2022-01-01
|
 Posted: Wed Apr 09, 2014 12:15 am Post subject: Posted: Wed Apr 09, 2014 12:15 am Post subject: |
 |
|
Lloydy wrote:
Simple, effective and cheap. What's not to like about that ? 
_________________
LENSES & CAMERAS FOR SALE.....
I have loads of stuff that I have to get rid of, if you see me commenting about something I have got and you want one, ask me.
My Flickr https://www.flickr.com/photos/mudplugga/
My ipernity -
http://www.ipernity.com/home/294337 |
|
| Back to top |
|
 |
NikonAIS


Joined: 23 Mar 2014
Posts: 227
Location: Pawleys Island, SC, US
|
 Posted: Wed Apr 09, 2014 12:18 am Post subject: Posted: Wed Apr 09, 2014 12:18 am Post subject: |
 |
|
NikonAIS wrote:
| Lloydy wrote: |
Simple, effective and cheap. What's not to like about that ?  |
And all the building materials are readily available at any hardware store. And you can make it as big or small as you need. A commercially available light tent about half that size is around 3 times as much as it cost me and you don't have much flexibility in background choice. I can use any half roll seamless background paper I choose
_________________
Nikon FTn, F2A, F3HP, F4E, F5, Nikkormat FT2, Nikon FE-2, Nikonos V, D850, D500 and D750. 8mm f/2.8 AIS, 16mm f/2.8 Fisheye AIS, 15mm f/3.5 AIS, 18mm f/3.5 AIS, 24mm f/2 AIS, 28mm f/2 AIS, 28mm f/3.5 Nikkor H non-AI, 25-50mm f/4 AIS, 28mm f/3.5 and 35mm f/2.8 UW-Nikkors, 35mm f/1.4 AIS, 50mm f/1.4 AIS, 50mm f/1.4 Nikkor-S, 50-135mm f/3.5 AIS, 55mm f/2.8 AIS Micro w/ PK-13, 80-200mm f/4 AIS, 85mm f/1.4 AIS, 105mm f/1.8 AIS, 10.5 cm f/2.5 non-AI, 105mm f/2.8 AIS Micro, 135mm f/2 AIS, 180mm f/2.8 ED AIS, 200mm f/4 Micro AIS and PN-11, 200mm f/2 ED-IF AIS, 300mm f/2.8 ED-IF AIS, 400mm f/2.8 ED-IF AIS, 500mm f/8 Reflex, 600mm f/4 ED-IF AIS, TC14B and TC300.
Hasselblad 500CM with PM-90 eye level finder and assorted A12 and A16 backs, Carl Zeiss C and CF T* 40mm f/4. 60mm f/3.5. 80mm f/2.8, 150mm f/4 and 250mm f/5.6
AF lenses are for sissies! |
|
| Back to top |
|
 |
philslizzy


Joined: 07 Aug 2012
Posts: 4745
Location: Cheshire, England
|
 Posted: Wed Apr 09, 2014 8:35 am Post subject: Posted: Wed Apr 09, 2014 8:35 am Post subject: |
 |
|
philslizzy wrote:
A great idea, I thought of something similar but I have no idea of design. I assume it is basically an upside down U shape sitting on the BG paper. How is the paper held in place and can you take photos of its construction? maybe a list of plumbing parts used too.
Please!  
I can see the straights are in 2 pieces so its going to be pretty small when disassembled.
Do your flash heads have any sort of diffusion? Looking at the setup, to me , it looks like there would be a 'hot-spot' where the light from the flashes meet.
More info!
Thanks
_________________
Hero in the 'messin-with-cameras-for-the-hell-of-it department'. Official. |
|
| Back to top |
|
 |
Lloydy


Joined: 02 Sep 2009
Posts: 7798
Location: Ironbridge. UK.
Expire: 2022-01-01
|
 Posted: Wed Apr 09, 2014 9:49 am Post subject: Posted: Wed Apr 09, 2014 9:49 am Post subject: |
 |
|
Lloydy wrote:
A friend of mine used fittings like this -
http://www.ebay.com/itm/1-1-4-3-Way-Side-Outlet-Elbow-PVC-Fitting-Connector-8-Pack-/321369479741
to make a very rigid cube with standard 1 1/4 inch pvc pipe, the ebay advert claims they are strong enough to make furniture with - obviously glued. My friend made a hothouse about 2 meter cube for orchids, and clipped clear polythene to the frame using pipe clips, which are expensive and stick out from the pipe. I like the idea of cutting clips from the pipe itself as NikonAIS has done, much neater and cheaper.
_________________
LENSES & CAMERAS FOR SALE.....
I have loads of stuff that I have to get rid of, if you see me commenting about something I have got and you want one, ask me.
My Flickr https://www.flickr.com/photos/mudplugga/
My ipernity -
http://www.ipernity.com/home/294337 |
|
| Back to top |
|
 |
kansalliskala


Joined: 19 Jul 2007
Posts: 5046
Location: Southern Finland countryside
Expire: 2016-12-30
|
 Posted: Wed Apr 09, 2014 3:43 pm Post subject: Posted: Wed Apr 09, 2014 3:43 pm Post subject: |
 |
|
kansalliskala wrote:
Nice!
How did you create the black & mirror thing?
_________________
MF: Kodak DCS SLR/c; Samsung NX10; OM-10; Canon T50
Zuiko 28/3.5, Distagon 35/2.8; Yashica ML 50/2;
Zuiko 50/1.4; S-M-C 120/2.8; Zuiko 135/3.5; 200/5;
Tamron AD1 135/2.8, Soligor 180/3.5; Tamron AD1 300/5.6
Tamron zooms: 01A, Z-210
Yashicaflex C; Київ 4 + Юпитер 8, 11; Polaroid 100; Olympus XA; Yashica T3
Museum stuff: Certo-Phot; Tele-Edixon 135; Polaris 90-190; Asahi Bellows; Ixus IIs
Projects: Agfa Isolette III (no shutter), Canon AE-1D (no sensor),
Nikon D80 (dead), The "Peace Camera"
AF: Canon, Tokina, Sigma Video: JVC GZ-MG275E |
|
| Back to top |
|
 |
konicamera


Joined: 03 May 2009
Posts: 746
Location: Warsaw, Poland
Expire: 2014-06-14
|
 Posted: Wed Apr 09, 2014 4:49 pm Post subject: Posted: Wed Apr 09, 2014 4:49 pm Post subject: |
 |
|
konicamera wrote:
Great tent, great photos. The fly is particularly fascinating.
BTW, what's the story with the Polish elements on the jet fighter?
_________________
L'homme s'ennuie du bien, cherche le mieux, trouve le mal, et s'y soummet, crainte du pire. - Duc François-Gaston de Lévis
While it is nice to be important, it's more important to be nice.
URL: www.konicafiles.com
|
|
| Back to top |
|
 |
NikonAIS


Joined: 23 Mar 2014
Posts: 227
Location: Pawleys Island, SC, US
|
 Posted: Wed Apr 09, 2014 5:37 pm Post subject: Posted: Wed Apr 09, 2014 5:37 pm Post subject: |
 |
|
NikonAIS wrote:
| konicamera wrote: |
Great tent, great photos. The fly is particularly fascinating.
BTW, what's the story with the Polish elements on the jet fighter? |
I built this aircraft several years ago so I really can't remember other than the fact that the pilot was of Polish descent. They were the kit decals. This particular photo, and model, was featured in 3 different scale modeling magazines over about a year and a half time frame. That thing is huge too, over 2 feet long. The landing gear are made from metal because plastic would deform over time due to its weight
_________________
Nikon FTn, F2A, F3HP, F4E, F5, Nikkormat FT2, Nikon FE-2, Nikonos V, D850, D500 and D750. 8mm f/2.8 AIS, 16mm f/2.8 Fisheye AIS, 15mm f/3.5 AIS, 18mm f/3.5 AIS, 24mm f/2 AIS, 28mm f/2 AIS, 28mm f/3.5 Nikkor H non-AI, 25-50mm f/4 AIS, 28mm f/3.5 and 35mm f/2.8 UW-Nikkors, 35mm f/1.4 AIS, 50mm f/1.4 AIS, 50mm f/1.4 Nikkor-S, 50-135mm f/3.5 AIS, 55mm f/2.8 AIS Micro w/ PK-13, 80-200mm f/4 AIS, 85mm f/1.4 AIS, 105mm f/1.8 AIS, 10.5 cm f/2.5 non-AI, 105mm f/2.8 AIS Micro, 135mm f/2 AIS, 180mm f/2.8 ED AIS, 200mm f/4 Micro AIS and PN-11, 200mm f/2 ED-IF AIS, 300mm f/2.8 ED-IF AIS, 400mm f/2.8 ED-IF AIS, 500mm f/8 Reflex, 600mm f/4 ED-IF AIS, TC14B and TC300.
Hasselblad 500CM with PM-90 eye level finder and assorted A12 and A16 backs, Carl Zeiss C and CF T* 40mm f/4. 60mm f/3.5. 80mm f/2.8, 150mm f/4 and 250mm f/5.6
AF lenses are for sissies! |
|
| Back to top |
|
 |
NikonAIS


Joined: 23 Mar 2014
Posts: 227
Location: Pawleys Island, SC, US
|
 Posted: Wed Apr 09, 2014 5:45 pm Post subject: Posted: Wed Apr 09, 2014 5:45 pm Post subject: |
 |
|
NikonAIS wrote:
| philslizzy wrote: |
A great idea, I thought of something similar but I have no idea of design. I assume it is basically an upside down U shape sitting on the BG paper. How is the paper held in place and can you take photos of its construction? maybe a list of plumbing parts used too.
Please!  
I can see the straights are in 2 pieces so its going to be pretty small when disassembled.
Do your flash heads have any sort of diffusion? Looking at the setup, to me , it looks like there would be a 'hot-spot' where the light from the flashes meet.
More info!
Thanks |
The fittings of for the bottom pieces are a simple 90º elbow, with one side threaded. The 4 vertical pieces are threaded at both ends. The fittings for the top ones are 3 way fittings, again with one threaded.
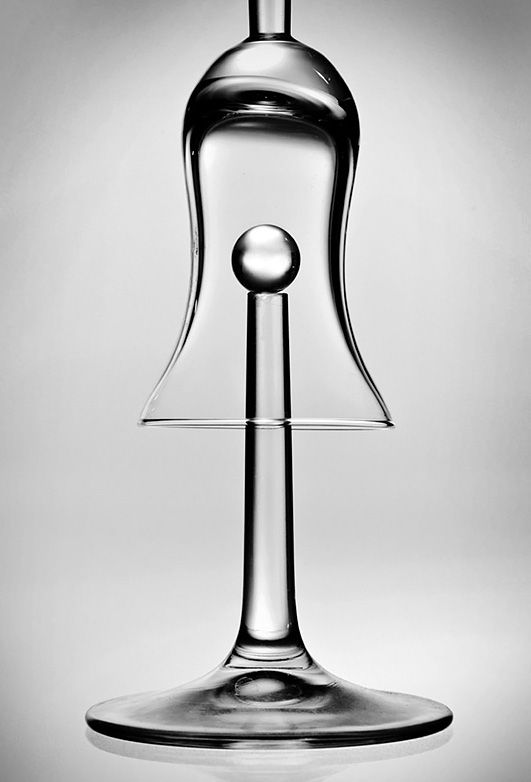
The heads have no diffusion on them, the doubled over bedsheet provides more than adequate diffusion. I have never noticed a hotspot in any photographs. The nicest thing is that by changing output percentage on one of more strobes, you can add modeling effects to the images. The image below only had light coming from above at full power and one at 1/4 power through the background paper. The glass above was suspended by some fishing line tied to the side posts. I had to get a glass cutter cut the top off of the one on the bottom and then put it into a flame to get a smooth cut.
_________________
Nikon FTn, F2A, F3HP, F4E, F5, Nikkormat FT2, Nikon FE-2, Nikonos V, D850, D500 and D750. 8mm f/2.8 AIS, 16mm f/2.8 Fisheye AIS, 15mm f/3.5 AIS, 18mm f/3.5 AIS, 24mm f/2 AIS, 28mm f/2 AIS, 28mm f/3.5 Nikkor H non-AI, 25-50mm f/4 AIS, 28mm f/3.5 and 35mm f/2.8 UW-Nikkors, 35mm f/1.4 AIS, 50mm f/1.4 AIS, 50mm f/1.4 Nikkor-S, 50-135mm f/3.5 AIS, 55mm f/2.8 AIS Micro w/ PK-13, 80-200mm f/4 AIS, 85mm f/1.4 AIS, 105mm f/1.8 AIS, 10.5 cm f/2.5 non-AI, 105mm f/2.8 AIS Micro, 135mm f/2 AIS, 180mm f/2.8 ED AIS, 200mm f/4 Micro AIS and PN-11, 200mm f/2 ED-IF AIS, 300mm f/2.8 ED-IF AIS, 400mm f/2.8 ED-IF AIS, 500mm f/8 Reflex, 600mm f/4 ED-IF AIS, TC14B and TC300.
Hasselblad 500CM with PM-90 eye level finder and assorted A12 and A16 backs, Carl Zeiss C and CF T* 40mm f/4. 60mm f/3.5. 80mm f/2.8, 150mm f/4 and 250mm f/5.6
AF lenses are for sissies!
Last edited by NikonAIS on Wed Apr 09, 2014 6:14 pm; edited 6 times in total |
|
| Back to top |
|
 |
NikonAIS


Joined: 23 Mar 2014
Posts: 227
Location: Pawleys Island, SC, US
|
 Posted: Wed Apr 09, 2014 5:47 pm Post subject: Posted: Wed Apr 09, 2014 5:47 pm Post subject: |
 |
|
NikonAIS wrote:
| kansalliskala wrote: |
Nice!
How did you create the black & mirror thing? |
In both images, the subject is sitting on a piece of glass.
_________________
Nikon FTn, F2A, F3HP, F4E, F5, Nikkormat FT2, Nikon FE-2, Nikonos V, D850, D500 and D750. 8mm f/2.8 AIS, 16mm f/2.8 Fisheye AIS, 15mm f/3.5 AIS, 18mm f/3.5 AIS, 24mm f/2 AIS, 28mm f/2 AIS, 28mm f/3.5 Nikkor H non-AI, 25-50mm f/4 AIS, 28mm f/3.5 and 35mm f/2.8 UW-Nikkors, 35mm f/1.4 AIS, 50mm f/1.4 AIS, 50mm f/1.4 Nikkor-S, 50-135mm f/3.5 AIS, 55mm f/2.8 AIS Micro w/ PK-13, 80-200mm f/4 AIS, 85mm f/1.4 AIS, 105mm f/1.8 AIS, 10.5 cm f/2.5 non-AI, 105mm f/2.8 AIS Micro, 135mm f/2 AIS, 180mm f/2.8 ED AIS, 200mm f/4 Micro AIS and PN-11, 200mm f/2 ED-IF AIS, 300mm f/2.8 ED-IF AIS, 400mm f/2.8 ED-IF AIS, 500mm f/8 Reflex, 600mm f/4 ED-IF AIS, TC14B and TC300.
Hasselblad 500CM with PM-90 eye level finder and assorted A12 and A16 backs, Carl Zeiss C and CF T* 40mm f/4. 60mm f/3.5. 80mm f/2.8, 150mm f/4 and 250mm f/5.6
AF lenses are for sissies! |
|
| Back to top |
|
 |
ForenSeil


Joined: 15 Apr 2011
Posts: 2726
Location: Kiel, Germany.
|
 Posted: Thu Apr 10, 2014 12:06 am Post subject: Posted: Thu Apr 10, 2014 12:06 am Post subject: |
 |
|
ForenSeil wrote:
Thank you for sharing!
Simple and very effective.
Funny trivia problem for me would be that it wouldn't work here that nice looking 1:1 . For some reason the thinnest PVC pipes you can get here locally in the 5+ large hardware stores are all 5cm in diameter (most 10cm diameter)   . That's funny, no clue why it's hard to find small PVC pipes in Germany . That's funny, no clue why it's hard to find small PVC pipes in Germany  . 5cm pipes are nice for building potatoguns and drain pipes and other DIY stuff but very bulky to build something like that . 5cm pipes are nice for building potatoguns and drain pipes and other DIY stuff but very bulky to build something like that 
But I think it wouldn't be hard to find an alternative as framwork or course.
For "small" objects like in your samples I personlly would prefer using very large styroboxes (styroboxes can be had in many different sizes https://www.google.de/search?q=styroporboxen&safe=off&client=firefox-a&hs=9cj&rls=org.mozilla:de:official&channel=sb&source=lnms&tbm=isch&sa=X&ei=3-FFU_wnyoi0BpO1gPAG&ved=0CAkQ_AUoAg&biw=1525&bih=712&dpr=0.9 O which can be bought for example from restaurant suppliers, fish markets etc. for very little money (~5€). They are larger than moster comercial lightboxes (which are often only 50x40x40cm etc.) and much cheaper and most importat even better for diffusing light than bedsheet. Only drawback is of course that they won't work for anything larger and they are absorbing much more light than a bedsheet, which means that you always need flashes or a tripod.
(For German readers, "Citti-Markt" is good adress to get unused and very large ones, about 0,5x0,5x1m sized, use google to find the closest one)
I have a question:
What did you use as black background on your mirror-shots?
I used exactly the same glasplate technique (inspired by such videos https://www.youtube.com/watch?v=r-gIhidB6cE ) but in much larger scale for (erotic) full body women potrait work with a large glas plate from an (dining) glas table I got for free, which worked great, but only with white back- and undergrounds so far, as my cheap crappy black bedsheet background shows to many disturbing details 
_________________
I'm not a collector, I'm a tester 
My camera: Sony A7+Zeiss Sonnar 55/1.8
Current favourite lenses (I have many more):
A few macro-Tominons, Samyang 12/2.8, Noritsu 50.7/9.5, Rodagon 105/5.6 on bellows, Samyang 135/2, Nikon ED 180/2.8, Leitz Elmar-R 250/4, Celestron C8 2000mm F10
Most wanted: Samyang 24/1.4, Samyang 35/1.4, Nikon 200/2 ED
My Blog: http://picturechemistry.own-blog.com/
(German language) |
|
| Back to top |
|
 |
Mir


Joined: 07 Feb 2011
Posts: 983
Location: Montreal, Canada
Expire: 2017-09-30
|
 Posted: Mon Apr 21, 2014 9:13 pm Post subject: Posted: Mon Apr 21, 2014 9:13 pm Post subject: |
 |
|
Mir wrote:
Black velvet works for me
_________________
"Obsta principiis, finem respice"
"There is a fine line between hobby and mental illness"
MISC: Tamron SP 35-80 (01A), Auto Chinon Tomioka 1.4/55, Tokina AT-X 2.5/90, Tamron SP 5,6/300 (54B)
ZEISS: WG Distagon 2.8/25, WG Distagon 2.8/35 HFT, WG Planar HFT 1.4/50, Ultron 1.8/50, WG Sonnar 2.8/85, WG Sonnar HFT 2.8/135
VOIGTLÄNDER : Ultron Aspherical 1.8/21, Ultron 2/28, Nokton Aspherical 1.2/35, Nokton Classic 1.4/40, Nokton 1.2/50, Nokton Aspherical 1.5/50, Color-Heliar 2.5/75
MINOLTA: MD 3.5/35-70 Macro, MD 1.2/50, MC Rokkor-X 1.2/58, MD Macro 3.5/50
LEITZ: SUMMICRON-R 2/35 (II), SUMMICRON-R 2/50 (II), TELE ELMARIT-M 2,8/90 (Thin)
CANON RF: 2.8/28, 2/35, 1.2/50, 1.4/50, 1.5/50, Serenar 1.8/50, 2/85, 2/100, 3.5/100
LTM : YASHICA YASHINON 1.8/5cm, FUJINON L 2/5cm, CHIYODA KOGAKU SUPER ROKKOR 1.8/5cm, CHIYOKO SUPER ROKKOR C 2/5cm, TOKYO KOGAKU Topcor-S 2/5cm, Nippon Kogaku NIKKOR-H.C 2/5cm, KMZ Jupiter-8 2/5cm
DKL : VOIGTLÄNDER SKOPAREX 3,4/35, SEPTON 2/50, DYNAREX 3,4/90, SUPER-DYNAREX 4/135, Scheiner-Kreuznach Retina-Xenon 1,9/50
And a small Minolta AF set: 2.8/20, 1.4/35, 1.4/50, 2/100, 4.5/100-200
@we3fotography
@7plus_pictures
@_whats.that.car_ |
|
| Back to top |
|
 |
|
|
