| View previous topic :: View next topic |
| Author |
Message |
simplex
Joined: 09 Jan 2024
Posts: 18
Location: Germany
|
 Posted: Thu Jul 18, 2024 2:52 pm Post subject: CZJ Pancolar 1.8 / 80mm: Sticky aperture repair Posted: Thu Jul 18, 2024 2:52 pm Post subject: CZJ Pancolar 1.8 / 80mm: Sticky aperture repair |
 |
|
simplex wrote:
It took me a while to come back here and finish the story I started posting this:
https://forum.mflenses.com/czj-80mm-f-1-8-pancolar-stupid-cleaning-idea-t29774,start,25.html#1581315 .
Meanwhile I moved to another town: just 5 km down the river, but anyway a lot of work.
My sprained left wrist healed, and 6 weeks ago a bicycle accident brought new injuries. A skull-brain-trauma deleted all details of the accident from my memory between the moment the car approached from behind and me waking up (only partially, to be honest) in the ambulance car. After that my right shoulder, right knee and right hand refused to do their respective jobs properly for several weeks.
But I can't complain too much: had I not worn a bicycle helmet, I probably would not post today, possibly forever. Guys: wear helmets when cycling! Period.
So, back to vintage glass. I have repaired and maintenanced around 20 or so vintage lenses since January this year, and so after recovering from the accident I felt confident to give the sticky blades of my Pancolar 80 the required treatment.
Please do not take my following posts as a complete repair guide - they are anything but that. What helped me to do the job is the following video:
https://www.youtube.com/watch?v=yhKxTnQduGM
The video is neither ideal nor sufficient, and many steps are missing, and many technical details are hidden by the lack of optical resolution. Nothing is explained. Many hours of careful trial and error were necessary to fulfill the job for me.
Let me post some pictures of the repair process I took for me as a visual notebook. Maybe they are useful for others, too.
Last edited by simplex on Fri Jul 19, 2024 8:29 am; edited 1 time in total |
|
| Back to top |
|
 |
simplex
Joined: 09 Jan 2024
Posts: 18
Location: Germany
|
| Posted: Thu Jul 18, 2024 2:57 pm Post subject: Sticky blades |
|
|
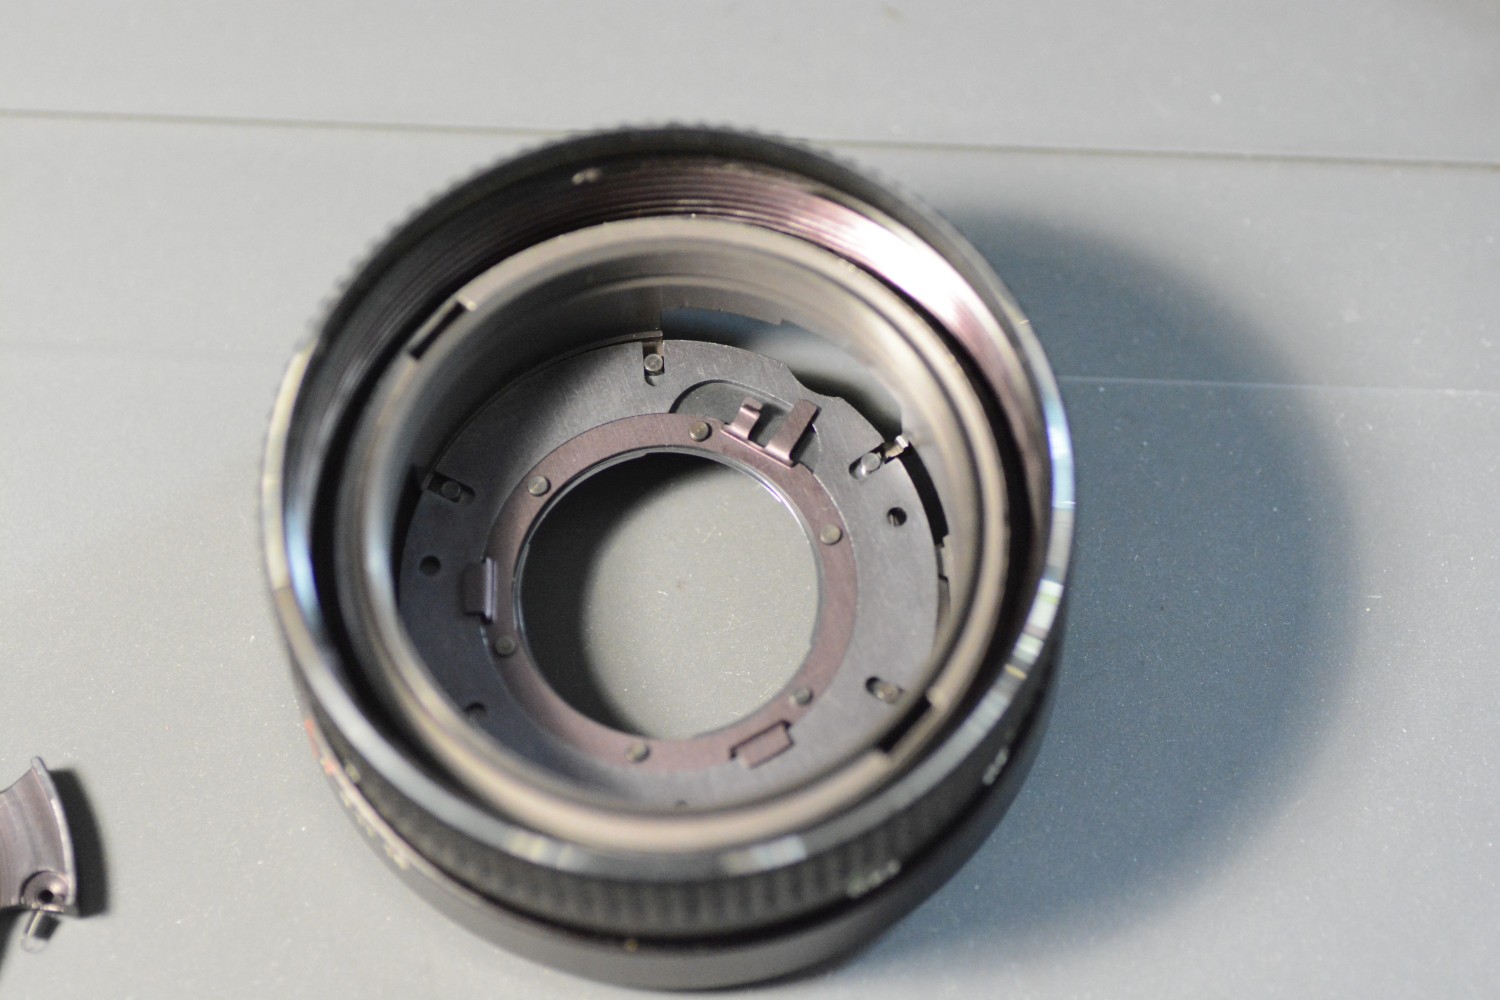
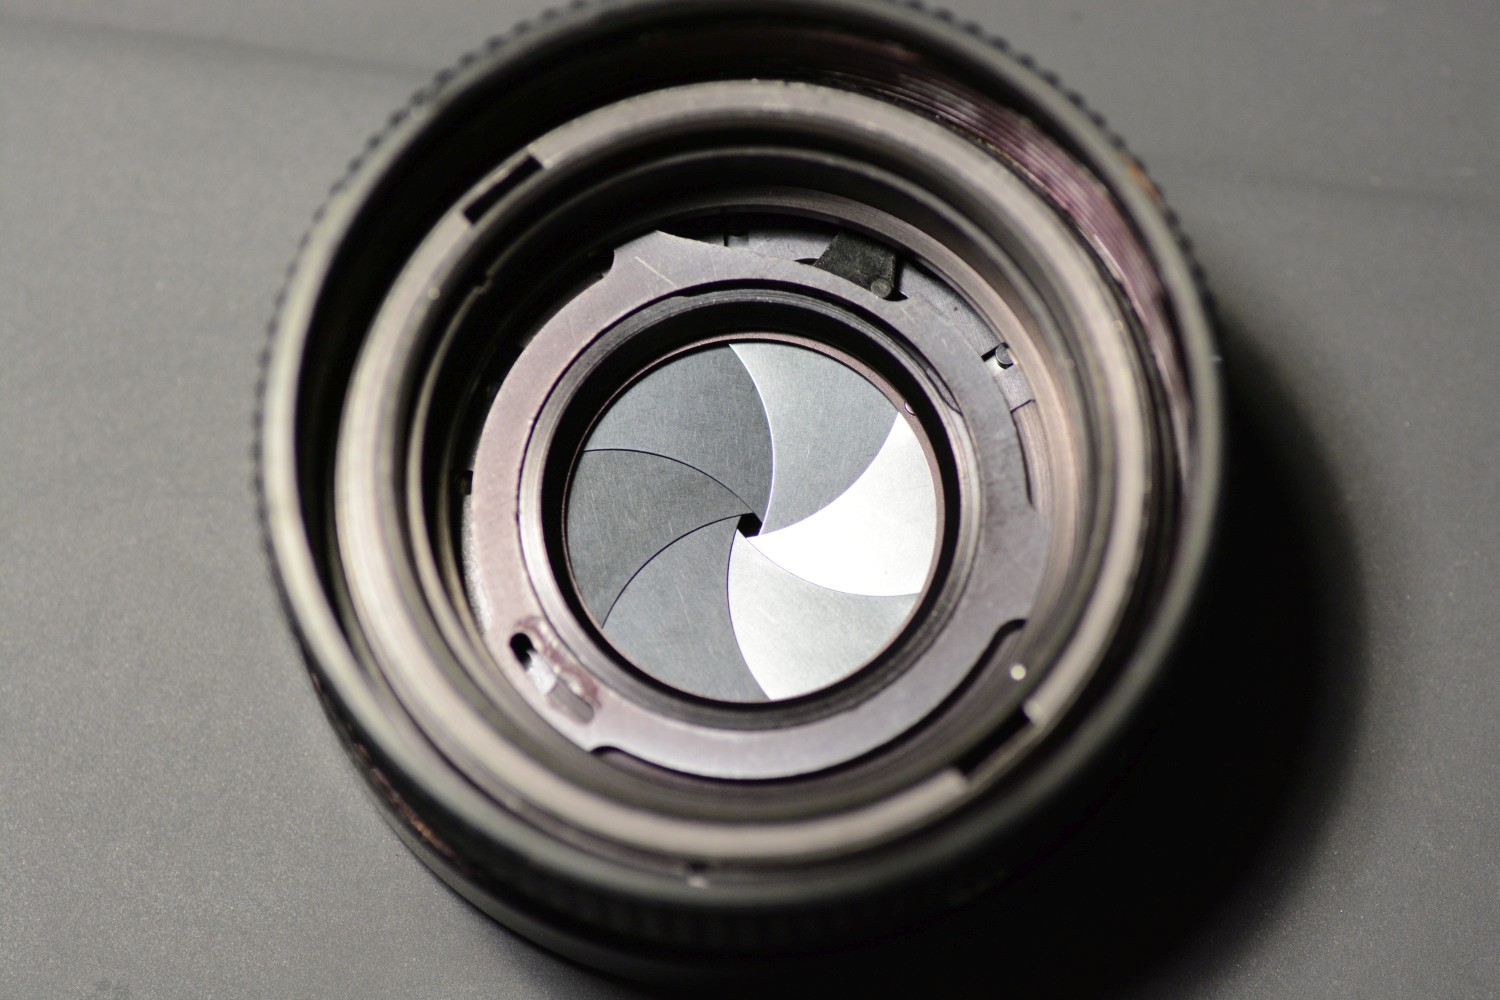
simplex wrote:
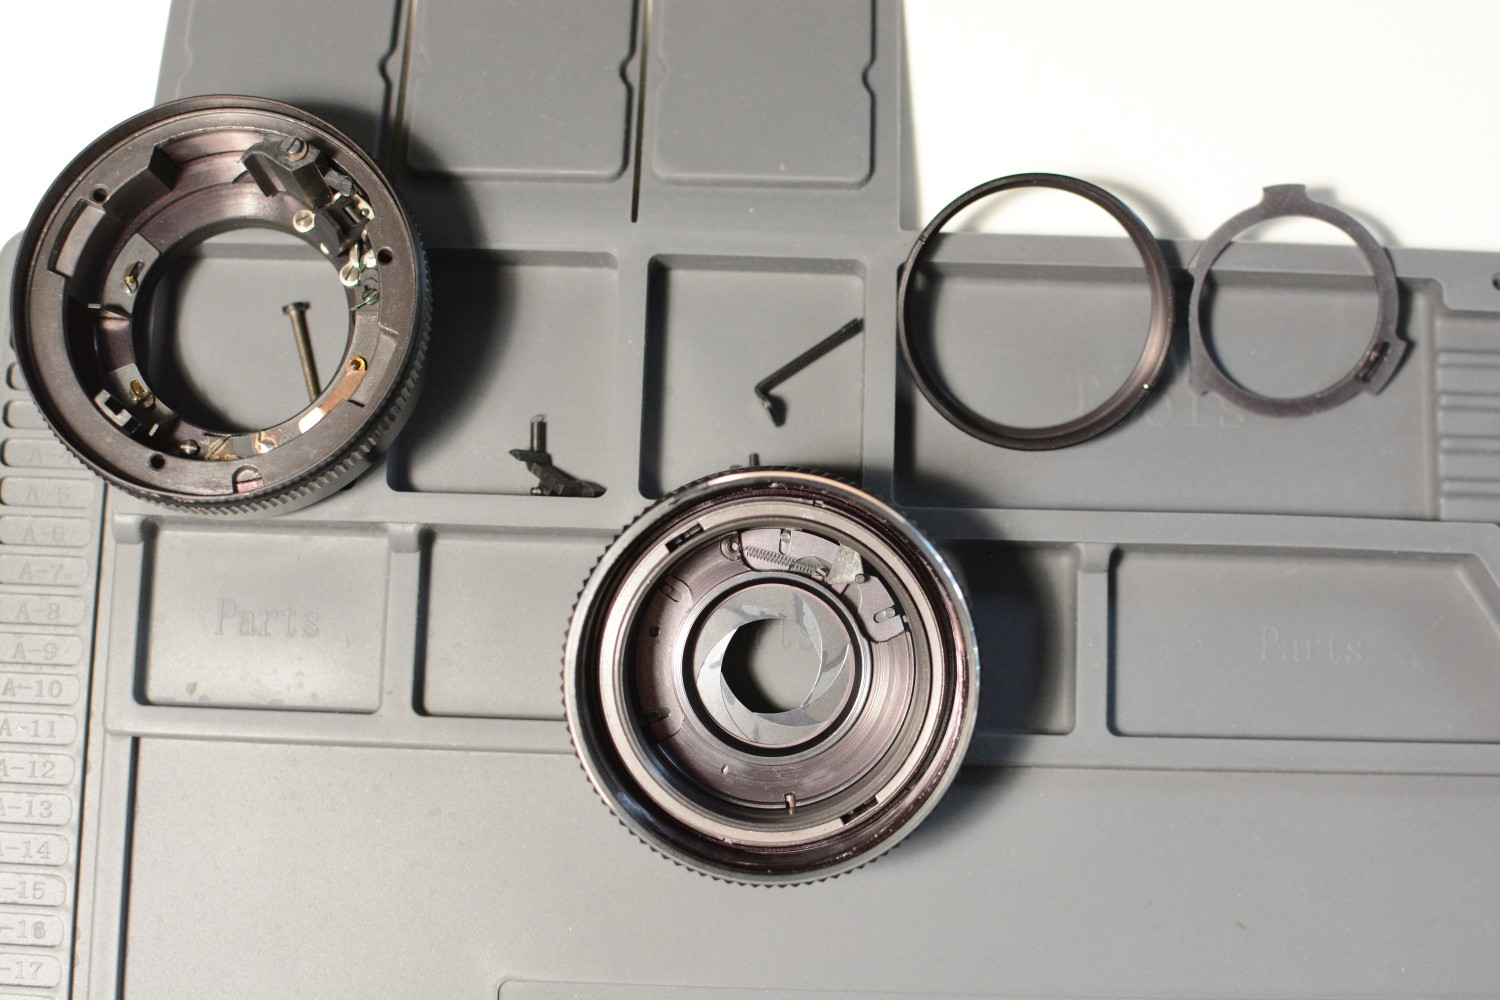
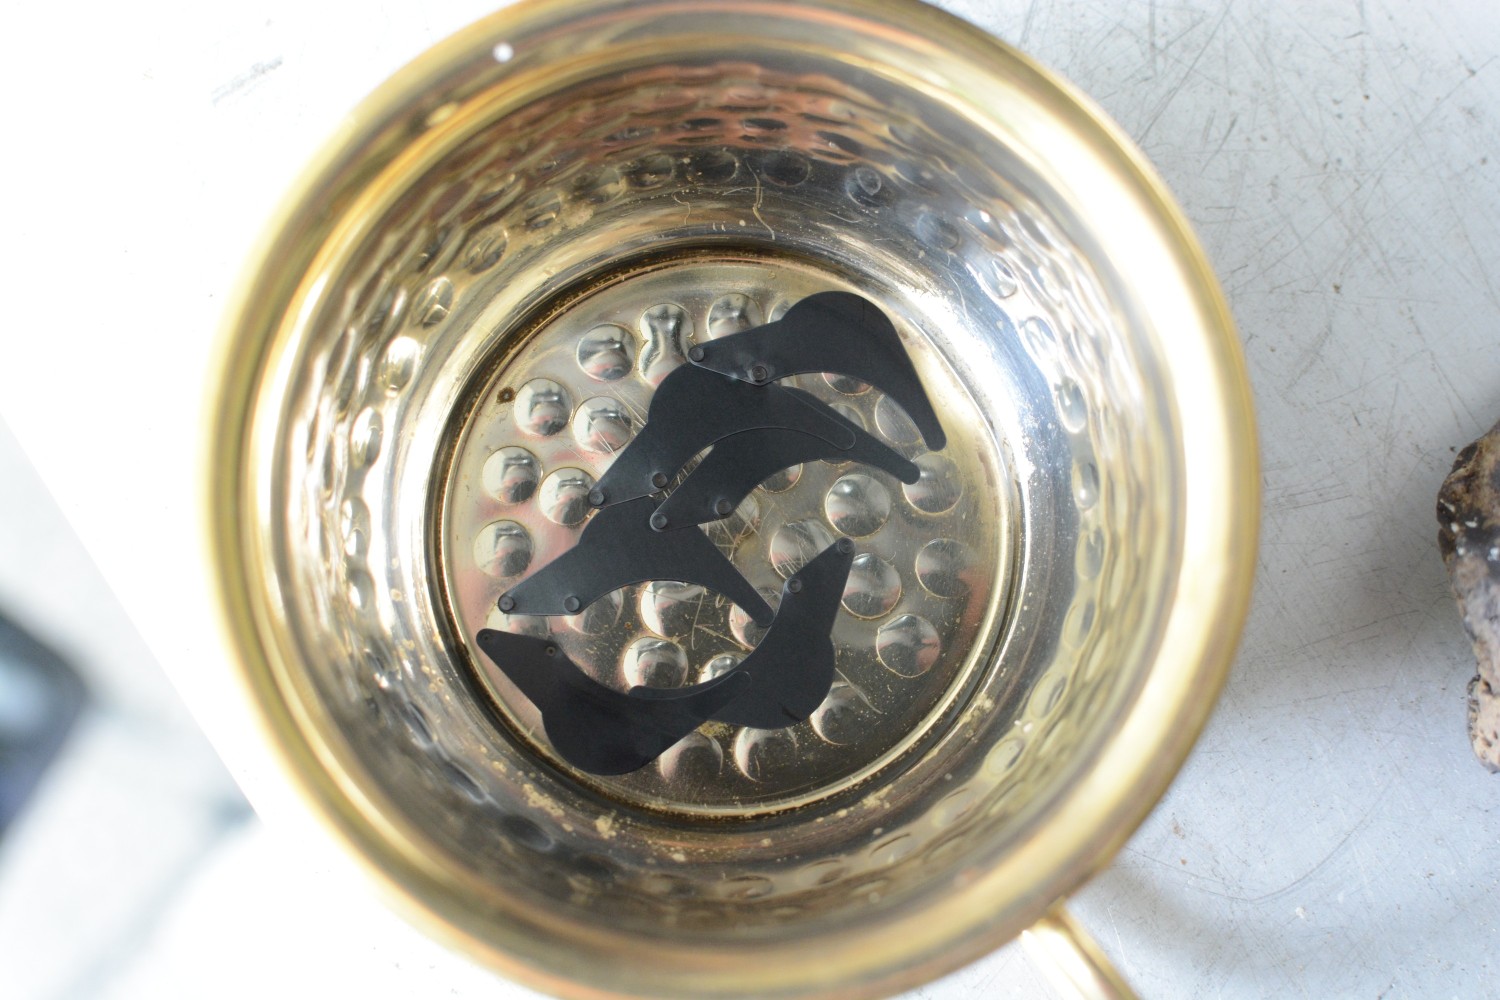
The sticky oil on the blades can easily be seen.

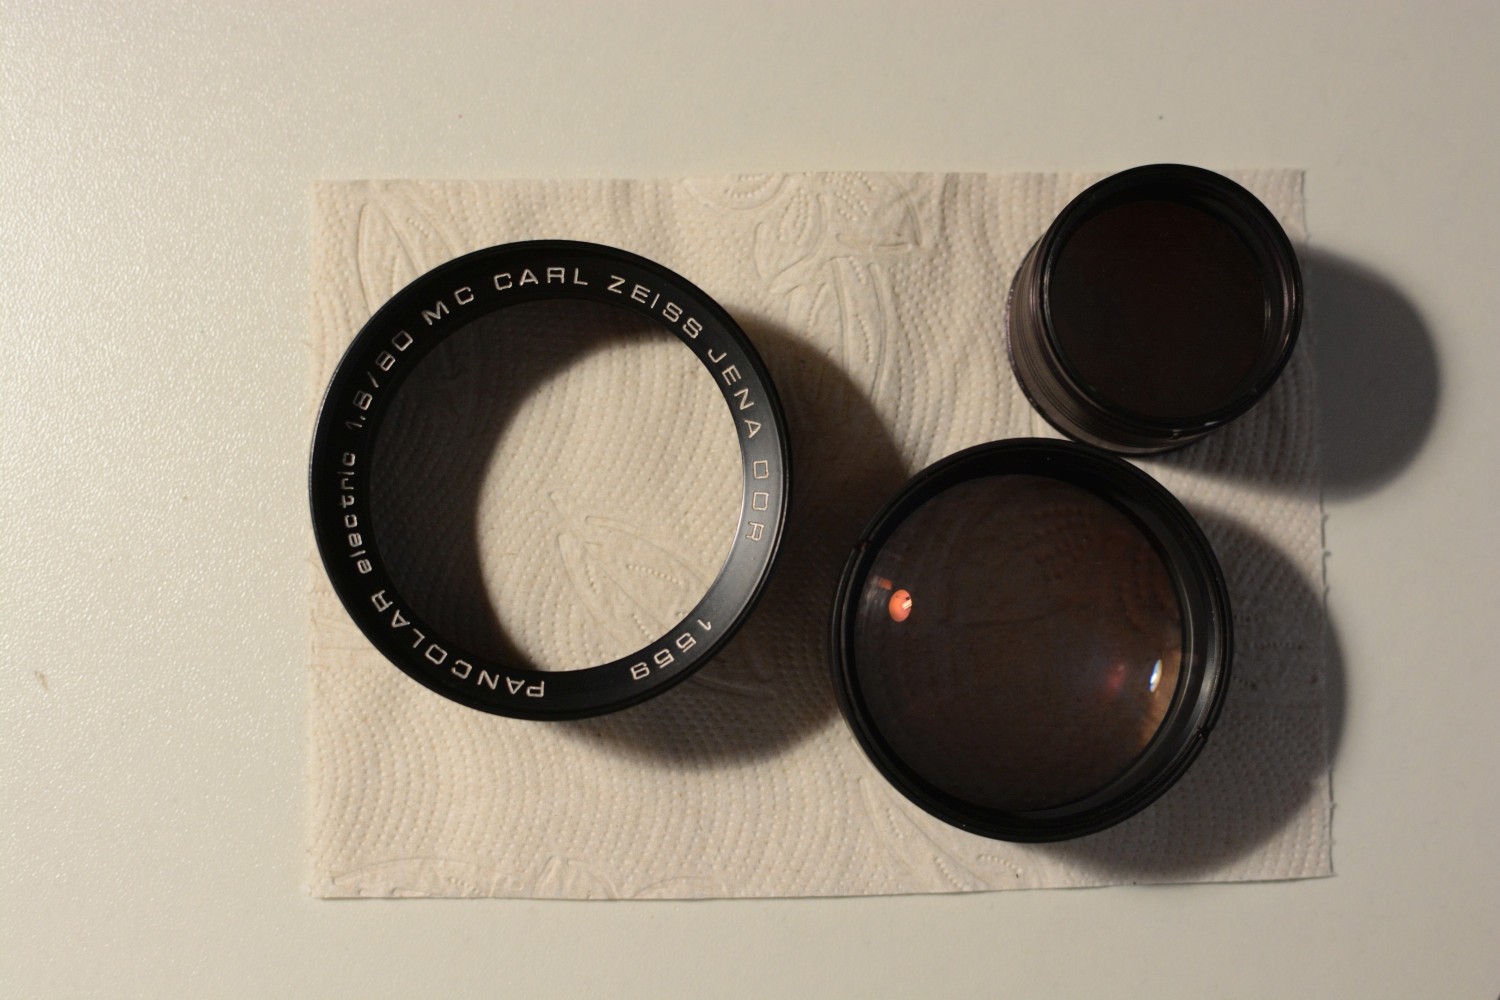
The optical elements.

Blades in naphta bath.
Last edited by simplex on Thu Jul 18, 2024 3:22 pm; edited 1 time in total |
|
| Back to top |
|
|
simplex
Joined: 09 Jan 2024
Posts: 18
Location: Germany
|
| Posted: Thu Jul 18, 2024 3:02 pm Post subject: |
|
|
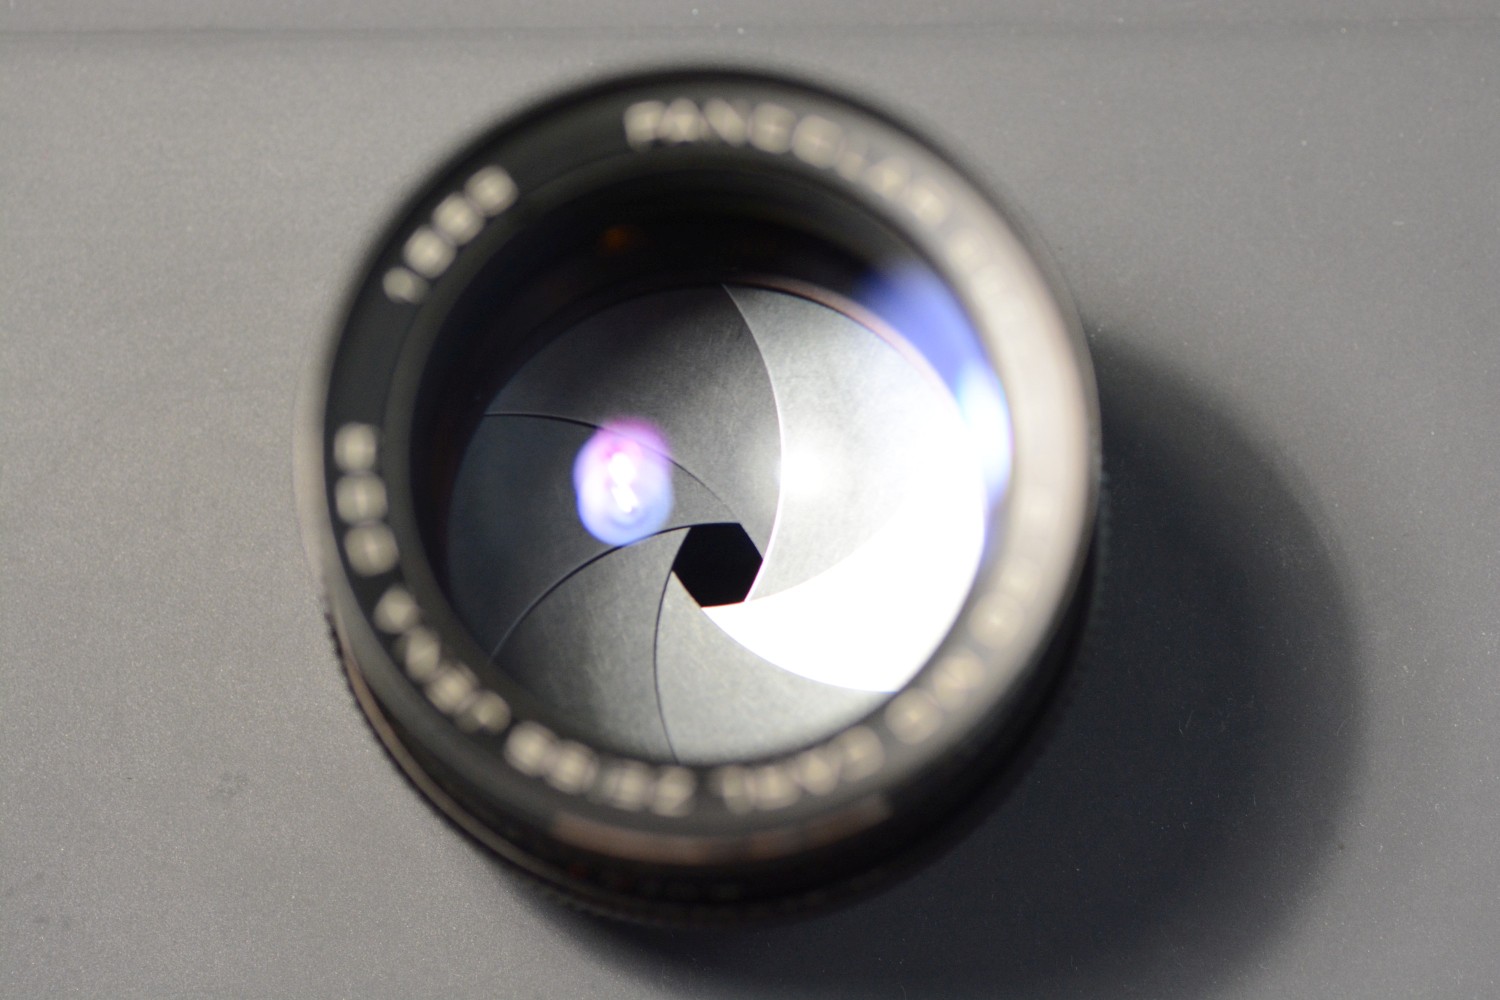
simplex wrote:
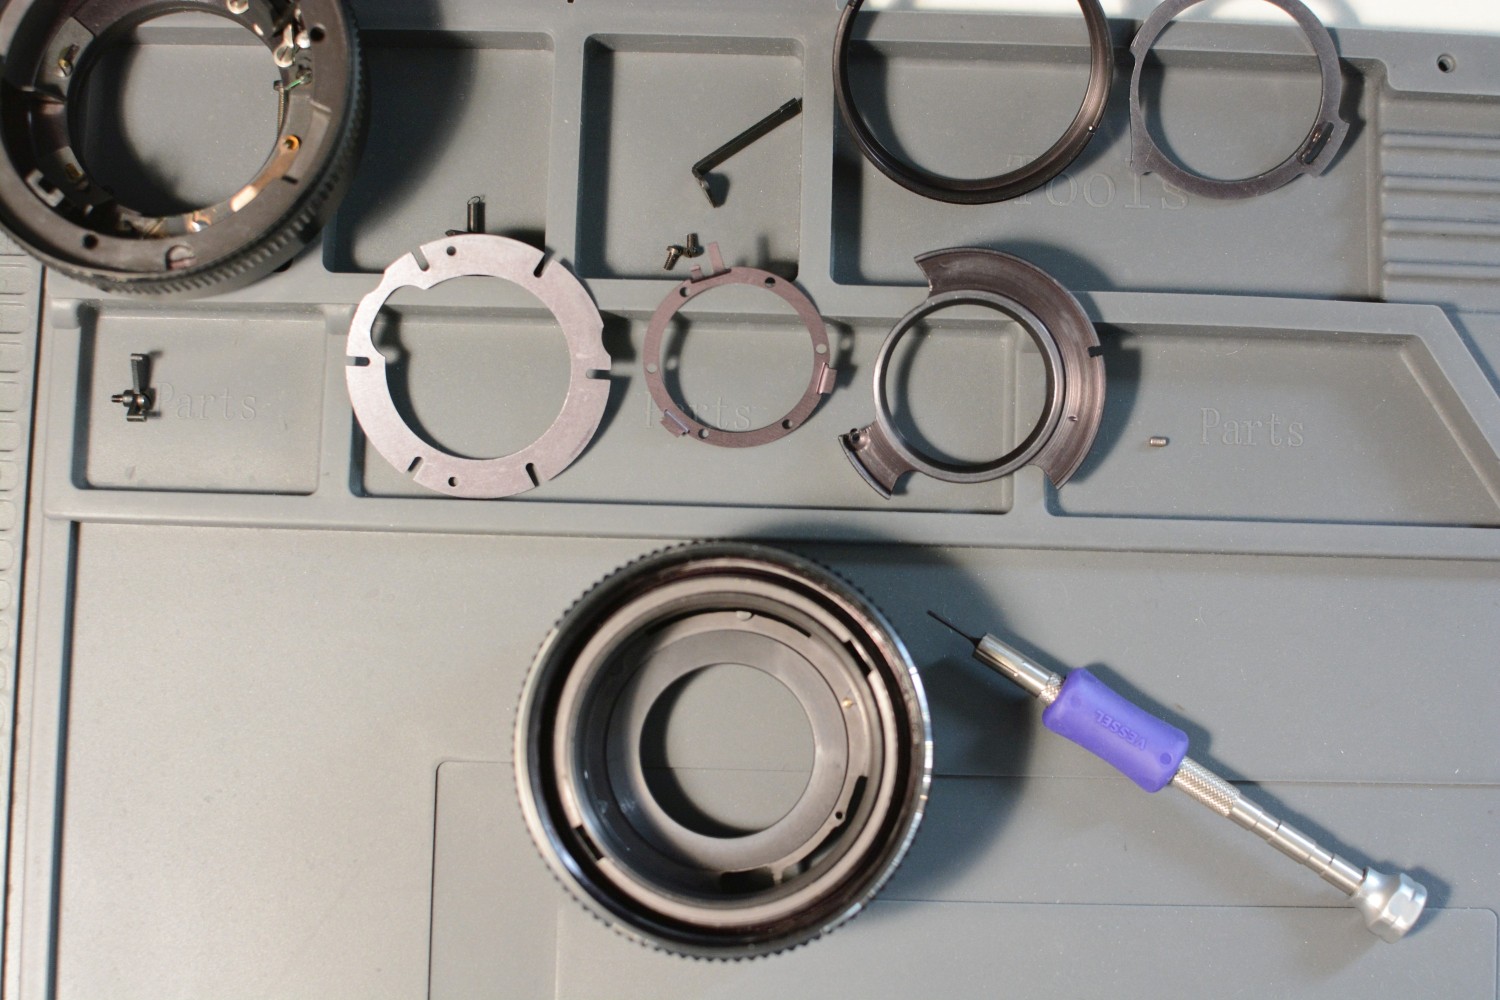
Aperture parts after cleaning. By the way: the screw driver seen here is the tinyest of my tools: 0.7 mm wide according to the manufacturer (Vessel). I only use it to agitate fragile parts like springs when even my tweezers are too coarse to do the job.

This tiny spring is a bit tricky to install.
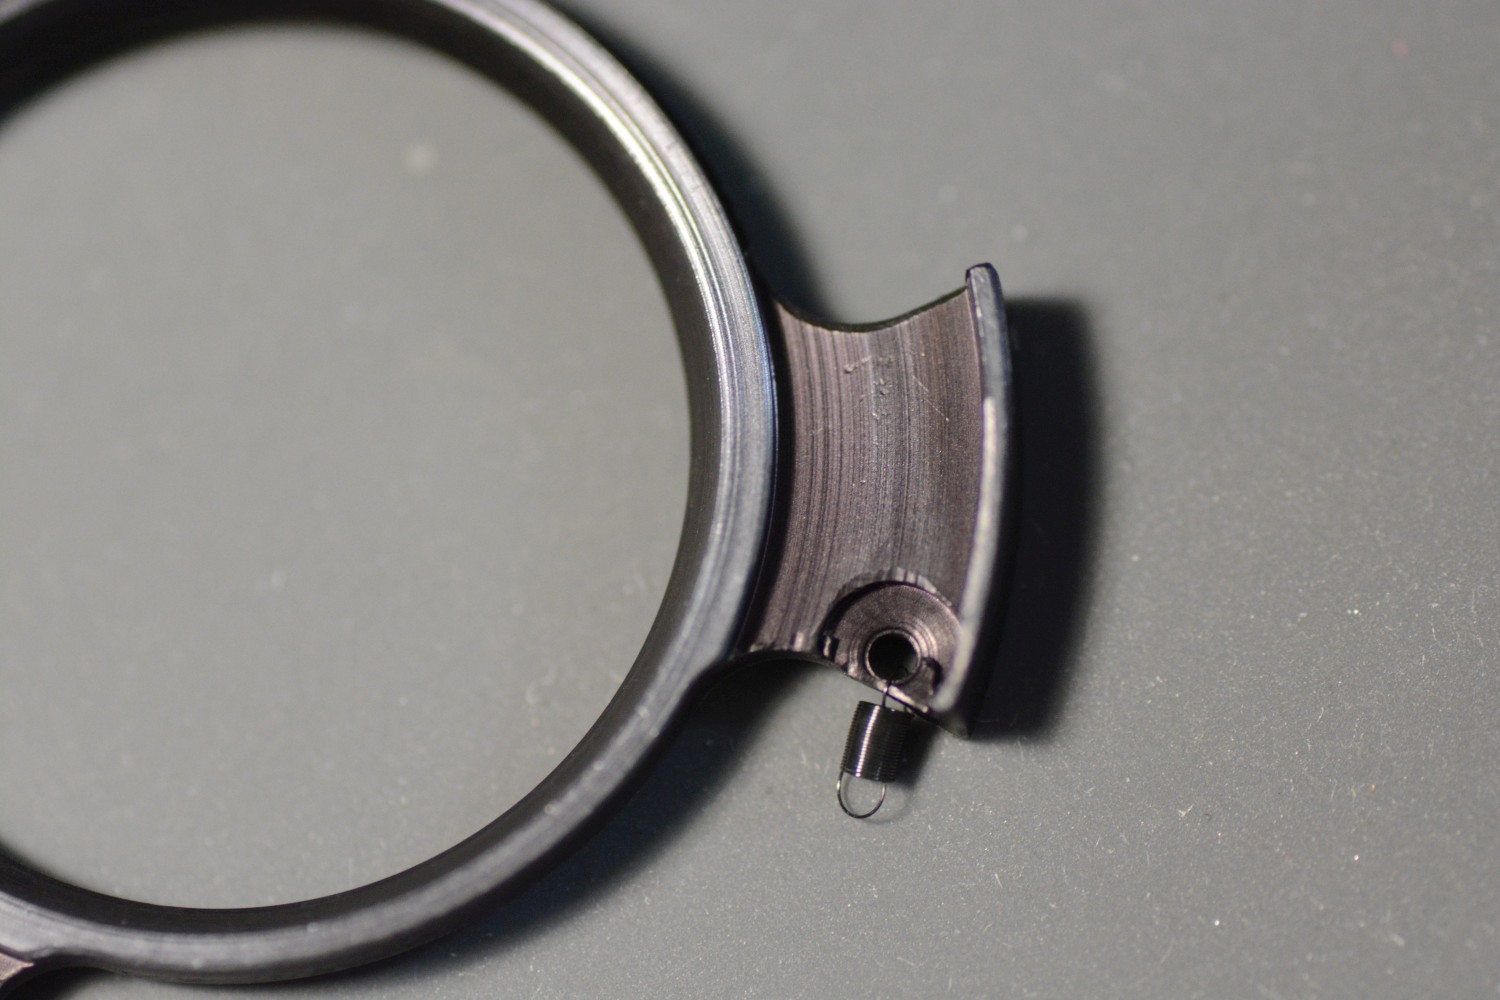
Blades and 2 holding rings are reinstalled, but still loose.

Last edited by simplex on Thu Jul 18, 2024 3:24 pm; edited 1 time in total |
|
| Back to top |
|
|
simplex
Joined: 09 Jan 2024
Posts: 18
Location: Germany
|
| Posted: Thu Jul 18, 2024 3:09 pm Post subject: |
|
|
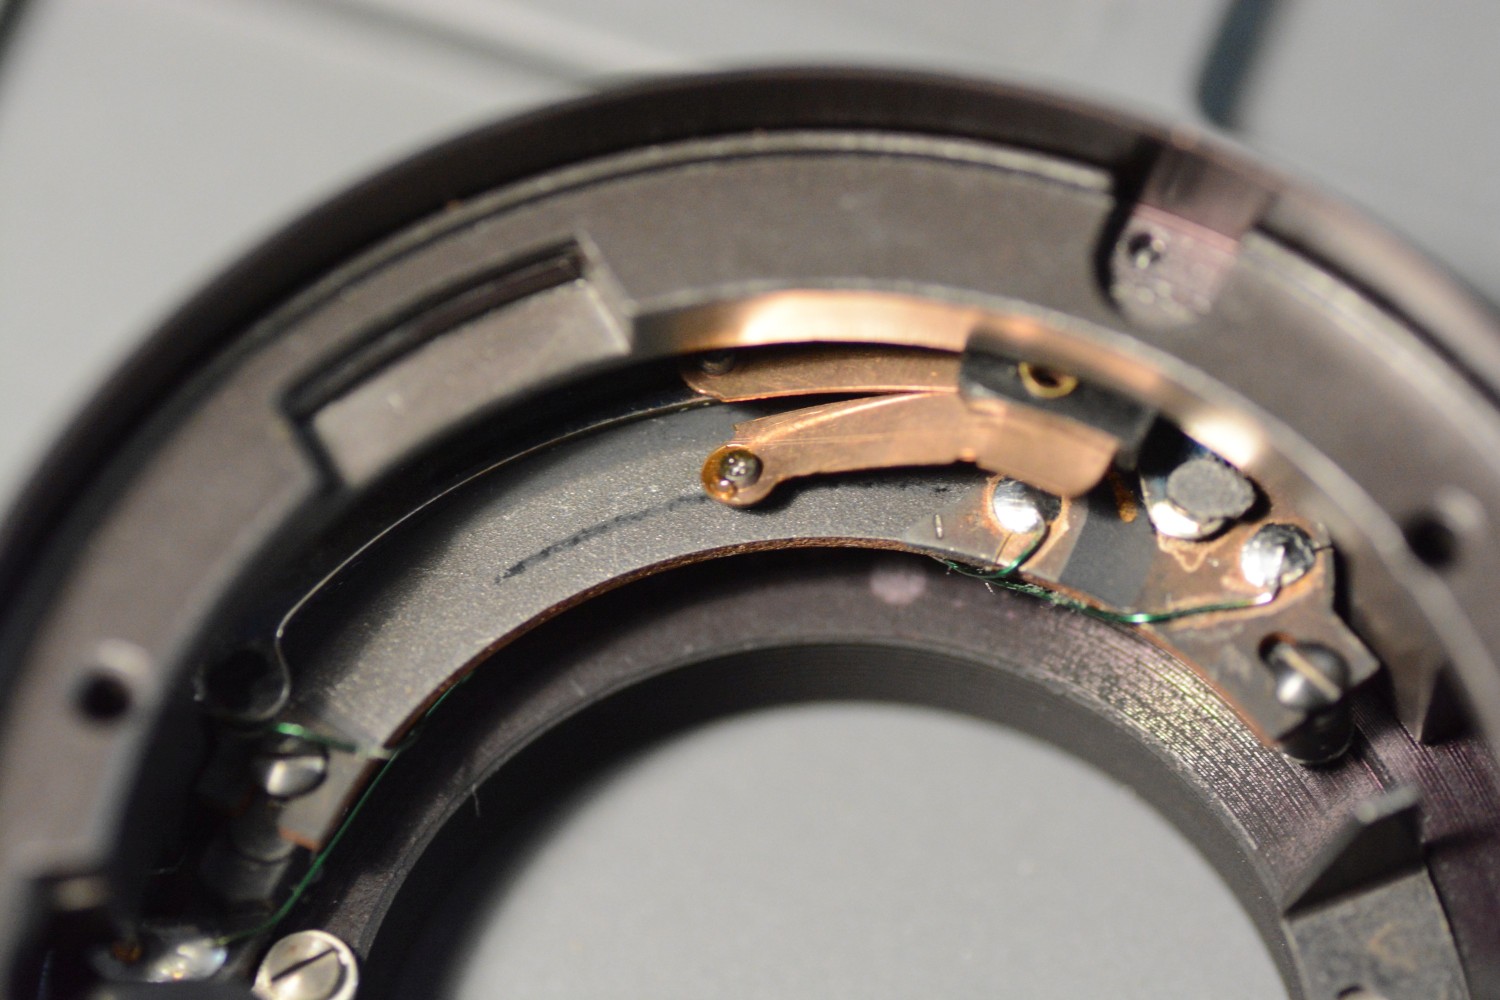
simplex wrote:
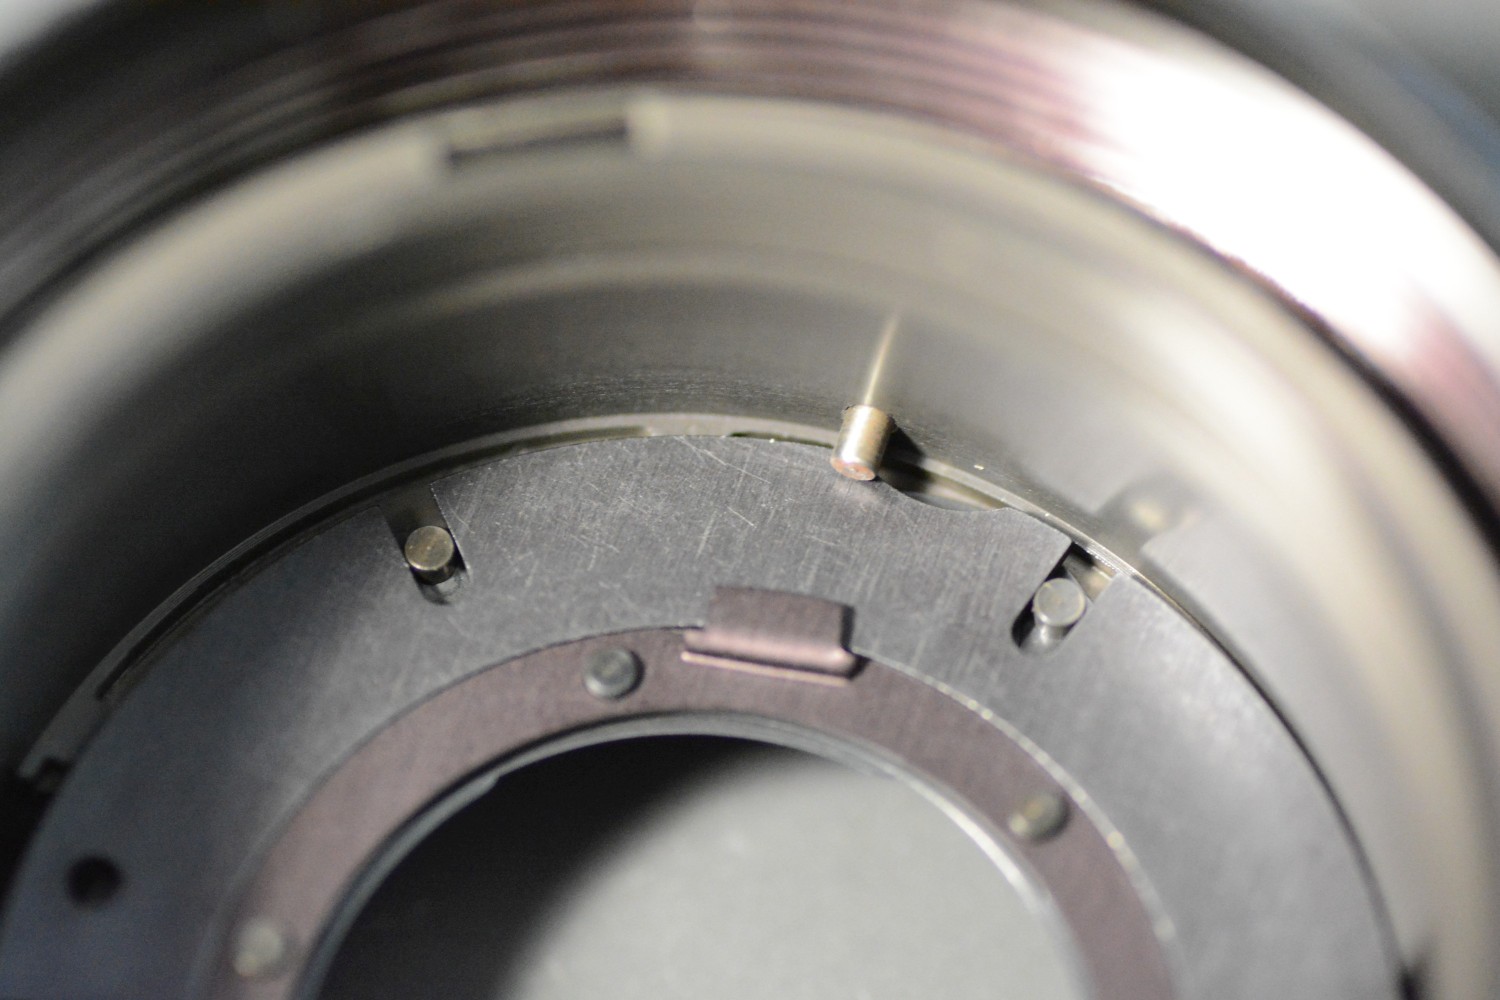
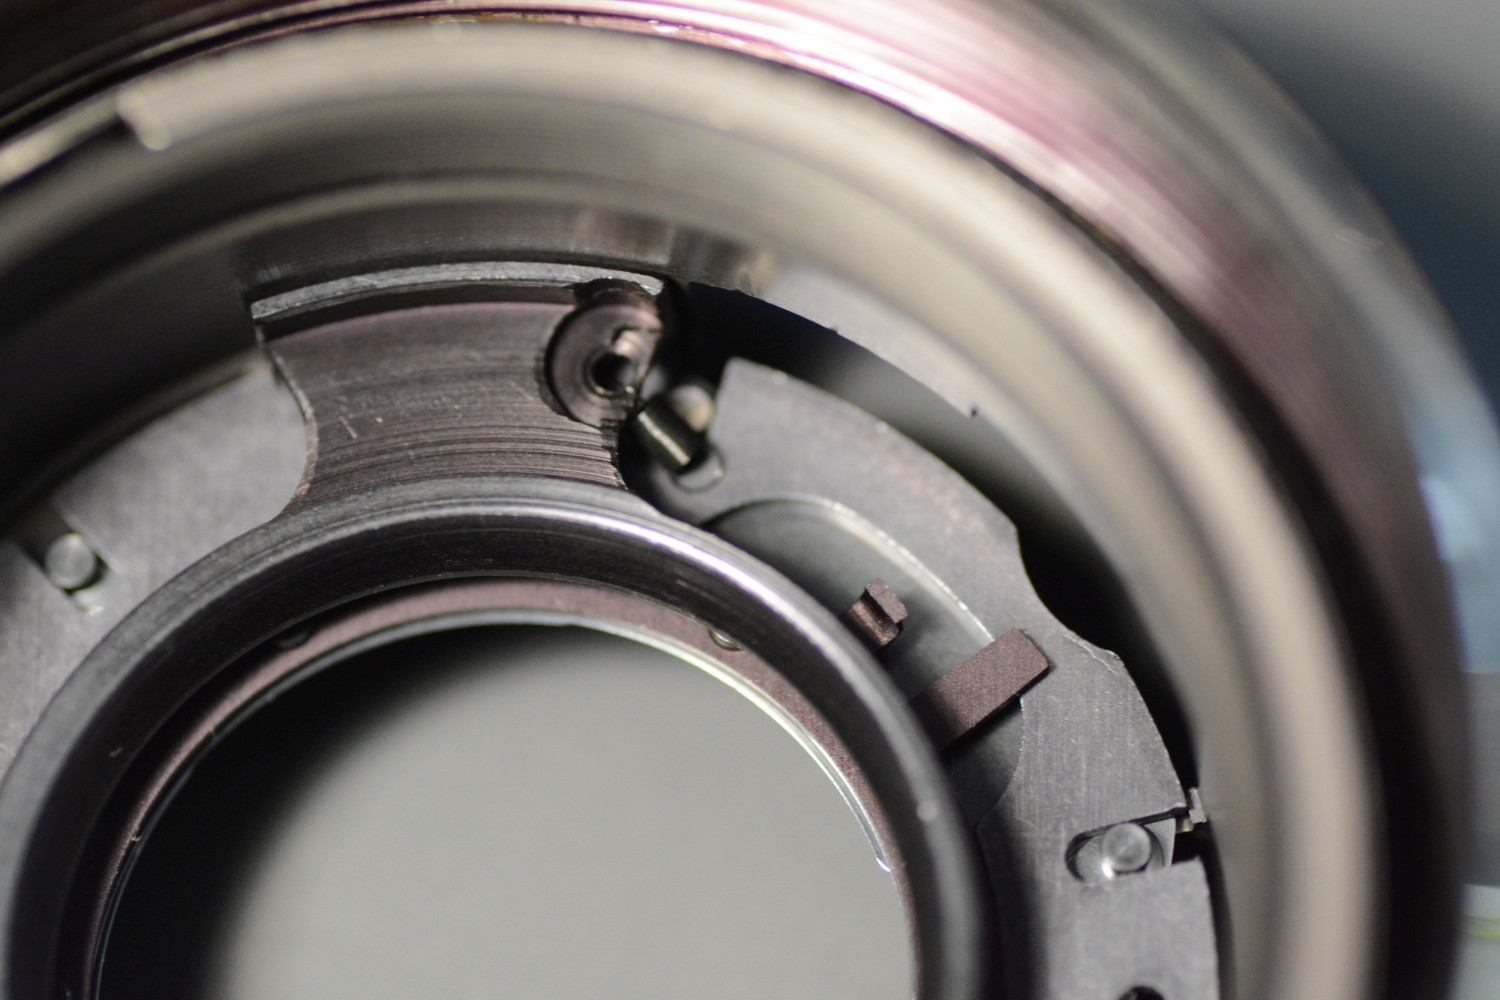
Reassembly of the aperture mechanism is half way done at this point.

A brief look at the 'electronics' here. Honestly, I would not trust this worn out potentiometer too much when used at an analog Praktica like VLC, PLC, or MTL5.

Now the spring has to go over that little hook. Here the tiny Vessel screwdriver helped a lot.
Last edited by simplex on Fri Jul 19, 2024 8:27 am; edited 2 times in total |
|
| Back to top |
|
|
simplex
Joined: 09 Jan 2024
Posts: 18
Location: Germany
|
| Posted: Thu Jul 18, 2024 3:16 pm Post subject: |
|
|
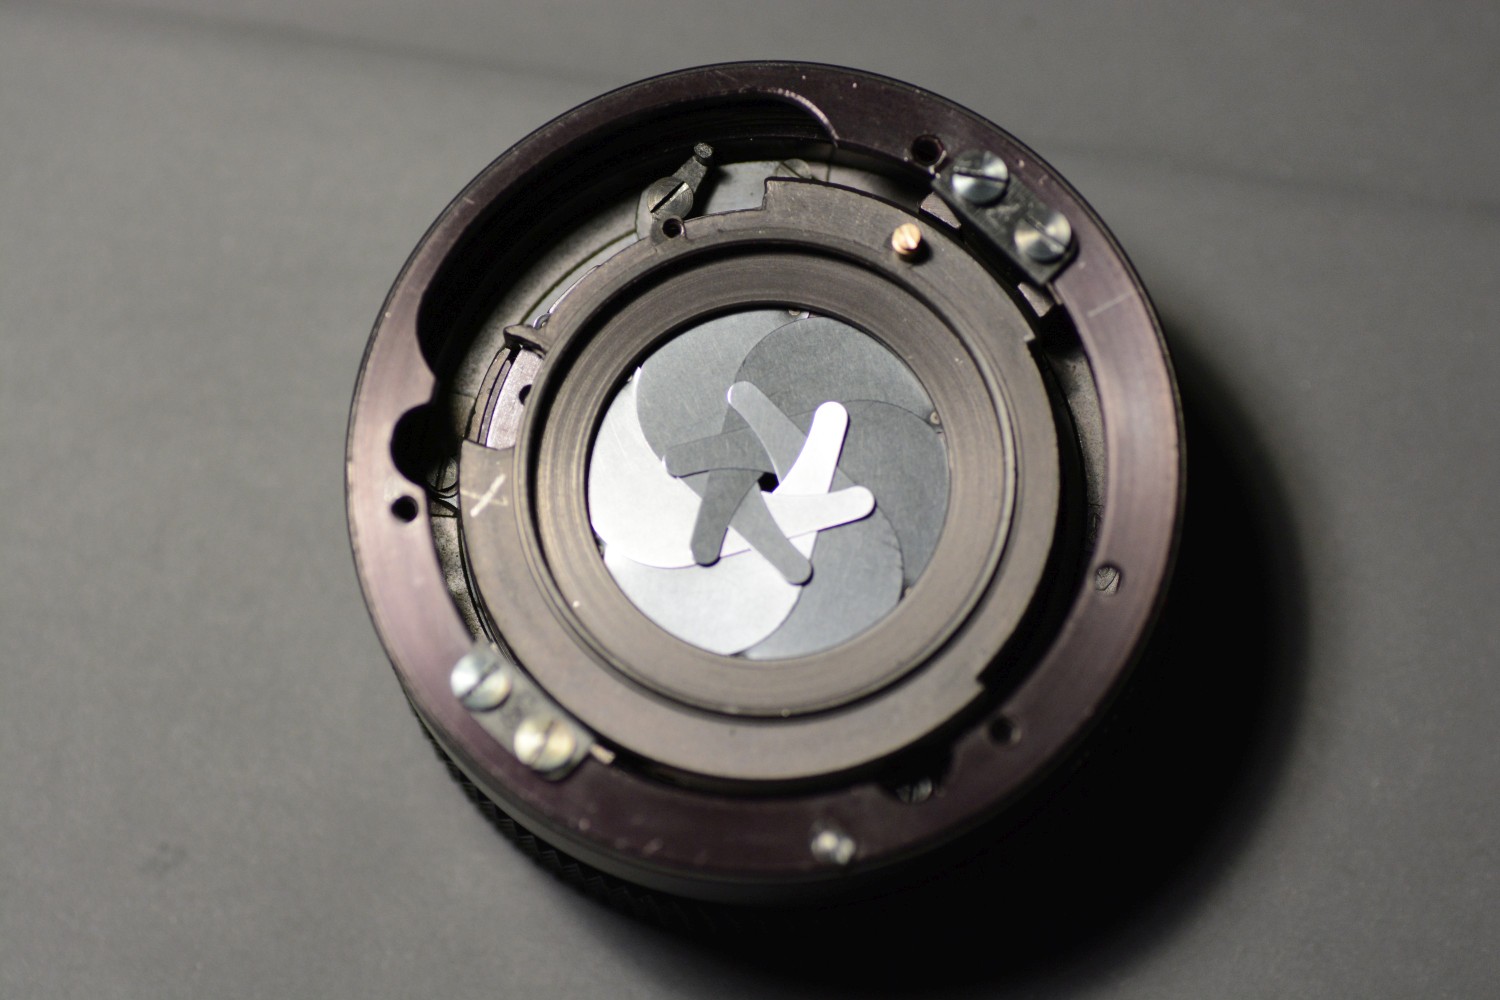
simplex wrote:
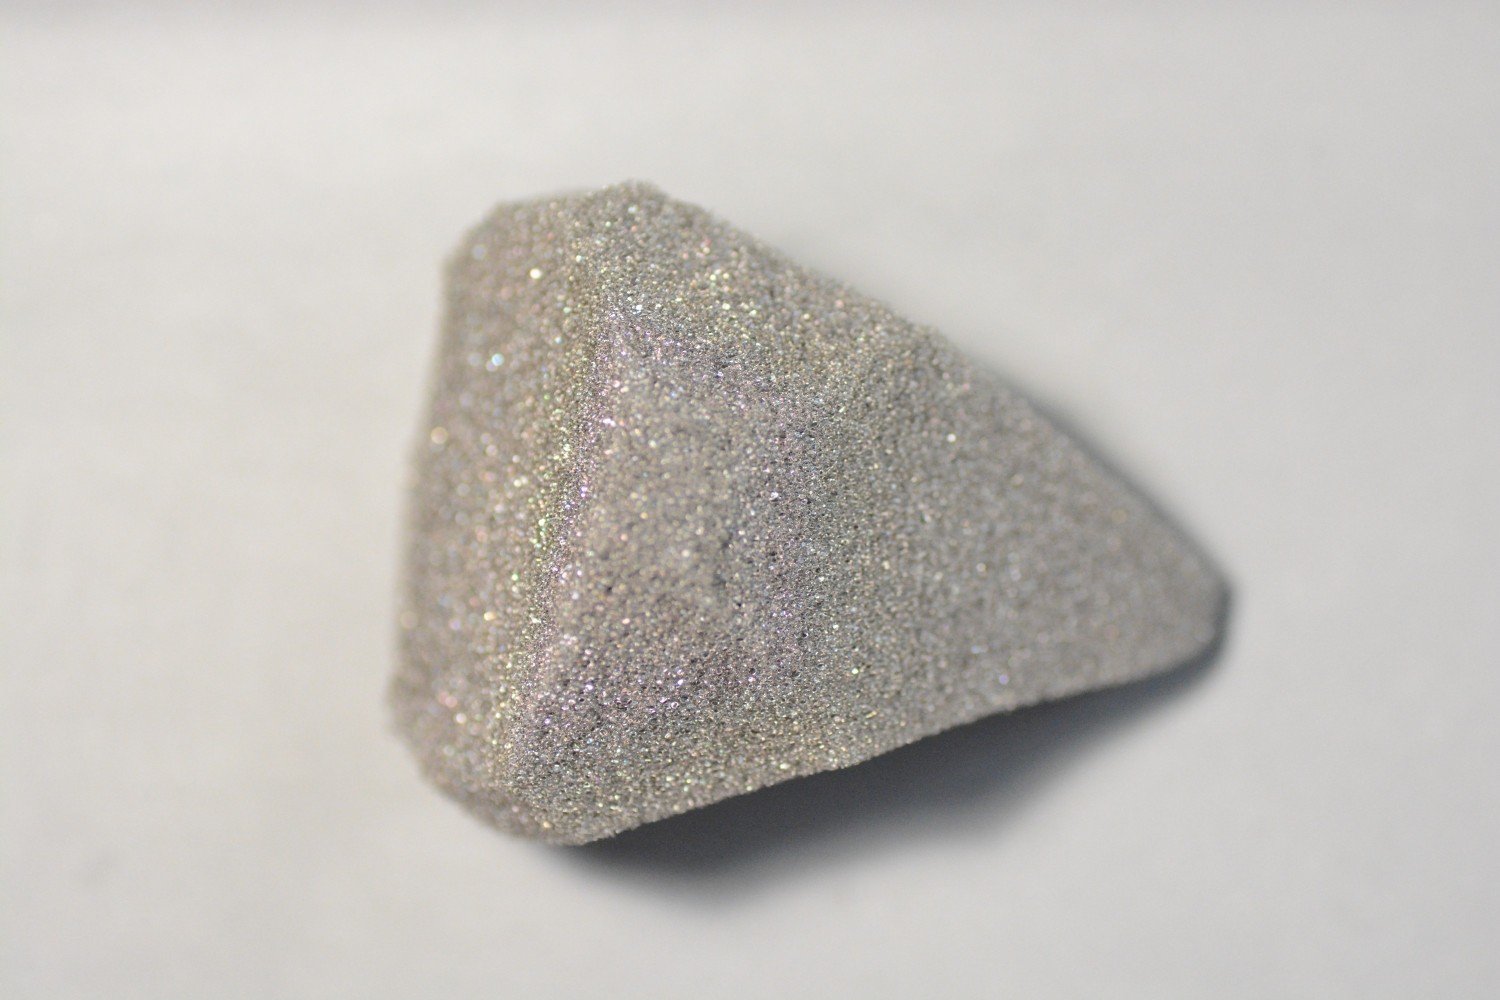
I designed this 'special tool' out of a piece of acoustic foam to fit into the inner tube from the top side to keep the still loose aperture assembly in place when turning the tube upside down to rotate the assembly gently in place.
In the I video linked in my 1st post above, the 'Kamtec' guy did it only with his hands. Honestly: I have absolutely no idea how he did it with that pinpoint accuracy. Probably he repaired a lens more than I did, or even two.
Aperture reassembly done.
Aperture reassembly from back side.
 |
|
| Back to top |
|
|
simplex
Joined: 09 Jan 2024
Posts: 18
Location: Germany
|
| Posted: Thu Jul 18, 2024 3:31 pm Post subject: Done! |
|
|
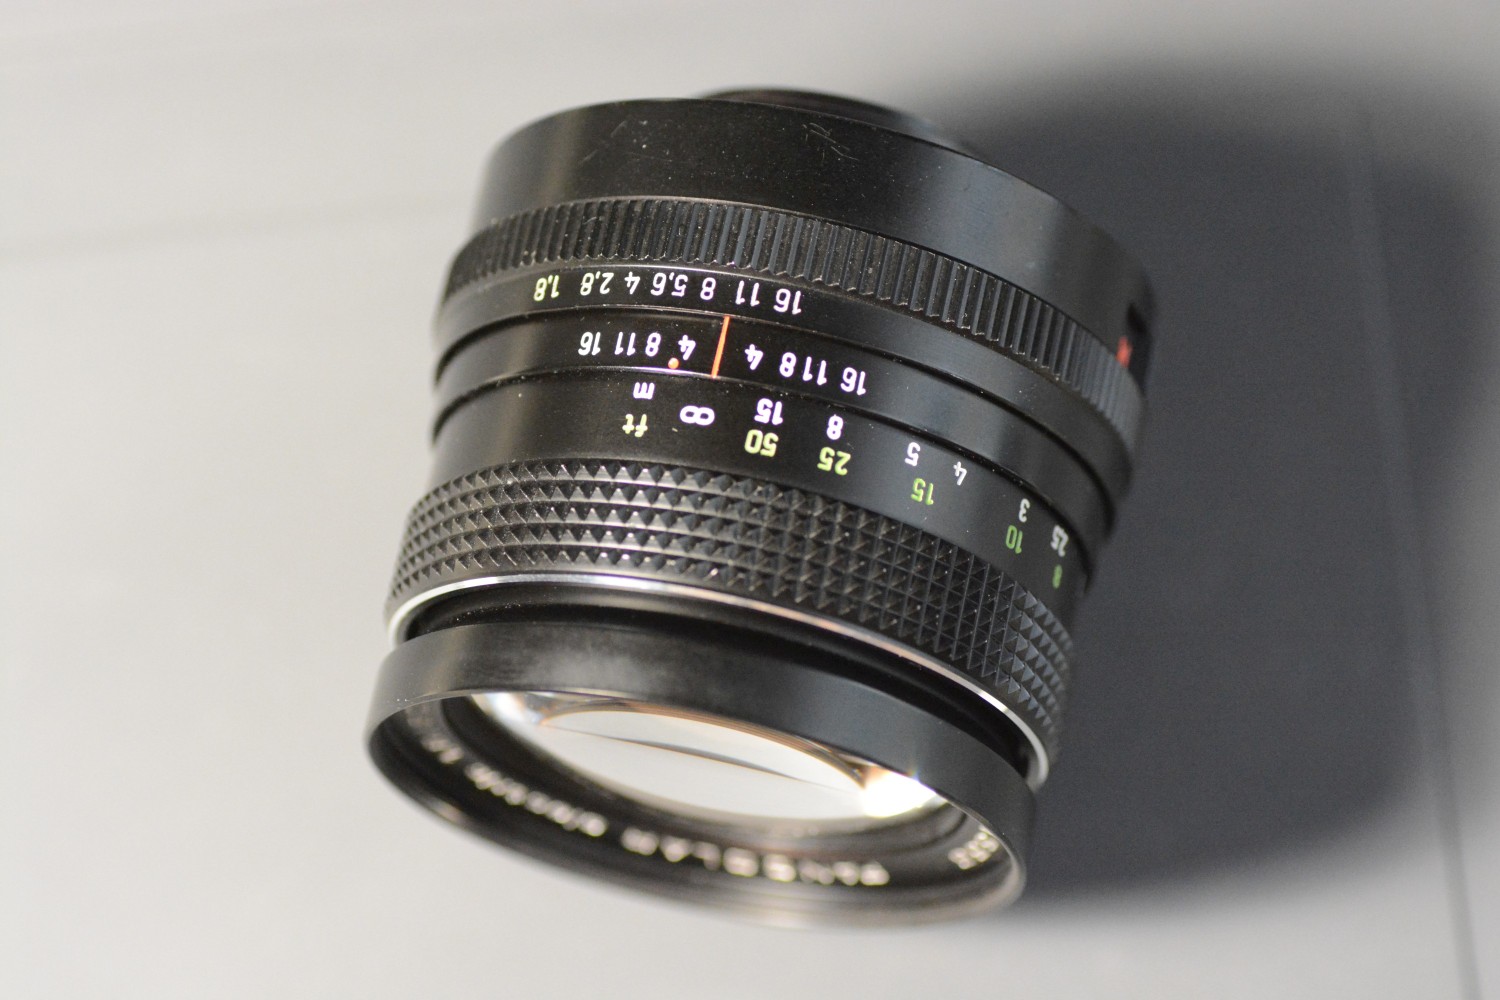
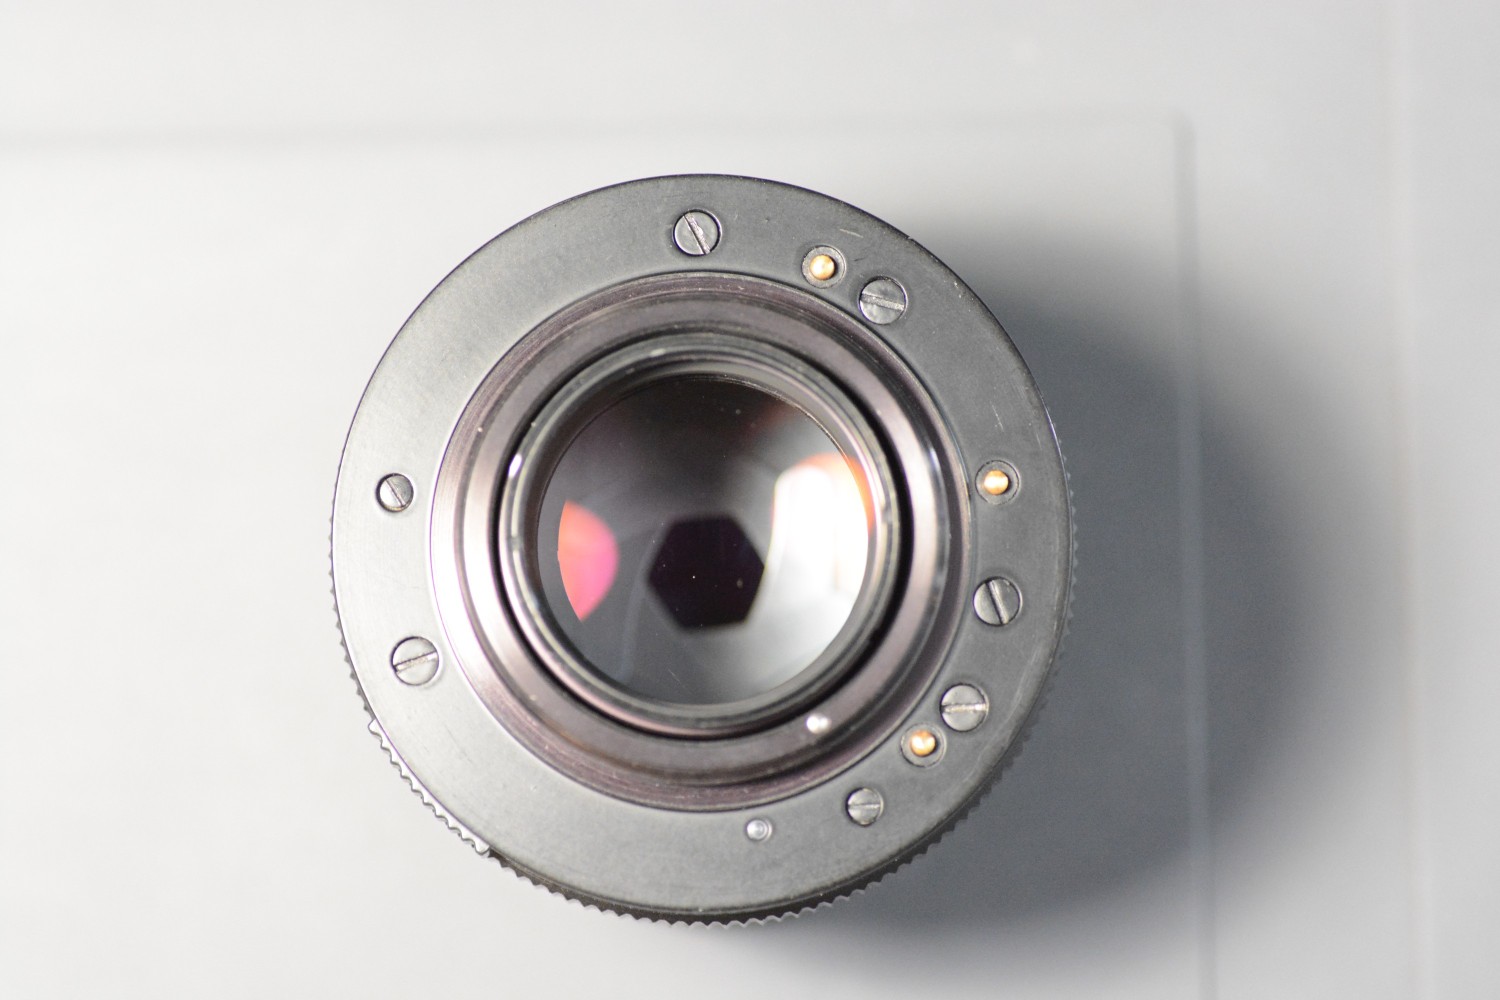
simplex wrote:
Finished #1
Finished #2

Finished #3
 |
|
| Back to top |
|
|
simplex
Joined: 09 Jan 2024
Posts: 18
Location: Germany
|
| Posted: Thu Jul 18, 2024 3:37 pm Post subject: My Pancolar 80 on my Sony. |
|
|
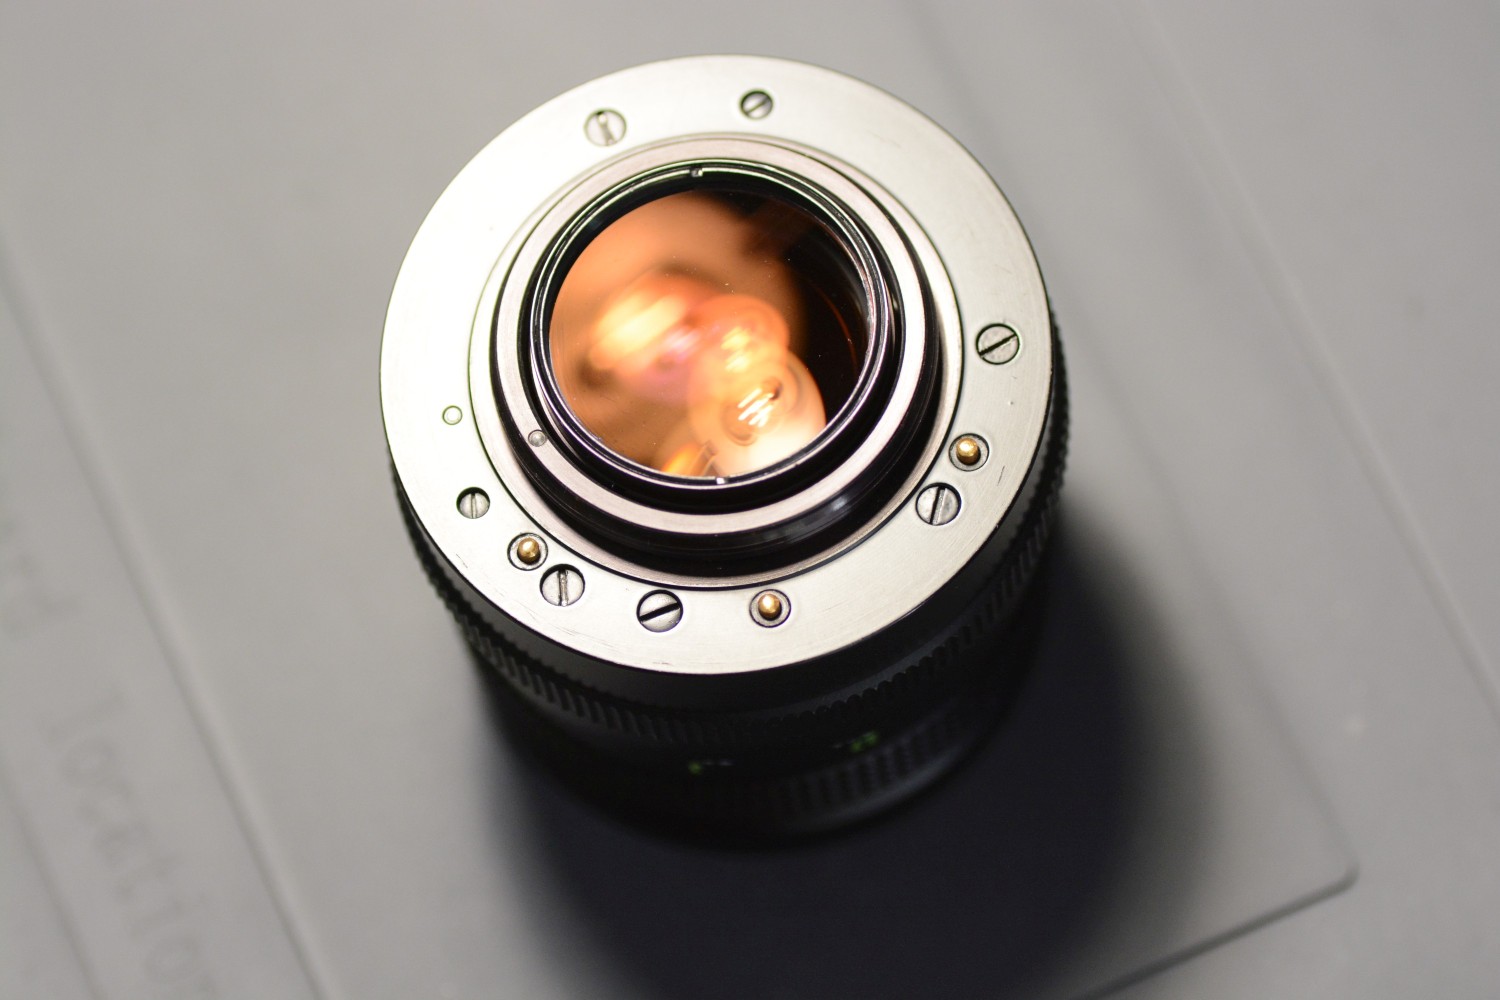
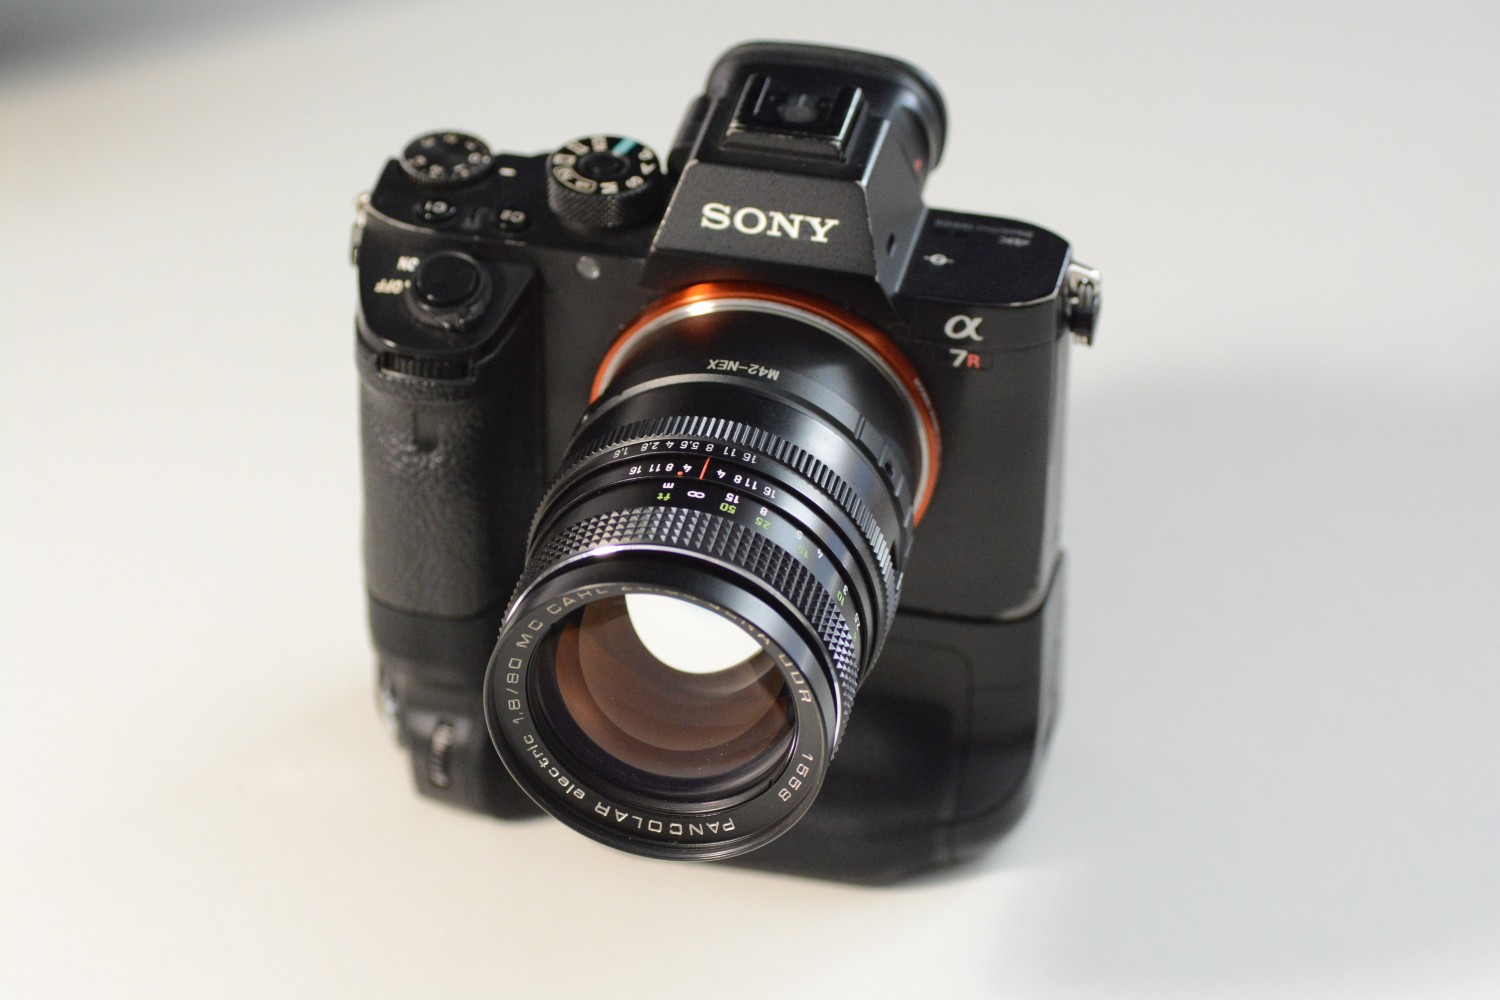
simplex wrote:
For the photos I used the full-spectrum LED lamp (around 4,000 Kelvin) which I also use for my repairs as well as general desk work. Given the yellowish reflections, I only can wonder whether there's some Thorium involved in the construction of this glass. Any ideas?

And this is how it looks like on my Sony A7R Mark 2. I already started to love this combo after a few dozen shots. Will post some sample images later to round this story up.
 |
|
| Back to top |
|
|
RokkorDoctor


Joined: 27 Nov 2021
Posts: 1438
Location: Kent, UK
Expire: 2025-05-01
|
| Posted: Thu Jul 18, 2024 4:10 pm Post subject: |
|
|
RokkorDoctor wrote:

_________________
Mark
SONY A7S, A7RII + dust-sealed modded Novoflex/Fotodiox/Rayqual MD-NEX adapters
Minolta SR-1, SRT-101/303, XD7/XD11, XGM, X700
Bronica SQAi
Ricoh GX100
Minolta majority of all Rokkor SR/AR/MC/MD models made
Sigma 14mm/3.5 for SR mount
Tamron SP 60B 300mm/2.8 (Adaptall)
Samyang T-S 24mm/3.5 (Nikon mount, DIY converted to SR mount)
Schneider-Kreuznach PC-Super-Angulon 28mm/2.8 (SR mount)
Bronica PS 35/40/50/65/80/110/135/150/180/200/250mm |
|
| Back to top |
|
|
visualopsins


Joined: 05 Mar 2009
Posts: 11067
Location: California
Expire: 2025-04-11
|
| Posted: Thu Jul 18, 2024 6:53 pm Post subject: |
|
|
visualopsins wrote:
Awesome work! Congrats! Thanks so much for sharing!
_________________
☮☮☮☮☮☮☮☮☮☮☮☮☮☮☮☮☮☮☮☮☮☮☮☮☮☮☮☮☮☮☮☮ like attracts like! ☮☮☮☮☮☮☮☮☮☮☮☮☮☮☮☮☮☮☮☮☮☮☮☮☮☮☮☮☮☮☮☮
Cameras: Sony ILCE-7RM2, Spotmatics II, F, and ESII, Nikon P4
Lenses:
M42 Asahi Optical Co., Takumar 1:4 f=35mm, 1:2 f=58mm (Sonnar), 1:2.4 f=58mm (Heliar), 1:2.2 f=55mm (Gaussian), 1:2.8 f=105mm (Model I), 1:2.8/105 (Model II), 1:5.6/200, Tele-Takumar 1:5.6/200, 1:6.3/300, Macro-Takumar 1:4/50, Auto-Takumar 1:2.3 f=35, 1:1.8 f=55mm, 1:2.2 f=55mm, Super-TAKUMAR 1:3.5/28 (fat), 1:2/35 (Fat), 1:1.4/50 (8-element), Super-Multi-Coated Fisheye-TAKUMAR 1:4/17, Super-Multi-Coated TAKUMAR 1:4.5/20, 1:3.5/24, 1:3.5/28, 1:2/35, 1:3.5/35, 1:1.8/85, 1:1.9/85 1:2.8/105, 1:3.5/135, 1:2.5/135 (II), 1:4/150, 1:4/200, 1:4/300, 1:4.5/500, Super-Multi-Coated Macro-TAKUMAR 1:4/50, 1:4/100, Super-Multi-Coated Bellows-TAKUMAR 1:4/100, SMC TAKUMAR 1:1.4/50, 1:1.8/55
M42 Carl Zeiss Jena Flektogon 2.4/35
Contax Carl Zeiss Vario-Sonnar T* 28-70mm F3.5-4.5
Pentax K-mount SMC PENTAX-A ZOOM 1:3.5 35~105mm, SMC PENTAX ZOOM 1:4 45~125mm
Nikon Micro-NIKKOR-P-C Auto 1:3.5 f=55mm, NIKKOR-P Auto 105mm f/2.5 Pre-AI (Sonnar), Micro-NIKKOR 105mm 1:4 AI, NIKKOR AI-S 35-135mm f/3,5-4,5
Tamron SP 17mm f/3.5 (51B), Tamron SP 17mm f/3.5 (151B), SP 500mm f/8 (55BB), SP 70-210mm f/3.5 (19AH)
Vivitar 100mm 1:2.8 MC 1:1 Macro Telephoto (Kiron)
|
|
| Back to top |
|
|
RokkorDoctor
Joined: 27 Nov 2021
Posts: 1438
Location: Kent, UK
Expire: 2025-05-01
|
| Posted: Thu Jul 18, 2024 8:24 pm Post subject: Re: My Pancolar 80 on my Sony. |
|
|
RokkorDoctor wrote:
| simplex wrote: |
For the photos I used the full-spectrum LED lamp (around 4,000 Kelvin) which I also use for my repairs as well as general desk work. Given the yellowish reflections, I only can wonder whether there's some Thorium involved in the construction of this glass. Any ideas?
[url=http://forum.mflenses.com/userpix/20247/big_12554_16_Any_Thorium_Inside___1.jpg]
|
Yellow reflections are not an indicator for thorium lenses; this is likely just a result of the chosen coating(s).
Thorium lenses, as they age can develop a warm, light yellow/amber hue when looking through them:
https://en.wikipedia.org/wiki/File:Yellowing_of_thorium_lenses.jpg
https://en.wikipedia.org/wiki/Thorium
_________________
Mark
SONY A7S, A7RII + dust-sealed modded Novoflex/Fotodiox/Rayqual MD-NEX adapters
Minolta SR-1, SRT-101/303, XD7/XD11, XGM, X700
Bronica SQAi
Ricoh GX100
Minolta majority of all Rokkor SR/AR/MC/MD models made
Sigma 14mm/3.5 for SR mount
Tamron SP 60B 300mm/2.8 (Adaptall)
Samyang T-S 24mm/3.5 (Nikon mount, DIY converted to SR mount)
Schneider-Kreuznach PC-Super-Angulon 28mm/2.8 (SR mount)
Bronica PS 35/40/50/65/80/110/135/150/180/200/250mm |
|
| Back to top |
|
|
simplex
Joined: 09 Jan 2024
Posts: 18
Location: Germany
|
| Posted: Fri Jul 19, 2024 11:51 am Post subject: Re: My Pancolar 80 on my Sony. |
|
|
simplex wrote:
| RokkorDoctor wrote: |
Yellow reflections are not an indicator for thorium lenses; this is likely just a result of the chosen coating(s).
Thorium lenses, as they age can develop a warm, light yellow/amber hue when looking through them: |
Thanks for clarifying! |
|
| Back to top |
|
|
simplex
Joined: 09 Jan 2024
Posts: 18
Location: Germany
|
| Posted: Fri Jul 19, 2024 12:02 pm Post subject: |
|
|
simplex wrote:
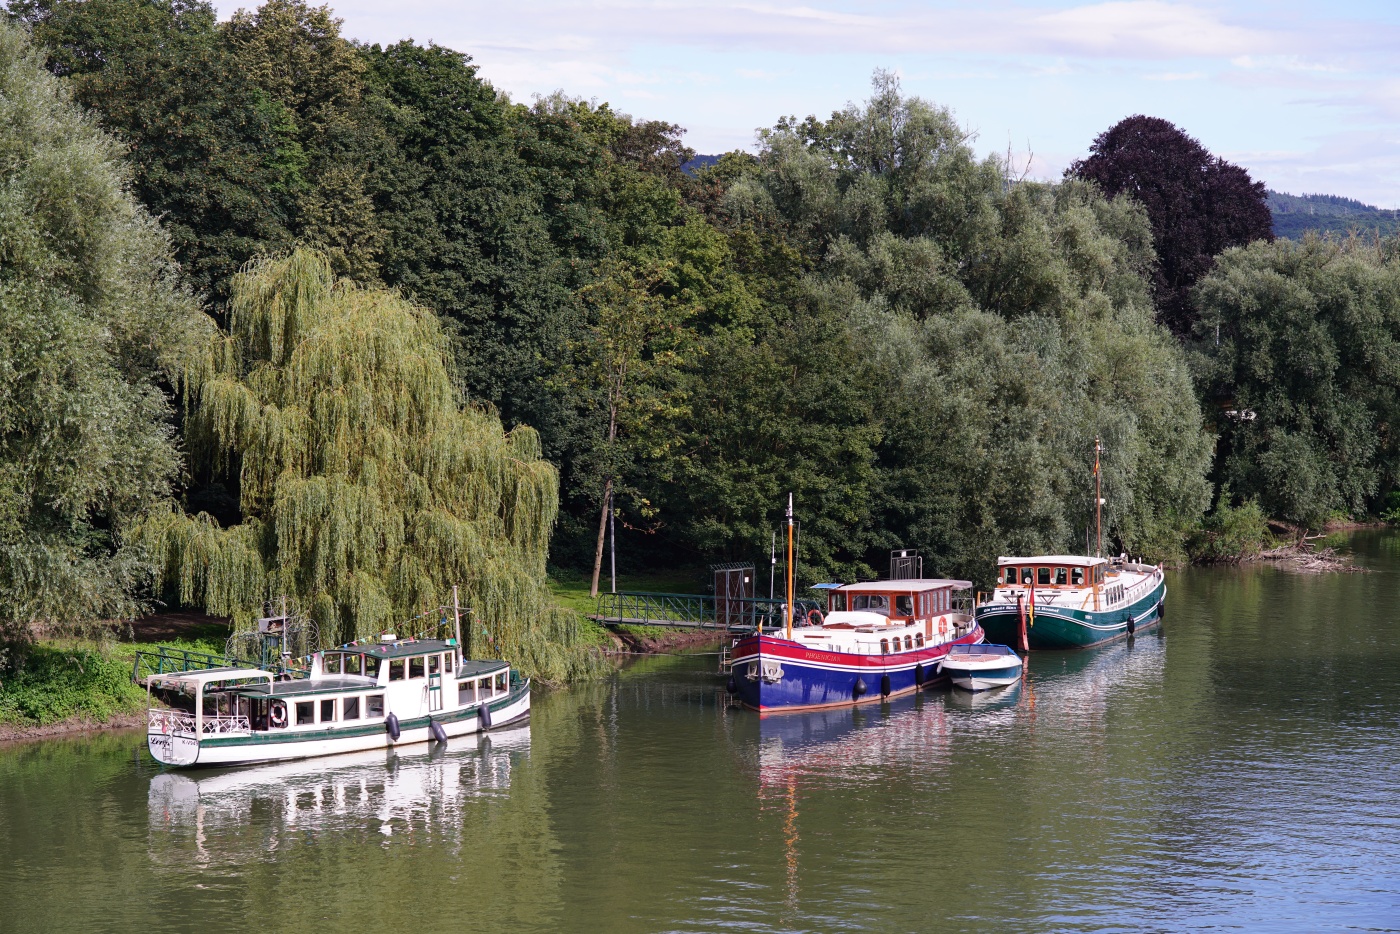
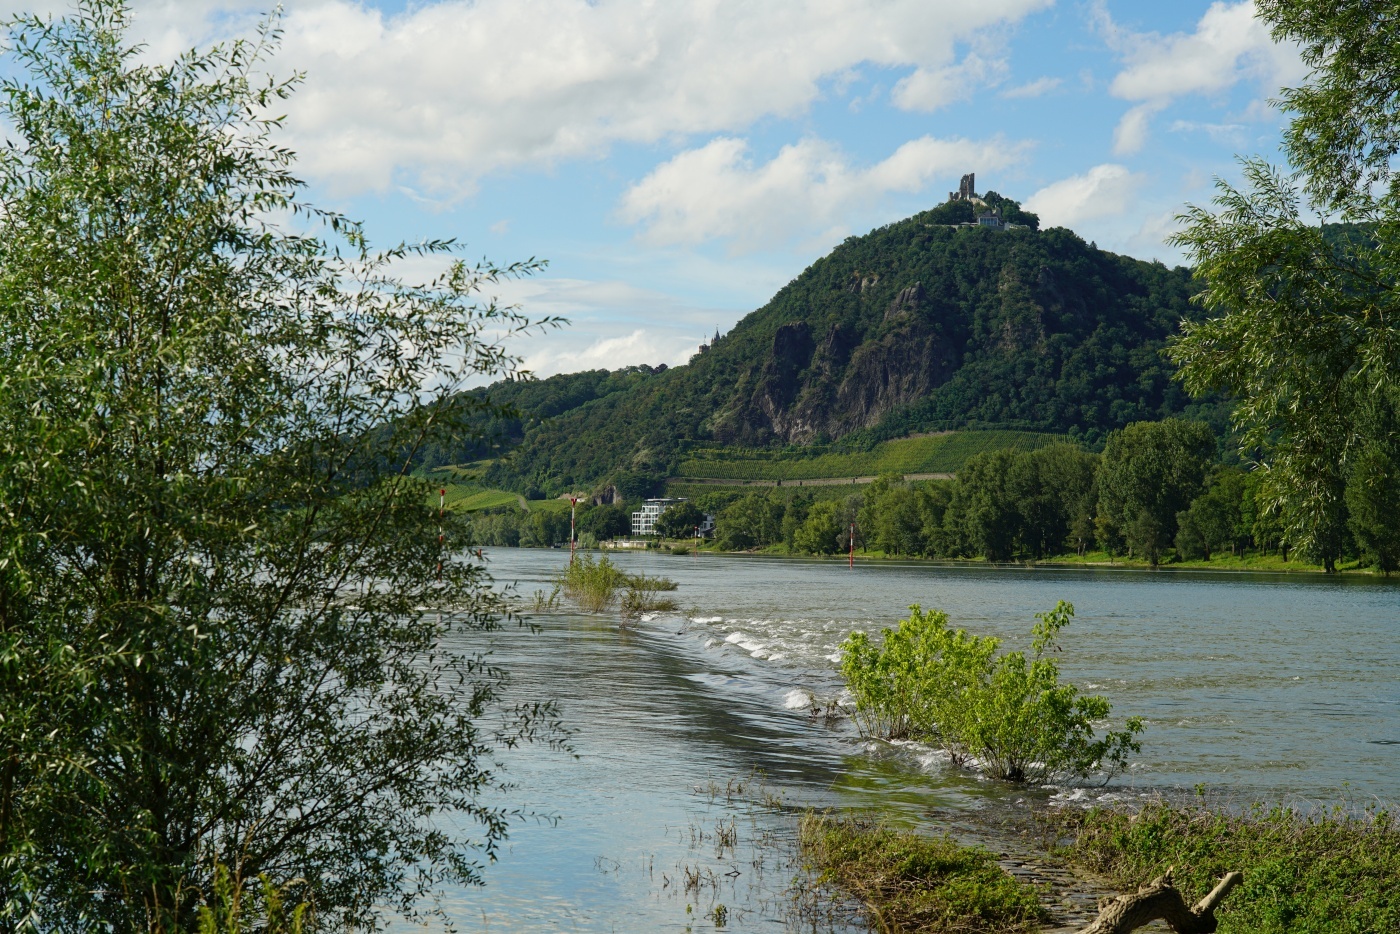
Just two simple landscape shots, a 20 minute walk away from my home, both at f8.
Some boats ...

Remains an ancient castle located at the peak of Drachenfels, on the Eastern shore of the Rhein (aka 'Rhine') River ...
Last edited by simplex on Fri Jul 19, 2024 12:15 pm; edited 1 time in total |
|
| Back to top |
|
|
simplex
Joined: 09 Jan 2024
Posts: 18
Location: Germany
|
| Posted: Fri Jul 19, 2024 12:05 pm Post subject: |
|
|
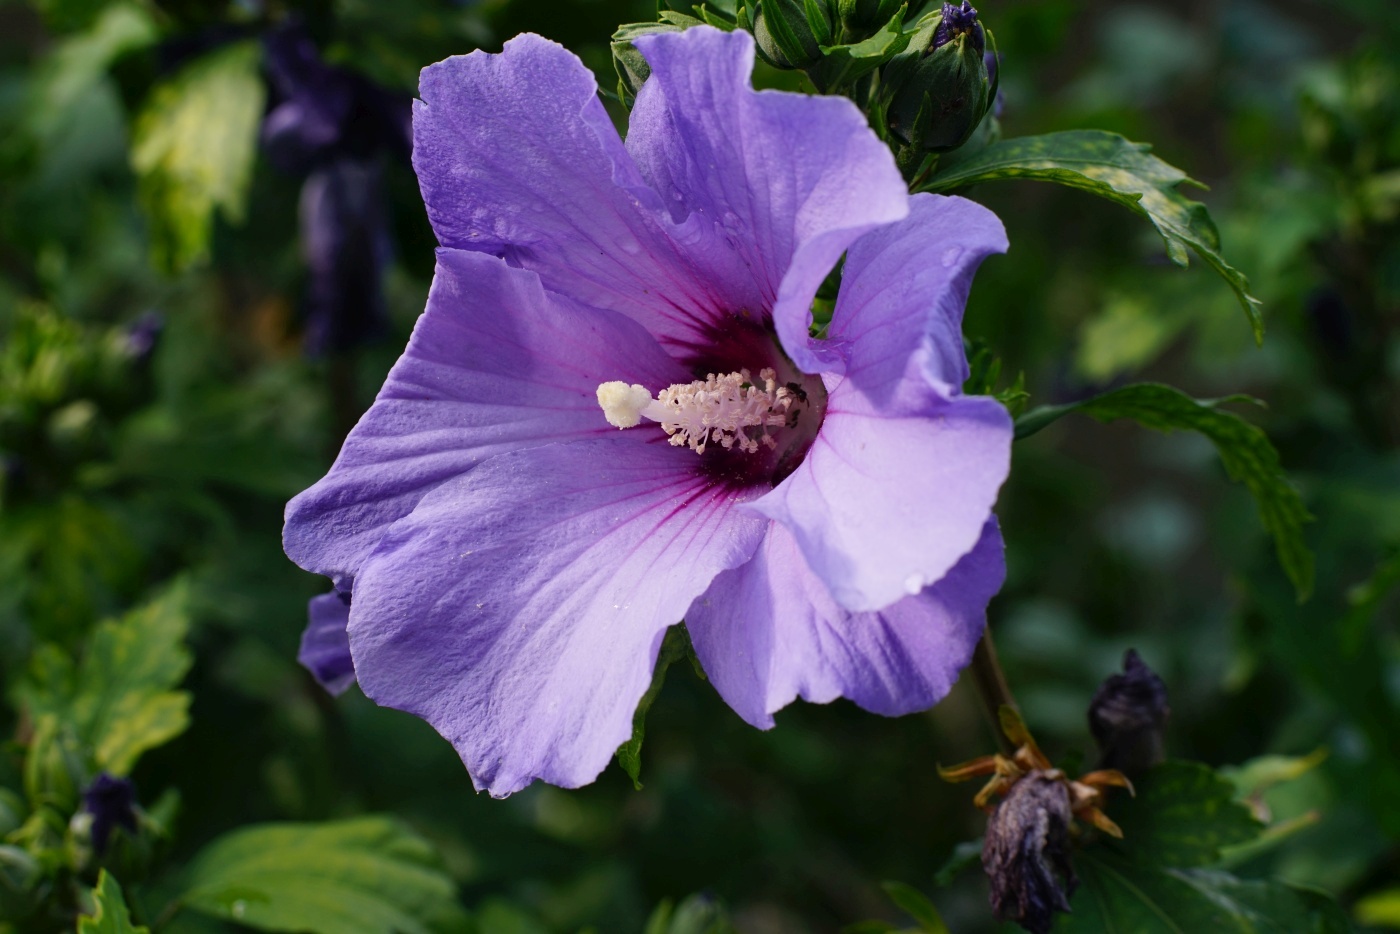
simplex wrote:
Some nice blossoms ... (no cropping and no extension tube used here, both around f16).
#1
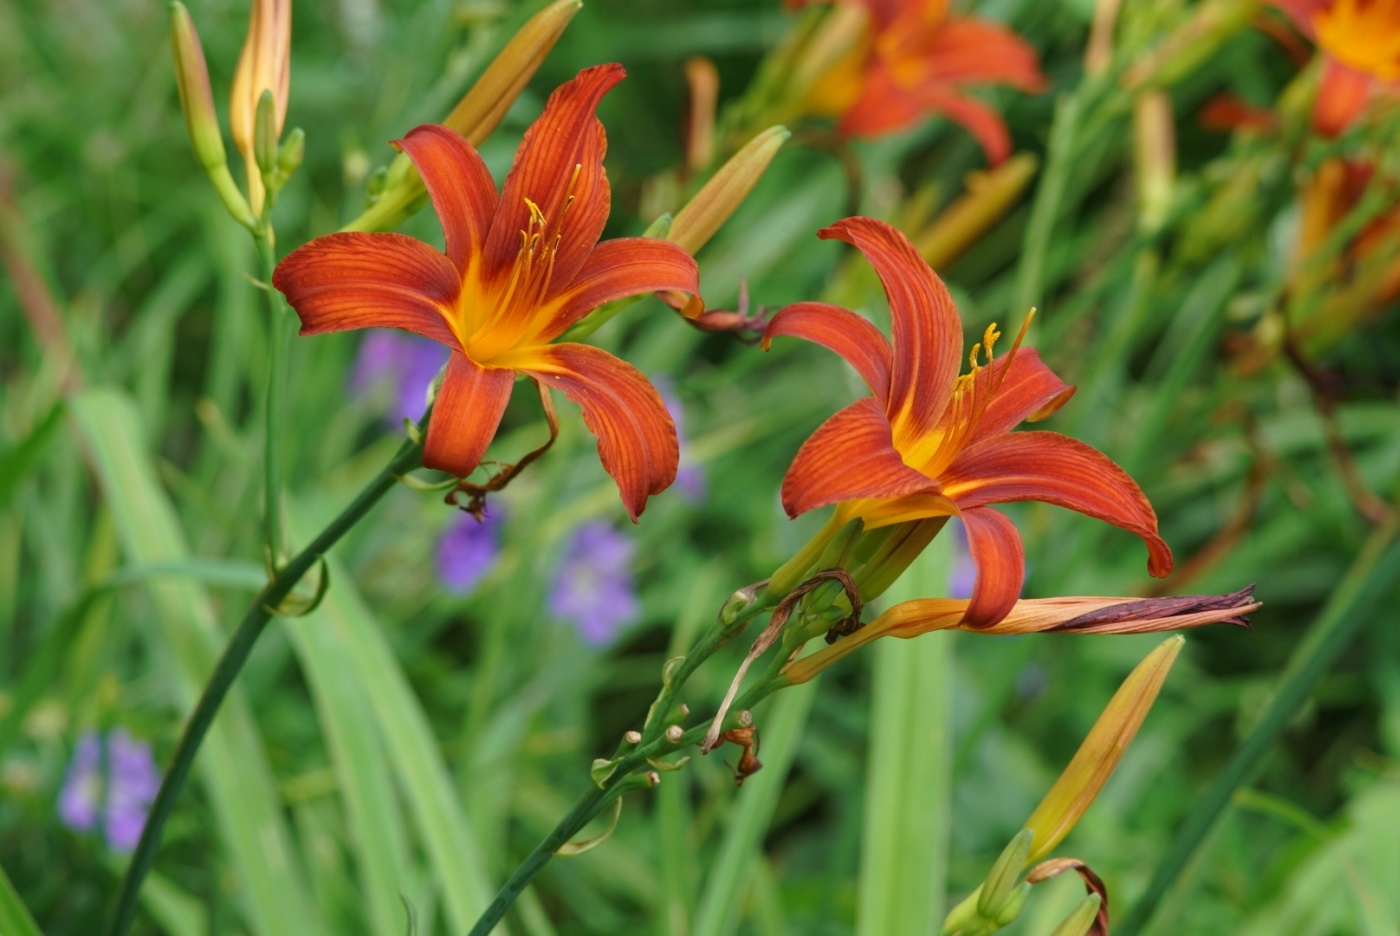
#2
Last edited by simplex on Fri Jul 19, 2024 12:15 pm; edited 1 time in total |
|
| Back to top |
|
|
simplex
Joined: 09 Jan 2024
Posts: 18
Location: Germany
|
| Posted: Fri Jul 19, 2024 12:09 pm Post subject: |
|
|
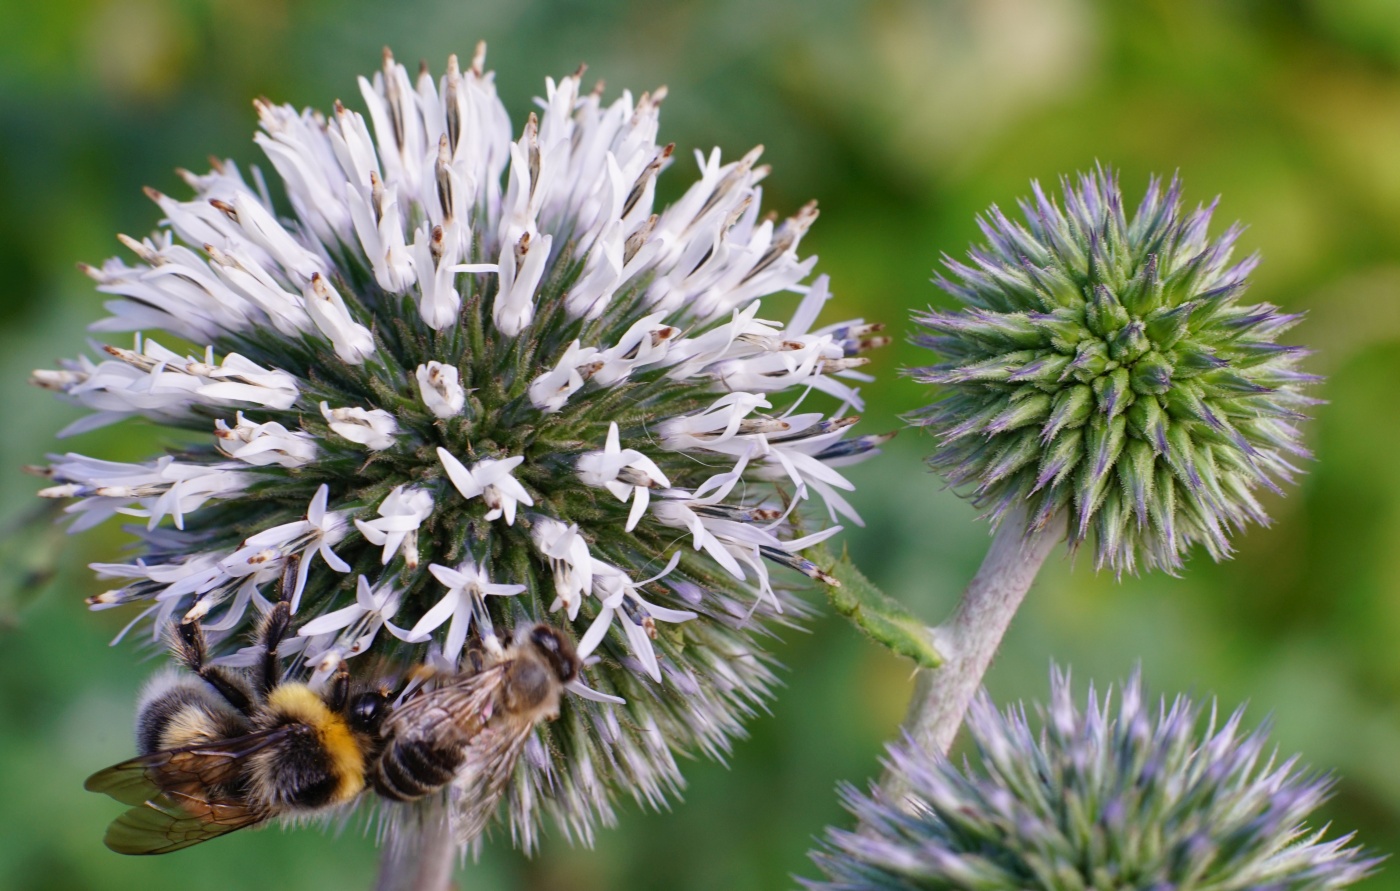
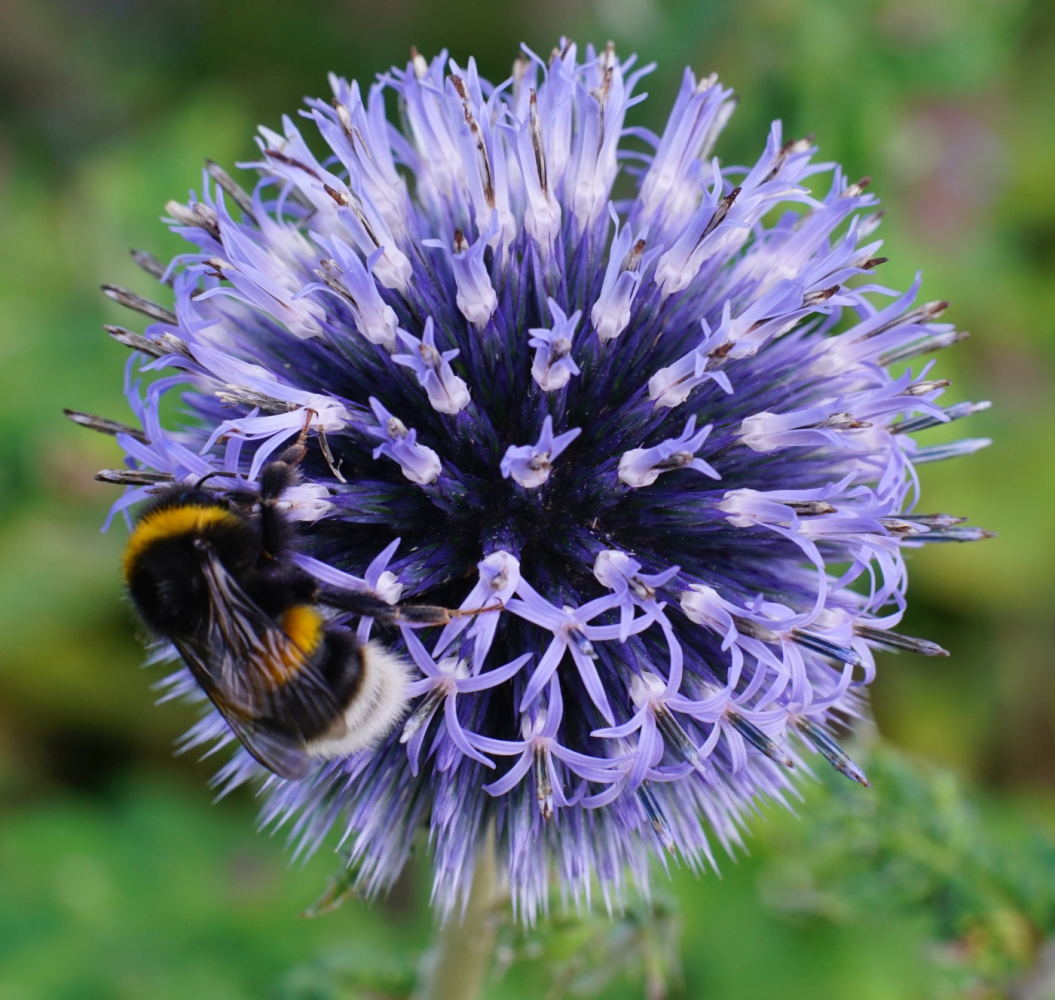
simplex wrote:
Lunchtime for our little neighbours ... I used a 20 mm extension tube here and cropped a little bit in post processing. Used f22 (minimum for this lens) for both shots to gain as much depth of field as possible, regardless any possible diffraction effects. It's hard enough to nail focus anyway.

Focus is not really ideal on that bumblebee, but this is the best out of a dozen shots I managed to get until the little guy was done and left.
 |
|
| Back to top |
|
|
stevemark
Joined: 29 Apr 2011
Posts: 4088
Location: Switzerland
|
| Posted: Fri Jul 19, 2024 1:36 pm Post subject: |
|
|
stevemark wrote:
Some background information here:
https://zeissikonveb.de/start/objektive/wechselobjektive-1970er/carl-zeiss-jena/pancolar-1-8-80.html
S
_________________
www.artaphot.ch |
|
| Back to top |
|
|
|
|
|
You cannot post new topics in this forum
You cannot reply to topics in this forum
You cannot edit your posts in this forum
You cannot delete your posts in this forum
You cannot vote in polls in this forum
|