| View previous topic :: View next topic |
| Author |
Message |
bychance

Joined: 24 Apr 2013
Posts: 345
Location: Kent, England
|
 Posted: Fri Mar 24, 2017 6:26 pm Post subject: Posted: Fri Mar 24, 2017 6:26 pm Post subject: |
 |
|
bychance wrote:
It is a nice example of an A1 Olivier, I got it off a dodgey sounding character on a manual lens forum some time ago, Lordy, Lewdly, Lanky or some such... It was for a student niece of mine but I gave her one of my eBay refurbs and kept this one for me. I don't feel in the least bit guilty  
_________________
I got where I am by avoiding where I was going.
Now where was I? |
|
| Back to top |
|
 |
Olivier


Joined: 18 Feb 2009
Posts: 5076
Location: France
Expire: 2015-08-06
|
| Posted: Fri Mar 24, 2017 6:51 pm Post subject: |
|
|
Olivier wrote:
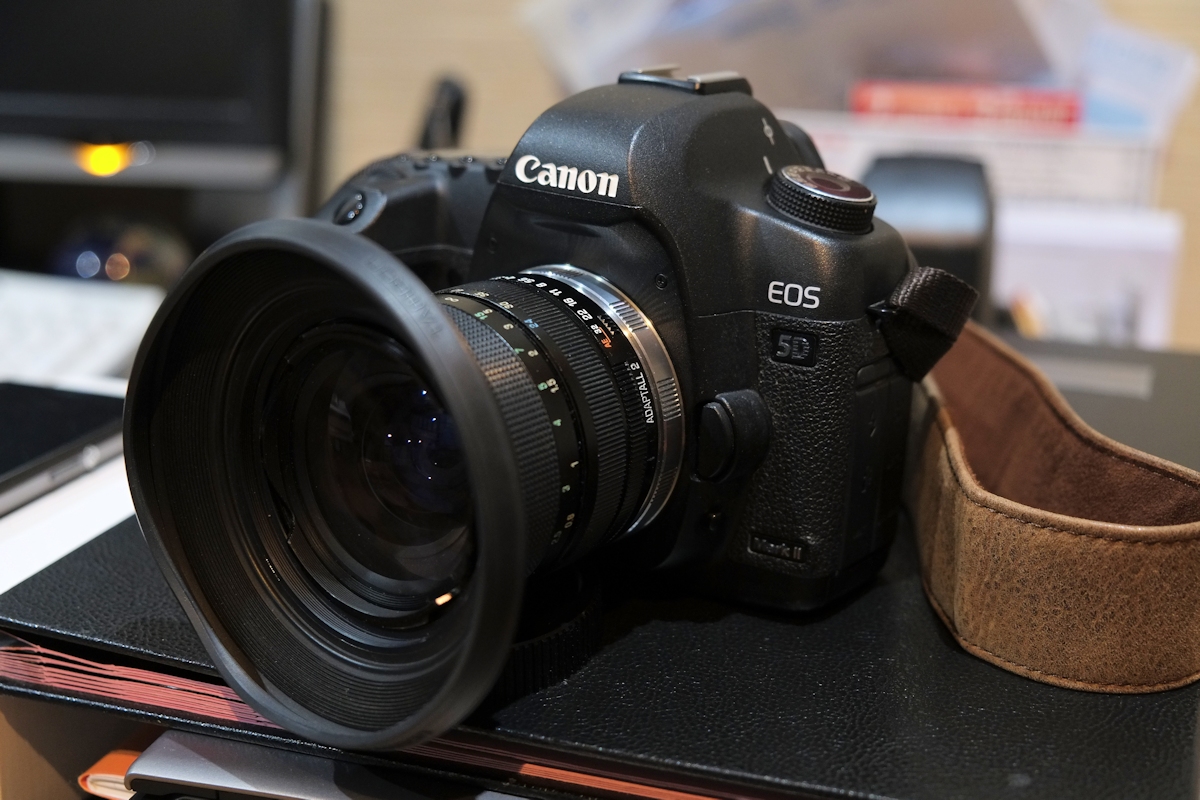
The Tamron rubber hood 25F for SP 35-80mm 01A fits the 24-48mm.
It has an outer ring screw.
Maybe too short, but it's better than nothing.
[Edit] : Maybe not too short as we can see the original here. It's a tulip one.
http://themanualphotographer.co.uk/tamron-adaptall-2-sp-24-48mm-f3-5-8-13a/sp24-48mm/
#1
#2

#3
_________________
Olivier - Moderator 
Dslr : Olympus Pen E-P2 - Fujifilm X-Pro2 - Canon 5D MkII.
SLr and MF lenses : for feedback and helping people, cameras and lenses I own : full list here http://forum.mflenses.com/viewtopic,p,1442740.html#1442740 |
|
| Back to top |
|
|
Oldhand

Joined: 01 Apr 2013
Posts: 5998
Location: Mid North Coast NSW - Australia
|
| Posted: Sat Mar 25, 2017 7:10 am Post subject: |
|
|
Oldhand wrote:
I think that you will get vignetting at 24mm in the corners with that lens hood.
Try it and see - it should work fine down to about 30mm or so
Better than nothing of course
T |
|
| Back to top |
|
|
Olivier
Joined: 18 Feb 2009
Posts: 5076
Location: France
Expire: 2015-08-06
|
| Posted: Sat Mar 25, 2017 2:43 pm Post subject: |
|
|
Olivier wrote:
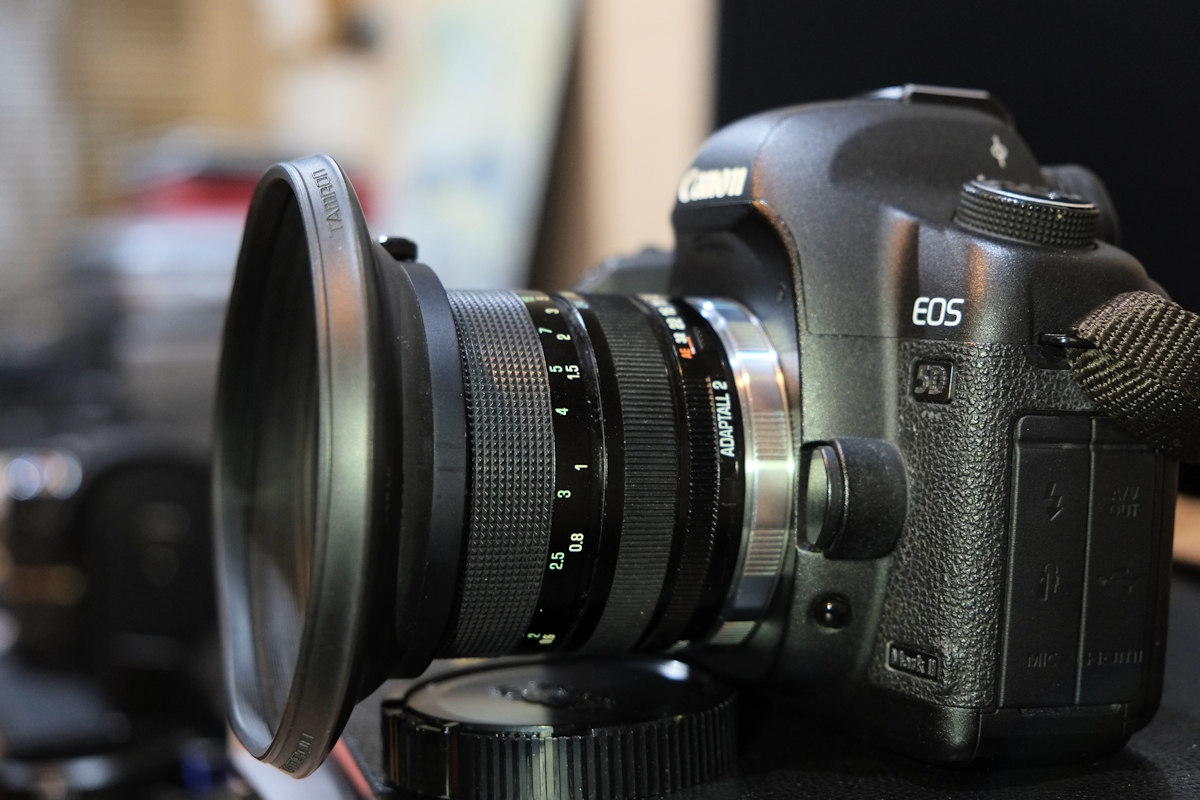
I've just tried with the 5D full format.
No vignetting at all at 24mm and further.
Flare is reduced but still there at +30° and -30° facing the light.
_________________
Olivier - Moderator
Dslr : Olympus Pen E-P2 - Fujifilm X-Pro2 - Canon 5D MkII.
SLr and MF lenses : for feedback and helping people, cameras and lenses I own : full list here http://forum.mflenses.com/viewtopic,p,1442740.html#1442740 |
|
| Back to top |
|
|
cooltouch

Joined: 15 Jan 2009
Posts: 9096
Location: Houston, Texas
|
| Posted: Sat Mar 25, 2017 3:46 pm Post subject: |
|
|
cooltouch wrote:
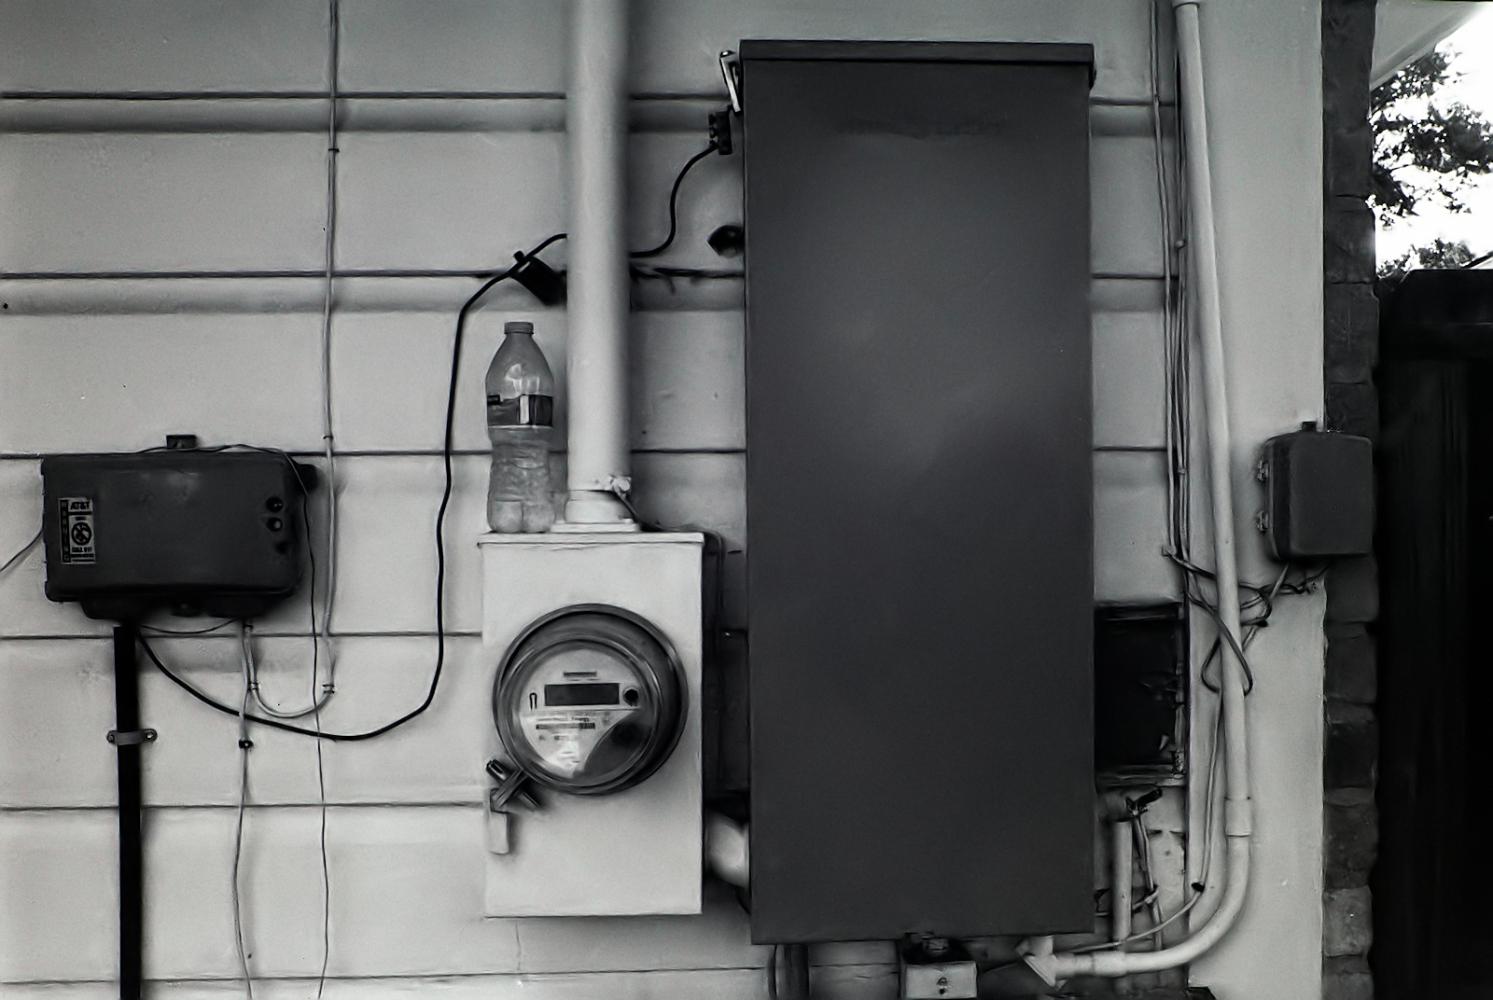
When this thread popped up again, it reminded me that I owed this thread a few pics.
These were shot with the Tamron 24-48 on my Pentax MX. Tri-X souped in D-76. I don't understand why these pics are so grainy. Usually Tri-X in D-76 doesn't have this much grain. But oh well, it is what it is. Isn't film fun!


Here's a shot of my MX with the 24-48 attached. I actually took the pic to show that a Canon eyecup fits a Pentax viewfinder eyepiece just fine. And it does. It's permanently affixed to my MX now.

_________________
Michael
My Gear List: http://michaelmcbroom.com/photo/gear.html
My Gallery: http://michaelmcbroom.com/gallery3/index.php/
My Flickr Page: https://www.flickr.com/photos/11308754@N08/albums
My Music: https://soundcloud.com/michaelmcbroom/albums
My Blog: http://michaelmcbroom.com/blogistan/ |
|
| Back to top |
|
|
tb_a

Joined: 26 Jan 2010
Posts: 3678
Location: Austria
Expire: 2019-08-28
|
| Posted: Sat Mar 25, 2017 4:30 pm Post subject: |
|
|
tb_a wrote:
Michael, I hope you don't mind, but I've applied the newest version of "Neat Image" (automatic setting) on your first picture just to see what it can do:
_________________
Thomas Bernardy
Manual focus lenses mainly from Minolta, Pentax, Voigtlaender, Leitz, Topcon and from Russia (too many to be listed here). |
|
| Back to top |
|
|
cooltouch
Joined: 15 Jan 2009
Posts: 9096
Location: Houston, Texas
|
| Posted: Sat Mar 25, 2017 4:51 pm Post subject: |
|
|
cooltouch wrote:
Hey Thomas, I d/l'd a demo copy of Neat Image recently and have played around with it some. It's a nice tool. Most often when I de-noise a photo, I use Topaz DeNoise. It works as well as most any others I've seen. Here's the same pic after I passed it through Topaz's DeNoise plugin:

Is there much of a difference? Eh, maybe a little, but not enough for me to worry about.
BTW, the reason why I uploaded the unprocessed images was because I wanted to show them "as is," without additional processing, as they would appear if I had printed them out on an enlarger.
_________________
Michael
My Gear List: http://michaelmcbroom.com/photo/gear.html
My Gallery: http://michaelmcbroom.com/gallery3/index.php/
My Flickr Page: https://www.flickr.com/photos/11308754@N08/albums
My Music: https://soundcloud.com/michaelmcbroom/albums
My Blog: http://michaelmcbroom.com/blogistan/ |
|
| Back to top |
|
|
tb_a
Joined: 26 Jan 2010
Posts: 3678
Location: Austria
Expire: 2019-08-28
|
| Posted: Sat Mar 25, 2017 5:27 pm Post subject: |
|
|
tb_a wrote:
| cooltouch wrote: |
| Is there much of a difference? |
Not really. Topaz seems to be fine as well. Is it likewise easy to apply or is manual tweaking necessary?
_________________
Thomas Bernardy
Manual focus lenses mainly from Minolta, Pentax, Voigtlaender, Leitz, Topcon and from Russia (too many to be listed here). |
|
| Back to top |
|
|
Olivier
Joined: 18 Feb 2009
Posts: 5076
Location: France
Expire: 2015-08-06
|
| Posted: Sat Mar 25, 2017 5:31 pm Post subject: |
|
|
Olivier wrote:
It seems to me that Neat Image is sharper.
But they're impressive, both of them.
_________________
Olivier - Moderator
Dslr : Olympus Pen E-P2 - Fujifilm X-Pro2 - Canon 5D MkII.
SLr and MF lenses : for feedback and helping people, cameras and lenses I own : full list here http://forum.mflenses.com/viewtopic,p,1442740.html#1442740 |
|
| Back to top |
|
|
cooltouch
Joined: 15 Jan 2009
Posts: 9096
Location: Houston, Texas
|
| Posted: Sat Mar 25, 2017 11:18 pm Post subject: |
|
|
cooltouch wrote:
Yes, the Neater Image version does appear to be a bit sharper. But the Topaz plugin also has sharpening and anti-blur controls. I was conservative with both, fearing artifacts if I cranked it up too far.
Thomas, the Topaz plugin is dead simple to use. Much easier than Noise Ninja, which I've always considered to be "just ok." I click on a preset value that determines the amount of correction to apply, and then if I want to adjust any of the settings, I can, but with the exception of slightly tweaking the sharpening and blur controls I usually leave it alone.
_________________
Michael
My Gear List: http://michaelmcbroom.com/photo/gear.html
My Gallery: http://michaelmcbroom.com/gallery3/index.php/
My Flickr Page: https://www.flickr.com/photos/11308754@N08/albums
My Music: https://soundcloud.com/michaelmcbroom/albums
My Blog: http://michaelmcbroom.com/blogistan/ |
|
| Back to top |
|
|
Herbert
Joined: 07 Sep 2023
Posts: 26
|
| Posted: Thu Sep 07, 2023 10:39 am Post subject: |
|
|
Herbert wrote:
Hello to all,
First post! I am using the Tamron 24-48 on a Panasonic S5 and I NEED to screw filters on!
The backstory: I had the S5 modified to full spectrum - the hotmirror in front of the sensor was removed.
https://www.youtube.com/watch?v=A64IRljvEaY
This also gives better results with vintage lenses calculated for celluloid,
as the light does not need to go through a sometimes
thick stack of glass before hitting the film / sensor plane.
https://www.lensrentals.com/blog/2014/07/sensor-stack-thickness-part-iii-the-summary/
I am using step up rings to adapt the 82mm filters to my manual lens collection.
So I cannot use the hood.
Got a step-up ring that could probably be pressed on the Tamron 24-48 with a lot of force and stay there.
Or even find a way to freeze the step up ring down to -200 degress ceslsius (it should shrink about 0.2 mm) and put it on the front.
Anyway, I assume both methods need the Tamron 24-48 to be disassembled.
It looks like the front is part of the barrel / tube and not an extra ring.
Can this barrel be removed without misaligning everything?
Are there service manuals available?
All the best,
many thanks,
Herbert |
|
| Back to top |
|
|
Slalom


Joined: 10 Dec 2017
Posts: 157
Location: Stourbridge
|
| Posted: Thu Sep 07, 2023 10:59 am Post subject: |
|
|
Slalom wrote:
Hi the lens has a 77mm filter ring. Source:
http://www.adaptall-2.com/lenses/13A.html |
|
| Back to top |
|
|
stevemark
Joined: 29 Apr 2011
Posts: 3814
Location: Switzerland
|
| Posted: Thu Sep 07, 2023 11:31 am Post subject: |
|
|
stevemark wrote:
The lens itself has a metal front bar which is shaped like a tulip (see iameg at adaptall-2.com). The 77 mm filter thread is found on the plastic sun shade, not on the lens itself.
S
_________________
www.artaphot.ch |
|
| Back to top |
|
|
Herbert
Joined: 07 Sep 2023
Posts: 26
|
| Posted: Thu Sep 07, 2023 9:08 pm Post subject: |
|
|
Herbert wrote:
Not really - a 58mm step up ring could fit into the tulip-shaped metal front bar
if Tamron had decided to mill helical steps inside the tulip.
I think in some forum someone tried to attach a filter
not realising that what looks like a thread inside the tulip isn't a thread at all. |
|
| Back to top |
|
|
D1N0

Joined: 07 Aug 2012
Posts: 2526
|
| Posted: Fri Sep 08, 2023 9:14 pm Post subject: |
|
|
D1N0 wrote:
Right It's 55mm but noting will thread in because the grooves run parallel, they don't spiral.
_________________
pentaxian |
|
| Back to top |
|
|
visualopsins

Joined: 05 Mar 2009
Posts: 10873
Location: California
Expire: 2025-04-11
|
| Posted: Fri Sep 08, 2023 9:29 pm Post subject: |
|
|
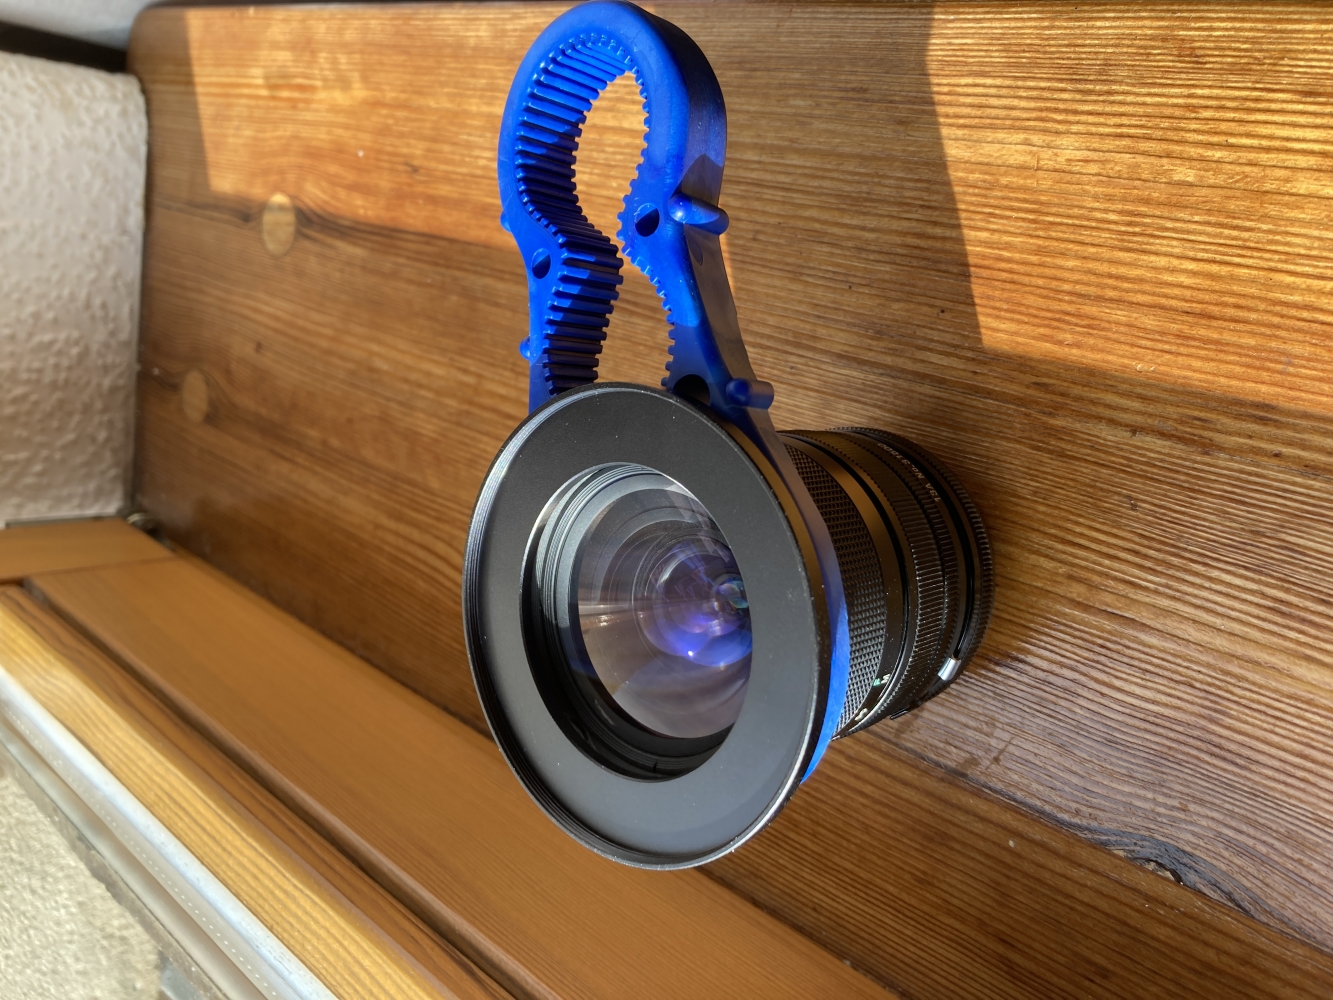
visualopsins wrote:
Clamp on...
_________________
☮☮☮☮☮☮☮☮☮☮☮☮☮☮☮☮☮☮☮☮☮☮☮☮☮☮☮☮☮☮☮☮ like attracts like! ☮☮☮☮☮☮☮☮☮☮☮☮☮☮☮☮☮☮☮☮☮☮☮☮☮☮☮☮☮☮☮☮
Cameras: Sony ILCE-7RM2, Spotmatics II, F, and ESII, Nikon P4
Lenses:
M42 Asahi Optical Co., Takumar 1:4 f=35mm, 1:2 f=58mm (Sonnar), 1:2.4 f=58mm (Heliar), 1:2.2 f=55mm (Gaussian), 1:2.8 f=105mm (Model I), 1:2.8/105 (Model II), 1:5.6/200, Tele-Takumar 1:5.6/200, 1:6.3/300, Macro-Takumar 1:4/50, Auto-Takumar 1:2.3 f=35, 1:1.8 f=55mm, 1:2.2 f=55mm, Super-TAKUMAR 1:3.5/28 (fat), 1:2/35 (Fat), 1:1.4/50 (8-element), Super-Multi-Coated Fisheye-TAKUMAR 1:4/17, Super-Multi-Coated TAKUMAR 1:4.5/20, 1:3.5/24, 1:3.5/28, 1:2/35, 1:3.5/35, 1:1.8/85, 1:1.9/85 1:2.8/105, 1:3.5/135, 1:2.5/135 (II), 1:4/150, 1:4/200, 1:4/300, 1:4.5/500, Super-Multi-Coated Macro-TAKUMAR 1:4/50, 1:4/100, Super-Multi-Coated Bellows-TAKUMAR 1:4/100, SMC TAKUMAR 1:1.4/50, 1:1.8/55
M42 Carl Zeiss Jena Flektogon 2.4/35
Contax Carl Zeiss Vario-Sonnar T* 28-70mm F3.5-4.5
Pentax K-mount SMC PENTAX-A ZOOM 1:3.5 35~105mm, SMC PENTAX ZOOM 1:4 45~125mm
Nikon Micro-NIKKOR-P-C Auto 1:3.5 f=55mm, NIKKOR-P Auto 105mm f/2.5 Pre-AI (Sonnar), Micro-NIKKOR 105mm 1:4 AI, NIKKOR AI-S 35-135mm f/3,5-4,5
Tamron SP 17mm f/3.5 (51B), Tamron SP 17mm f/3.5 (151B), SP 500mm f/8 (55BB), SP 70-210mm f/3.5 (19AH)
Vivitar 100mm 1:2.8 MC 1:1 Macro Telephoto (Kiron)
|
|
| Back to top |
|
|
Herbert
Joined: 07 Sep 2023
Posts: 26
|
| Posted: Mon Oct 02, 2023 11:29 am Post subject: |
|
|
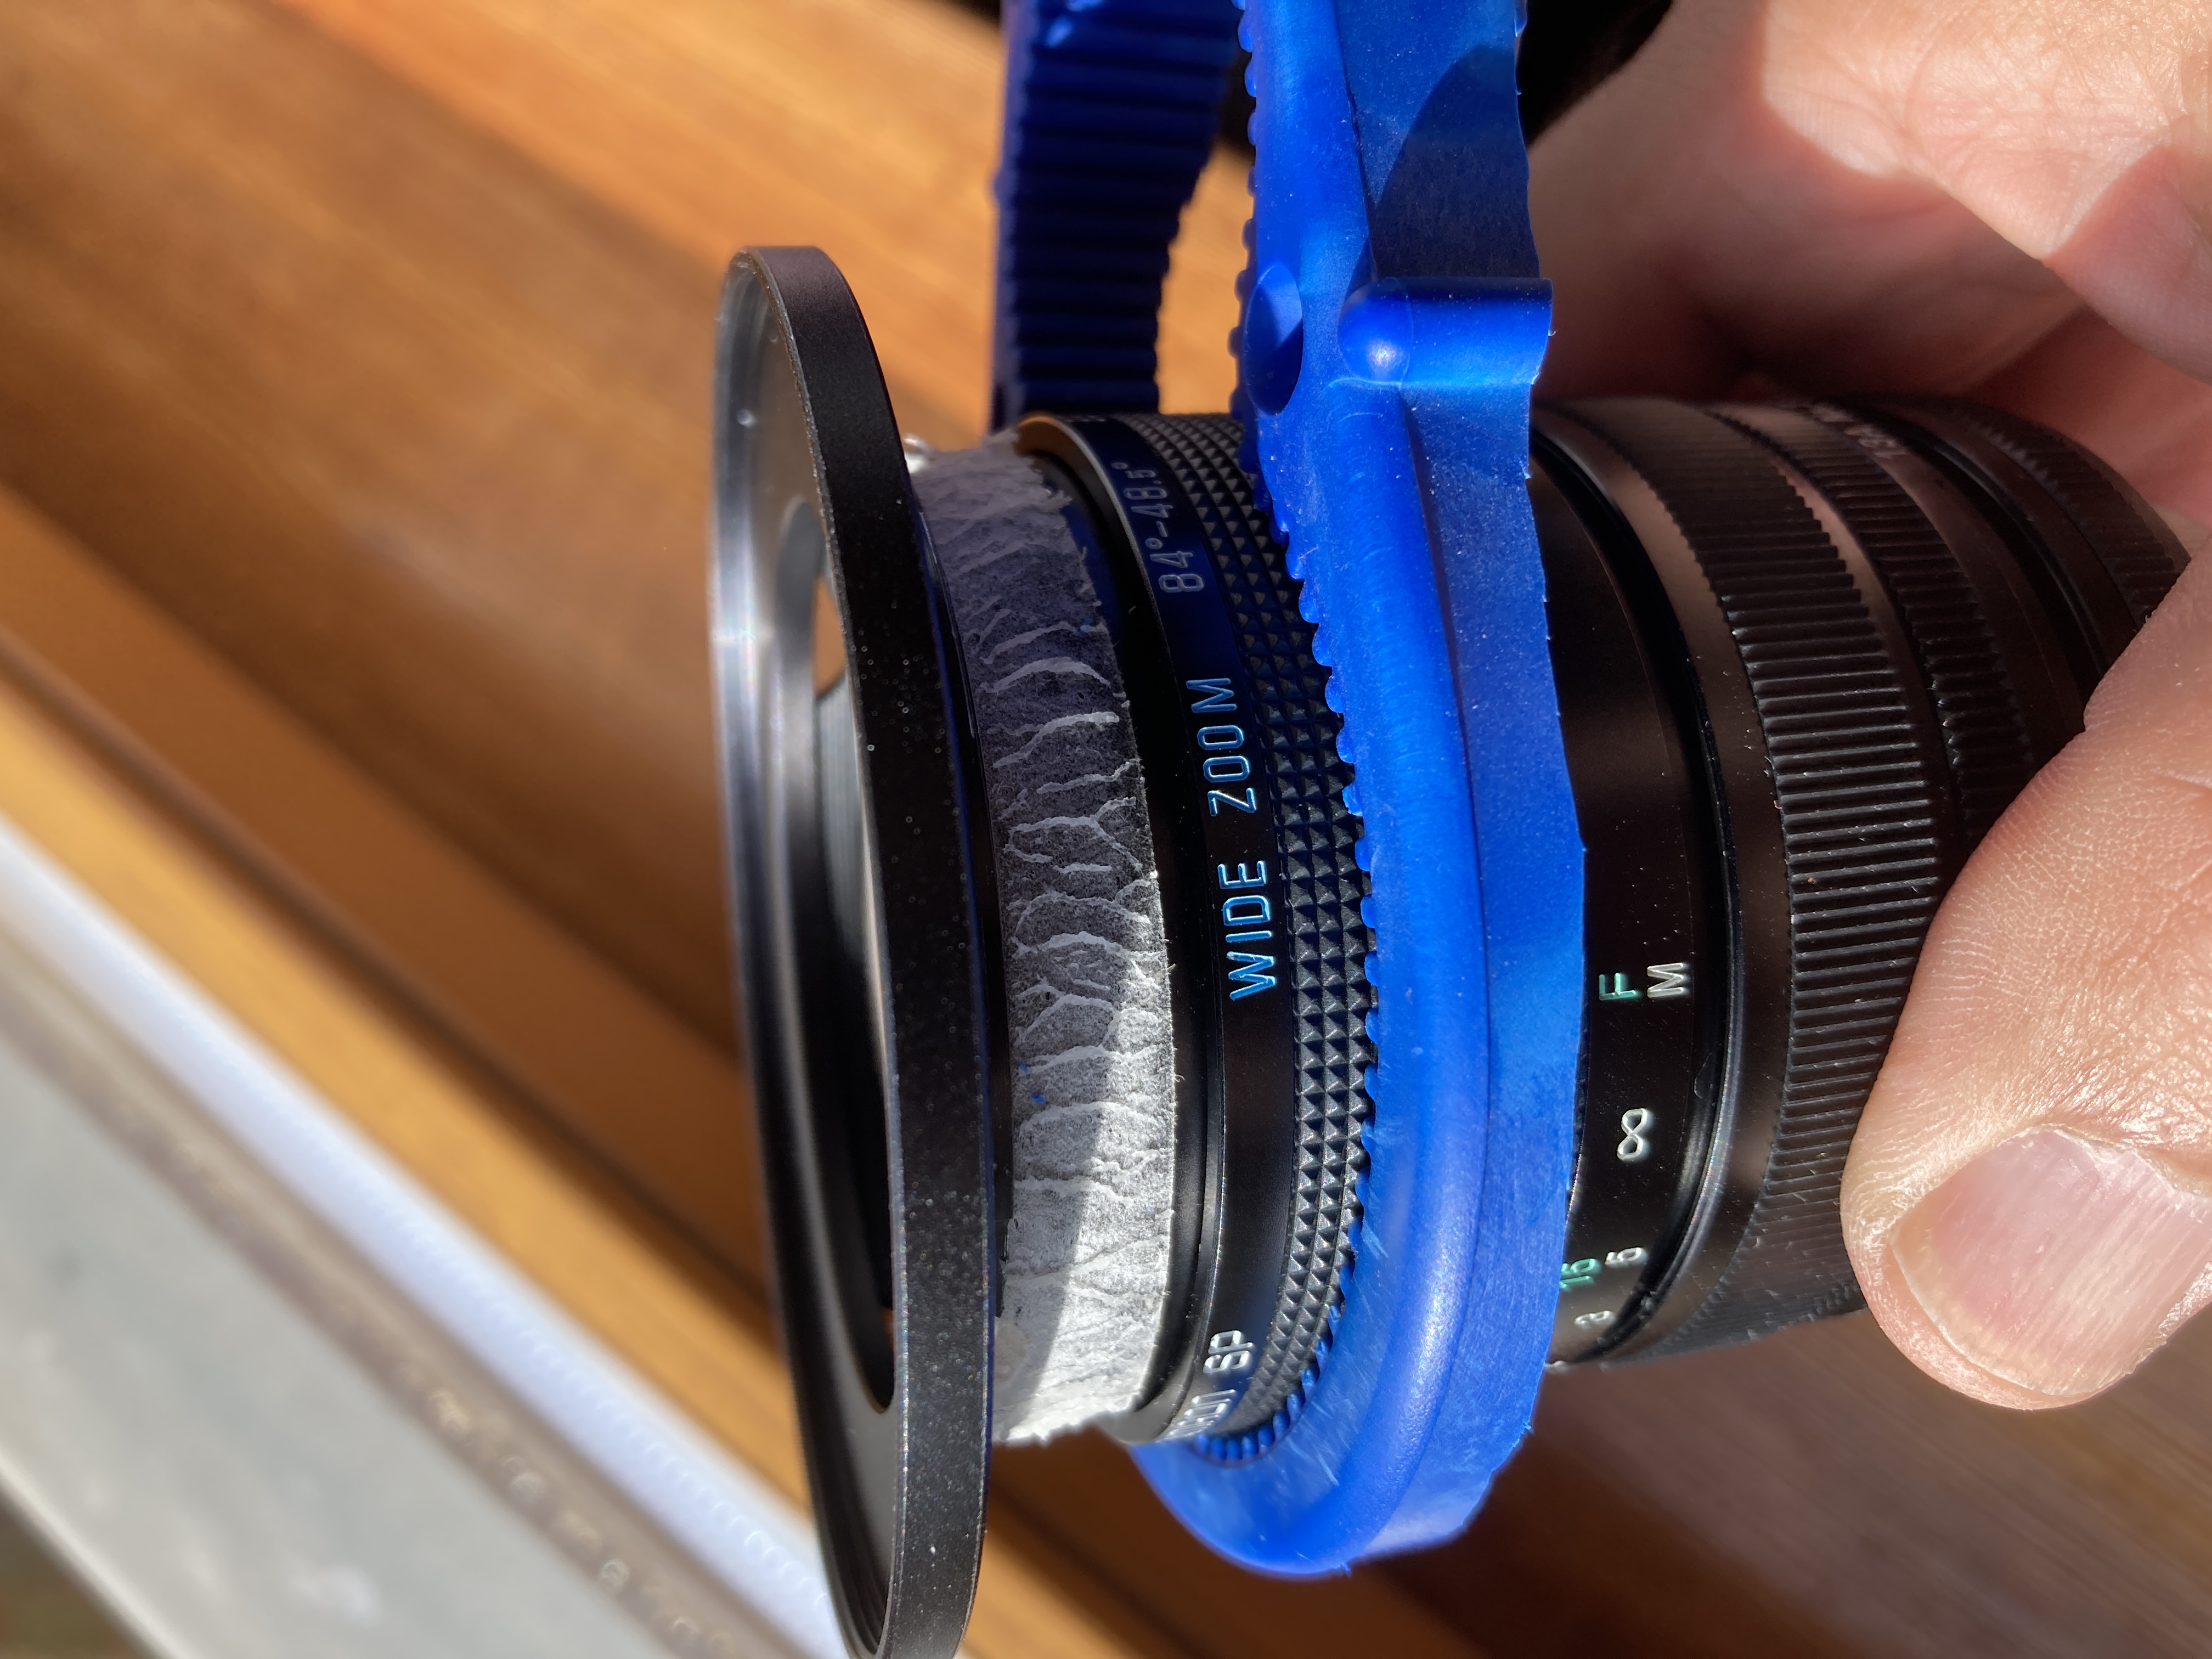
Herbert wrote:
| D1N0 wrote: |
| Right It's 55mm but noting will thread in because the grooves run parallel, they don't spiral. |
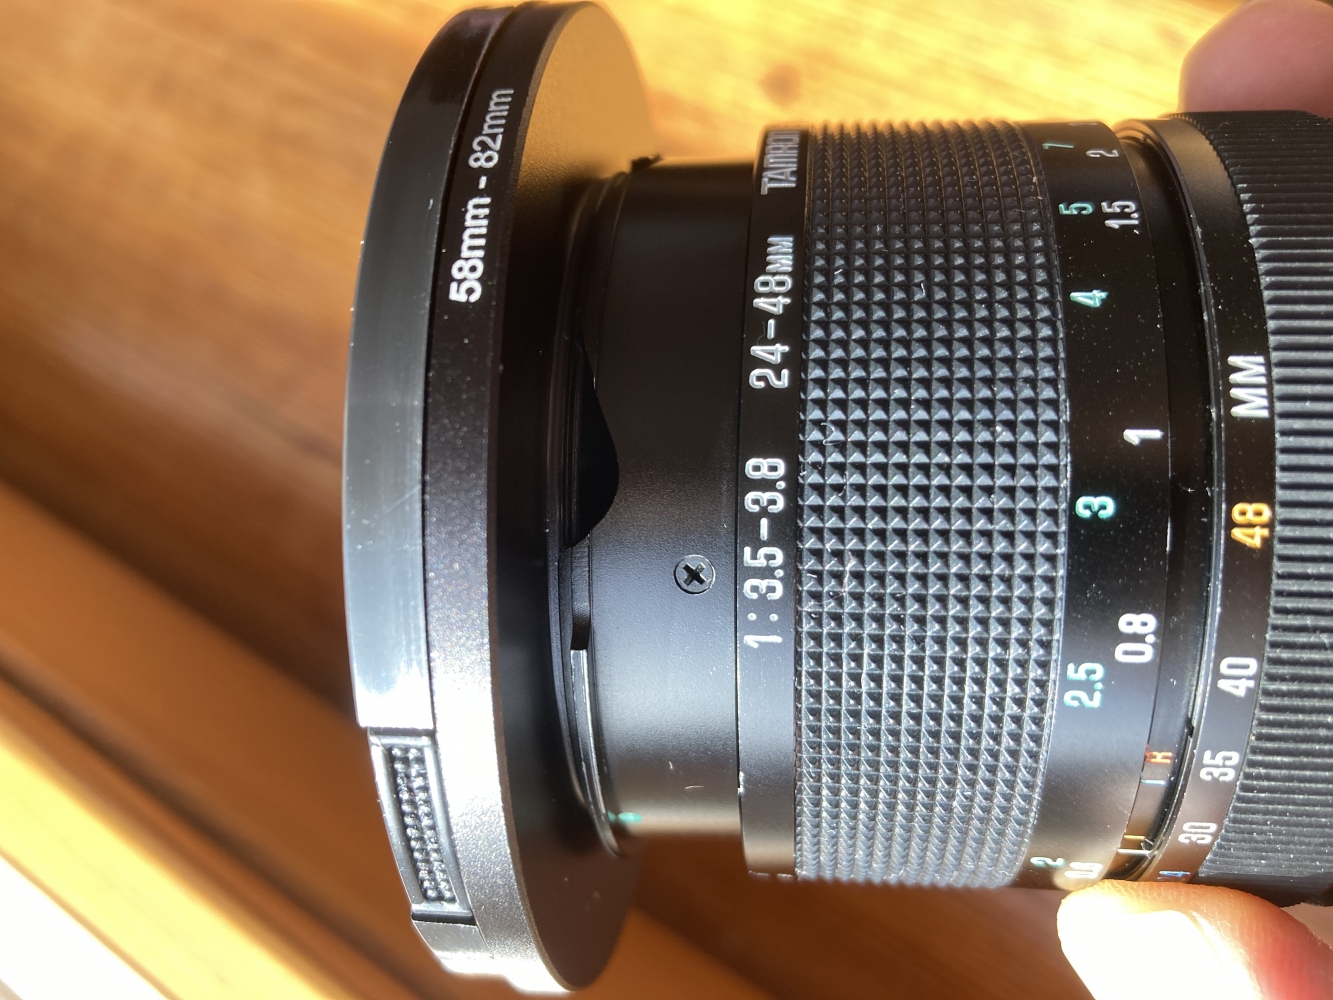
I know. But I did manage to "screw" on a 58mm-82mm step up ring.
In my case a filter ring is mandatory , because I modified my camera to full spectrum - It can't shoot without filters,
for visible light or infrared. Of course the focus and zoom rings need to be protected from excessive force needed.
So i did put double adhesive tape on the front (tulip) tube and used a rubber ring (normally for opening jars) to get some grip.
"Screwed" the ring on, with all strength, as far as I could. The thread will cut it´s way, at least for a full turn, until it gets stuck.
Later some cleaning work is needed, to get the sticky residue from the adhesive tape off, rust roll the ball of tape over the metal,
the clean with alcohol. A thin hair tie can be used to prevent light to sneak in from the side of the tulip (not pictured)
No vignetting at 24mm, at least on a Panasonic S5.
BTW, someone with access to a lathe could even mill a thread cutter for 58mm, but this would be expensive.
Maybe some repairers even had such a tool to repair dented threads. But this is just guessing.
[img]
#1

#2
#3

#1
[/img] |
|
| Back to top |
|
|
RokkorDoctor


Joined: 27 Nov 2021
Posts: 1371
Location: Kent, UK
Expire: 2025-05-01
|
| Posted: Mon Oct 02, 2023 12:40 pm Post subject: |
|
|
RokkorDoctor wrote:
Why not use a 62-82mm step-up ring and modify it with some DIY drilling & filing of a couple of slots in the 62mm protruding thread such that it twist onto the same bayonet ridges that the original lens-hood twists onto?
Intuitively I would utilise those protruding bayonet ridges to somehow mount an 82mm screw-filter holder...
_________________
Mark
SONY A7S, A7RII + dust-sealed modded Novoflex/Fotodiox/Rayqual MD-NEX adapters
Minolta SR-1, SRT-101/303, XD7/XD11, XGM, X700
Bronica SQAi
Ricoh GX100
Minolta majority of all Rokkor SR/AR/MC/MD models made
Sigma 14mm/3.5 for SR mount
Tamron SP 60B 300mm/2.8 (Adaptall)
Samyang T-S 24mm/3.5 (Nikon mount, DIY converted to SR mount)
Schneider-Kreuznach PC-Super-Angulon 28mm/2.8 (SR mount)
Bronica PS 35/40/50/65/80/110/135/150/180/200/250mm |
|
| Back to top |
|
|
Herbert
Joined: 07 Sep 2023
Posts: 26
|
| Posted: Mon Oct 02, 2023 1:39 pm Post subject: |
|
|
Herbert wrote:
| RokkorDoctor wrote: |
Why not use a 62-82mm step-up ring and modify it with some DIY drilling & filing of a couple of slots in the 62mm protruding thread such that it twist onto the same bayonet ridges that the original lens-hood twists onto?
Intuitively I would utilise those protruding bayonet ridges to somehow mount an 82mm screw-filter holder... |
Because you would need a 3D mill and special tools to mill the slots.
The outside bayonet ridges will not "catch" a threat, but the inner profile does,
because it tapers towards the outer edge. The difference in diameter is only 0.4mm at the thickest parts. |
|
| Back to top |
|
|
RokkorDoctor
Joined: 27 Nov 2021
Posts: 1371
Location: Kent, UK
Expire: 2025-05-01
|
| Posted: Mon Oct 02, 2023 2:56 pm Post subject: |
|
|
RokkorDoctor wrote:
| Herbert wrote: |
| RokkorDoctor wrote: |
Why not use a 62-82mm step-up ring and modify it with some DIY drilling & filing of a couple of slots in the 62mm protruding thread such that it twist onto the same bayonet ridges that the original lens-hood twists onto?
Intuitively I would utilise those protruding bayonet ridges to somehow mount an 82mm screw-filter holder... |
Because you would need a 3D mill and special tools to mill the slots.
The outside bayonet ridges will not "catch" a threat, but the inner profile does,
because it tapers towards the outer edge. The difference in diameter is only 0.4mm at the thickest parts. |
You don't always need a mill unless you are going for factory-machined looks. Quite accurate mechanical work can be achieved with hand-tools as long as you have accurate measuring tools and patience. Hand-files, drills, fret-saws and sanding-sticks can be quite effective on aluminium and brass; I have made many DIY mods on aluminium & brass components without using a mill.
You are probably thinking enclosed slots, but you could make open L-shaped slots in the step-up ring that catch behind the bayonet ridges. With some additional ABS or polystyrene plasticard as extra material to use it would be even easier.
_________________
Mark
SONY A7S, A7RII + dust-sealed modded Novoflex/Fotodiox/Rayqual MD-NEX adapters
Minolta SR-1, SRT-101/303, XD7/XD11, XGM, X700
Bronica SQAi
Ricoh GX100
Minolta majority of all Rokkor SR/AR/MC/MD models made
Sigma 14mm/3.5 for SR mount
Tamron SP 60B 300mm/2.8 (Adaptall)
Samyang T-S 24mm/3.5 (Nikon mount, DIY converted to SR mount)
Schneider-Kreuznach PC-Super-Angulon 28mm/2.8 (SR mount)
Bronica PS 35/40/50/65/80/110/135/150/180/200/250mm |
|
| Back to top |
|
|
Herbert
Joined: 07 Sep 2023
Posts: 26
|
| Posted: Mon Oct 02, 2023 5:37 pm Post subject: |
|
|
Herbert wrote:
| Quote: |
Quite accurate mechanical work can be achieved with hand-tools as long as you have accurate measuring tools and patience. Hand-files, drills, fret-saws and sanding-sticks can be quite effective on aluminium and brass; I have made many DIY mods on aluminium & brass components without using a mill.
You are probably thinking enclosed slots, but you could make open L-shaped slots in the step-up ring that catch behind the bayonet ridges. |
Well, in fact I am thinking L-shaped slots. I did built things like my camera cage and adapter box under the cam with the tools you mentioned. But screwing / unscrewing parts constantly without hassle that also need to fit without play has to be done extremely precise. |
|
| Back to top |
|
|
stevemark
Joined: 29 Apr 2011
Posts: 3814
Location: Switzerland
|
| Posted: Mon Oct 02, 2023 8:19 pm Post subject: |
|
|
stevemark wrote:
Maybe getting another lens is an easier solution?
1) Minolta MD-III 3.5/24-35mm: small but sophisticated wideangle zoom with 10 lenses
2) Sigma 3.5-4.2/21-35mm: early superwide zoom with pretty good performance, comparable to Tamron 24-50 or Canon nFD 3.5/20-35mm L
S
_________________
www.artaphot.ch |
|
| Back to top |
|
|
Herbert
Joined: 07 Sep 2023
Posts: 26
|
| Posted: Tue Oct 03, 2023 12:33 pm Post subject: |
|
|
Herbert wrote:
| stevemark wrote: |
Maybe getting another lens is an easier solution?
1) Minolta MD-III 3.5/24-35mm: small but sophisticated wideangle zoom with 10 lenses
2) Sigma 3.5-4.2/21-35mm: early superwide zoom with pretty good performance, comparable to Tamron 24-50 or Canon nFD 3.5/20-35mm L
S |
Why, when the solution was already described 5 posts ago?
A jar opener, adhesive double sided tape and step up ring for $15
against a Minolta that sells for $350?
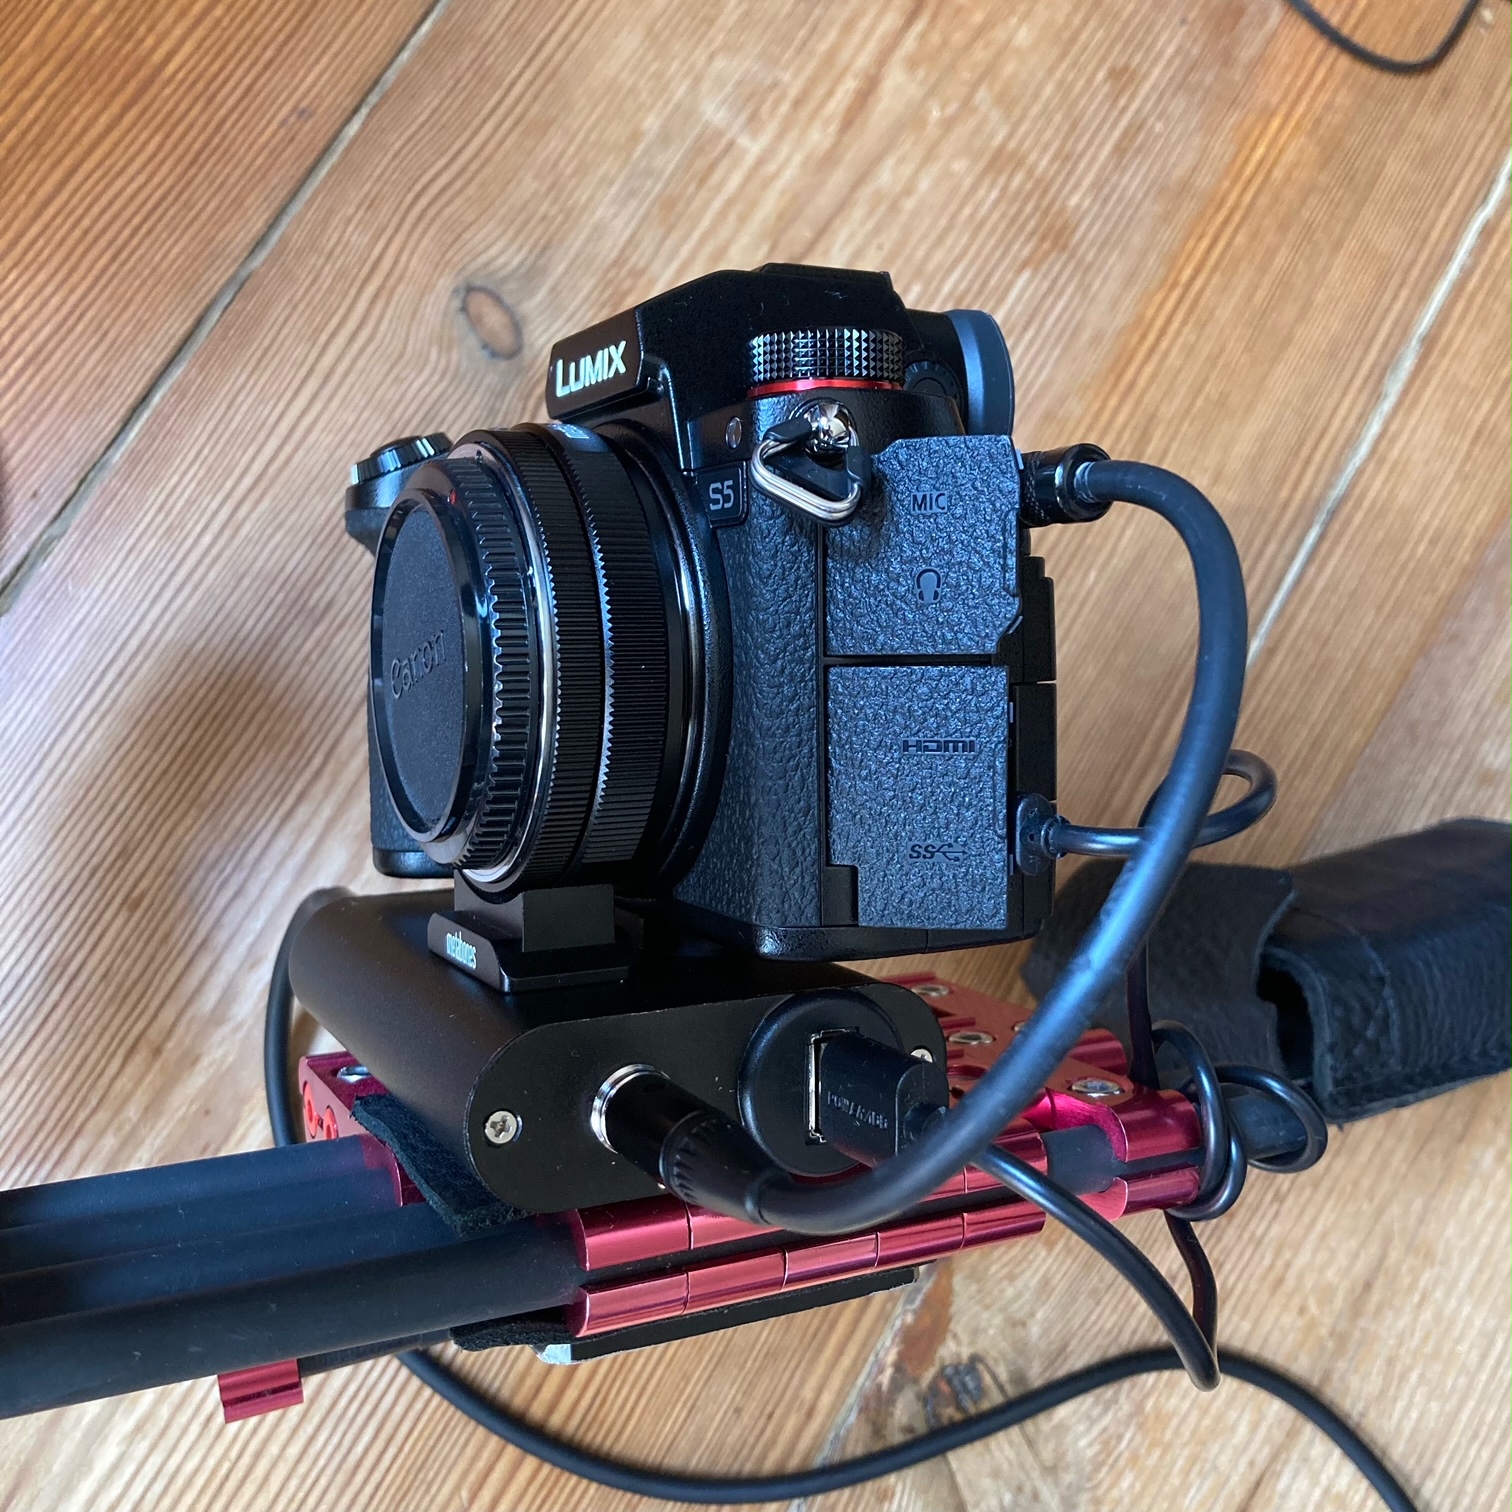
Besides the fact that I use Canon FD exclusively, because
the Canon FD-adapter is fixed to my DIY camera rig.
The Metabones FD adapter is very rugged, it carries the weight of the FD vintage lenses
and reliefs the S5' body from any weight:
#1

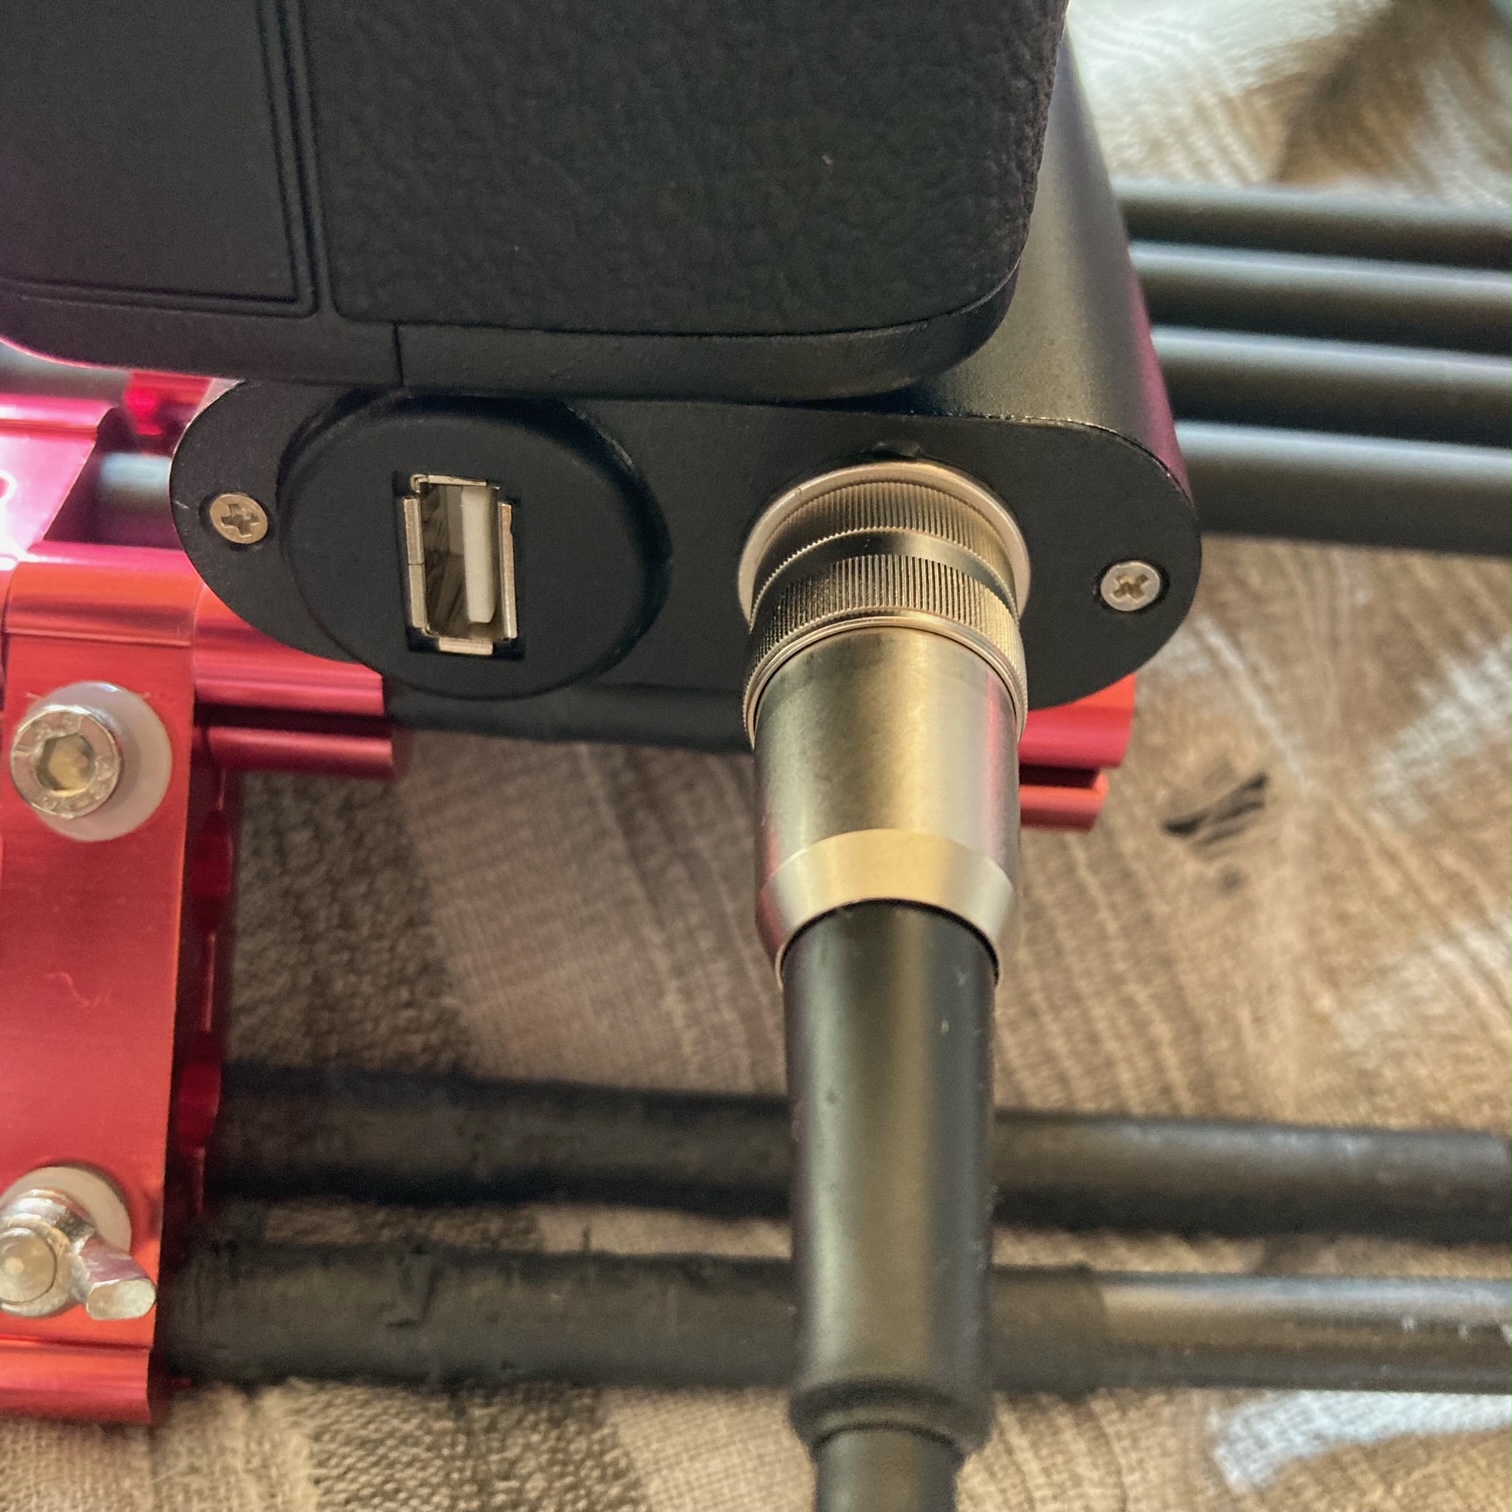
The the box beneath the camera is DIY. It is for adapting 5V from power banks, transferring data and connecting to XLR audio from portable field mixers.
#2
 |
|
| Back to top |
|
|
visualopsins
Joined: 05 Mar 2009
Posts: 10873
Location: California
Expire: 2025-04-11
|
| Posted: Tue Oct 03, 2023 5:15 pm Post subject: |
|
|
visualopsins wrote:
 Nice workmanship Herbert!!! Nice workmanship Herbert!!!
_________________
☮☮☮☮☮☮☮☮☮☮☮☮☮☮☮☮☮☮☮☮☮☮☮☮☮☮☮☮☮☮☮☮ like attracts like! ☮☮☮☮☮☮☮☮☮☮☮☮☮☮☮☮☮☮☮☮☮☮☮☮☮☮☮☮☮☮☮☮
Cameras: Sony ILCE-7RM2, Spotmatics II, F, and ESII, Nikon P4
Lenses:
M42 Asahi Optical Co., Takumar 1:4 f=35mm, 1:2 f=58mm (Sonnar), 1:2.4 f=58mm (Heliar), 1:2.2 f=55mm (Gaussian), 1:2.8 f=105mm (Model I), 1:2.8/105 (Model II), 1:5.6/200, Tele-Takumar 1:5.6/200, 1:6.3/300, Macro-Takumar 1:4/50, Auto-Takumar 1:2.3 f=35, 1:1.8 f=55mm, 1:2.2 f=55mm, Super-TAKUMAR 1:3.5/28 (fat), 1:2/35 (Fat), 1:1.4/50 (8-element), Super-Multi-Coated Fisheye-TAKUMAR 1:4/17, Super-Multi-Coated TAKUMAR 1:4.5/20, 1:3.5/24, 1:3.5/28, 1:2/35, 1:3.5/35, 1:1.8/85, 1:1.9/85 1:2.8/105, 1:3.5/135, 1:2.5/135 (II), 1:4/150, 1:4/200, 1:4/300, 1:4.5/500, Super-Multi-Coated Macro-TAKUMAR 1:4/50, 1:4/100, Super-Multi-Coated Bellows-TAKUMAR 1:4/100, SMC TAKUMAR 1:1.4/50, 1:1.8/55
M42 Carl Zeiss Jena Flektogon 2.4/35
Contax Carl Zeiss Vario-Sonnar T* 28-70mm F3.5-4.5
Pentax K-mount SMC PENTAX-A ZOOM 1:3.5 35~105mm, SMC PENTAX ZOOM 1:4 45~125mm
Nikon Micro-NIKKOR-P-C Auto 1:3.5 f=55mm, NIKKOR-P Auto 105mm f/2.5 Pre-AI (Sonnar), Micro-NIKKOR 105mm 1:4 AI, NIKKOR AI-S 35-135mm f/3,5-4,5
Tamron SP 17mm f/3.5 (51B), Tamron SP 17mm f/3.5 (151B), SP 500mm f/8 (55BB), SP 70-210mm f/3.5 (19AH)
Vivitar 100mm 1:2.8 MC 1:1 Macro Telephoto (Kiron)
|
|
| Back to top |
|
|
stevemark
Joined: 29 Apr 2011
Posts: 3814
Location: Switzerland
|
| Posted: Wed Oct 04, 2023 10:11 pm Post subject: |
|
|
stevemark wrote:
| Herbert wrote: |
| stevemark wrote: |
Maybe getting another lens is an easier solution?
1) Minolta MD-III 3.5/24-35mm: small but sophisticated wideangle zoom with 10 lenses
2) Sigma 3.5-4.2/21-35mm: early superwide zoom with pretty good performance, comparable to Tamron 24-50 or Canon nFD 3.5/20-35mm L
S |
Why, when the solution was already described 5 posts ago?
A jar opener, adhesive double sided tape and step up ring for $15
against a Minolta that sells for $350?
|
350 bucks for a Minolta 24-35mm - sure??
wow ... my last MD-III 3.5/24-35 was less than 50.-- CHF, and the Sigma somwhere in the twenties ... one or two years ago, that is.
Ebay currently lists the Minolta MD 24-35mm starting at "CHF 63.-- or best offer", ... and the Sigma 21-35 "buy it now" starting at USD 33.-- (AF version) or USD 46.-- (MF version).
S
_________________
www.artaphot.ch |
|
| Back to top |
|
|
|
|