| View previous topic :: View next topic |
| Author |
Message |
tomasg

Joined: 01 Nov 2009
Posts: 1135
Expire: 2014-04-28
|
 Posted: Wed Jan 11, 2017 12:59 pm Post subject: Tair 11, CLA tutorial Posted: Wed Jan 11, 2017 12:59 pm Post subject: Tair 11, CLA tutorial |
 |
|
tomasg wrote:
Hi
This is a tutorial for an almost full cleaning, lubrication and adjustment for a Tair 11, alu version. The main reason for this tutorial is actually to show how to clean and polish old alu lenses. It is in three parts! Please read all the three parts before starting!
Sorry for some blurry pics, i ll post some better ones in the future.
PART 1
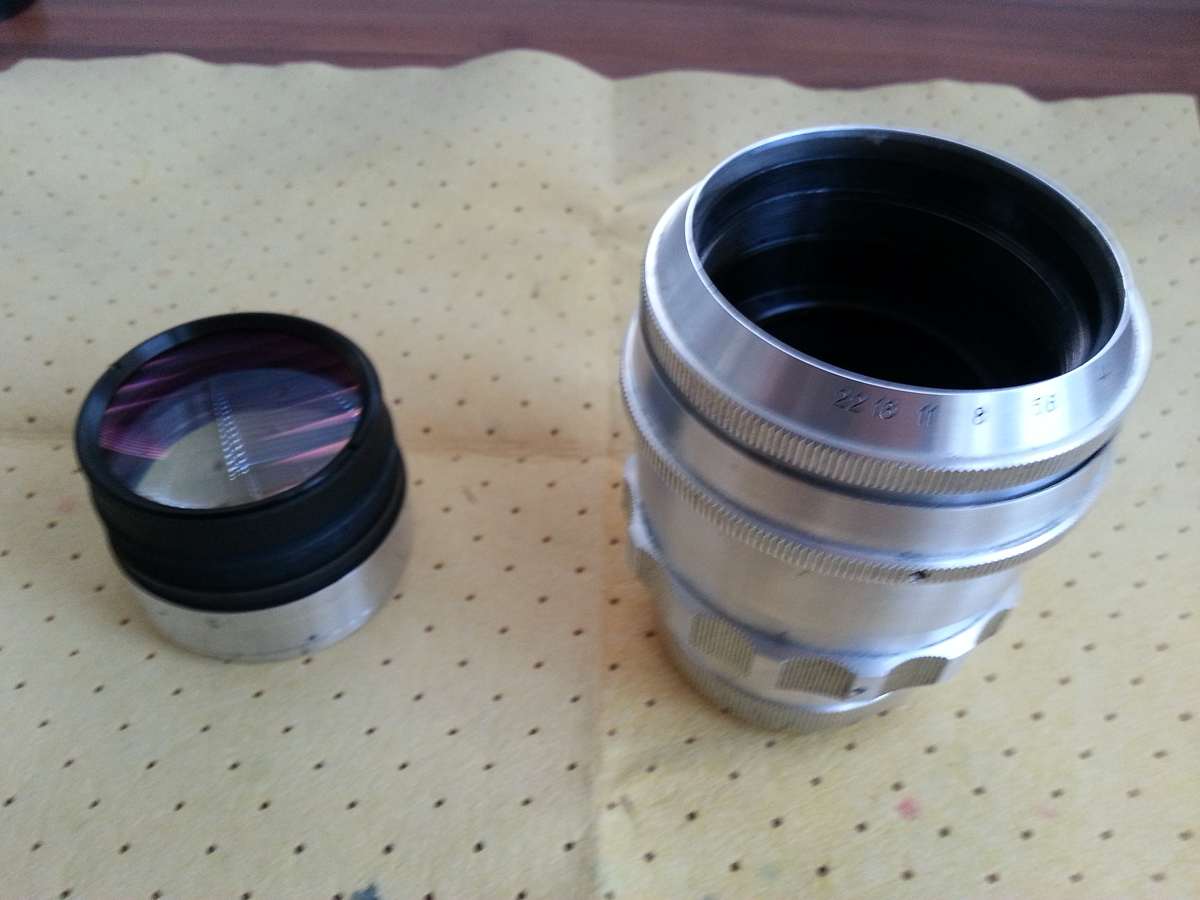
So here we go, first you unscrew the front optical block, like on some other Russian lenses (Helios 44 and 40 for example), if you can t unscrew it with a reasonable force skip this step for now and unscrew it at a later stage in the tutorial. Over forcing it you ll damage a head of an important screw in the focusing mechanism!

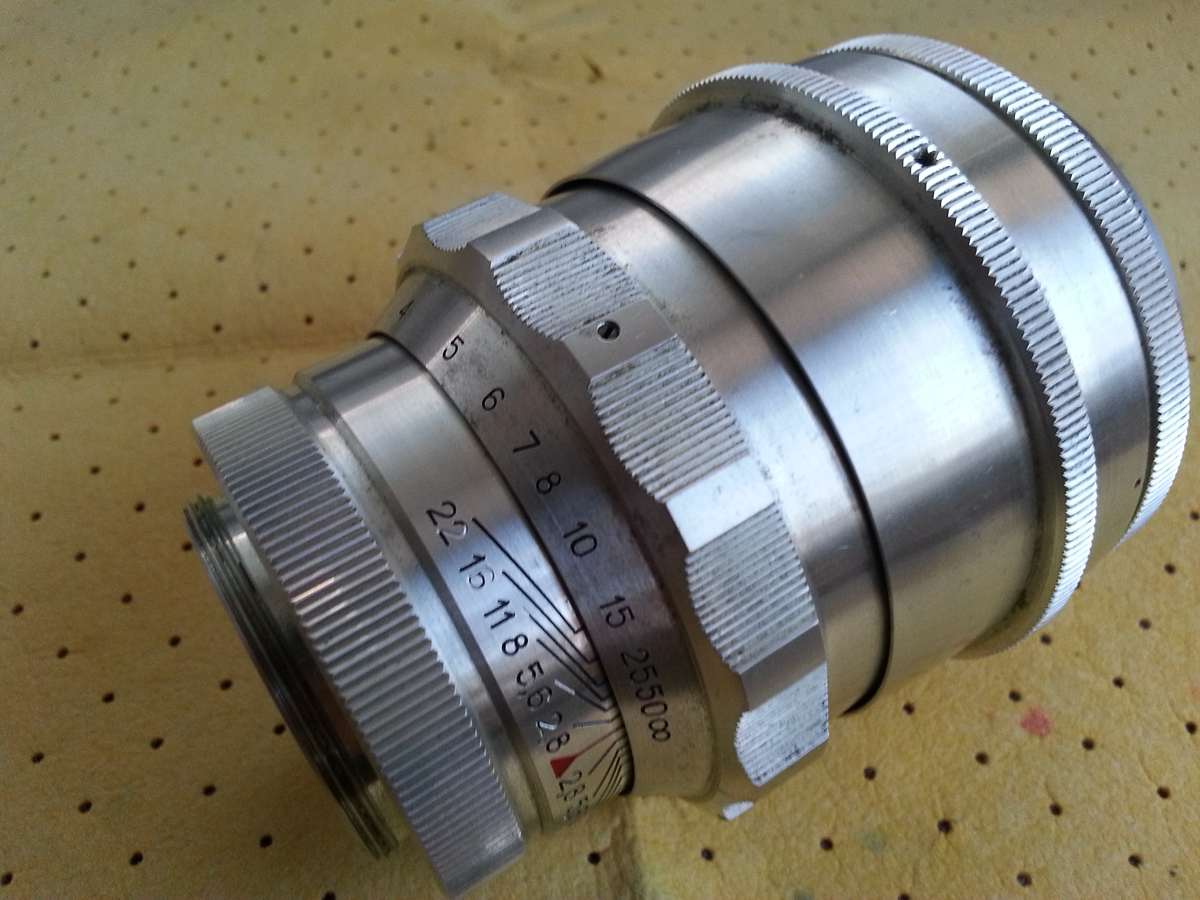
Next remove the focusing ring, unscrew the 3 screws. Personally i screw back the screws after i remove the parts, this way i don t loose them, check if the screws are "stable" and leave them there, just be sure to unscrew them when putting back the part.


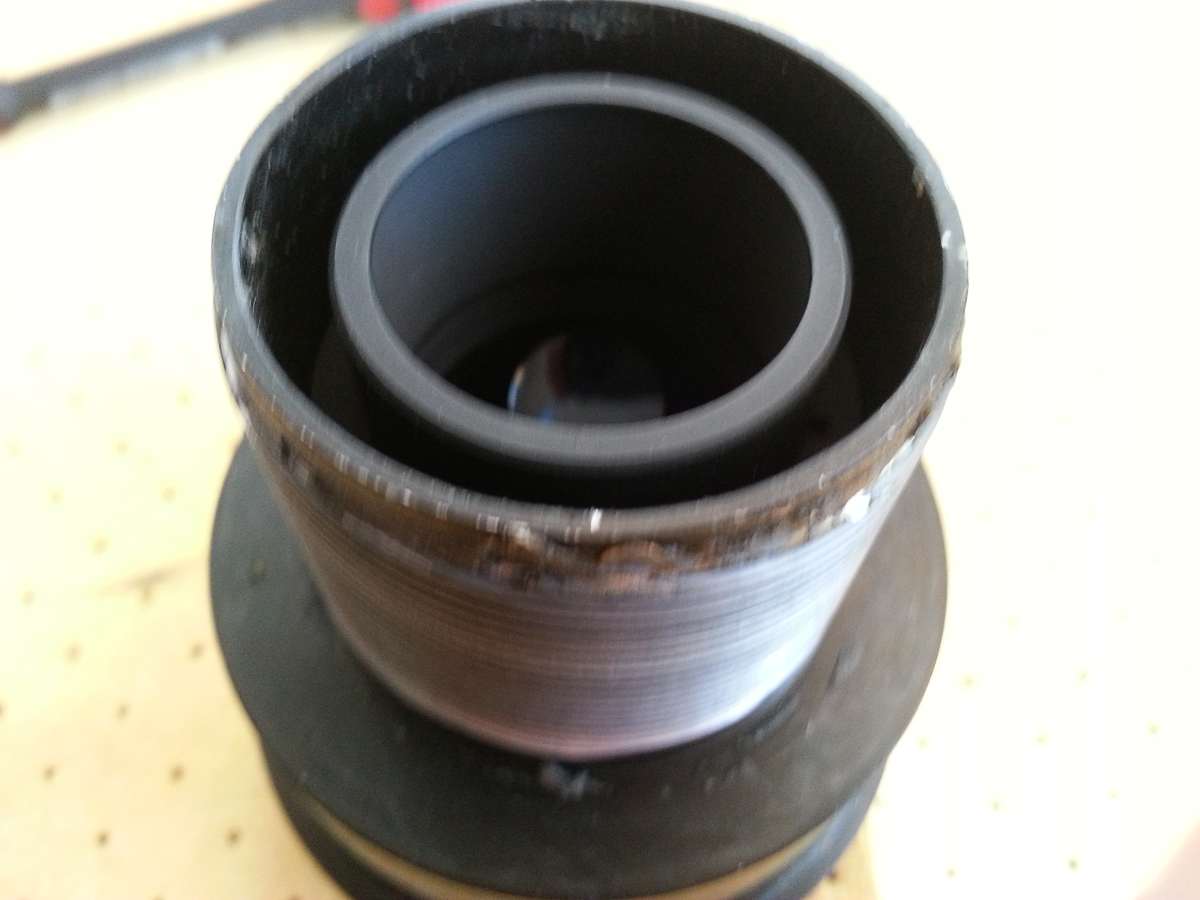
Next remove the back aperture ring, if you had problems removing the front block you can now remove it by holding the black ring that is covered by the aperture ring and is held in place by one screw, this is safer than holding the focusing mechanism:

and the front one, both are held by 3 screws each: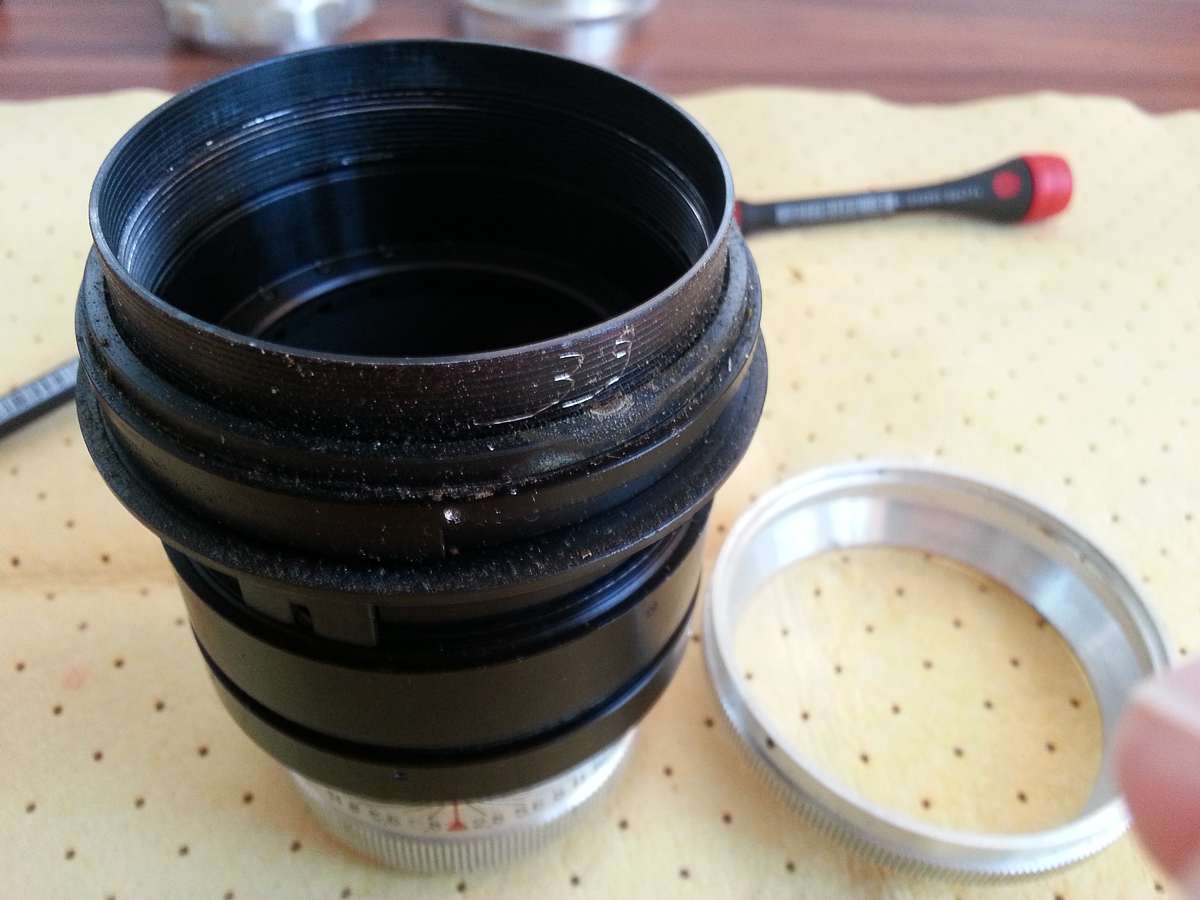
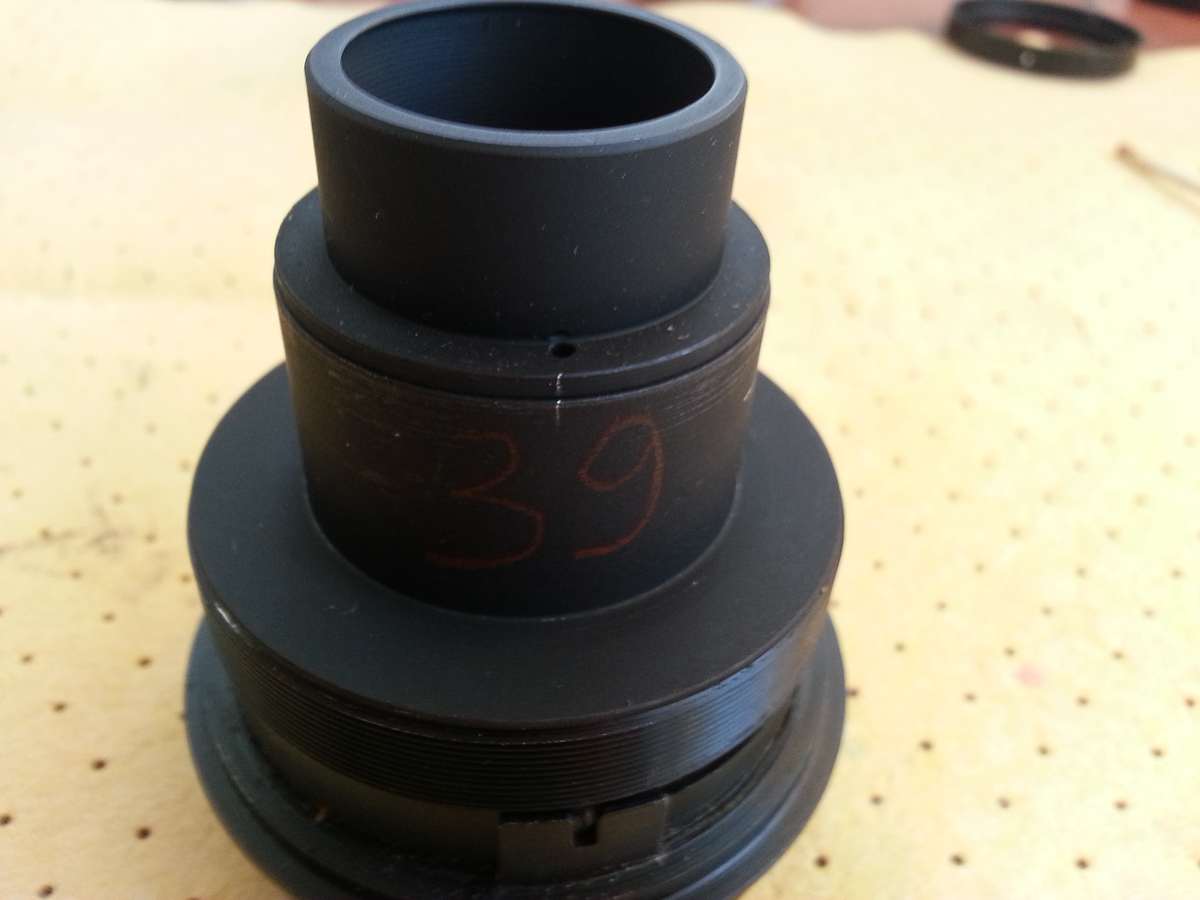
lots of dirt on my lens and notice the number 39, it will appear later again:

next unscrew and this time remove the 3 scrrews on the black ring, this one often needs some force to come off so it s better if it s without any portruding screws, if you can t remove it try to put back the focusing ring and use it to unscrew the ring (sorry for the bad pic but i am sure you ll find the screws):

[url=http://forum.mflenses.com/userpix/20171/big_2108_20170110_081116_1.jpg]
 [/url] [/url]
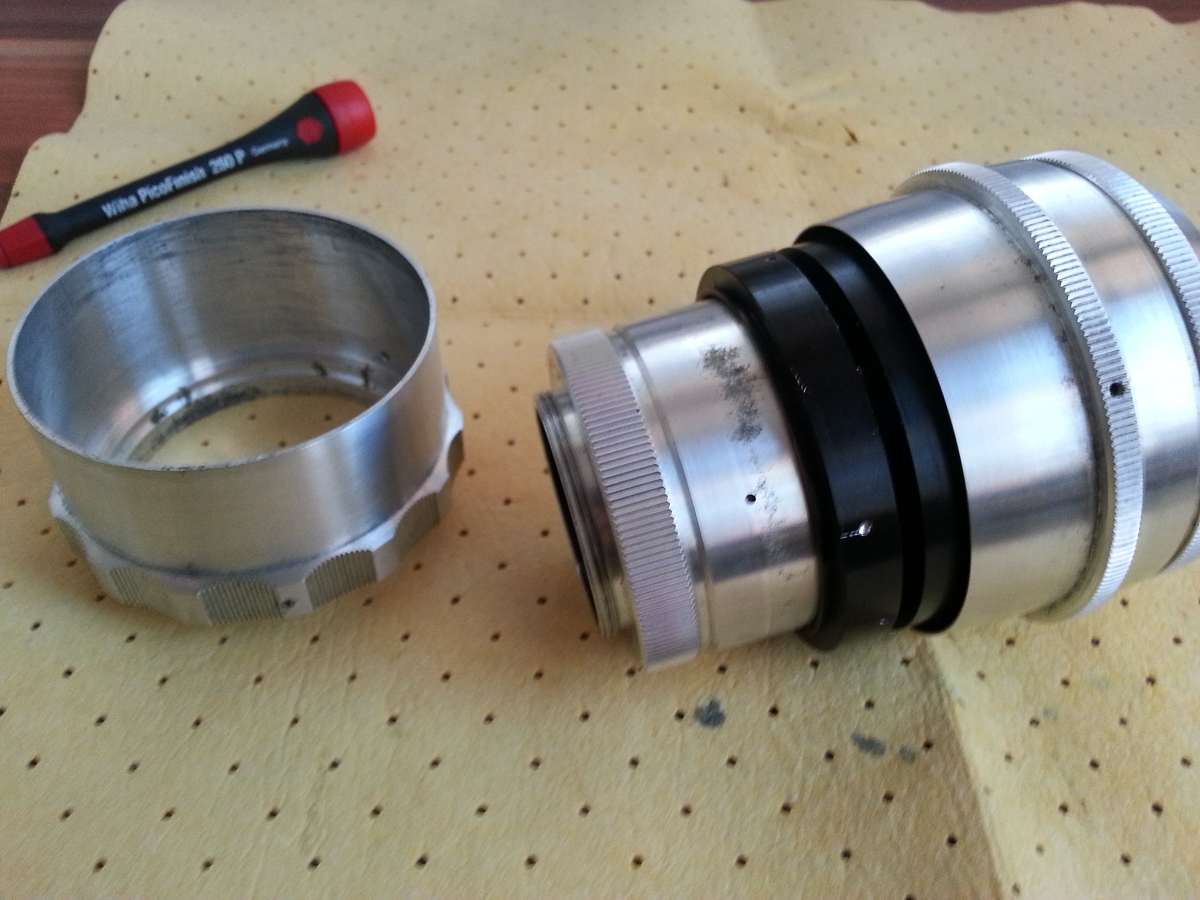
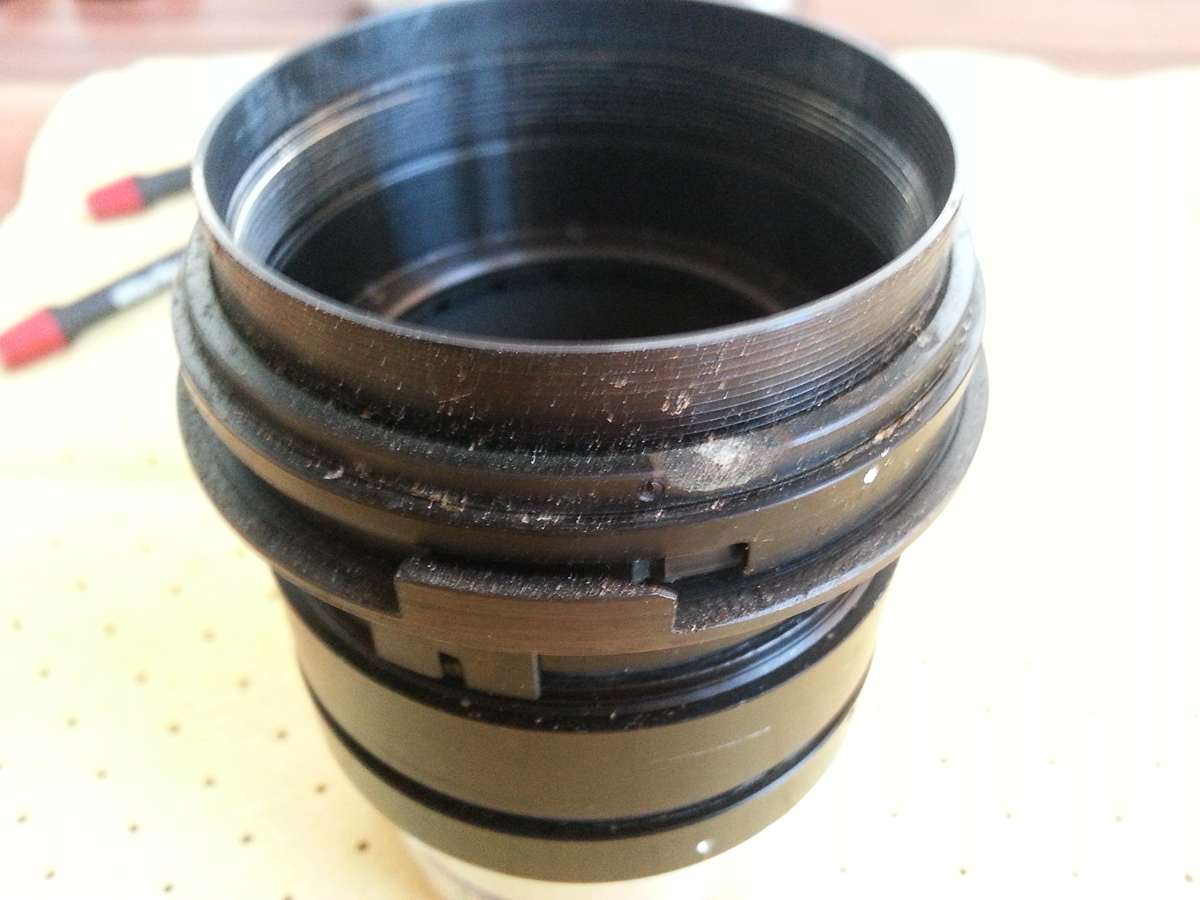
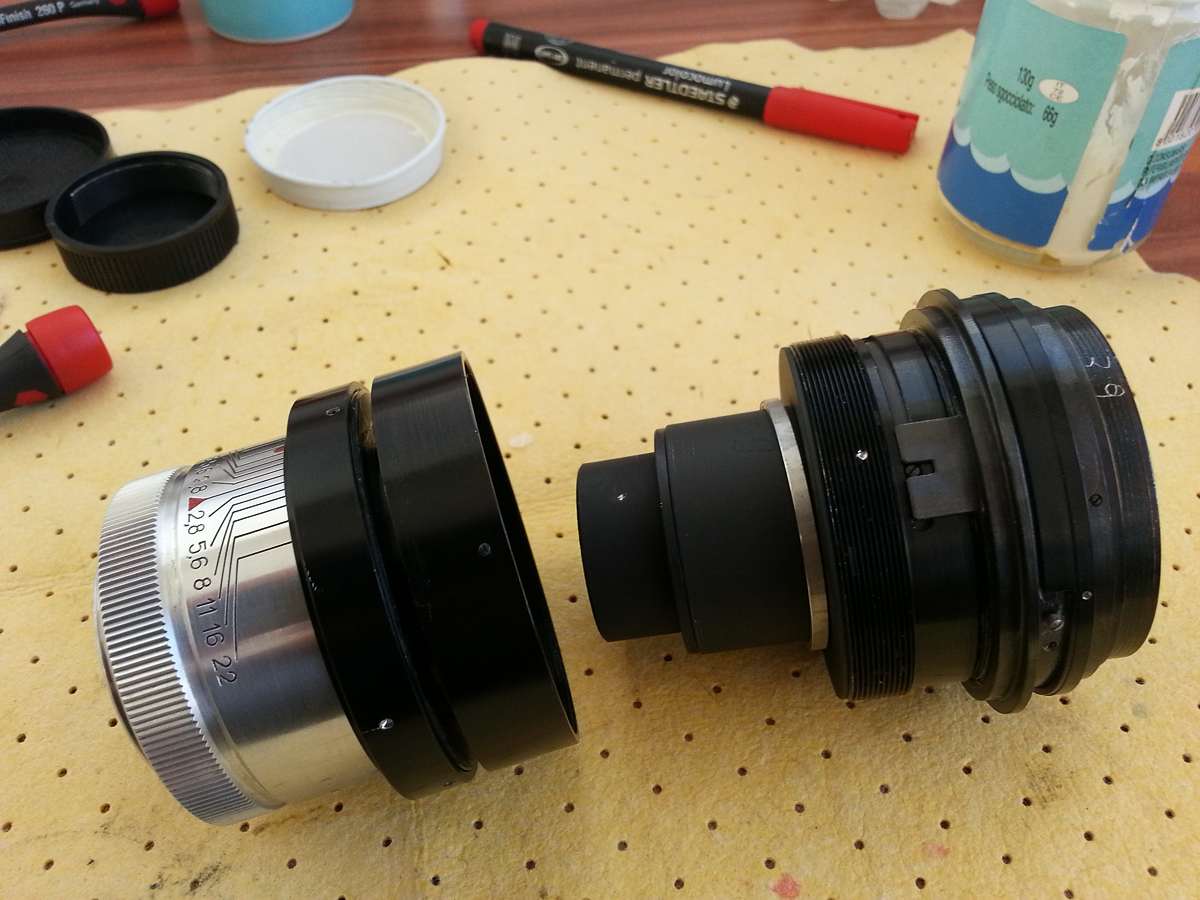
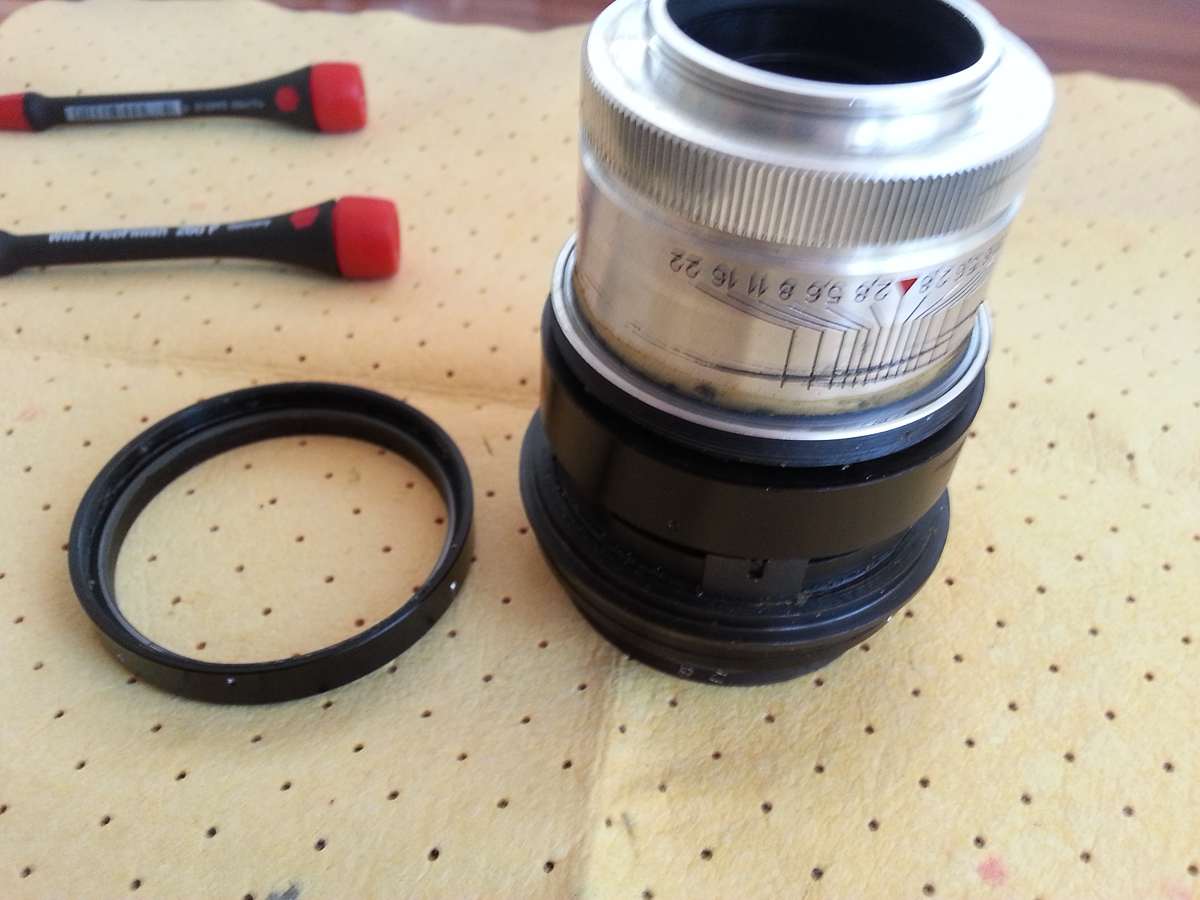
now remove the ring with the mount by pulling it, not turning it:


if all you have to do is polish the alu rings you can stop here, but i think this is unlikely and you ll probably need to at least regrease the focusing mechanism so next unscrew the screw that stops the focusing ring, this is the screw which head you have to be careful not to damage, even a small damage will introduce some play in the focusing, as this head travel in a slot in the ring that you just removed:
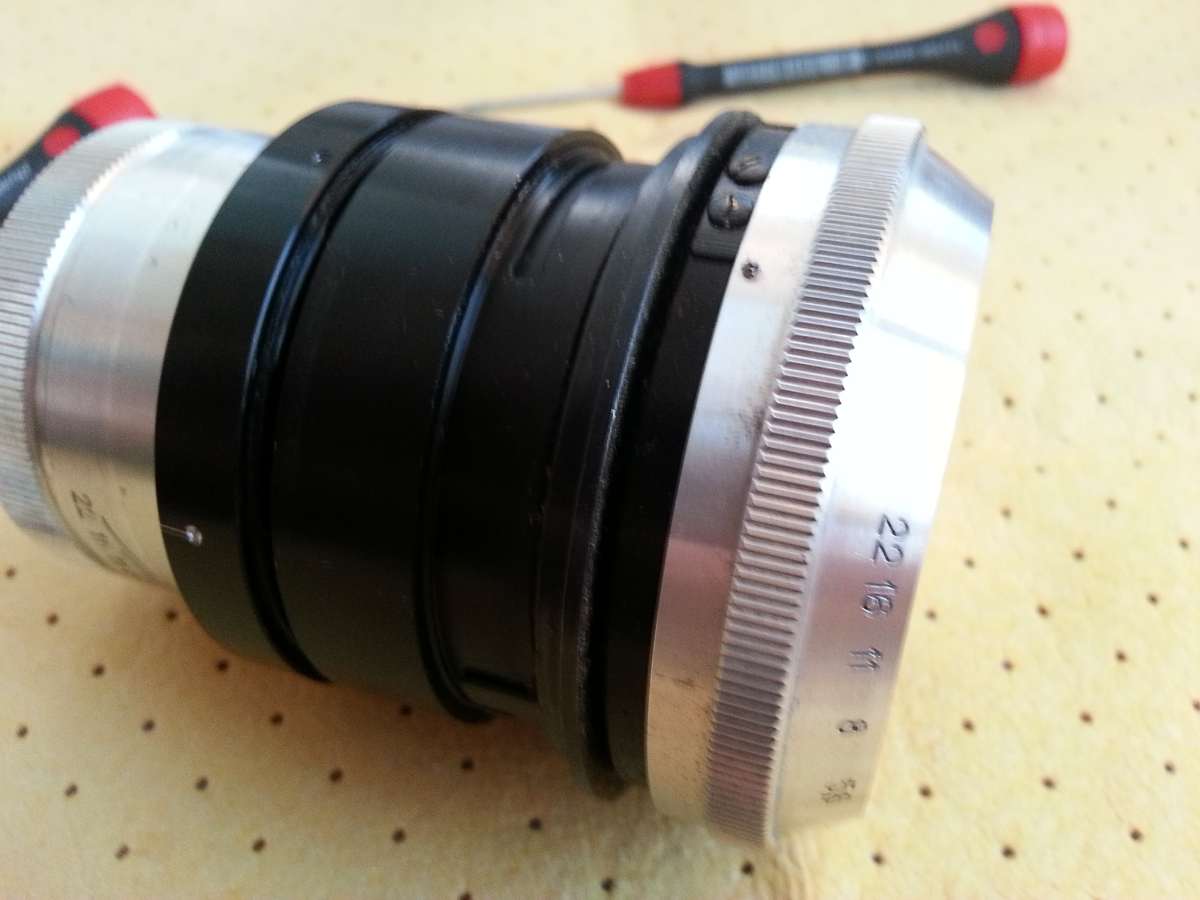
next remove the black ring on the helicoid, there should be already a mark where the screw touches it, if not mark this spot with a screwdriver, as the ring has to go back at the same position:
also mark the position where the ring comes off the focusing helicoid, easyer than to guess which step is the right one:

for easier cleaning and lubing you can remove the focusing helicoid, unscrew one screw on the big black ring, if you want you can do this before dissasembling the focusing block:

for most this will be enough, my copy had a bit of oil on the aperture blades and the aperture ring with the click stops was a bit stiff for my taste (i like all my lenses to have the same resistance, more or less) and the second one was without any resistance at all, instead of being a bit damped.
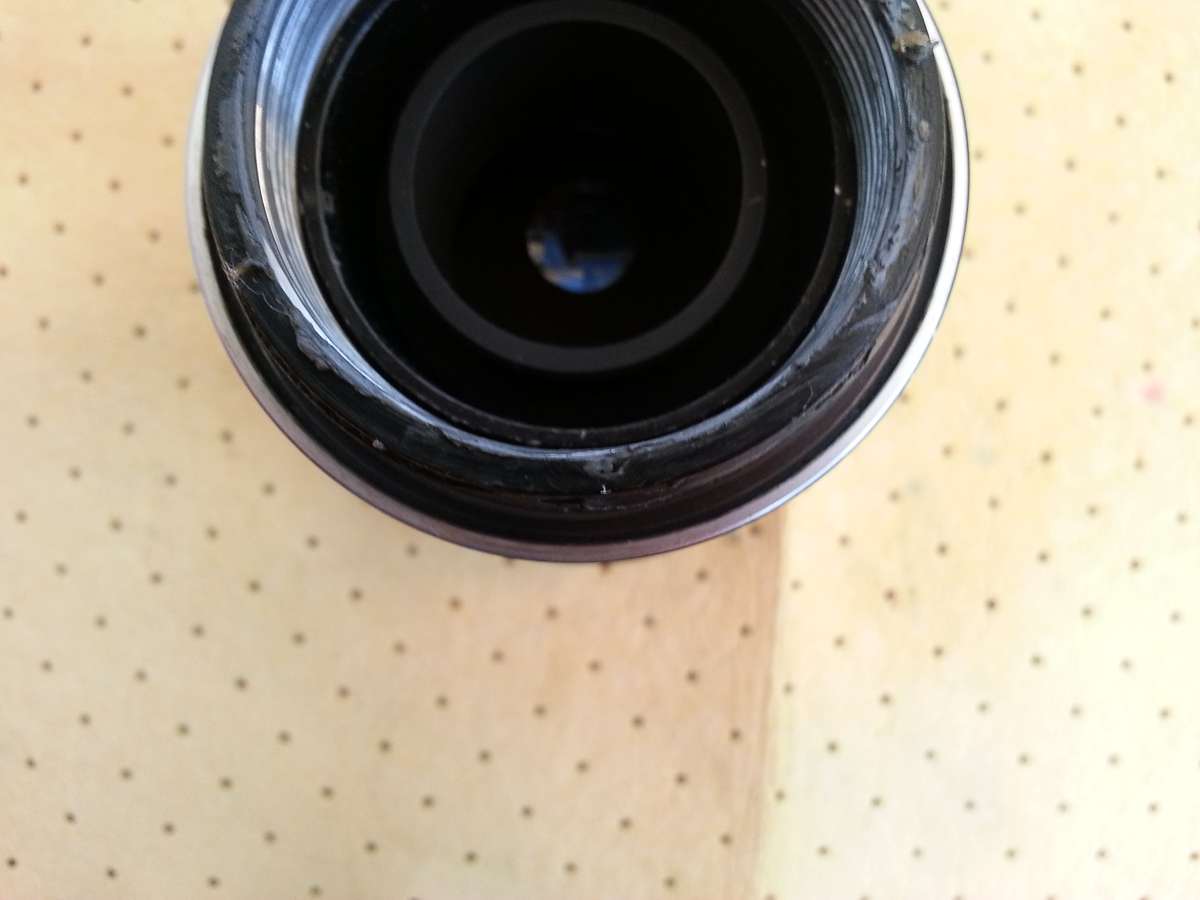
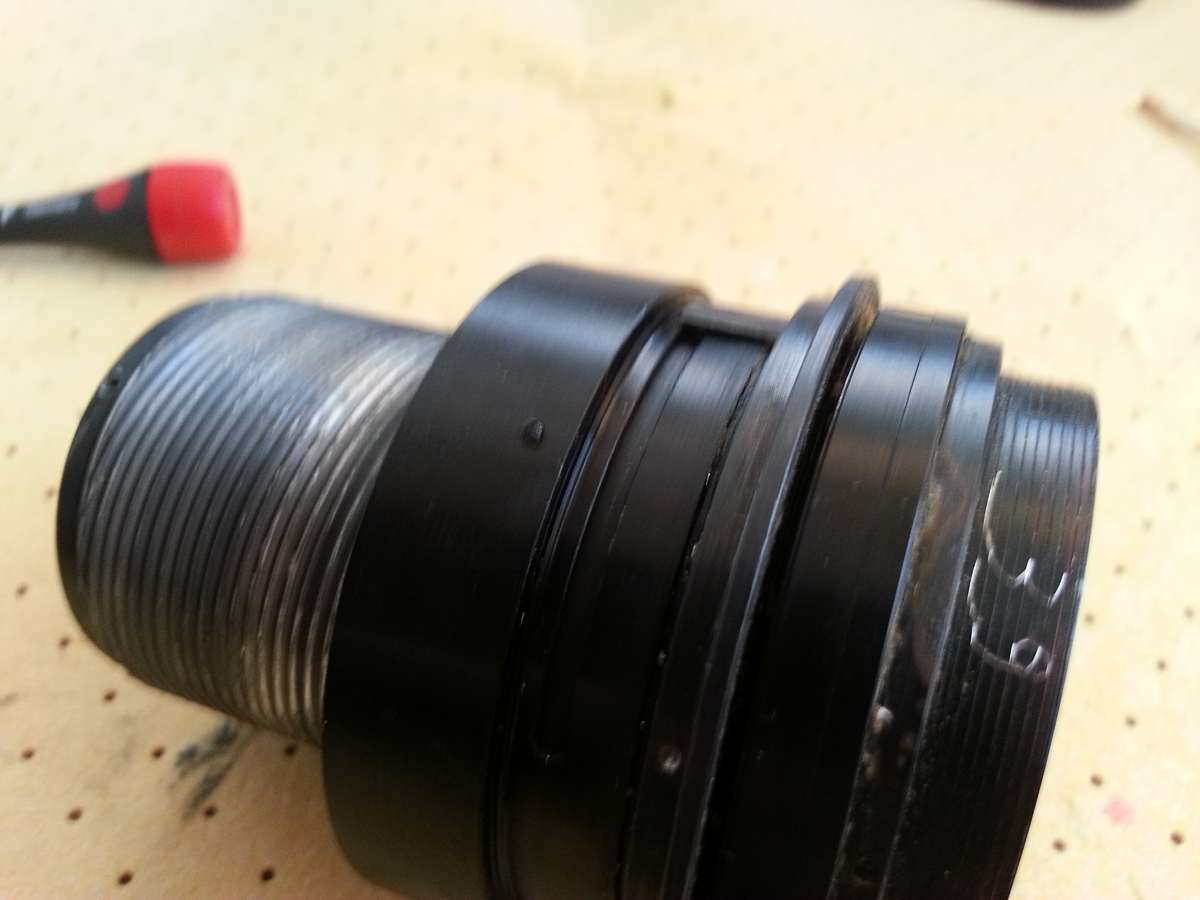
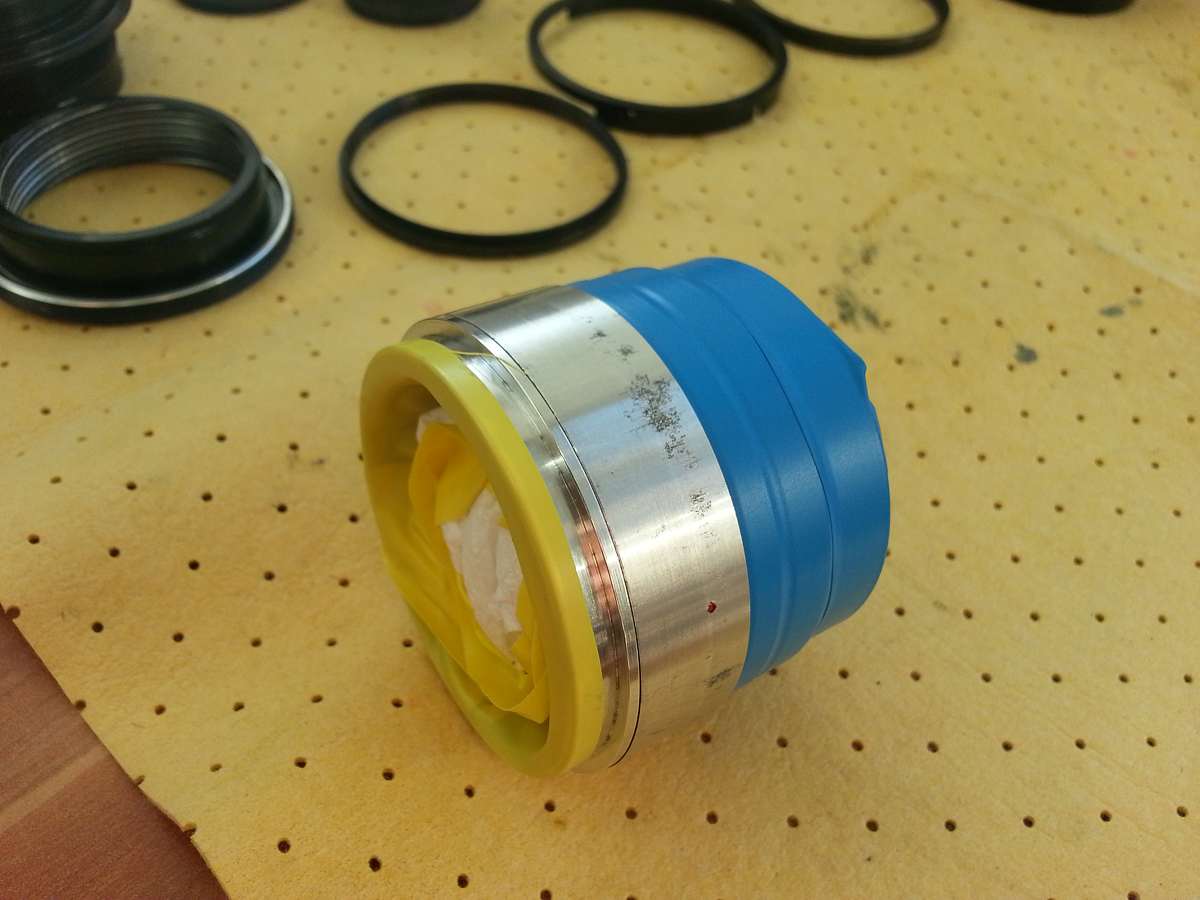
To CLA the aperture mechanism start by removing the rear optical element you will nedd a spanner with "needles":

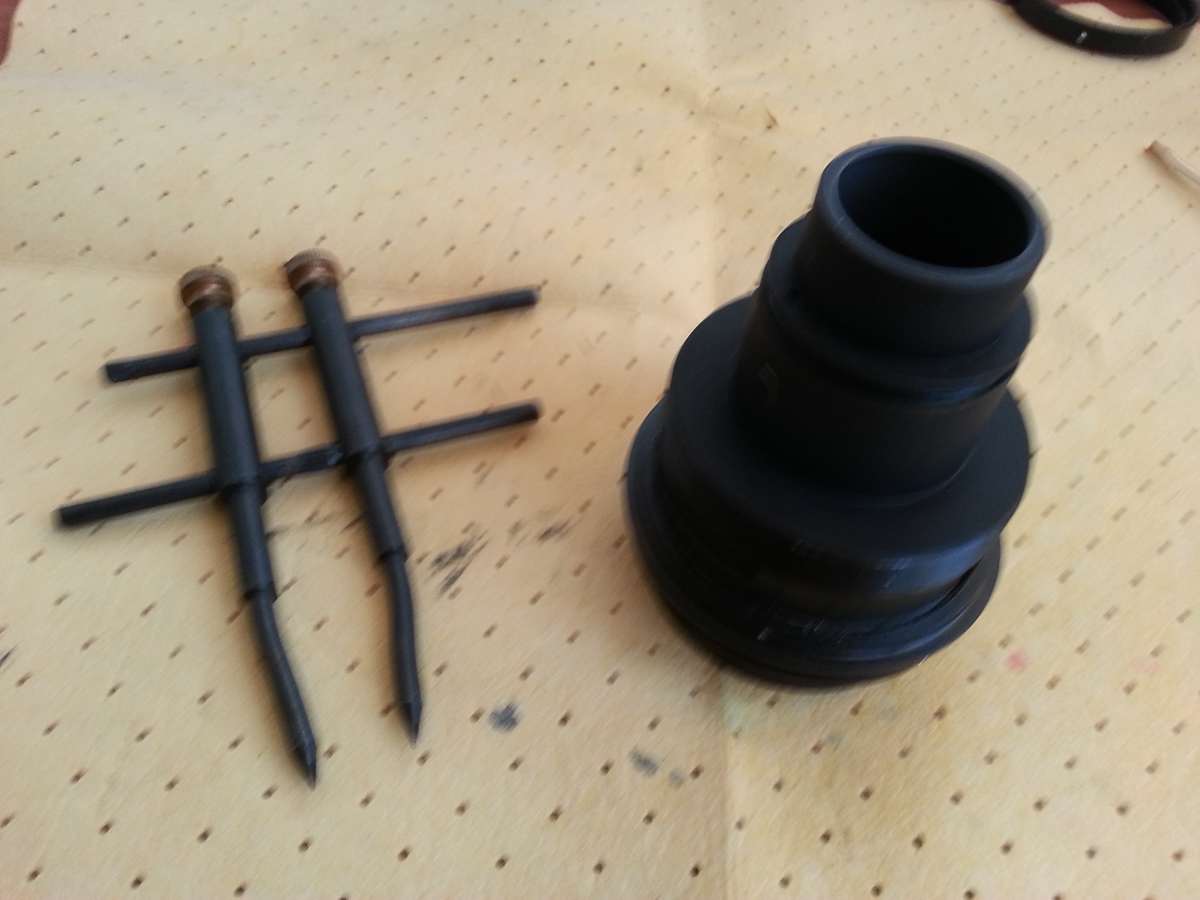
remember 39, yes my lens is in a M39 mount  next remove the ring that holds the element in when removing this part be careful not to unscrew the whole back part of the aperture assembly or the blades may fall out: next remove the ring that holds the element in when removing this part be careful not to unscrew the whole back part of the aperture assembly or the blades may fall out:

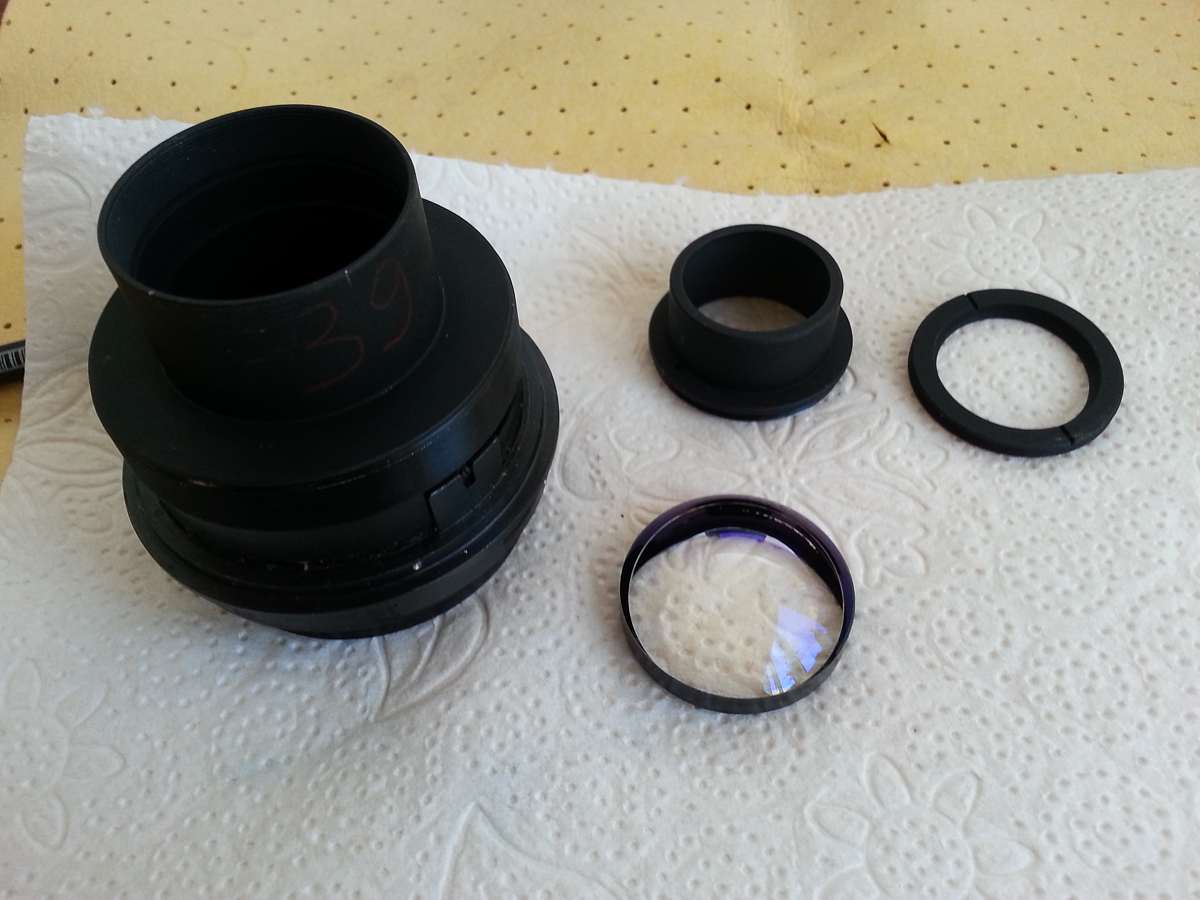
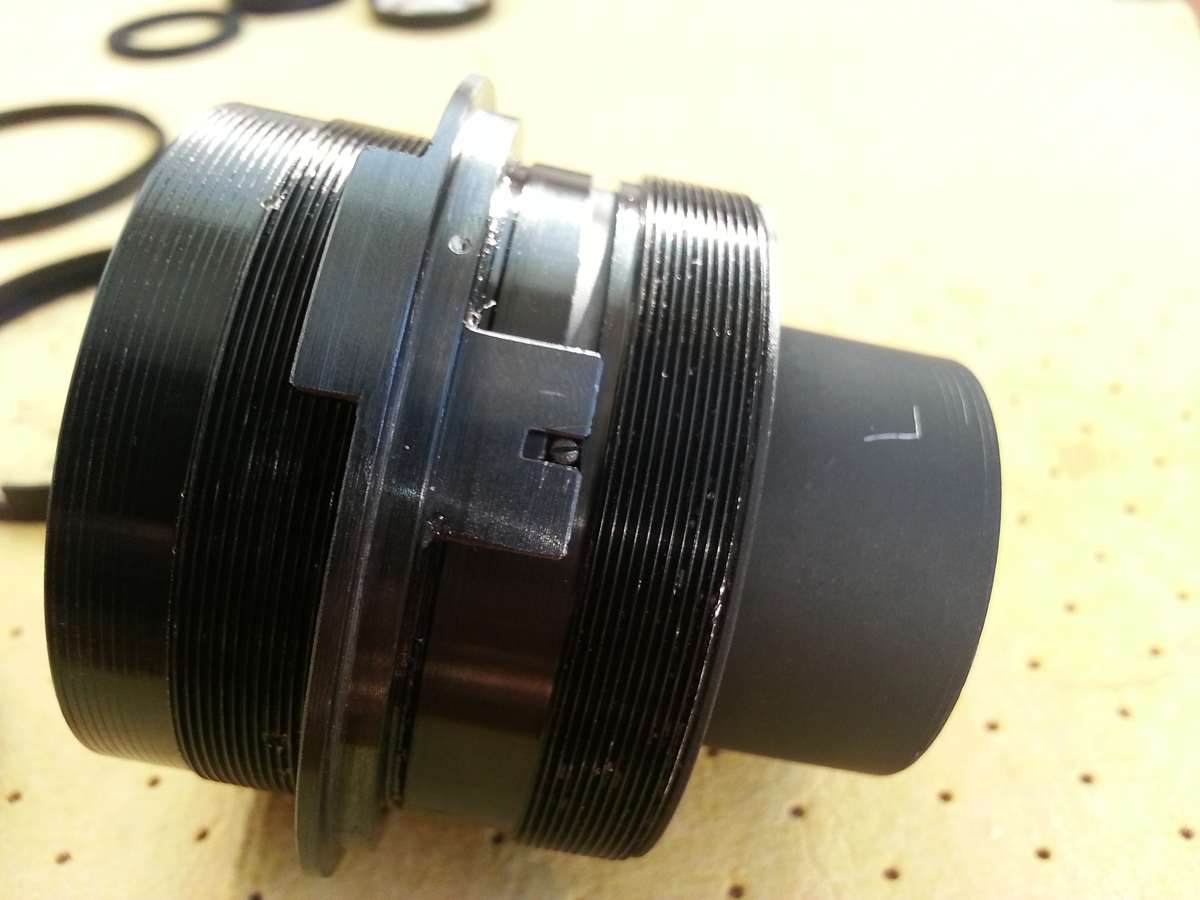
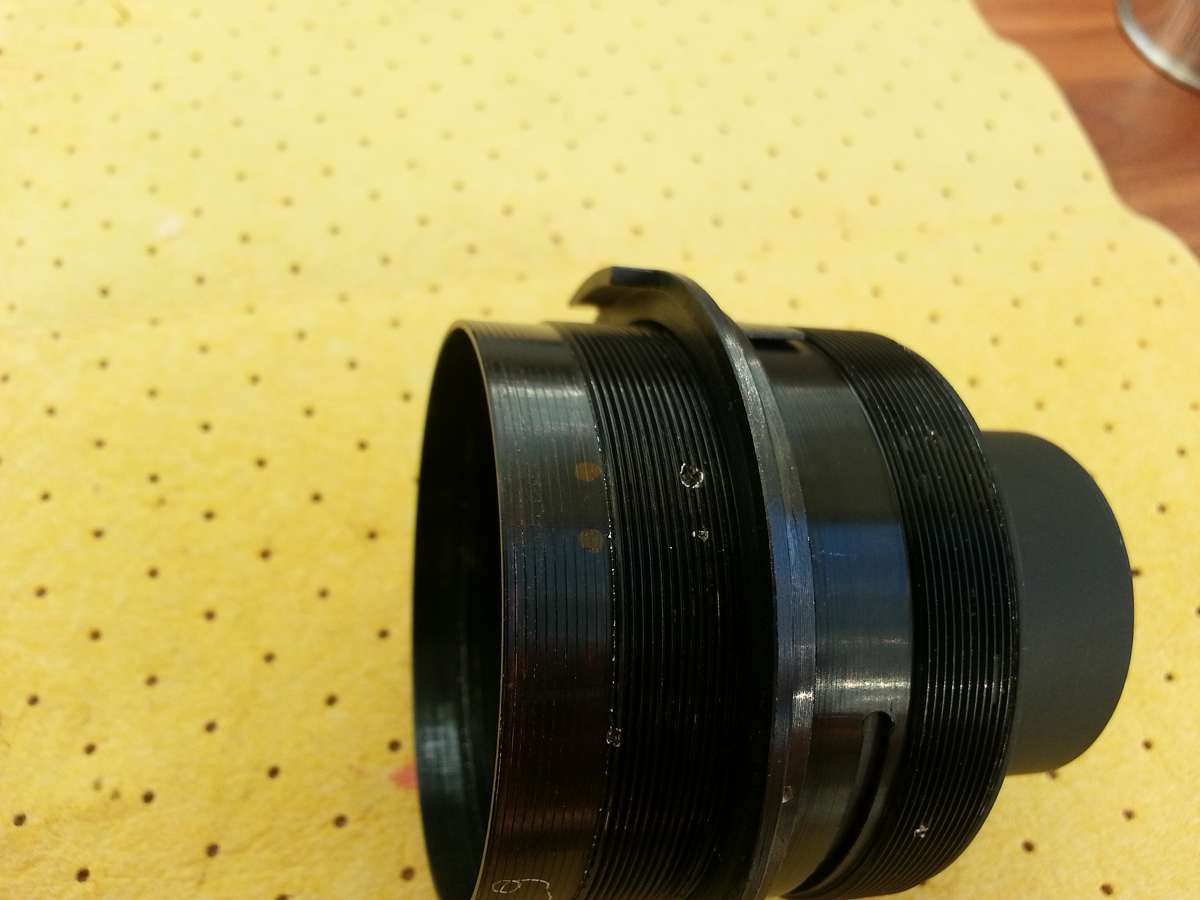
start by removing the first ring, again it s held by 3 screws, then take out the second ring, remove the two "big" screws on the third ring and unscrew it, removing this one was very difficult on my lens as the thread was a bit damaged by the holes for the screws:
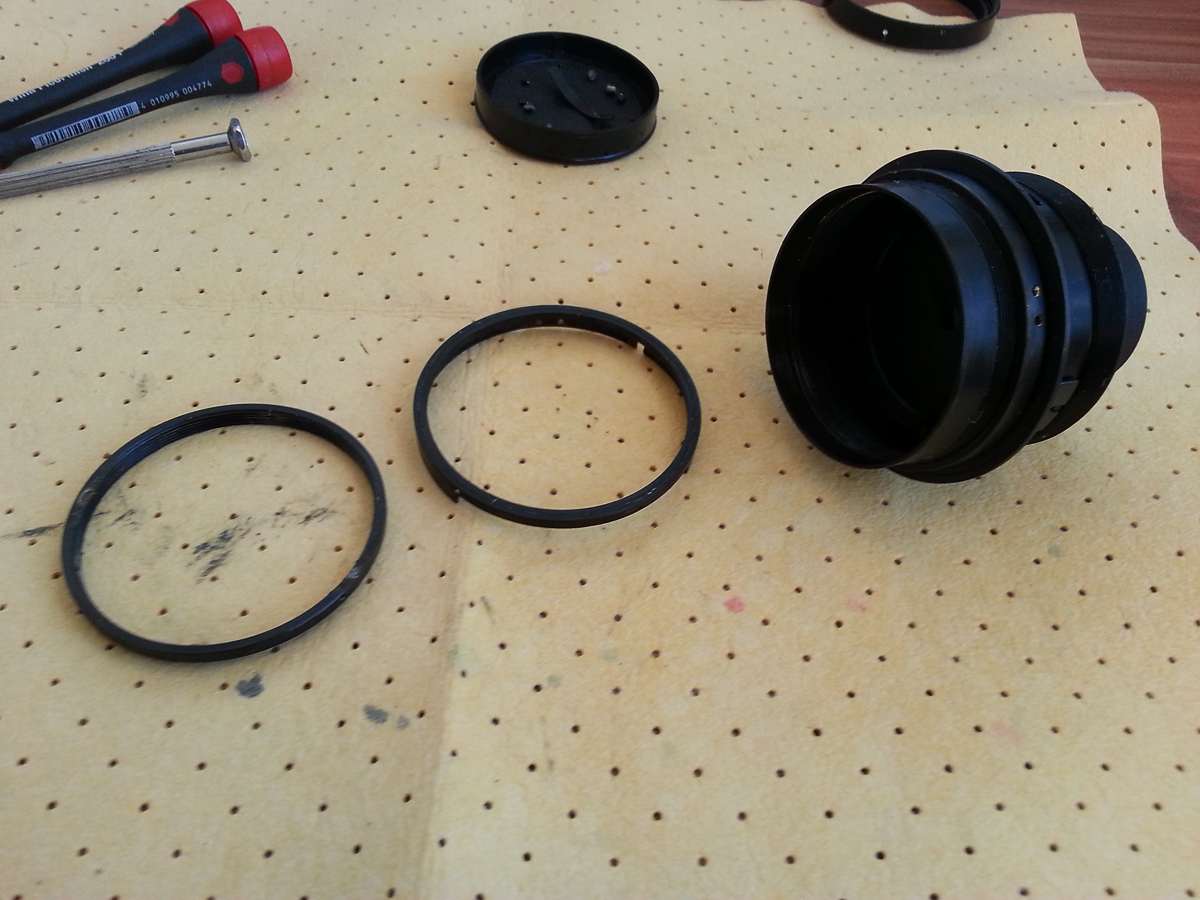
the last ring can be unscrewed after you remove the two scrwes that go into the ring that governs the aperture blades:


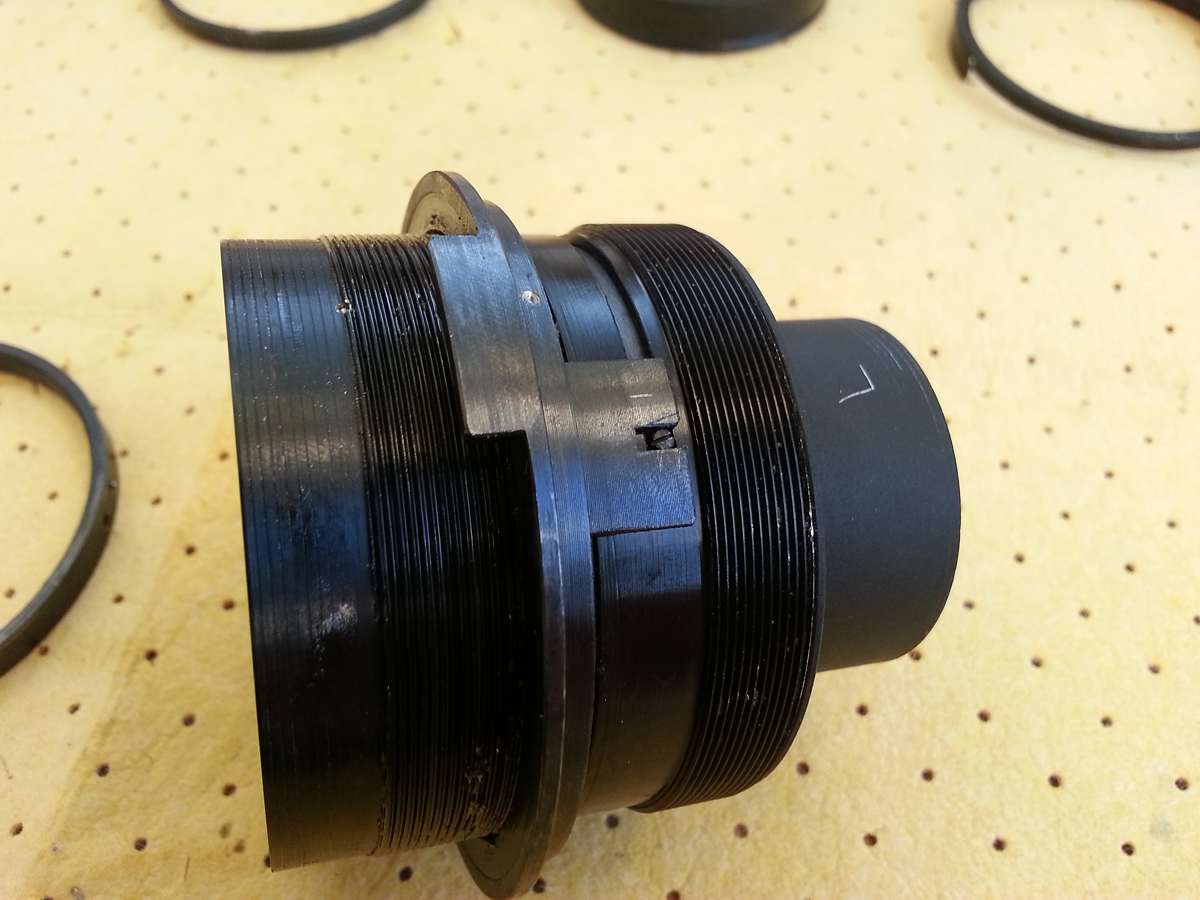
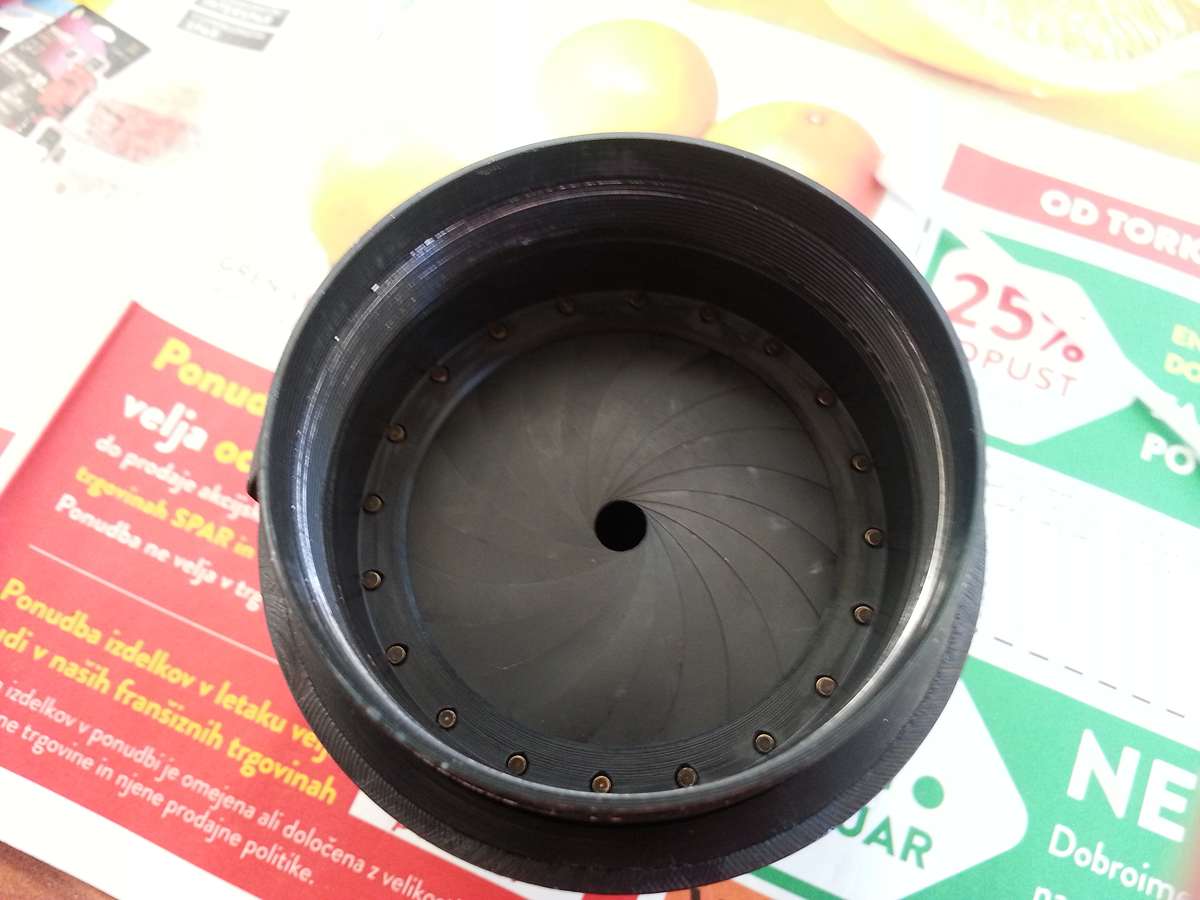
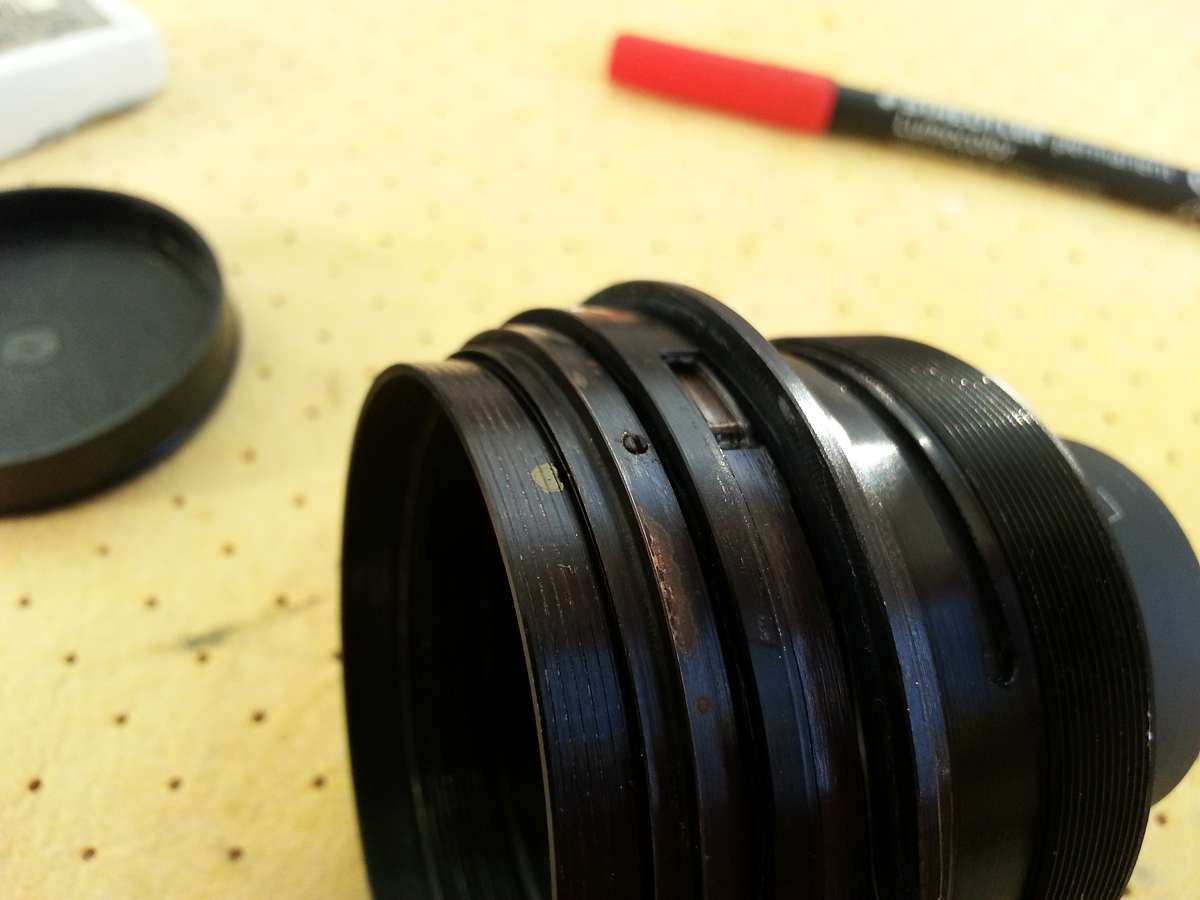
now you can clean the aperture blades, i do it without dissasembling it, i use a brush, withe spirit and a blower, it needs more passes this waybut one avoids putting back 20 blades, again be careful not to unscerw the back part (that holds the rear lens) of the aperture assembly, or the blades might drop out:

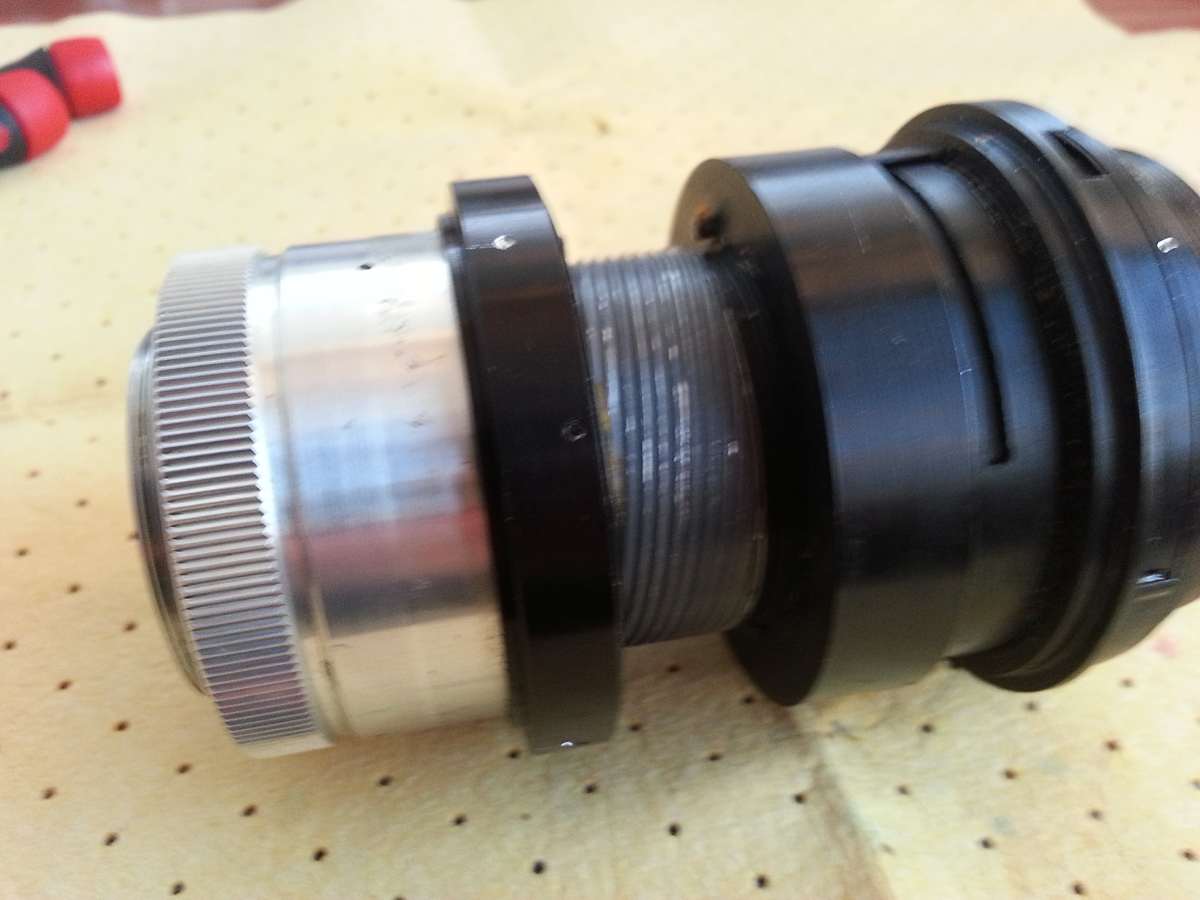
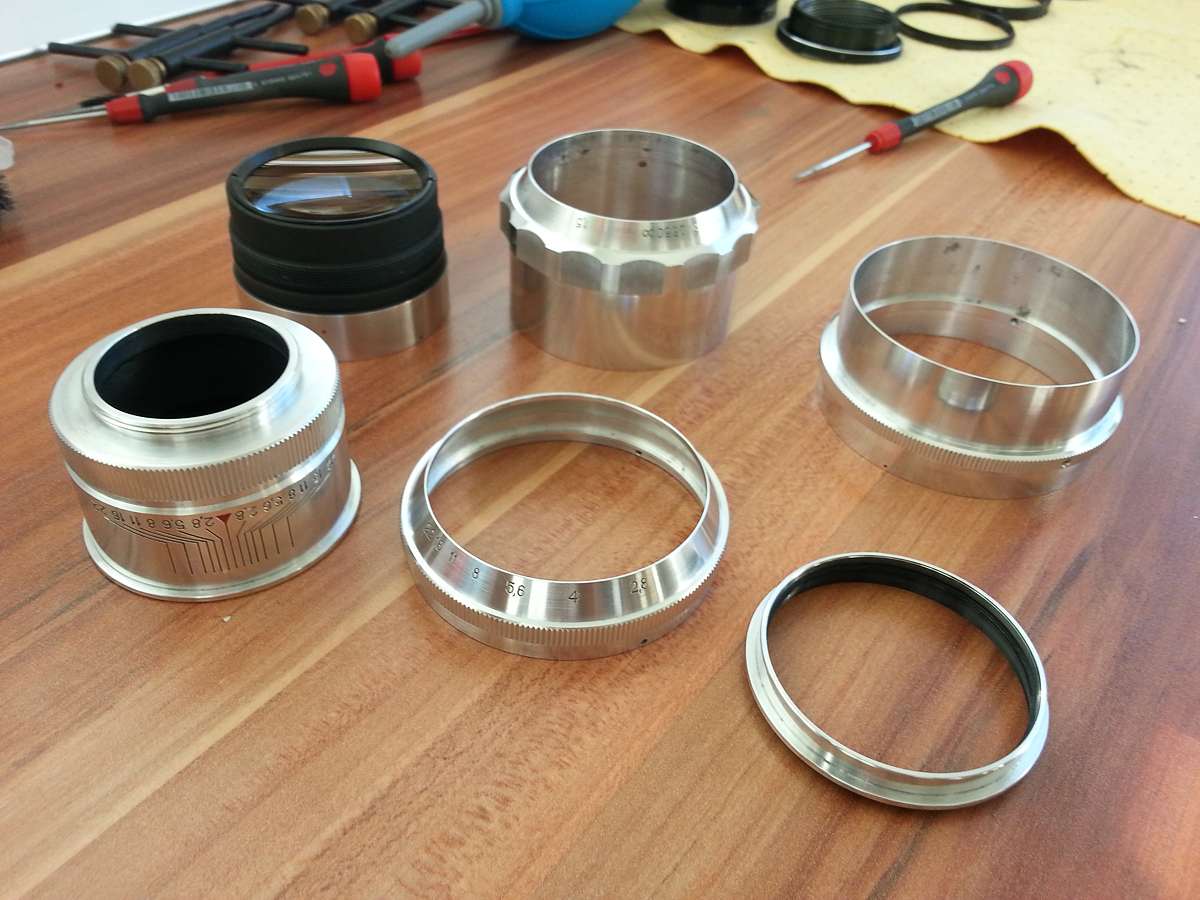
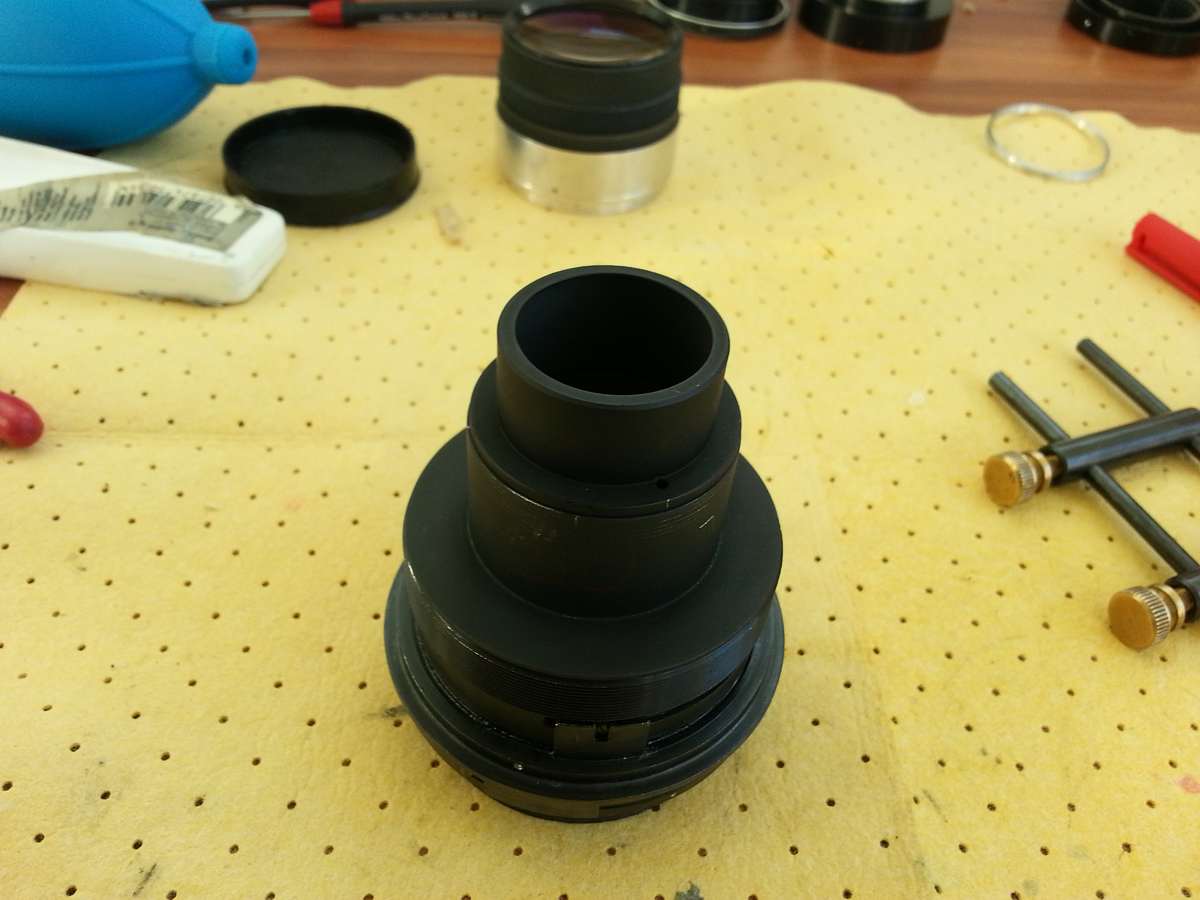
This is what we have now:

in part 2 the polishing!
Last edited by tomasg on Wed Jan 11, 2017 5:52 pm; edited 3 times in total |
|
| Back to top |
|
 |
Raxar

Joined: 25 Mar 2014
Posts: 222
|
| Posted: Wed Jan 11, 2017 1:09 pm Post subject: |
|
|
Raxar wrote:
 |
|
| Back to top |
|
|
tomasg
Joined: 01 Nov 2009
Posts: 1135
Expire: 2014-04-28
|
| Posted: Wed Jan 11, 2017 1:52 pm Post subject: |
|
|
tomasg wrote:
PART 2
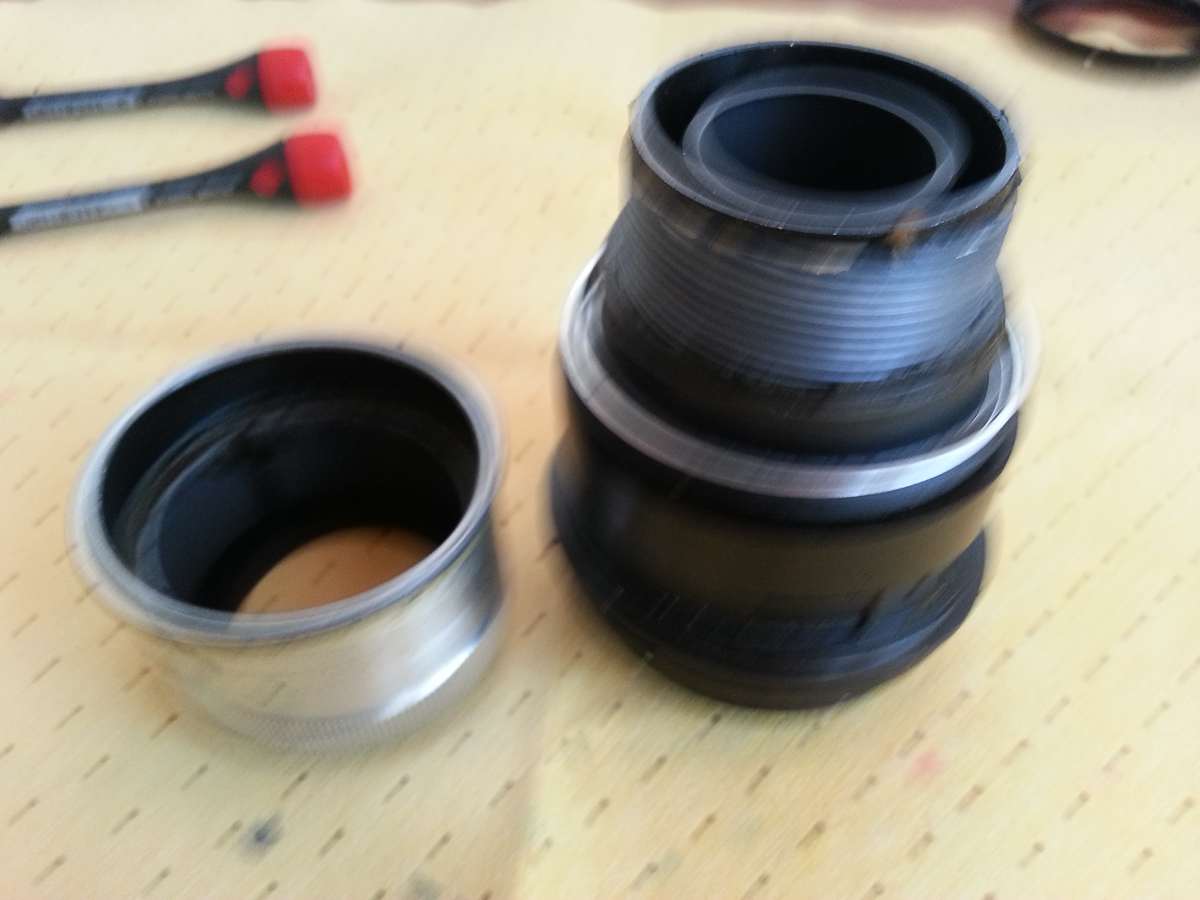
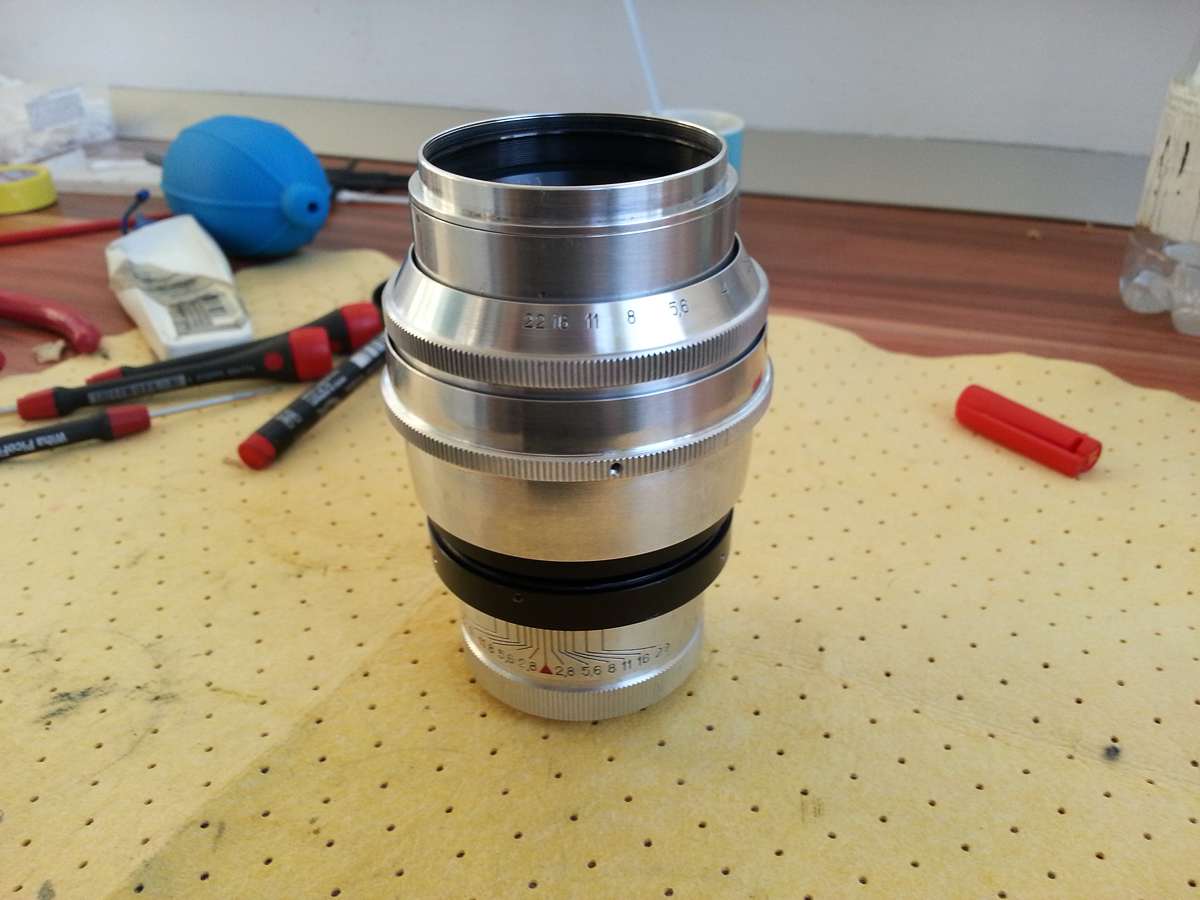
First one last ring to remove, simply untighten the small screw:

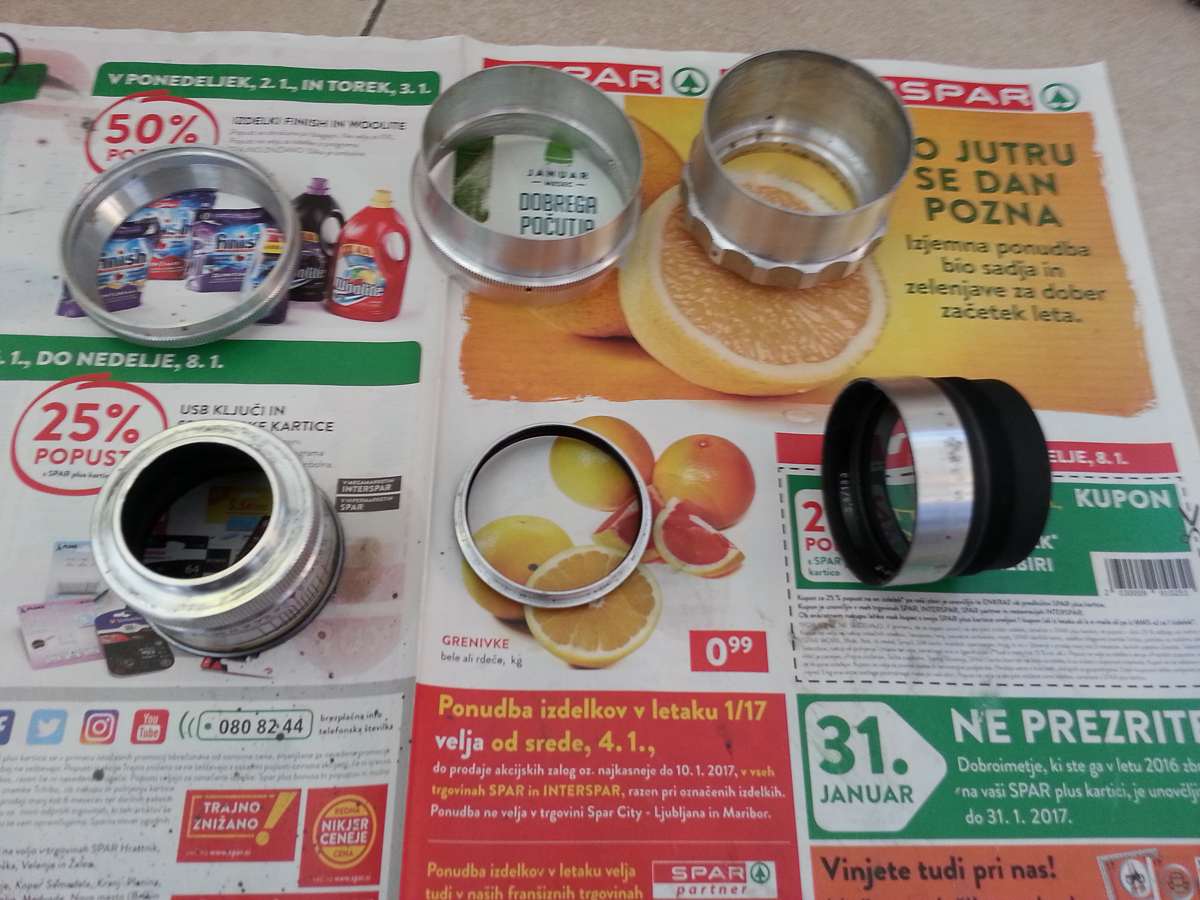
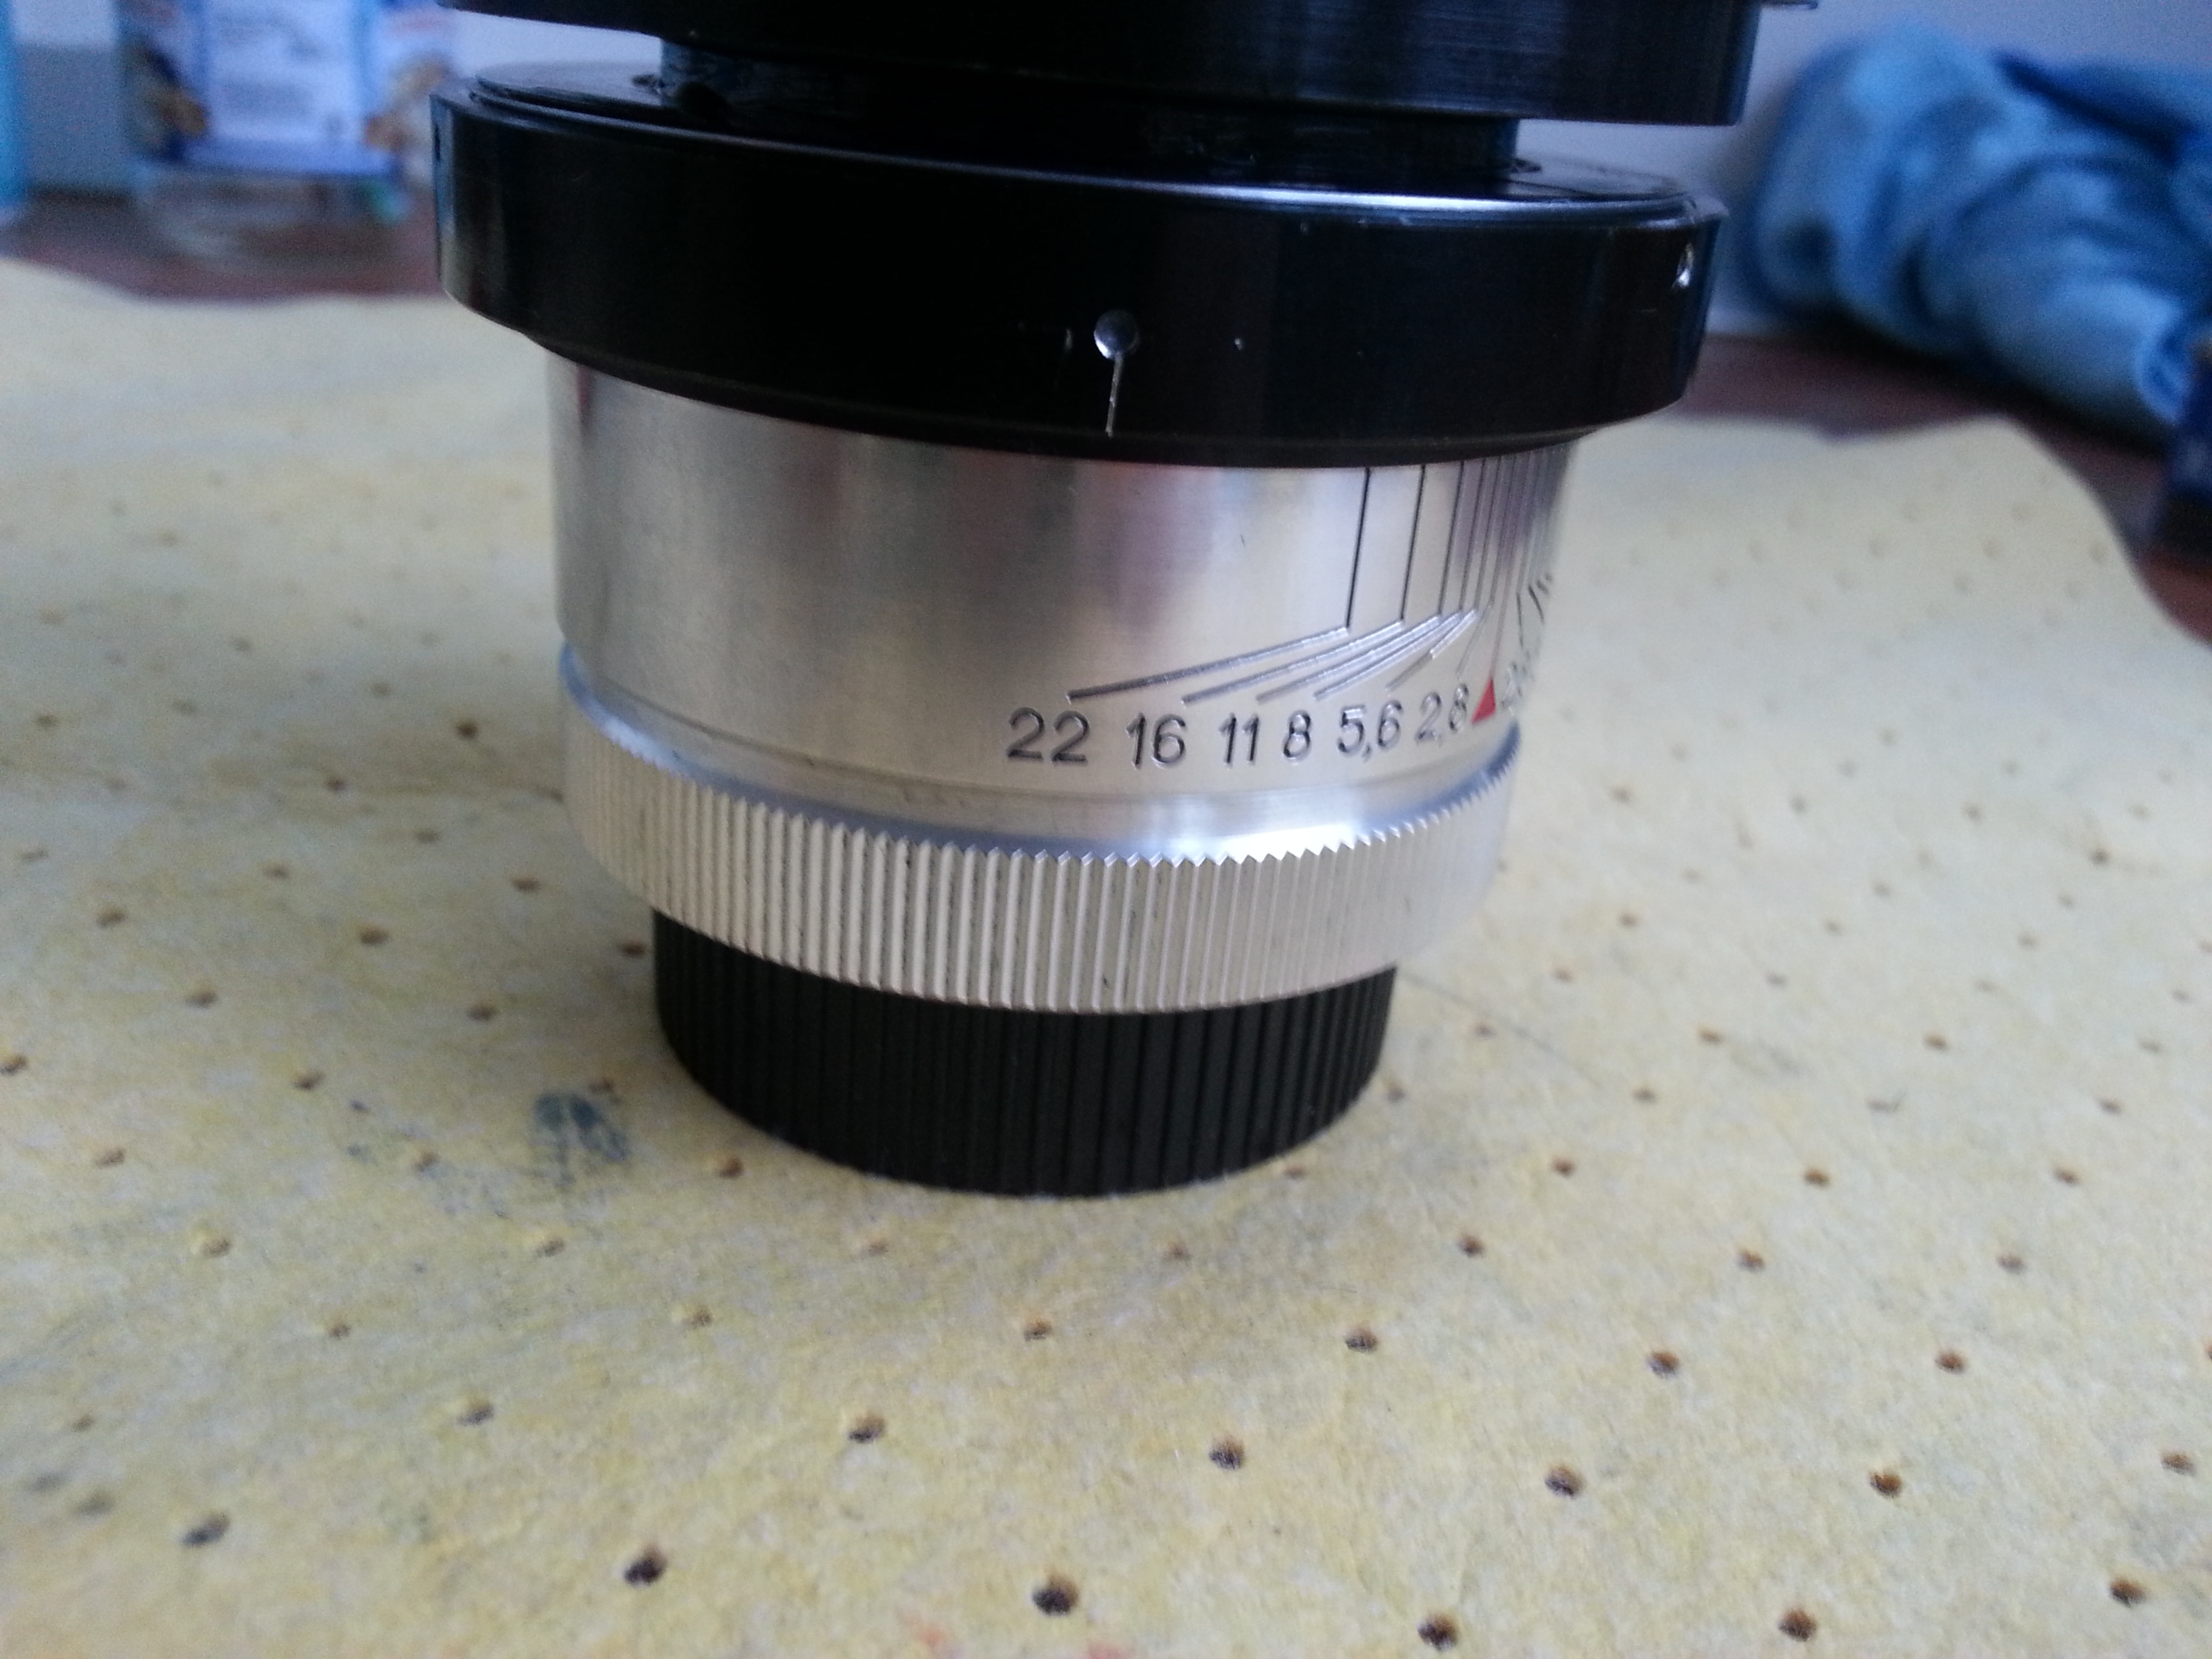
now these are the alu parts to polish:

Generic tips and material:
use gloves, a protection "mask" and protection glasses, if possible do it outdoor
make sure the material is really alluminium and not brass
do a test on the internal part of the ring
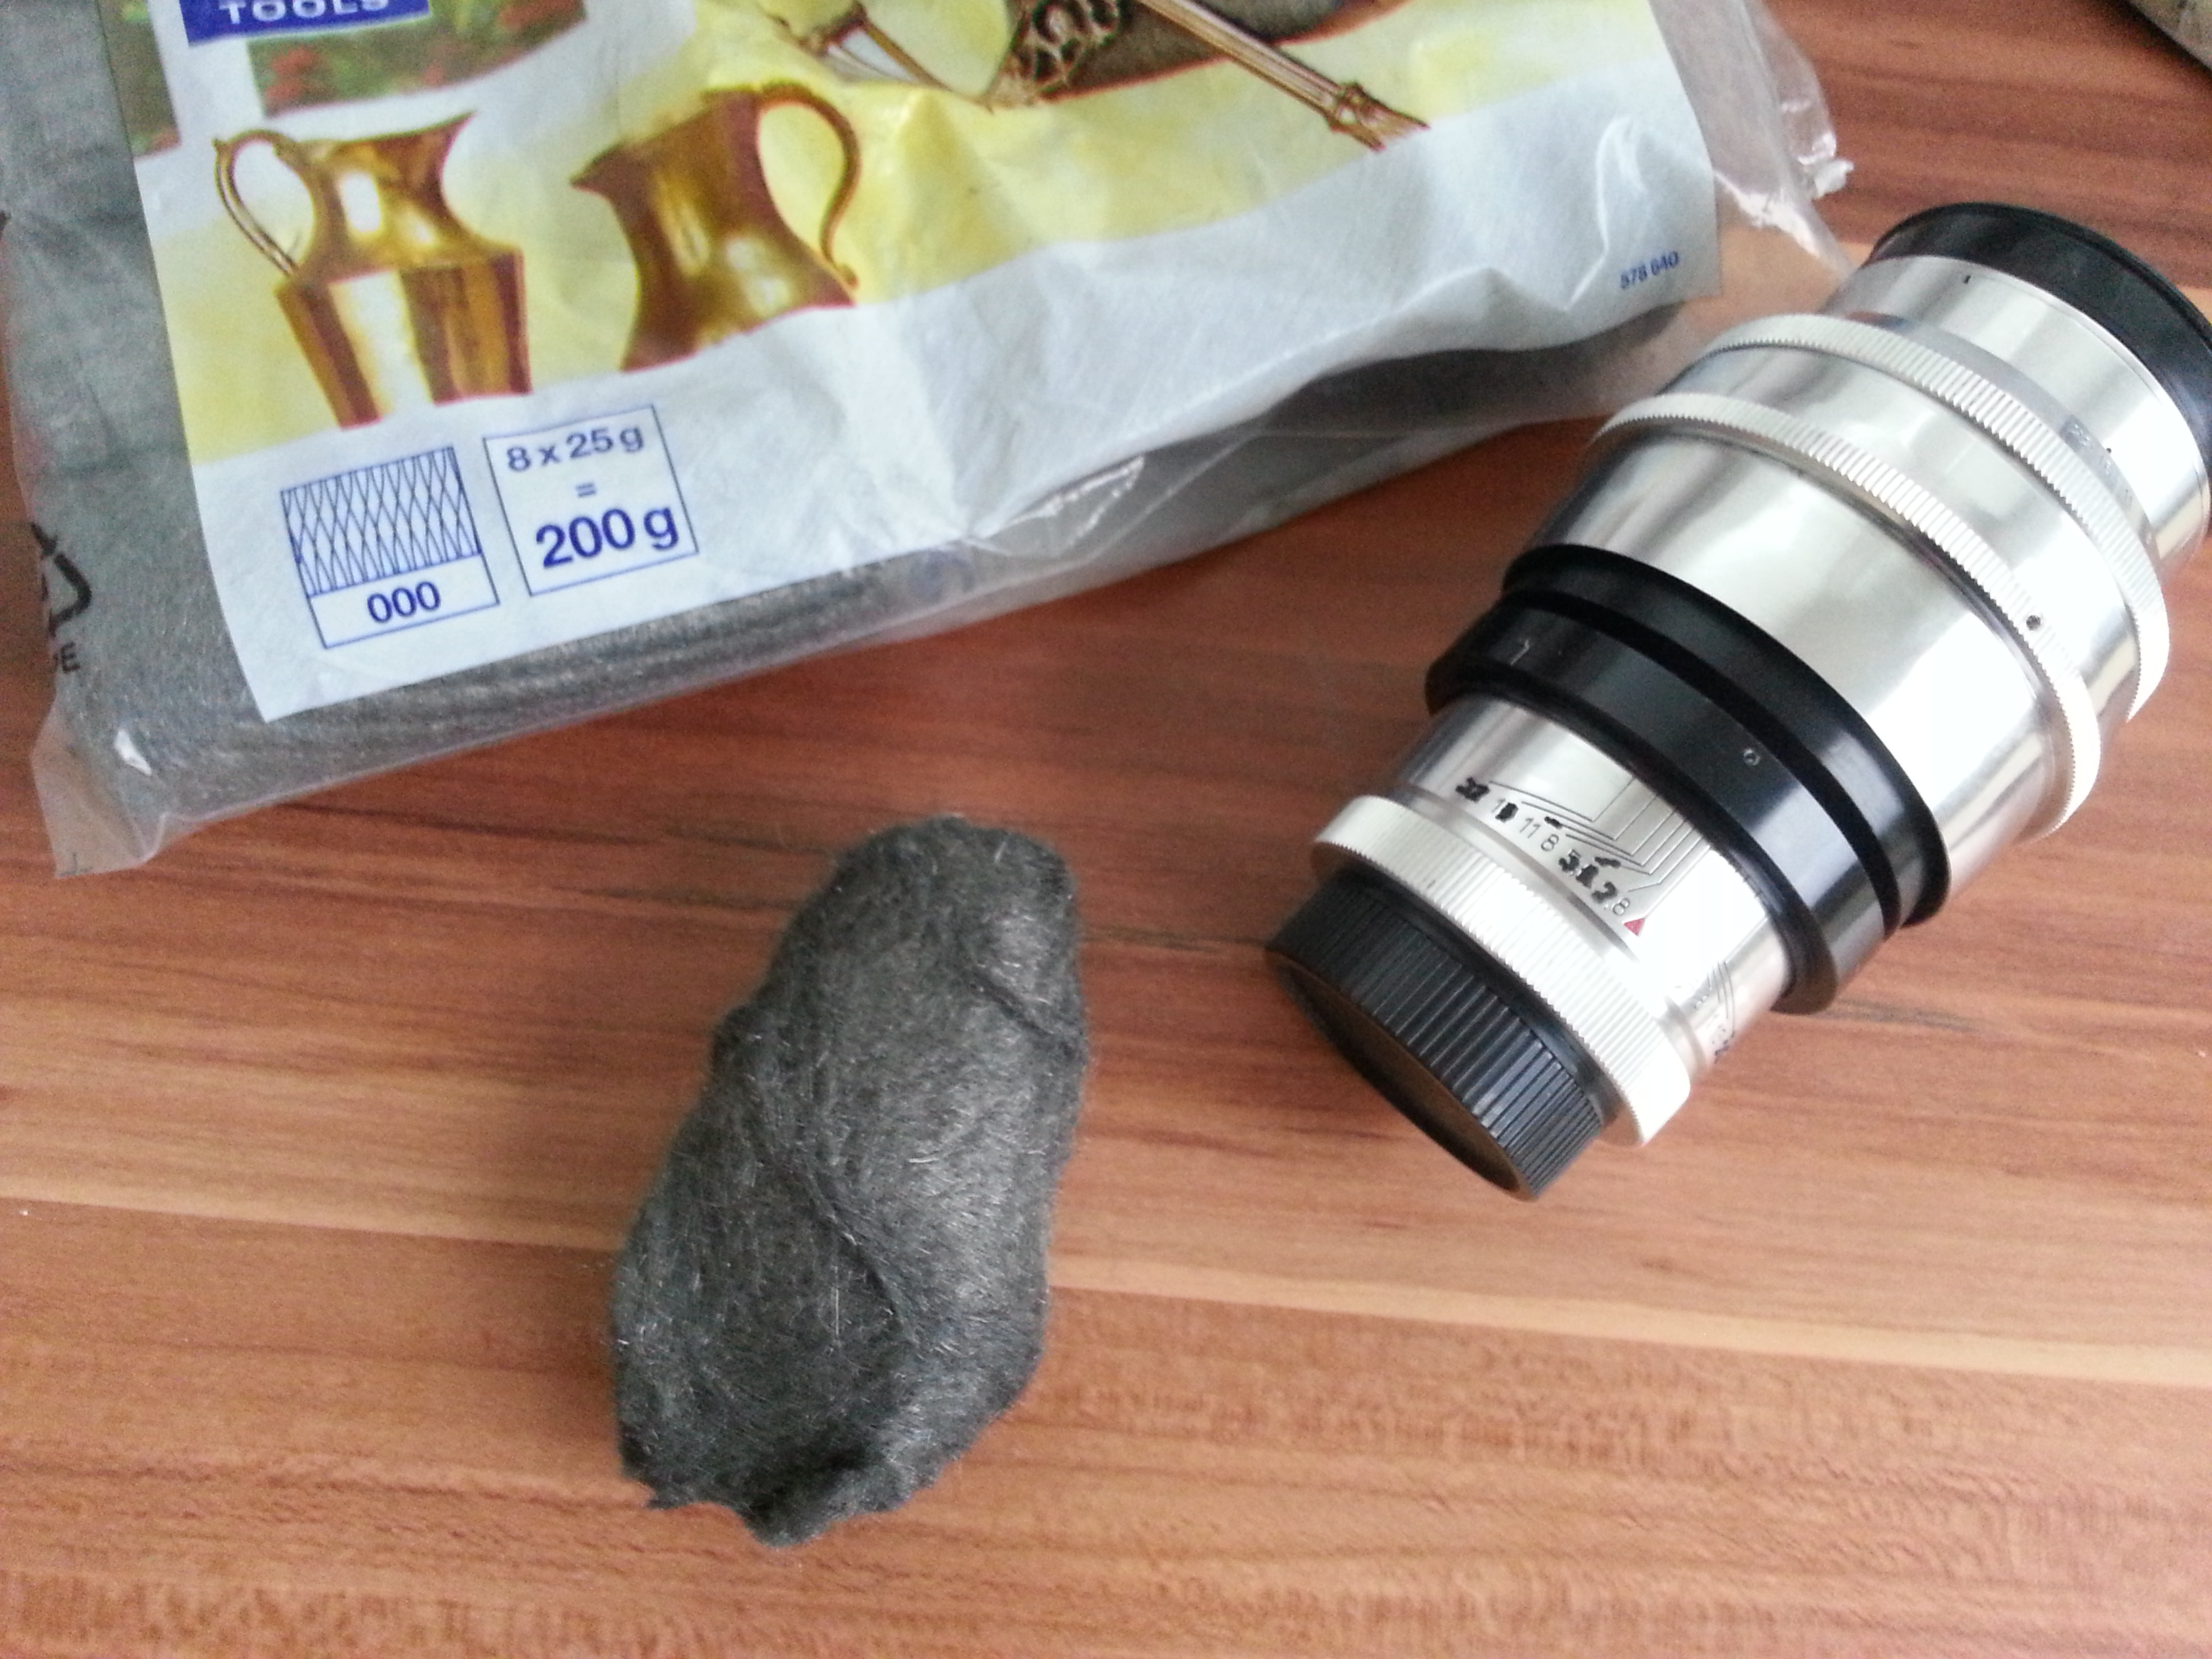
this is done by using steel wool, i buy mine in a big generic hardware shop like Obi, the wool comes in different grades "000" (triple zero) being the finest, i start with "00" and finish with the "000". When i use the "00" i add some generic polishing paste for metal, this has to advantages, it sppeds up the process and it preserves the wool, using water will have the same effect, like with sand paper and metallic surfaces.
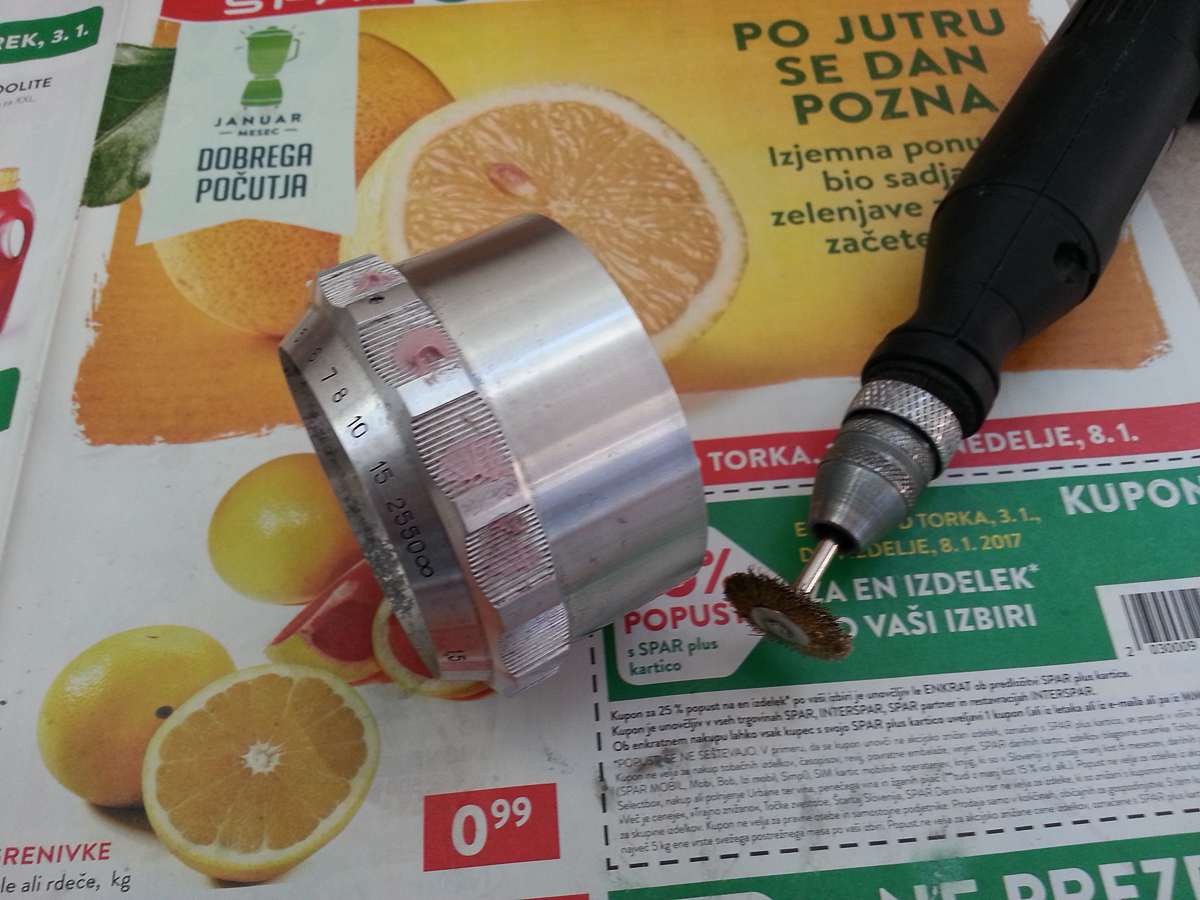
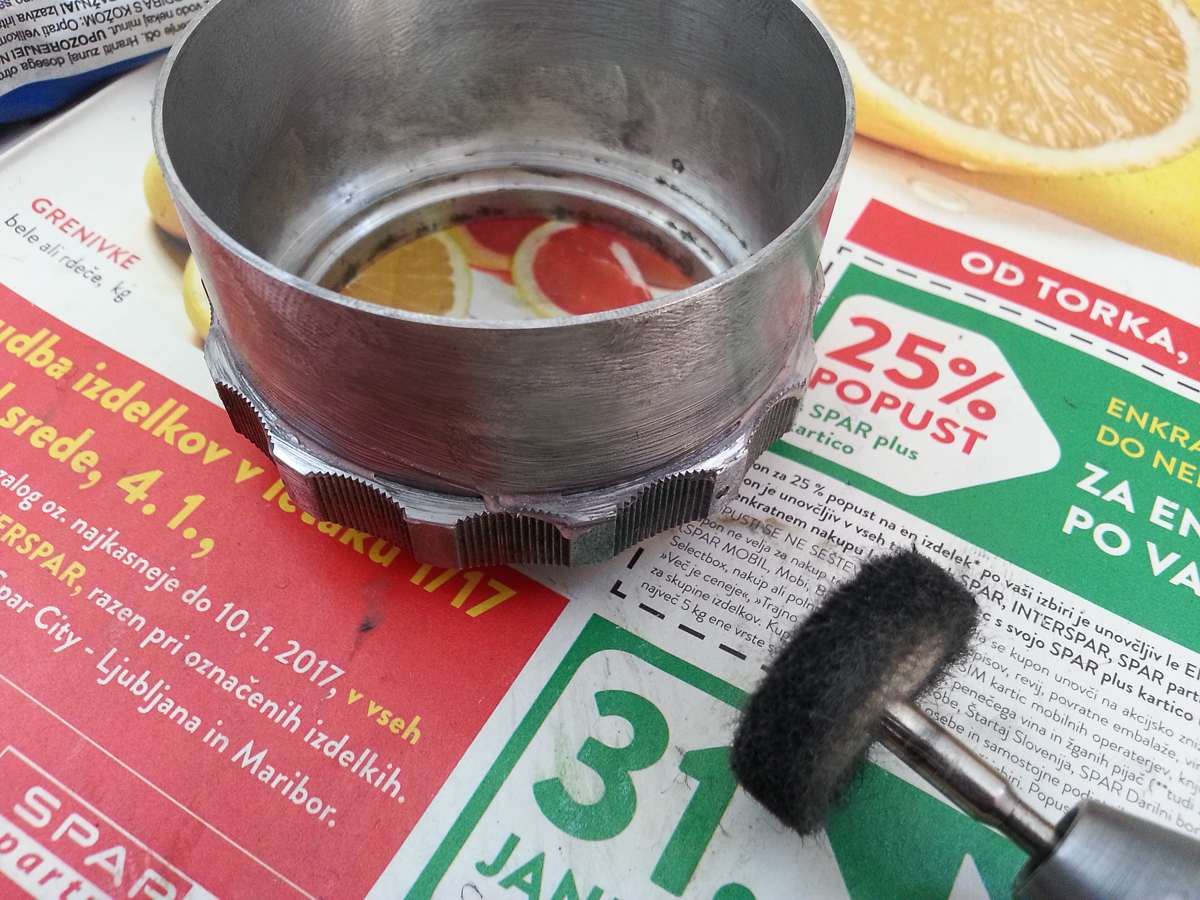
A Dremel like tool is also handy to clean the "ribs".
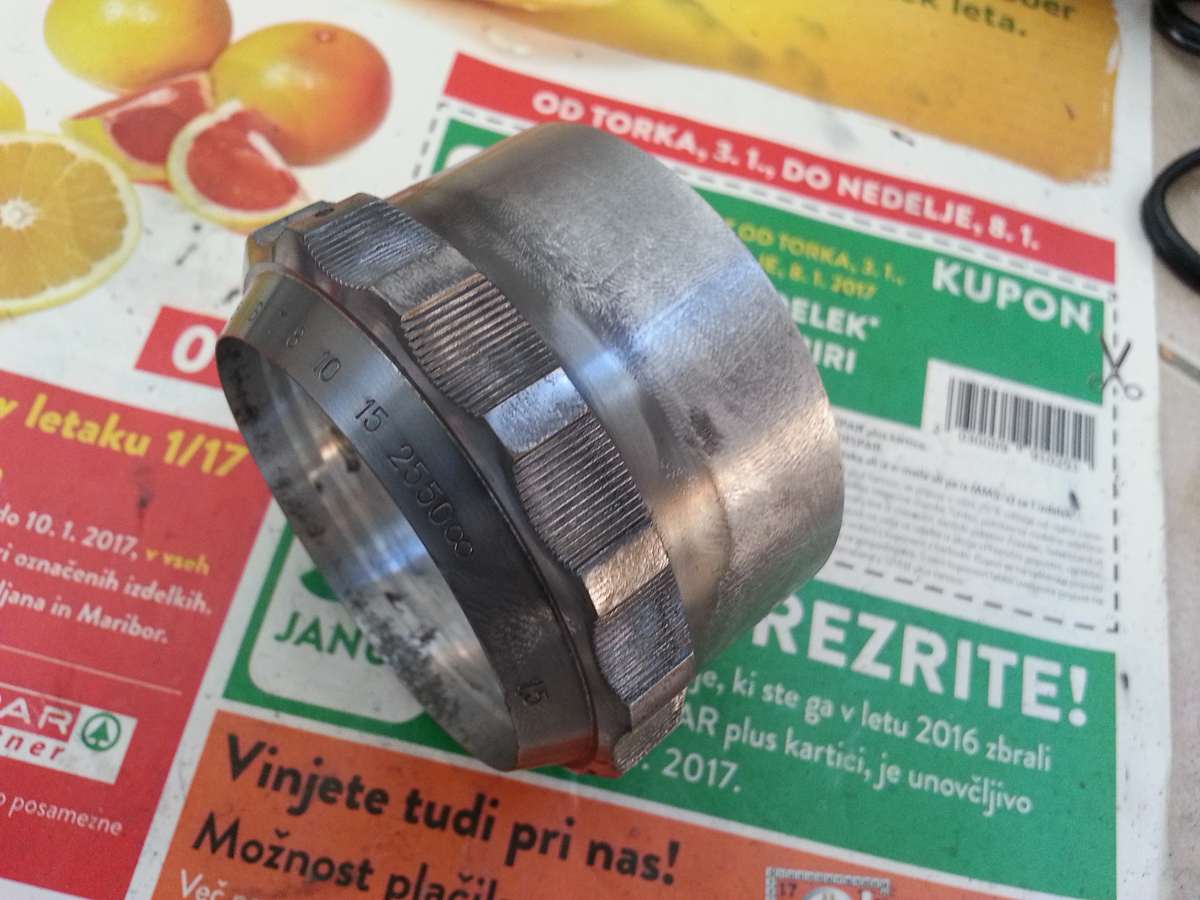
In fact this is how i start, a bit of polishing paste, Dremel and a soft brass brush, be sure it s a soft one use it for the ribs only, avoid the other surfaces, a good idea is to try everything on the inside of the ring first!

the paste will make a mess but don t worry, sometimes i also use a soft brush that comes usually with the tool set, i use it for the spots hard to reach, like surfaces at 90 degree angles:


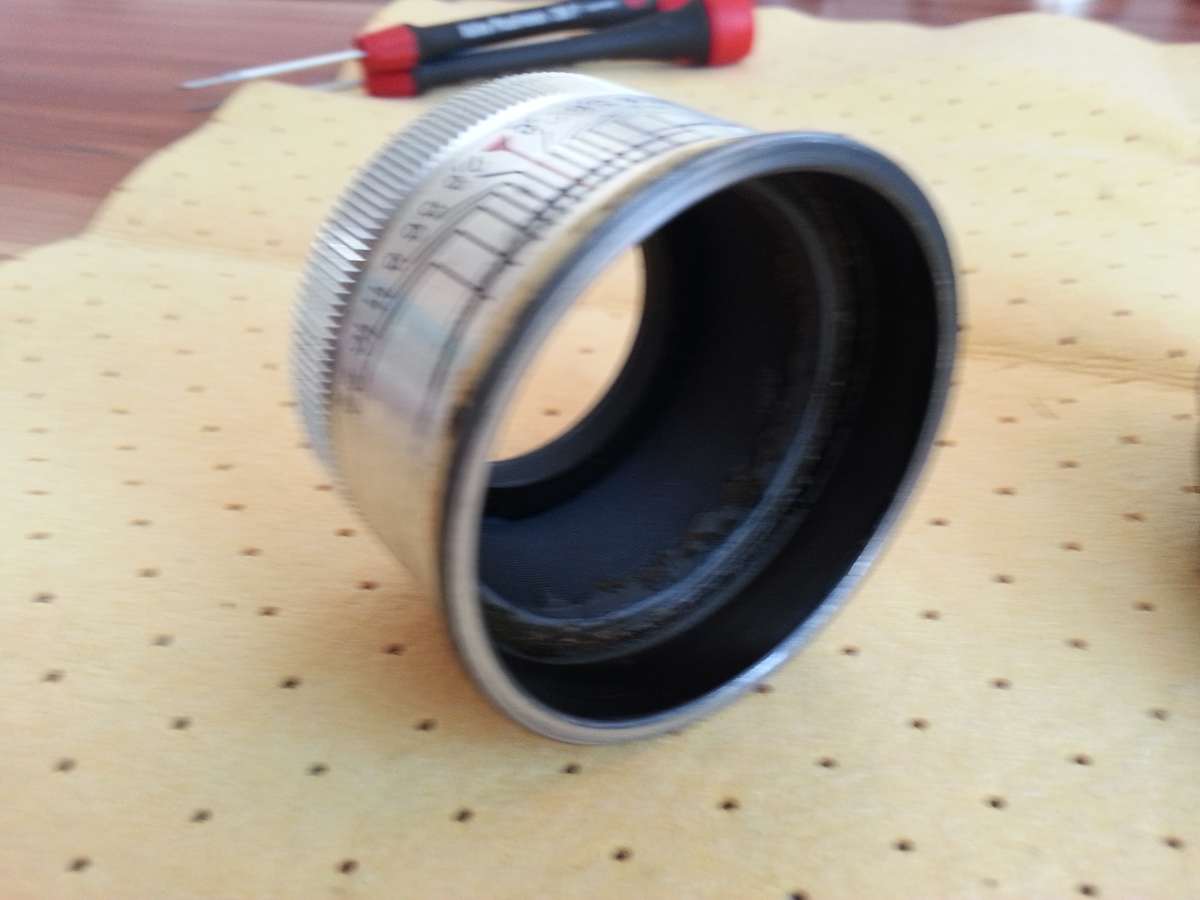
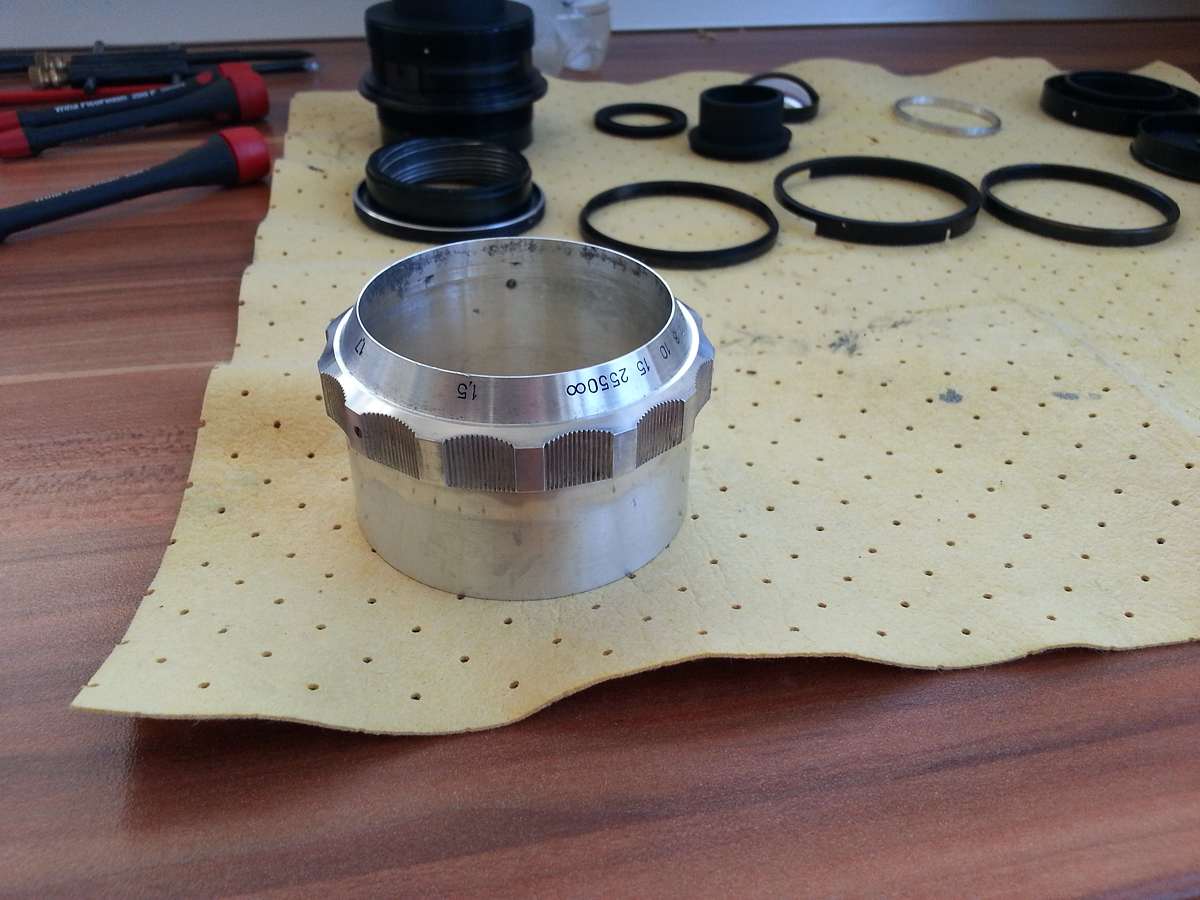
once i do this i start to work with the "00" wool and thee polishing paste, always moving it laterally, or holding the wool still and rotating the ring, this way the surface will look more even:

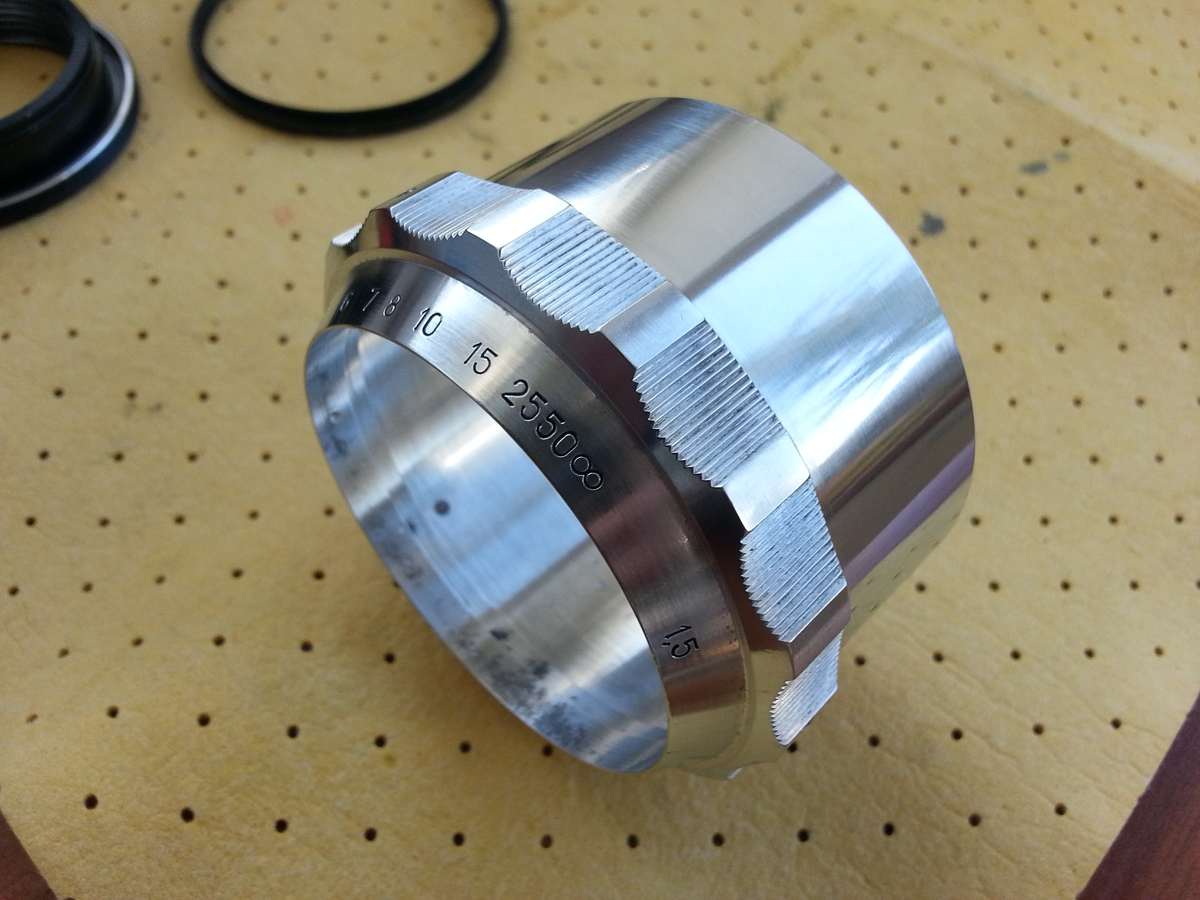
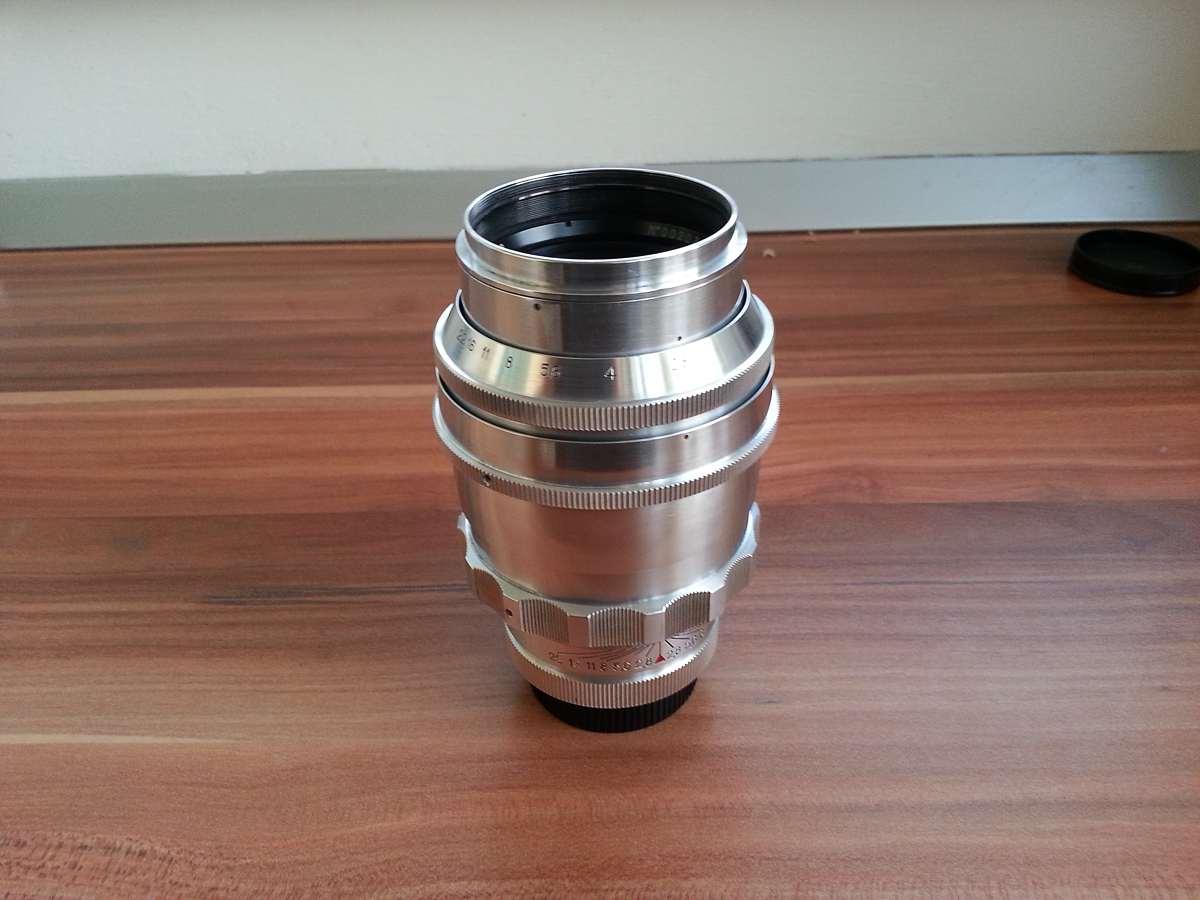
it doesn t look impressive at first, it takes at least one more step, next i wash the ring with water and a mild detergent and work on a dry ring with the final "000" wool, wash everything again to avoid the remains of the wool:

and that s it actually! You ll have to find on your own how much polishing you need with each wool. Although this method is generally safe for the numbers and letters that are engraved take care not to overdo this parts. With this method you won t be able to remove the deep scratches or dents, to do this i first use sand paper and water on the scratches only! Starting with a 300 grain and all the way to finishing with 1000 or 1200
It takes a bit of practice, for example start by applaying some pressure on the wool at first, then as you polish it applay less and less. The main ingredient remains "elbow grease" as they say
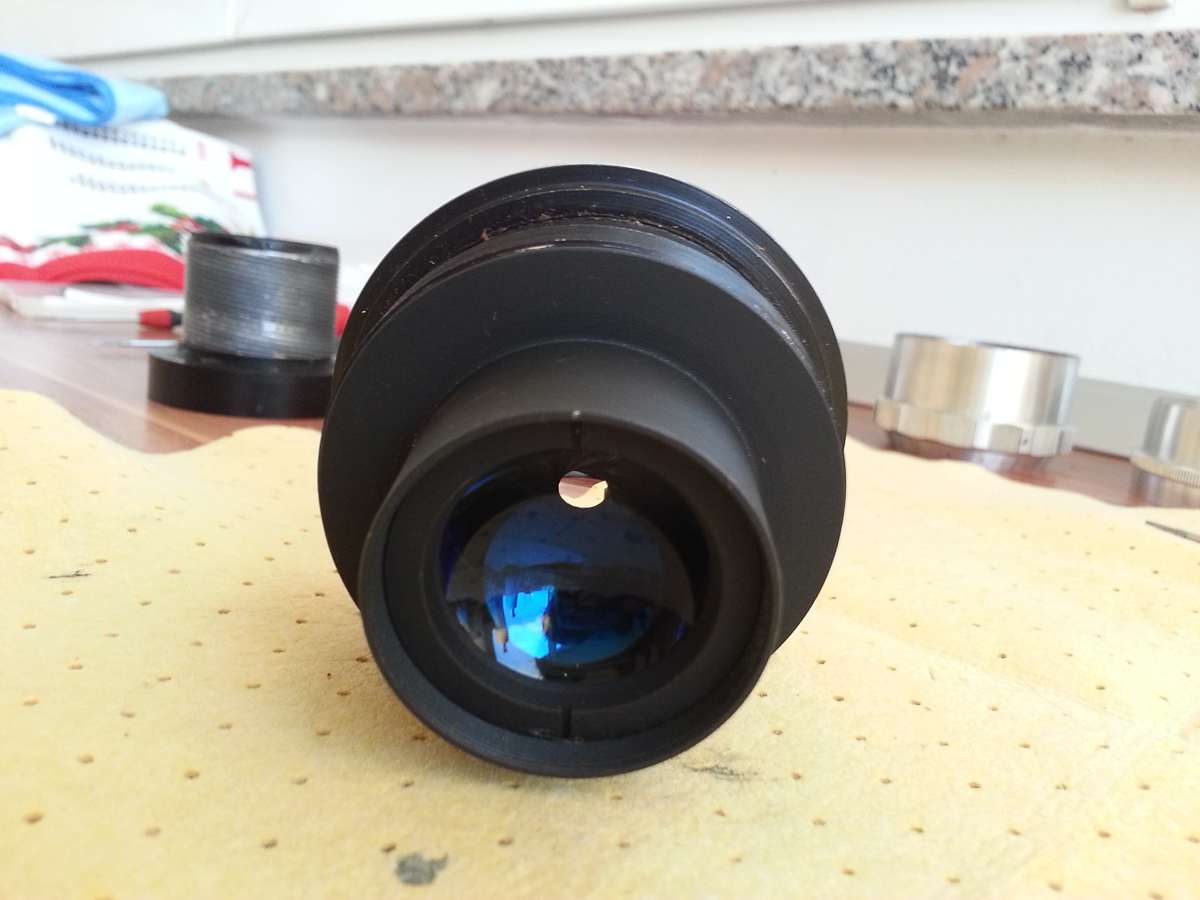
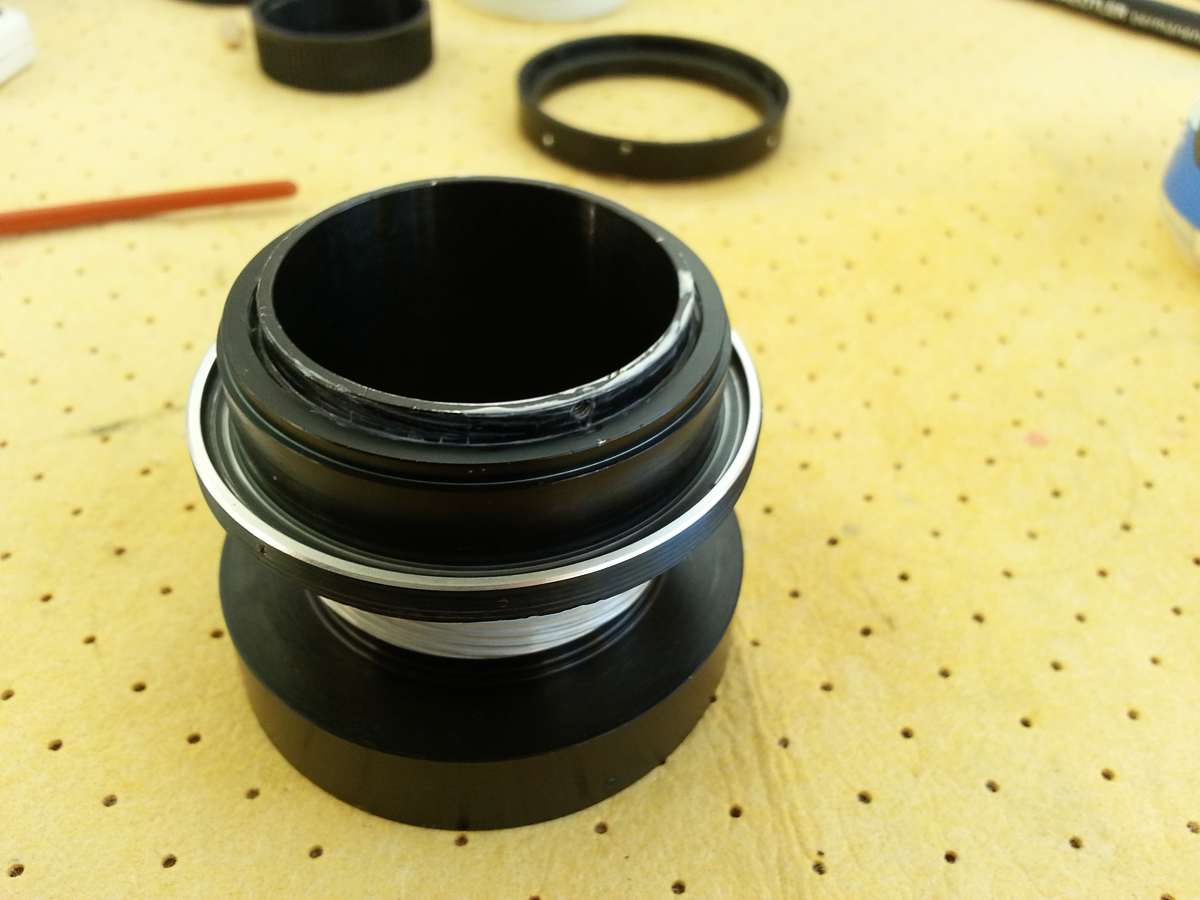
The front part of the Tair needed a bit of extra care, as there was still glue on the lens rings i didn t want to open them so i did it this way, i put back on the small ring and protected the glass, i didn t use the polishing paste on this one:
you can see some scratches on this one that i first sanded with paper to reduce them, if you do this make sure the ring is really made of alluminium and not chromed brass!
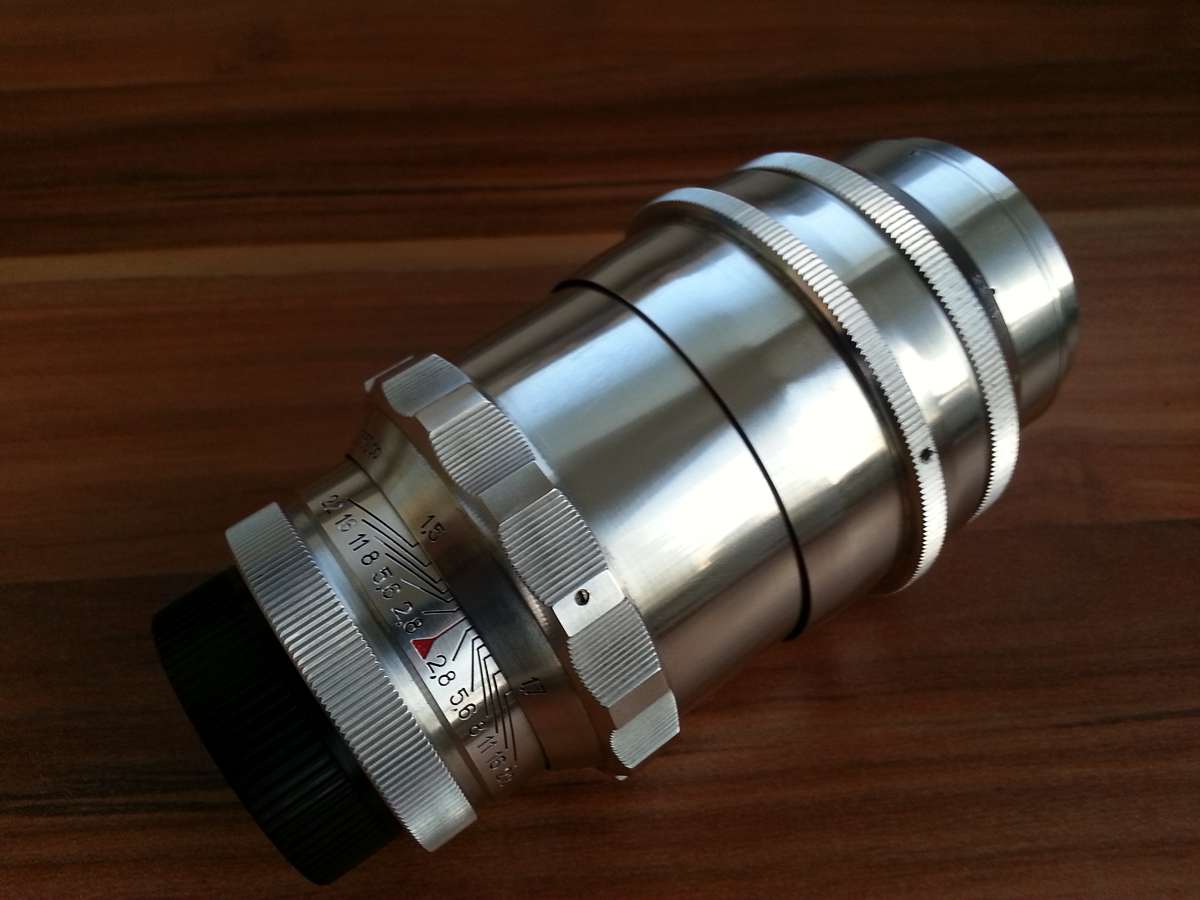
Repeat the process for all the alu parts:

in the third part we ll put the lens back togheter!
Last edited by tomasg on Wed Jan 11, 2017 5:40 pm; edited 5 times in total |
|
| Back to top |
|
|
tomasg
Joined: 01 Nov 2009
Posts: 1135
Expire: 2014-04-28
|
| Posted: Wed Jan 11, 2017 2:52 pm Post subject: |
|
|
tomasg wrote:
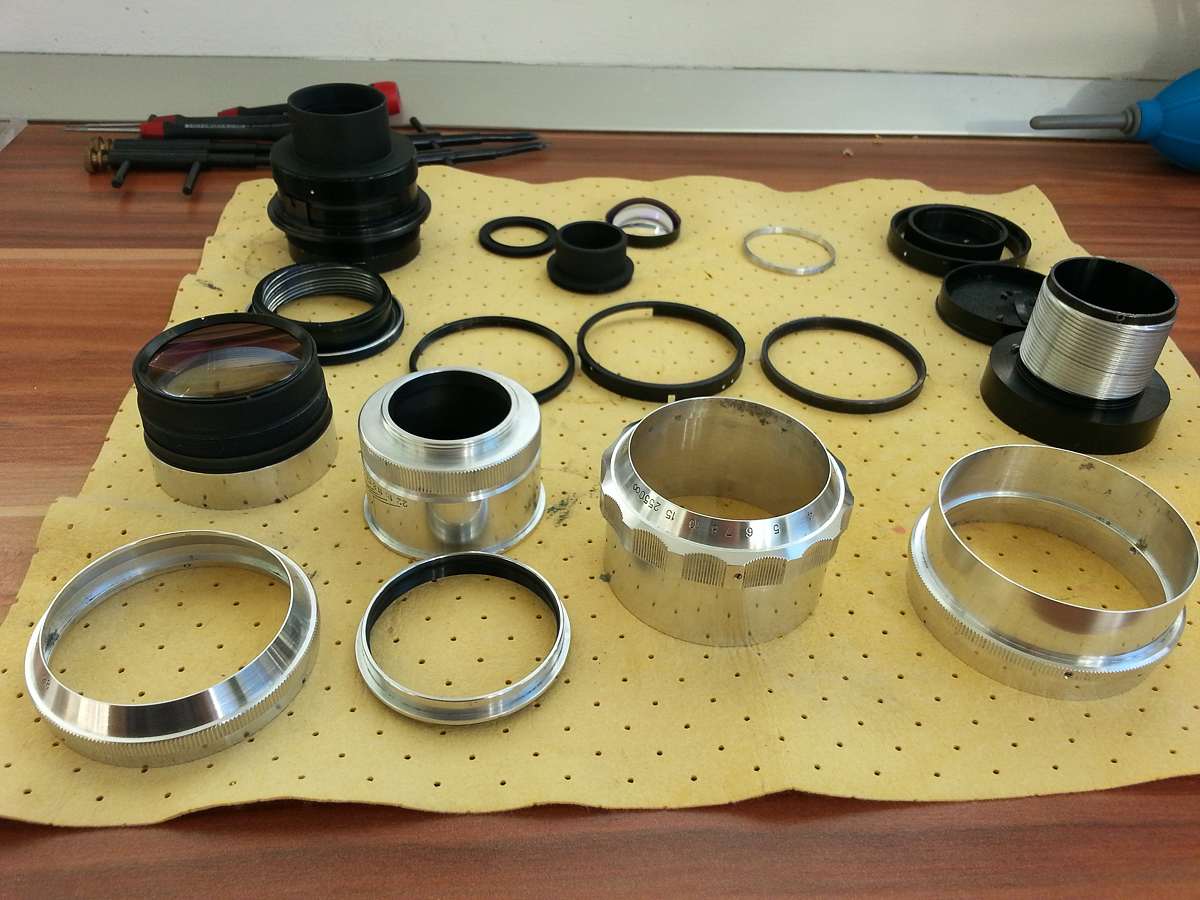
PART 3
This is what we have now:

start by reassembling the aperture block (gresase a bit the rings that turn), first the back ring, grase a bit the thread where the ring sits, do not apply too much of it and try to use a sticky, non creeping grease (this is where oil on aperture comes from), i made two small marks before i removed the screws, but the difference each turn of the ring makes is so big that you ll have no problems in finding the right position:

mark with a sharpie where the holes for the screws are and screw back the second ring, insert back the two big screws:
[url=http://forum.mflenses.com/userpix/20171/big_2108_20170110_131719_1.jpg]
 [/url] [/url]
put back in the third ring, mark again at least one hole for the screws of the third ring and put it back, this ring is tight and you first have to push it on and then rotate to screw it:
install back the arm and roller for the click stops, adjust the tension and grease to your likeing, check that everything works as it should, next put back the rear element:

time to assemble the focusing mechanism, put on the ring screw it in a bit, it has to reach this position:
if it doesn t you ll have to fing the correct step on the thread, try the next one, or go to the one before, but always one step at a time, put the screw back in once you got it right next lube the helicoid, no need to over do it, you can add more later:

yes, this was actually almost enough, i later added just a bit of it (always add it at one end in front of the focusing ring then turn the ring to push the grease over the helicoid) but this may vary based on what grease you use. I greased the slot on the mount ring with the original sticky grease:

put back on the mount ring and grease it, agian go easy with it (unless you like stiffy focusing):

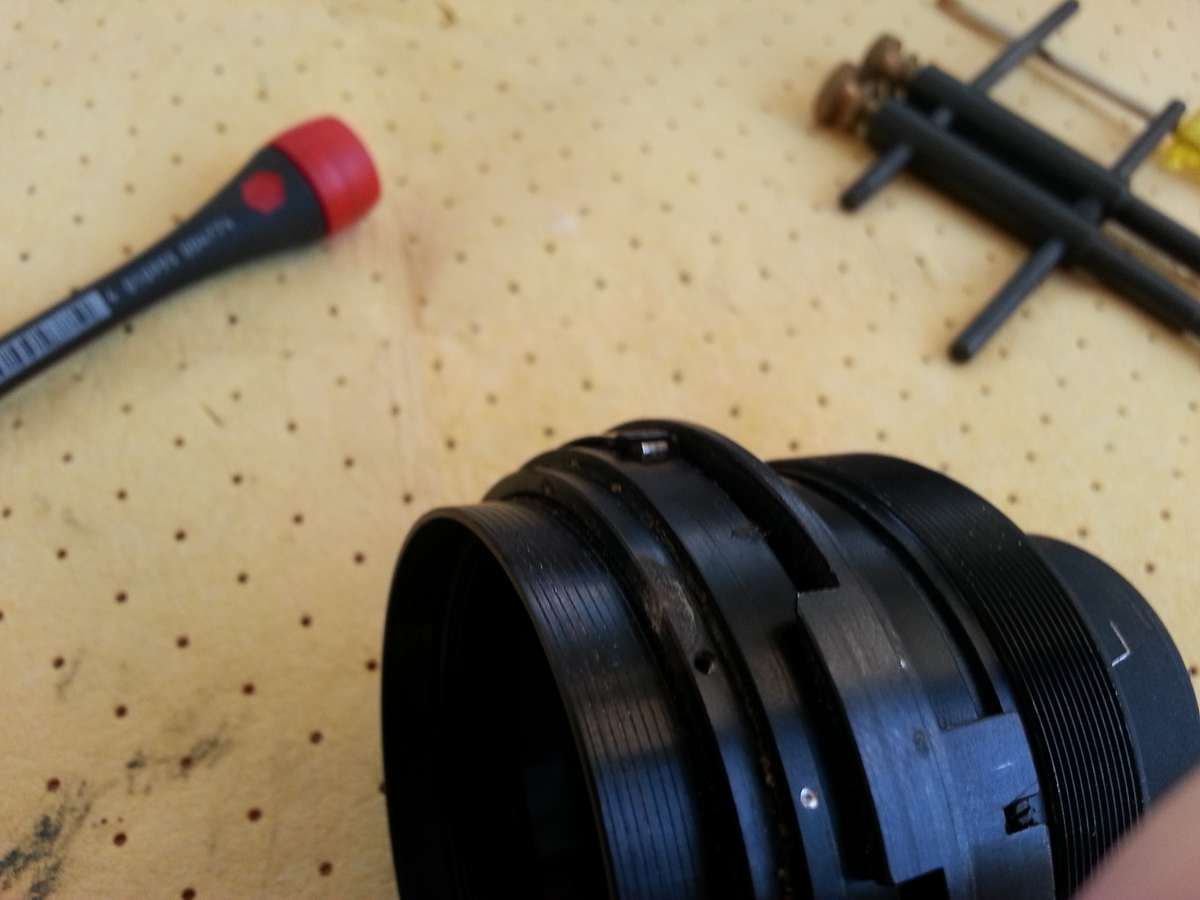
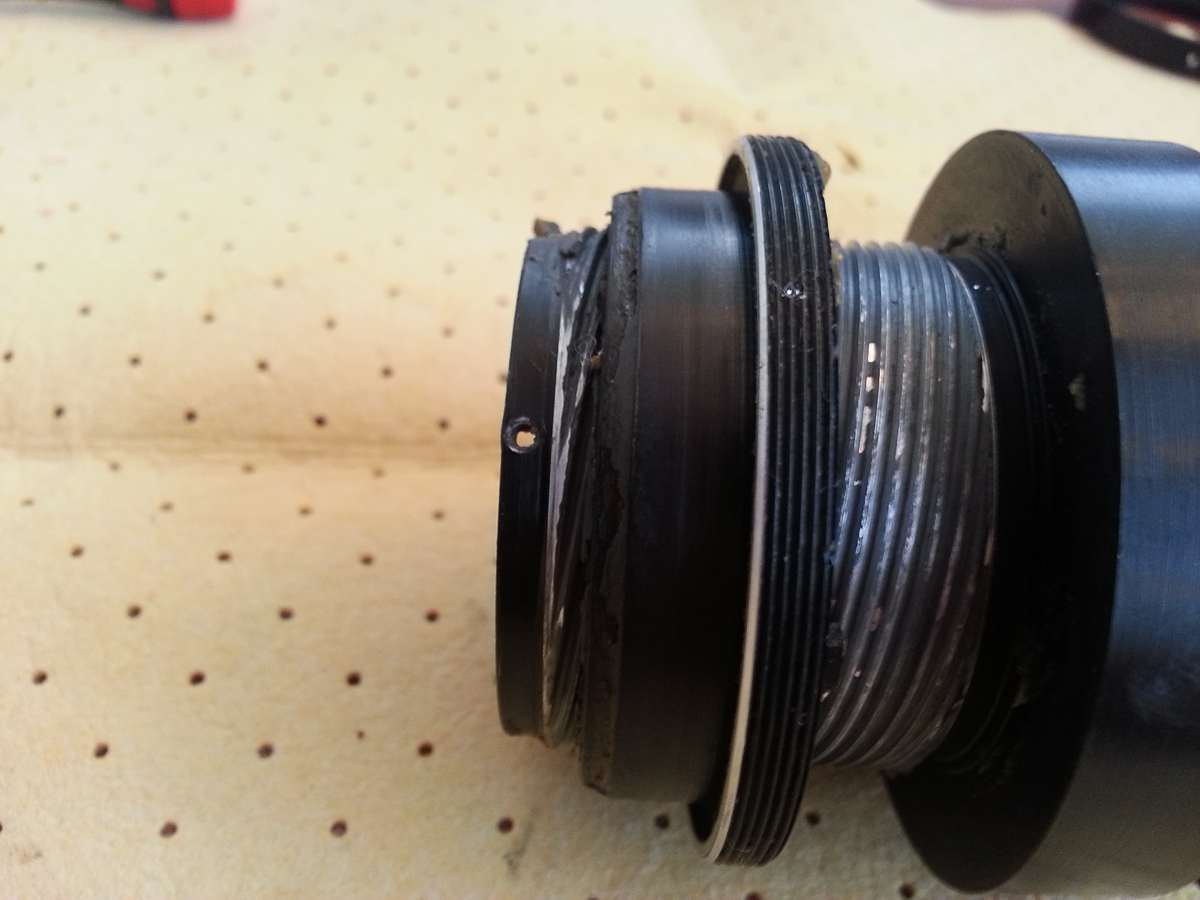
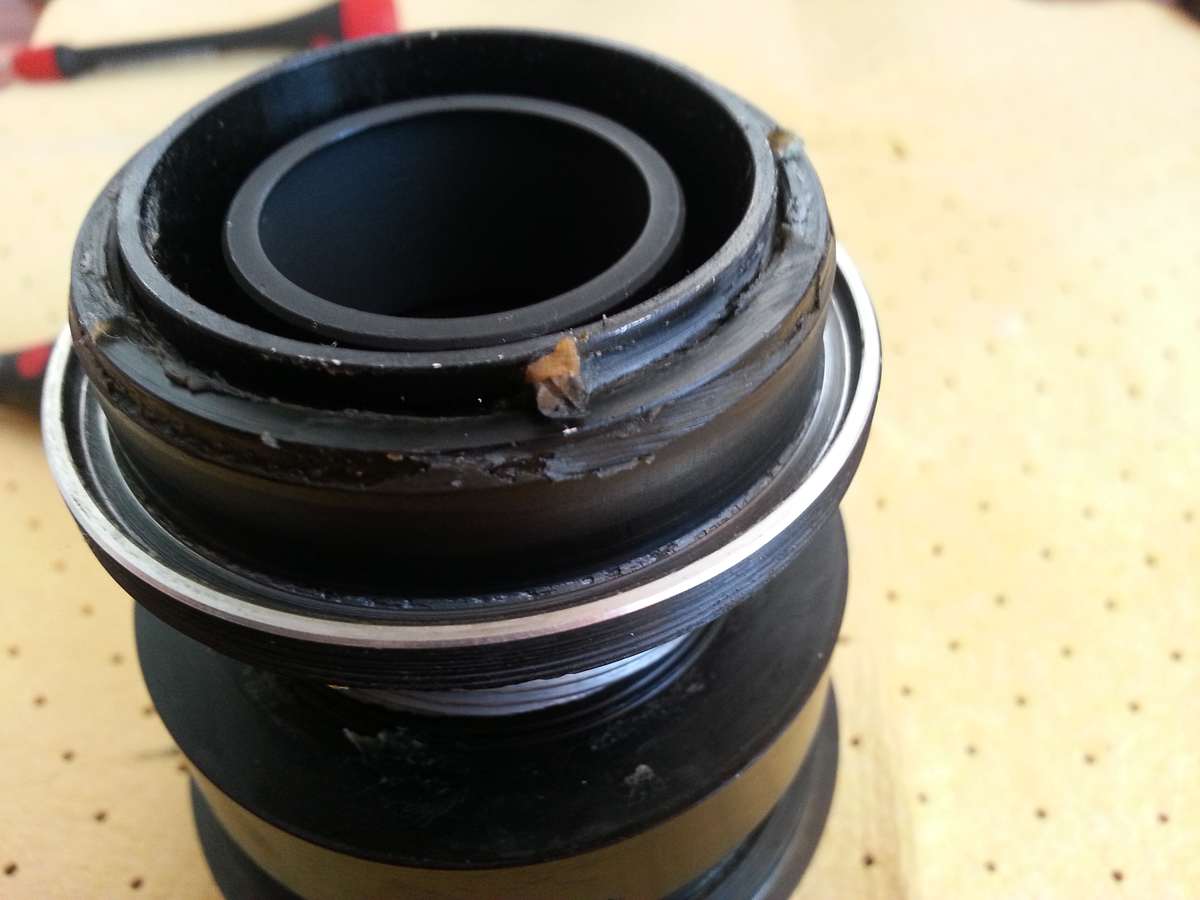
next put back on the black ring that covers the focusing ring, i suugest to try to put them together before you put them on the helicoid, to do a test if you can screw them togheter enough. If so set the focusing ring to minimum focusing distance and again mark the position of one hole for the screw, be careful at the end you may have to tighten it hard, if that s the case stop, because by doing so you can again damage the screw (becouse the focusing ring pushes towards the screw) or even brake the hole for it, just look how close to the border of the ring the hole is! My lens came with this problem, the screw was bent (actually the hole alomst broke), i had to send off a bit both the threads of the rings to be able to alling the holes for the screws on both rings! To make any sense of what i am talking about, this is what i found on my lens when i opened the rings, notice the slightly bent border of the hole:

and everything in place, not shown in a pic, put a bit of grease on the "back" of the mount ring before you close it with the black ring that joins the focusing ring:

put back the focusing and aperture assemby, don t forget the shim ring:

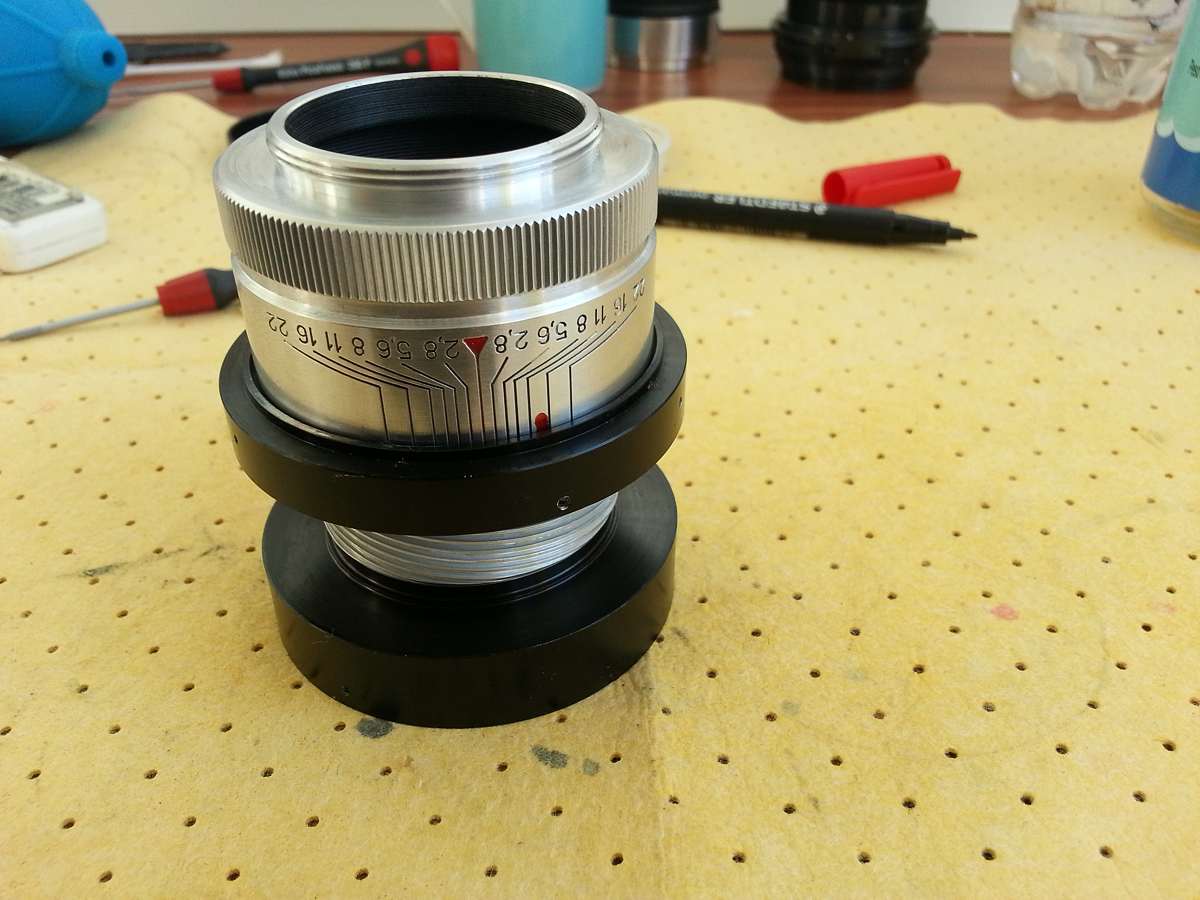
at this point you are almost an expert , so put back the aperture rings and the front optical block, starting with it, the red dot on it will serve as a pointer:

set the focusing to infinity and put back the alu focusing ring, before doing so you may turn the focusing a bit to see how it feels, try to do so holding the lens horizontally, as it s a heavy lens too little grease on the heliocoid could be felt, if it s too stiff, add a drop of oil (no wd40 or similar, i use Krown oil)...that s it:


Tomas
Last edited by tomasg on Wed Jan 11, 2017 5:09 pm; edited 5 times in total |
|
| Back to top |
|
|
ks73
Joined: 14 Oct 2015
Posts: 45
Location: Kokkola, Finland
|
| Posted: Wed Jan 11, 2017 4:41 pm Post subject: |
|
|
ks73 wrote:
This is great! 
_________________
Kalle
Flickr: https://www.flickr.com/photos/140575793@N08/ |
|
| Back to top |
|
|
tomasg
Joined: 01 Nov 2009
Posts: 1135
Expire: 2014-04-28
|
| Posted: Wed Jan 11, 2017 4:53 pm Post subject: |
|
|
tomasg wrote:
Probably the most important thing,the wool:
 |
|
| Back to top |
|
|
tomasg
Joined: 01 Nov 2009
Posts: 1135
Expire: 2014-04-28
|
| Posted: Wed Jan 11, 2017 4:54 pm Post subject: |
|
|
tomasg wrote:
| ks73 wrote: |
| This is great! |
Thank you! |
|
| Back to top |
|
|
tomasg
Joined: 01 Nov 2009
Posts: 1135
Expire: 2014-04-28
|
| Posted: Wed Jan 11, 2017 6:30 pm Post subject: |
|
|
tomasg wrote:
| Raxar wrote: |
|
|
|
| Back to top |
|
|
Nordentro


Joined: 24 Jun 2010
Posts: 4713
Location: Lillehammer, Norway
Expire: 2015-01-29
|
| Posted: Wed Jan 11, 2017 7:28 pm Post subject: |
|
|
Nordentro wrote:
Nice job! 
I've polished quite a few om my lenses too.
It's remarkable to see the change really...
_________________
Lars | Manuellfokus.no |
|
| Back to top |
|
|
tomasg
Joined: 01 Nov 2009
Posts: 1135
Expire: 2014-04-28
|
| Posted: Wed Jan 11, 2017 7:52 pm Post subject: |
|
|
tomasg wrote:
| Nordentro wrote: |
Nice job!
I've polished quite a few om my lenses too.
It's remarkable to see the change really... |
Yes indeed, the pictures don t tell the whole story. Do you have a similar method? |
|
| Back to top |
|
|
Nordentro
Joined: 24 Jun 2010
Posts: 4713
Location: Lillehammer, Norway
Expire: 2015-01-29
|
| Posted: Wed Jan 11, 2017 8:55 pm Post subject: |
|
|
Nordentro wrote:
| tomasg wrote: |
| Nordentro wrote: |
Nice job!
I've polished quite a few of my lenses too.
It's remarkable to see the change really... |
Yes indeed, the pictures don t tell the whole story. Do you have a similar method? |
Yes, I bought different pastes and start with rough pastes and then the fine in the end.
I also use dremel with different polish tools.
Some lenses are easy to polish, like brass chrome ones. Alu lenses takes more time to get a nice finish 
Sometimes I wonder if they even get more shiny than they where brand new, ha ha
_________________
Lars | Manuellfokus.no |
|
| Back to top |
|
|
hasan


Joined: 12 Mar 2007
Posts: 313
|
| Posted: Wed Jan 11, 2017 9:33 pm Post subject: |
|
|
hasan wrote:
|
|
| Back to top |
|
|
Olivier

Joined: 18 Feb 2009
Posts: 5077
Location: France
Expire: 2015-08-06
|
| Posted: Wed Jan 11, 2017 10:58 pm Post subject: |
|
|
Olivier wrote:
Great !
Thank you very much Tomas. 
_________________
Olivier - Moderator 
Dslr : Olympus Pen E-P2 - Fujifilm X-Pro2 - Canon 5D MkII.
SLr and MF lenses : for feedback and helping people, cameras and lenses I own : full list here http://forum.mflenses.com/viewtopic,p,1442740.html#1442740 |
|
| Back to top |
|
|
tomasg
Joined: 01 Nov 2009
Posts: 1135
Expire: 2014-04-28
|
| Posted: Thu Jan 12, 2017 8:58 am Post subject: |
|
|
tomasg wrote:
Thank you guys, i didn t thought there would be much interest in this. Would be a tutorial of a Trioplan 100/2.8 be interesting? There doesn t seem to be many tutorials about this very desirable lens on the web. |
|
| Back to top |
|
|
Olivier
Joined: 18 Feb 2009
Posts: 5077
Location: France
Expire: 2015-08-06
|
| Posted: Thu Jan 12, 2017 10:03 am Post subject: |
|
|
Olivier wrote:
| tomasg wrote: |
| Thank you guys, i didn t thought there would be much interest in this. Would be a tutorial of a Trioplan 100/2.8 be interesting? There doesn t seem to be many tutorials about this very desirable lens on the web. |
Yes, I would be interested.
_________________
Olivier - Moderator
Dslr : Olympus Pen E-P2 - Fujifilm X-Pro2 - Canon 5D MkII.
SLr and MF lenses : for feedback and helping people, cameras and lenses I own : full list here http://forum.mflenses.com/viewtopic,p,1442740.html#1442740 |
|
| Back to top |
|
|
tomasg
Joined: 01 Nov 2009
Posts: 1135
Expire: 2014-04-28
|
| Posted: Thu Jan 12, 2017 11:25 am Post subject: |
|
|
tomasg wrote:
One last touch, with the wool:

a bit of black paint, a thin brush and since i don t like to wait, a hair dryer

wool "000" and some gentle action on the paint

much better!
 |
|
| Back to top |
|
|
tomasg
Joined: 01 Nov 2009
Posts: 1135
Expire: 2014-04-28
|
| Posted: Thu Jan 12, 2017 12:24 pm Post subject: |
|
|
tomasg wrote:
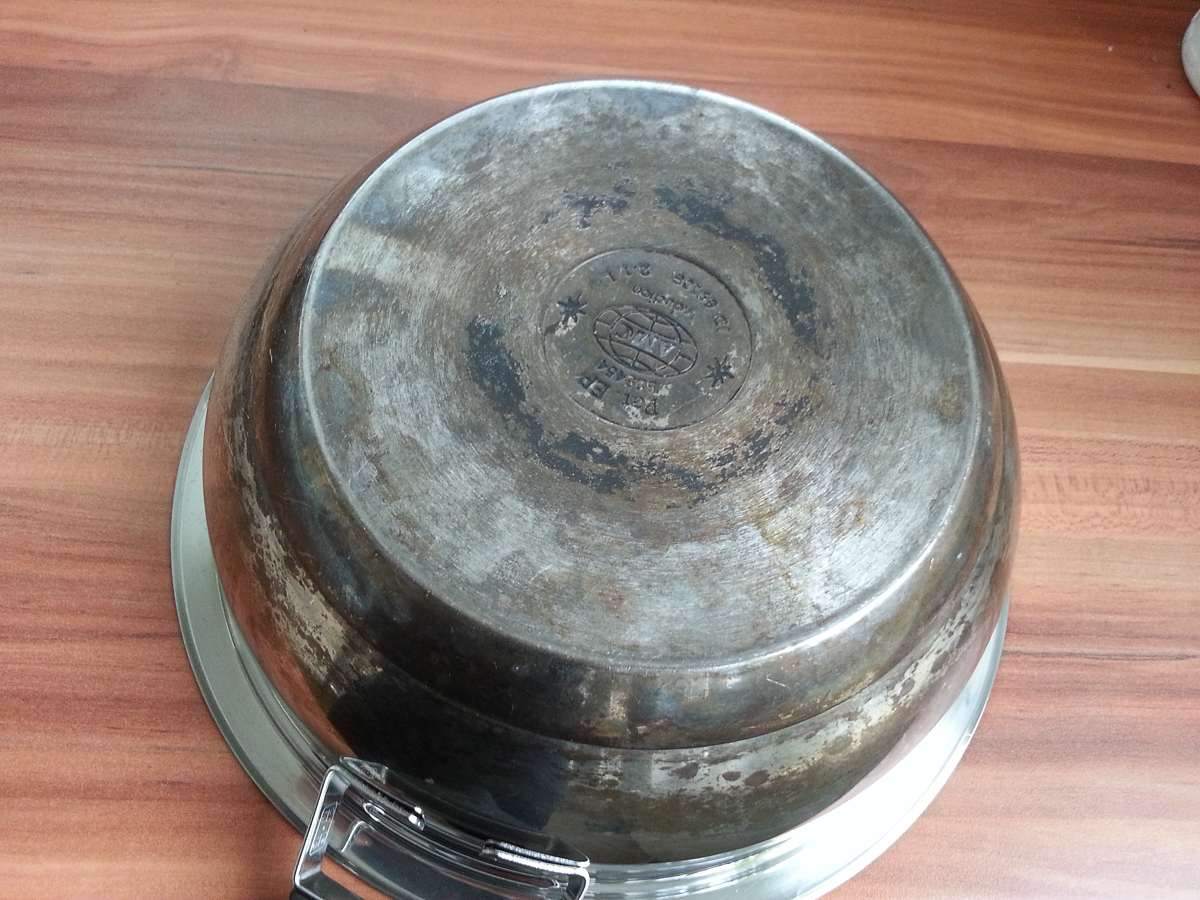
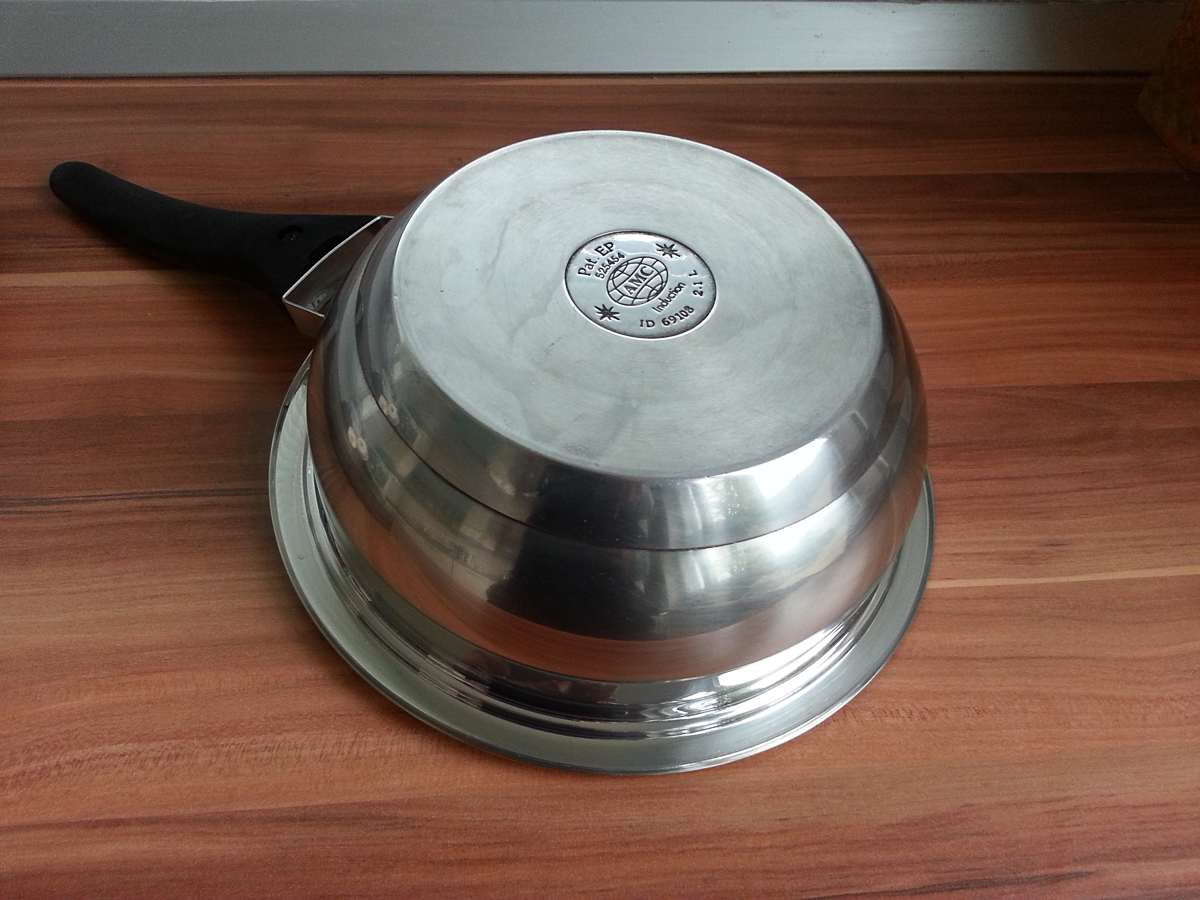
I know i am starting to get annoying, but just in case the lady of the house complains about the mess with this wool and polishing paste you can do this:

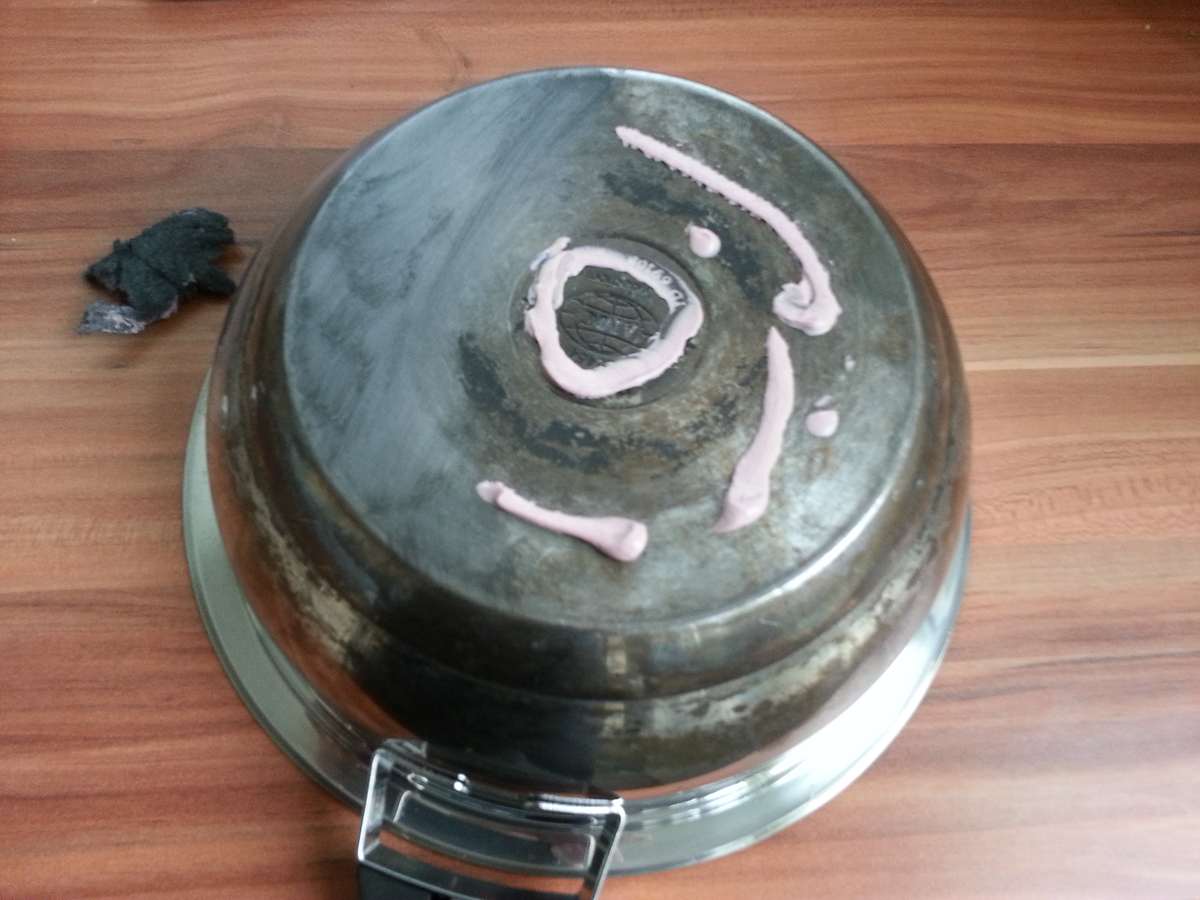

i am sure she ll approve (be very gentle on the glossy surfaces) |
|
| Back to top |
|
|
Olivier
Joined: 18 Feb 2009
Posts: 5077
Location: France
Expire: 2015-08-06
|
| Posted: Thu Jan 12, 2017 8:06 pm Post subject: |
|
|
Olivier wrote:
| tomasg wrote: |
i am sure she ll approve (be very gentle on the glossy surfaces) |
Be gentle on the lady's either.  
_________________
Olivier - Moderator
Dslr : Olympus Pen E-P2 - Fujifilm X-Pro2 - Canon 5D MkII.
SLr and MF lenses : for feedback and helping people, cameras and lenses I own : full list here http://forum.mflenses.com/viewtopic,p,1442740.html#1442740 |
|
| Back to top |
|
|
evilhomura89
Joined: 09 Feb 2017
Posts: 19
|
| Posted: Tue Feb 14, 2017 12:16 am Post subject: |
|
|
evilhomura89 wrote:
| tomasg wrote: |
I know i am starting to get annoying, but just in case the lady of the house complains about the mess with this wool and polishing paste you can do this:
i am sure she ll approve (be very gentle on the glossy surfaces) |
Wow, this is definitely a good move to pull
|
|
| Back to top |
|
|
tomasg
Joined: 01 Nov 2009
Posts: 1135
Expire: 2014-04-28
|
| Posted: Tue Feb 14, 2017 8:48 am Post subject: |
|
|
tomasg wrote:
| evilhomura89 wrote: |
| tomasg wrote: |
I know i am starting to get annoying, but just in case the lady of the house complains about the mess with this wool and polishing paste you can do this:
i am sure she ll approve (be very gentle on the glossy surfaces) |
Wow, this is definitely a good move to pull
|
|
|
| Back to top |
|
|
|
|