| View previous topic :: View next topic |
| Author |
Message |
NigelPStanley
Joined: 08 Feb 2018
Posts: 10
|
 Posted: Sat Mar 02, 2019 2:16 pm Post subject: DIY Konica F mount adapter Posted: Sat Mar 02, 2019 2:16 pm Post subject: DIY Konica F mount adapter |
 |
|
NigelPStanley wrote:
Adapting Konica F lenses
This story started when I did not read an Ebay listing properly, and found I had bought an F mount 200mm f3.5 rather than the AR mount I thought I was buying. Fortunately it came with a broken camera and a bonus 52mm f1.8, so I thought it would probably be possible to make a diy adapter using the camera mount. It was, but a bit trickier than I thought it would be.
There were three main issues to be solved.
1) Mounting the lens
This required the mount to be removed from the camera. This is reasonably straightforward. I’m afraid I did not take photos as I did this, and this description is from memory so may not capture everything.. But there are no particular tricks, and you could probably just force the trim around the lens mount off with brute force or cut it off with a dremel. But this is how I did it.
You start by peeling off the plastic covering material either side of the lens to expose the lens board. This is held on to the camera by four screws.
To free the lens board you also need to remove the top and bottom of the camera. The bottom is easy and is a case of unscrewing everything you can see. The top is more complicated as it requires removing all the control knobs – most unscrew fairly easily but brute force may be required on some.
You should be able to unscrew the self timer lever on the lens board by using the two holes on the boss holding it on. I couldn’t shift it so had to lever the whole thing off.
The final step in exposing the lens mount is removing the trim around it. There are a number of tiny screws that are revealed once you free the lens board. A bigger problem is the comma/teardrop shaped lever that mates with the aperture link on the lens. Again I had to lever that off. We will return to this issue in the final section. You should also remove the clip that latches into the lens to hold it in place. I wasn’t able to use that on my adapter but you may be able to think of a way of putting on an adapter.
Once you remove the trim you can simply unscrew four screws holding the lens mount to the camera.
2) Making an adapter
If you look it up, the F mount has the same flange distance as an AR mount. I therefore thought that I would be able to simply replace the AR mount in an AR adapter with the mount from the F camera. But it didn’t work. The mount goes snugly into the adapter but it won’t focus to infinity. If you have better metal working tools than I do, it might be possible to remove some metal from the adapter – only a mm or two would be needed. Similarly it would no doubt be possible to 3d print something if you have those skills.
I then spent a lot of time looking at other adapters and helicoids that I have trying to find something that would work. It needs to hit infinity, or just beyond, if the lens is not going to lose a lot of its close-focusing range. But I was not able to come up with anything with the parts I had on hand.
Of course it does not mean this is not a possible solution for others. But I came to the conclusion that I would not be able to modify any existing adapter that I had and would need to find something else.
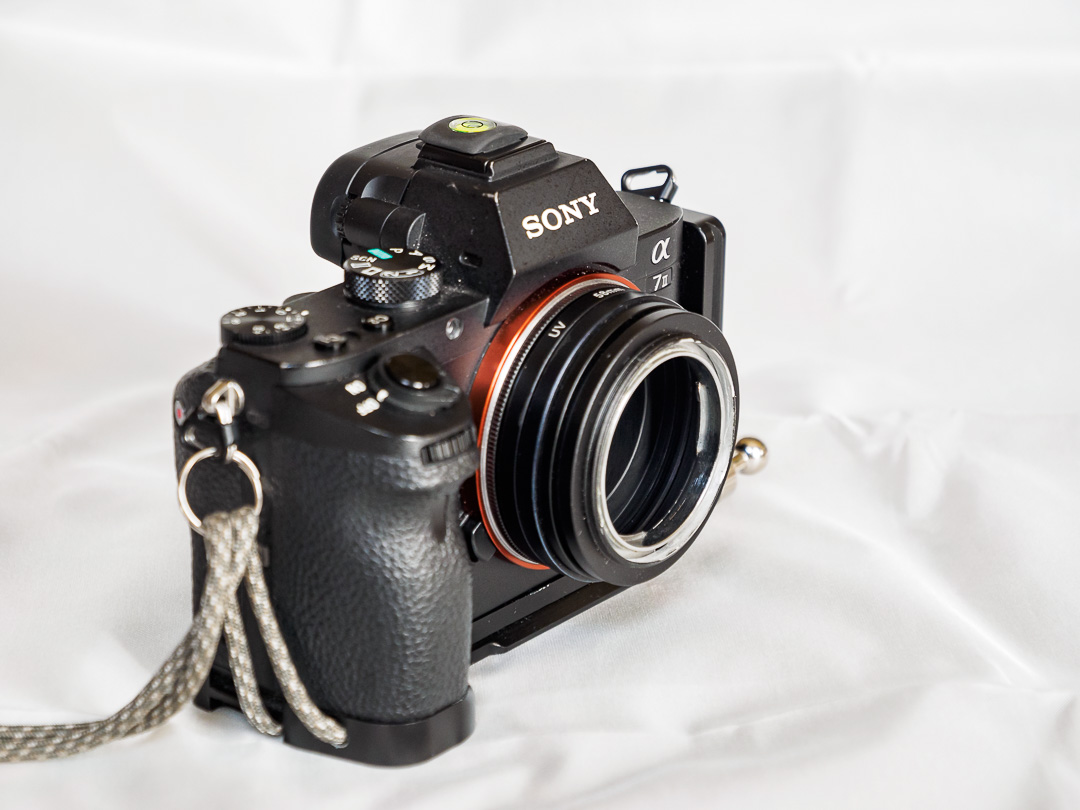
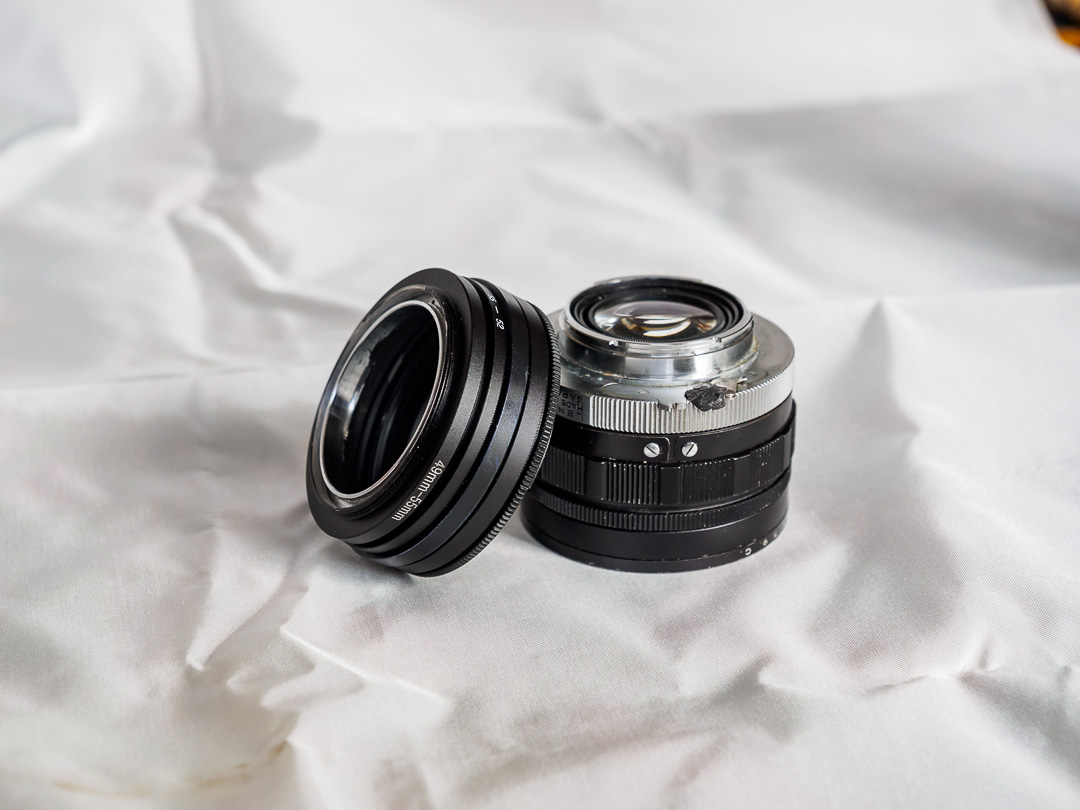
I then discovered that the camera mount fitted snugly inside a 49mm-55mm step up ring, and that you could hold it in place with a 55mm to 52mm step down ring. This combination neatly centres the mount and holds it securely.
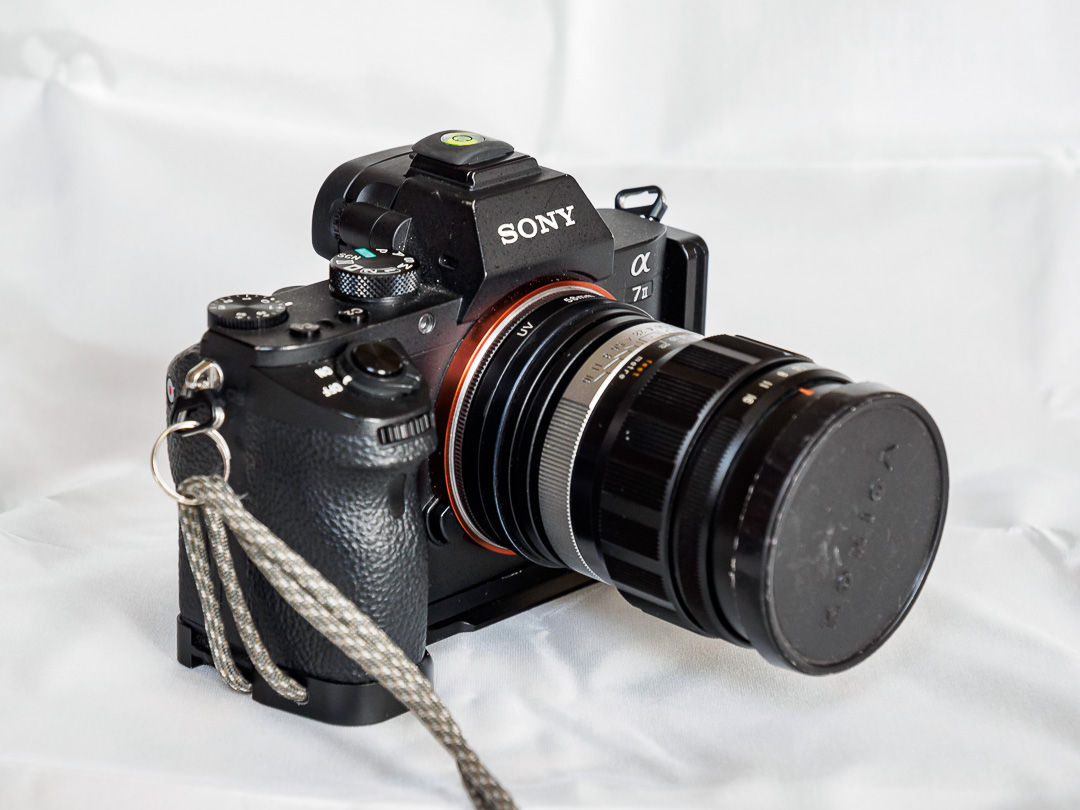
The next task was then to work out some way of fixing this to the camera at the right distance. In the end I used a combination of a deglassed filter and a step-up ring mounted to a Sony E to 58mm macro reverse adapter. While I will list what I did, these parts are not standard - and any version is going to need fine-tuning with some shims of some kind. I needed to use a couple of the rings that hold the glass into cheap UV filters, to stop one of the rings fully screwing into its mate. And of course if you are using a camera other than a Sony E mount you will need a different flange distance. In short this is easy in principle, but fiddly in practice to get right.
My combination:
• Sony E 58mm reverse macro adapter to a
• 58mm UV filter (deglassed) (with two “glass holder†rings in the filter side that screws on the adapter) to a
• 58mm to 52mm step up ring to the
• 55mm-52mm step down ring that holds the camera mount in the 49mm to 55mm step up ring.
The final step is to fine-tune the orientation of the camera mount within the step-up ring to ensure that lenses mount with the aperture control at the top where you can see it. I also put a coat of matt black paint on the insides of all the rings. Whether this makes a difference I don’t know, but it can’t do any harm
This is all more rigid and secure than it sounds, and provides a stable way of mounting an F mount lens on a Sony. But it is not quite the final step.
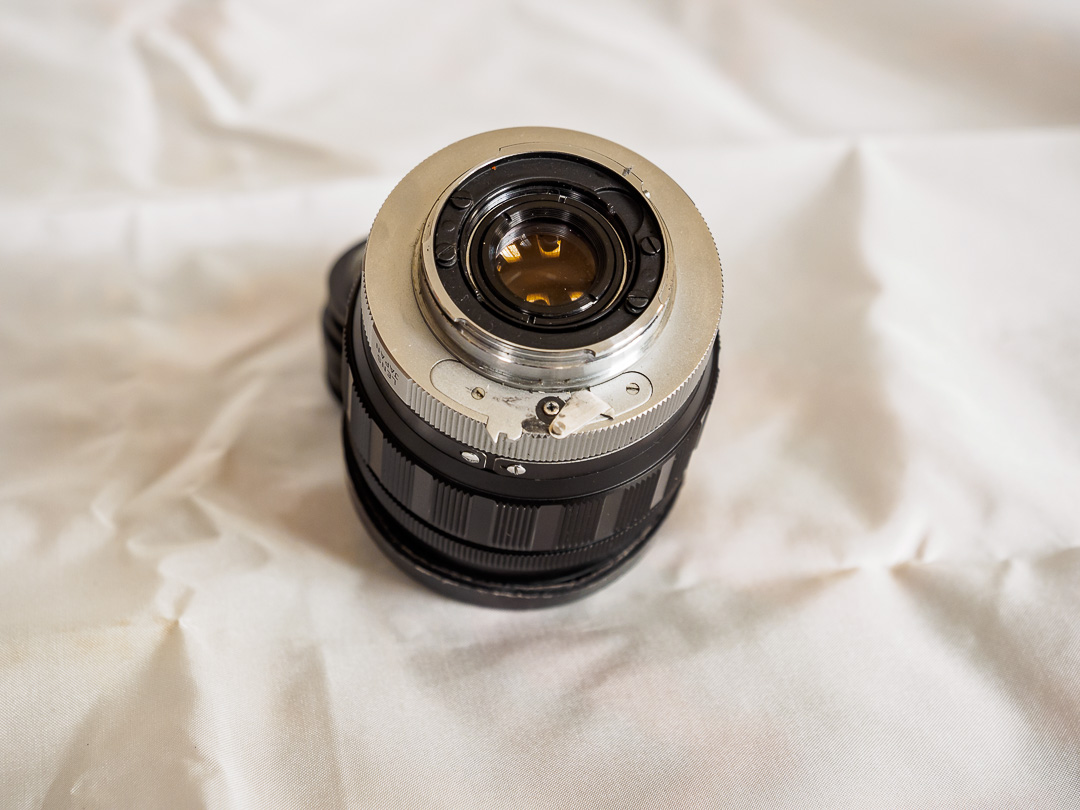
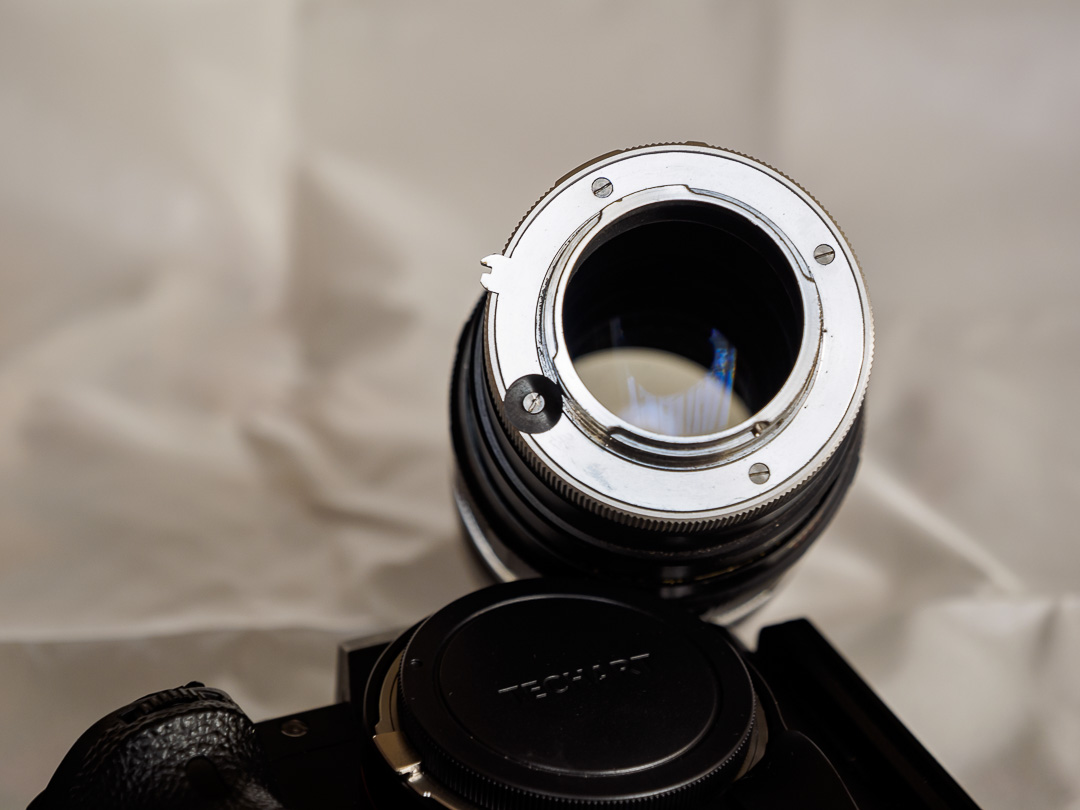
3) Modding each lens
While this all works there are two problems left.
• There is nothing on the adapter to close the aperture of the lens and it will stay wide open (unless it’s a preset lens such as the 200mm f3.5). On each lens there’s a lever that the camera would have moved to stop down the lens when you opened the shutter.
• The camera mount is now lacking the latch that kept the lens firm in the mount and stopped it turning when you adjust focus or aperture. I found this was an issue with the 200mm and the 35mm f2.8 (that I bought in anticipation of this all working). The 52 mm f1.8 had a very smooth focus that didn’t twist the lens round in the mount.
I dealt with these two issues on a lens by lens basis. (This is where it gets to be a series of bodges, and there may well be better ways to do this.)
There is no way on my adapter rings to mount the latch that came from the camera, and I couldn’t see any easy way of making an alternative. But I found that you could solve both issues with the same approach. The aperture lever is on a plate that is held into the lens with some counter-sunk screws making it all level with the rest of the rear of the lens. But you can hold the aperture lever out with a washer secured with a tiny screw put into an original screw hole. This screw is now raised above the level of the rear of the lens and catches against the 49mm part of the step up ring in which the mount is secured and provides enough friction to hold the lens secure. A bit of epoxy putty can also help hold out the lever. (On the 35mm I found my efforts didn’t quite get it all the way. But once it is mounted it sticks out from the side of the lens enough to pull it fully out with a finger, and enough friction to hold it there.)
On the preset 200mm (which was the loosest), there are four screws in the rear of lens. I lifted one of these and put a very thin flexible washer on this (never throw anything away) and it now catches too – enough to keep the lens secure when turning the focus.
So I now have a working F mount adapter.
But I can also see why Konica didn’t keep the F mount for very long.
#1 adapter and 52mm lens
#2 adapter with 35mm f2.8 lens

#3 35mm lens

#4 52mm lens

#5 200mm lens

#6 adapter on camera

_________________
Nigel |
|
| Back to top |
|
 |
DigiChromeEd


Joined: 29 Dec 2009
Posts: 3462
Location: Northern Ireland
|
| Posted: Sat Mar 02, 2019 3:03 pm Post subject: Re: DIY Konica F mount adapter |
|
|
DigiChromeEd wrote:
Hi Nigel
Welcome to the forum! You cannot post images or links in your first post, an anti-spam measure. You'll be ok from now on.
| NigelPStanley wrote: |
Adapting Konica F lenses
This story started when I did not read an Ebay listing properly, and found I had bought an F mount 200mm f3.5 rather than the AR mount I thought I was buying. Fortunately it came with a broken camera and a bonus 52mm f1.8, so I thought it would probably be possible to make a diy adapter using the camera mount. It was, but a bit trickier than I thought it would be.
There were three main issues to be solved.
1) Mounting the lens
This required the mount to be removed from the camera. This is reasonably straightforward. I’m afraid I did not take photos as I did this, and this description is from memory so may not capture everything.. But there are no particular tricks, and you could probably just force the trim around the lens mount off with brute force or cut it off with a dremel. But this is how I did it.
You start by peeling off the plastic covering material either side of the lens to expose the lens board. This is held on to the camera by four screws.
To free the lens board you also need to remove the top and bottom of the camera. The bottom is easy and is a case of unscrewing everything you can see. The top is more complicated as it requires removing all the control knobs – most unscrew fairly easily but brute force may be required on some.
You should be able to unscrew the self timer lever on the lens board by using the two holes on the boss holding it on. I couldn’t shift it so had to lever the whole thing off.
The final step in exposing the lens mount is removing the trim around it. There are a number of tiny screws that are revealed once you free the lens board. A bigger problem is the comma/teardrop shaped lever that mates with the aperture link on the lens. Again I had to lever that off. We will return to this issue in the final section. You should also remove the clip that latches into the lens to hold it in place. I wasn’t able to use that on my adapter but you may be able to think of a way of putting on an adapter.
Once you remove the trim you can simply unscrew four screws holding the lens mount to the camera.
2) Making an adapter
If you look it up, the F mount has the same flange distance as an AR mount. I therefore thought that I would be able to simply replace the AR mount in an AR adapter with the mount from the F camera. But it didn’t work. The mount goes snugly into the adapter but it won’t focus to infinity. If you have better metal working tools than I do, it might be possible to remove some metal from the adapter – only a mm or two would be needed. Similarly it would no doubt be possible to 3d print something if you have those skills.
I then spent a lot of time looking at other adapters and helicoids that I have trying to find something that would work. It needs to hit infinity, or just beyond, if the lens is not going to lose a lot of its close-focusing range. But I was not able to come up with anything with the parts I had on hand.
Of course it does not mean this is not a possible solution for others. But I came to the conclusion that I would not be able to modify any existing adapter that I had and would need to find something else.
I then discovered that the camera mount fitted snugly inside a 49mm-55mm step up ring, and that you could hold it in place with a 55mm to 52mm step down ring. This combination neatly centres the mount and holds it securely.
The next task was then to work out some way of fixing this to the camera at the right distance. In the end I used a combination of a deglassed filter and a step-up ring mounted to a Sony E to 58mm macro reverse adapter. While I will list what I did, these parts are not standard - and any version is going to need fine-tuning with some shims of some kind. I needed to use a couple of the rings that hold the glass into cheap UV filters, to stop one of the rings fully screwing into its mate. And of course if you are using a camera other than a Sony E mount you will need a different flange distance. In short this is easy in principle, but fiddly in practice to get right.
My combination:
• Sony E 58mm reverse macro adapter to a
• 58mm UV filter (deglassed) (with two “glass holder†rings in the filter side that screws on the adapter) to a
• 58mm to 52mm step up ring to the
• 55mm-52mm step down ring that holds the camera mount in the 49mm to 55mm step up ring.
The final step is to fine-tune the orientation of the camera mount within the step-up ring to ensure that lenses mount with the aperture control at the top where you can see it. I also put a coat of matt black paint on the insides of all the rings. Whether this makes a difference I don’t know, but it can’t do any harm
This is all more rigid and secure than it sounds, and provides a stable way of mounting an F mount lens on a Sony. But it is not quite the final step.
3) Modding each lens
While this all works there are two problems left.
• There is nothing on the adapter to close the aperture of the lens and it will stay wide open (unless it’s a preset lens such as the 200mm f3.5). On each lens there’s a lever that the camera would have moved to stop down the lens when you opened the shutter.
• The camera mount is now lacking the latch that kept the lens firm in the mount and stopped it turning when you adjust focus or aperture. I found this was an issue with the 200mm and the 35mm f2.8 (that I bought in anticipation of this all working). The 52 mm f1.8 had a very smooth focus that didn’t twist the lens round in the mount.
I dealt with these two issues on a lens by lens basis. (This is where it gets to be a series of bodges, and there may well be better ways to do this.)
There is no way on my adapter rings to mount the latch that came from the camera, and I couldn’t see any easy way of making an alternative. But I found that you could solve both issues with the same approach. The aperture lever is on a plate that is held into the lens with some counter-sunk screws making it all level with the rest of the rear of the lens. But you can hold the aperture lever out with a washer secured with a tiny screw put into an original screw hole. This screw is now raised above the level of the rear of the lens and catches against the 49mm part of the step up ring in which the mount is secured and provides enough friction to hold the lens secure. A bit of epoxy putty can also help hold out the lever. (On the 35mm I found my efforts didn’t quite get it all the way. But once it is mounted it sticks out from the side of the lens enough to pull it fully out with a finger, and enough friction to hold it there.)
On the preset 200mm (which was the loosest), there are four screws in the rear of lens. I lifted one of these and put a very thin flexible washer on this (never throw anything away) and it now catches too – enough to keep the lens secure when turning the focus.
So I now have a working F mount adapter.
But I can also see why Konica didn’t keep the F mount for very long.
#1 adapter and 52mm lens
#2 adapter with 35mm f2.8 lens
#3 35mm lens
#4 52mm lens
#5 200mm lens
#6 adapter on camera
|
_________________
"I've got a Nikon camera, I like to take a photograph" - Paul Simon
Last edited by DigiChromeEd on Sun Mar 03, 2019 1:18 pm; edited 1 time in total |
|
| Back to top |
|
|
Lightshow

Joined: 04 Nov 2011
Posts: 3666
Location: Calgary
|
| Posted: Sat Mar 02, 2019 9:33 pm Post subject: |
|
|
Lightshow wrote:
Yeah the F mount was horrible, one of the least secure mounts I've seen, I have a couple lenses and a set of tubes, the tubes rely on the aperture lever to keep the lens from coming off the tube, which it barely does, the AR mount is far superior in every way.
Welcome to the site, great first post.
_________________
A Manual Focus Junky...
One photographers junk lens is an artists favorite tool.
My lens list
http://www.flickr.com/photos/lightshow-photography/ |
|
| Back to top |
|
|
NigelPStanley
Joined: 08 Feb 2018
Posts: 10
|
| Posted: Sun Mar 03, 2019 11:44 am Post subject: |
|
|
NigelPStanley wrote:
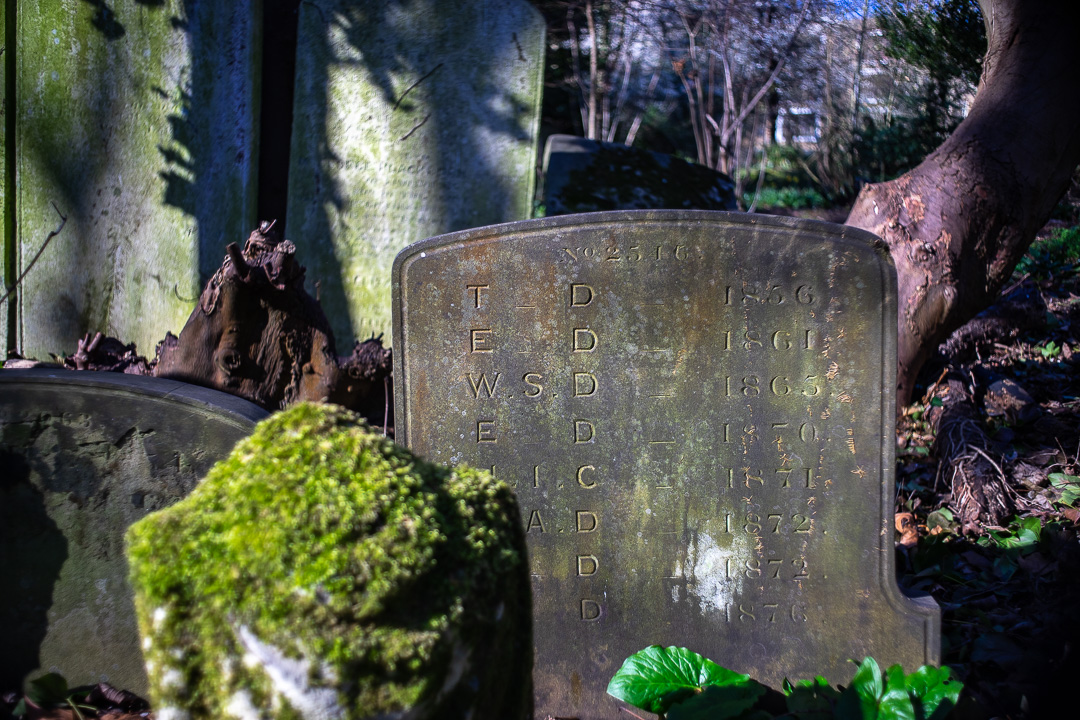
Here's a couple taken with the 35mm f2.8 Konishiraku Hexanon F mount lens.
It's sharp and has Konica attributes. But it does not like flare or backlighting much - definitely one for a lens hood.


_________________
Nigel |
|
| Back to top |
|
|
hexanon.net
Joined: 29 Sep 2018
Posts: 9
|
| Posted: Wed Mar 06, 2019 2:40 am Post subject: |
|
|
hexanon.net wrote:
great job! |
|
| Back to top |
|
|
Svyatoslav

Joined: 05 Apr 2019
Posts: 13
Location: Cherkassy
|
| Posted: Tue Feb 11, 2020 8:37 am Post subject: |
|
|
Svyatoslav wrote:
 a good solution and quite workable !!! Bravo! a good solution and quite workable !!! Bravo!
_________________
xt1 nexanon 52\1.8 57\1.4 50\1.4 100\2.8 |
|
| Back to top |
|
|
|
|
|
You cannot post new topics in this forum
You cannot reply to topics in this forum
You cannot edit your posts in this forum
You cannot delete your posts in this forum
You cannot vote in polls in this forum
|