| View previous topic :: View next topic |
| Author |
Message |
Jieffe


Joined: 04 Nov 2007
Posts: 754
Location: Belgium
|
 Posted: Mon Jan 21, 2008 10:31 am Post subject: A bit of DIY with the Zenitar Posted: Mon Jan 21, 2008 10:31 am Post subject: A bit of DIY with the Zenitar |
 |
|
Jieffe wrote:
I've got the flu and decided to stay home today. As I'm getting bored, I though I could share with you the little (non-destructive) modifications made to my Zenitar 16mm.
First of all, it's the K-mount version. Used on a digital Pentax body, you need to use it in manual mode. Most of the time, I forget to push the Ae-l button to mesure the exposure. Therefore, I wanted my lens to behave like a M42 fitted with a K adapter.
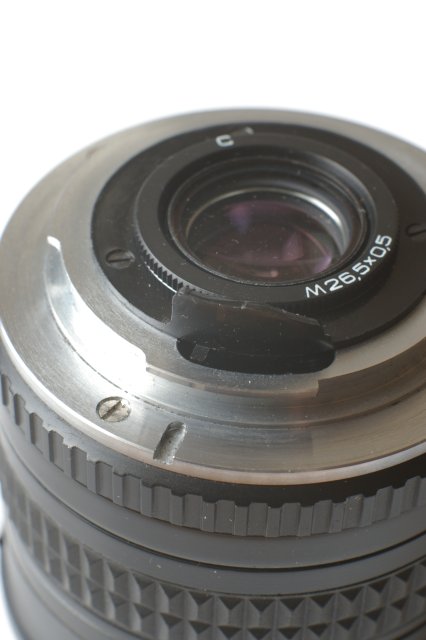
Very easy to do : just unscrew the clear filter then remove the black circle (3 screws). You remove the 2 screws fixing the lever and voilŕ, you can use the Av mode.
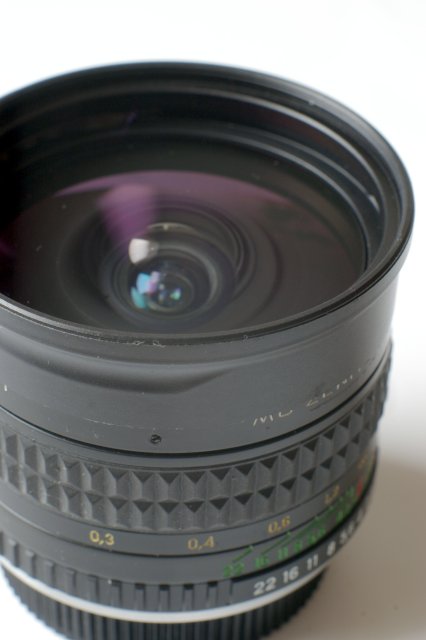
I then turned my attention to the (lack of) front filter ring.
Some internet sources suggests to fit a 60 to 62 step-up ring but this proved to be the difficult part. B&H list one but the sending costs to Europe are too high. On Ebay, most adapters are for Hasseblad, not compatible with a 60mm thread. I finally found this one : Click here to see on Ebay. To secure the ring, I cut 2 fine strips of electrician tape which I placed on the hood threads, then I simply screwed the ring. Finished with a strip of electrician tape around the lens to avoid light leaks.
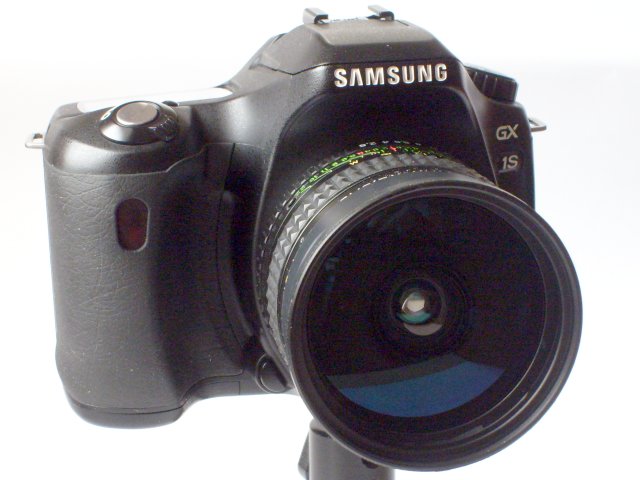
Beauty shot (made with the little brother Samsung S630) :
Fitted with a Cokin P Filter Holder :

No vignetting on my camera (1,5 crop factor). |
|
| Back to top |
|
 |
Jesito


Joined: 24 Aug 2007
Posts: 5745
Location: Olivella, Catalonia, (Spain)
Expire: 2015-01-07
|
| Posted: Sat Feb 02, 2008 10:49 am Post subject: |
|
|
Jesito wrote:
Nice findings, Jieffe... I've just seen this thread.
I'm thinking in getting a Zenitar. How do you like it?
Could you please post same samples?
Thanks!.
Jes.
_________________
Jesito, Moderator 
Jesito's backsack:
Zooms Sigma 70-300, Tamron 35-135 and 70-210 short, 70-210 long, 28-70 CF Macro, 35-70, 35-80, Vivitar 70-210 KA, Tamron 70-250.
Fixed Industar-50, , Tamron 24mm, Tamron 135mm, Sands Hunter 135mm, Pancolar 50mm, Volna-3, many Exakta lenses
DSLR SIGMA SD9 & SD14, EOS 5D, Sony A700 and NEXF3, Oly E-330, E-400, E-450, E-1
TLR/6x6/645 YashicaMat, Petri 6x45, Nettar, Franka Solida, Brilliant
SLR Minolta X300, Fuji STX II, Praktica VLC3, Pentax P30t, EXA500, EXA 1A, Spotmatic(2), Chinon CM-4S, Ricoh, Contax, Konica TC-X , Minolta 5000, 7000i, 3Sxi, EOS 500 and CX
Rangefinders Chinon 35EE, Konica C35 auto, Canonet 28, Yashica Lynx, FED-2, Yashica electro 35, Argus C3 & C4, Regula Cita III, Voigtlander Vitoret (many), Welta Welti-I, Kodak Signette 35, Zorki-4, Bessa-R & L, Minolta Weathermatic, olympus XA2
Compact Film Konica C35V, Voigtlander Vitorets, Canon Prima Super 105, Olympus XA2 and XA3
Compact Digital Olympus C-5050, Aiptek Slim 3000, Canon Powershot A540, Nikon 5200, SIGMA DP1s, Polaroid X530, IXUS55, Kodak 6490, Powershot G9 and G10
CSCCanon EOS-M, Samsung NX100 and NX210, Lumix G5, NEX-F3 |
|
| Back to top |
|
|
Richard_D

Joined: 21 Oct 2007
Posts: 2378
Location: Faversham Kent UK
|
| Posted: Sat Feb 02, 2008 12:33 pm Post subject: |
|
|
Richard_D wrote:
A useful little tutorial - thanks
_________________
Richard
The interesting bit:
Nikkors: 20mm f2.8 AIS, 24mm f2.8 AIS, 28mm f2.8 AIS, 35mm f2 AIS, 50mm f1.4 AI, 50mm f1.48AI, 50m f2 AI,
55mm f3.5 AI'd, 105mm f4 AI, 135mm f2.8 AI'd, 135mm f3.5 AI'd, 200mm f4 AI'd .
Nikon E Series: 100mm f2.8 .
Soviet Nikon Mount: Zenitar 16mm f2.8, Arsat/arax/photex 85mm T&S f2.8 .
Other: Asahi Super Takumar 55 mm f2 (M42) ,Tamron 300mm f5.6 SP, Tamron 500mm f8 SP.
DSLR: Nikon D700. 35mm SLRsNikon FE, Pentax S1a.
TLR: Rolliecord II.
Sub-Minature: Pentax Auto 110, 18mm f2.8, 24mm f2.8, 50mm f2.8.
More to come... |
|
| Back to top |
|
|
Juanma


Joined: 01 Jan 2008
Posts: 257
Location: Cambrils, Spain
|
| Posted: Sat Feb 02, 2008 4:53 pm Post subject: |
|
|
Juanma wrote:
| Jesito wrote: |
Nice findings, Jieffe... I've just seen this thread.
I'm thinking in getting a Zenitar. How do you like it?
Could you please post same samples?
Thanks!.
Jes. |
If you like the fish-eye effect, a Peleng 8mm is far better for a crop camera like yours. The Zenitar is best for a full frame camera. On a crop camera the effect is mild (if you compare it to the Peleng)
_________________
Juanma
Canon EOS 600 | Praktica MTL5B | Zorki 4K | Jupiter 8 | Flektogon 4/20 | Pentacon 2,8/29 | Flektogon 2,4/35 | Tessar 2,8/50 | Industar 50-2 | Jupiter 9 | Sonnar 3,5/135 | Some AF stuff | A couple of MF lenses coming... |
|
| Back to top |
|
|
Flor27

Joined: 13 Sep 2007
Posts: 1195
Location: Paris, France
|
| Posted: Sat Feb 02, 2008 8:11 pm Post subject: |
|
|
Flor27 wrote:
A Peleng on an APS-C cropped sensor has approx. the same field of view of a 16mm Fisheye on 24x36mm frame.
_________________
Switching from M42 to Minolta MD & Contax/Yashica |
|
| Back to top |
|
|
Juanma
Joined: 01 Jan 2008
Posts: 257
Location: Cambrils, Spain
|
| Posted: Sat Feb 02, 2008 10:17 pm Post subject: |
|
|
Juanma wrote:
| Flor27 wrote: |
| A Peleng on an APS-C cropped sensor has approx. the same field of view of a 16mm Fisheye on 24x36mm frame. |
Exactly, that's the point. 
Thanks, Florent.
_________________
Juanma
Canon EOS 600 | Praktica MTL5B | Zorki 4K | Jupiter 8 | Flektogon 4/20 | Pentacon 2,8/29 | Flektogon 2,4/35 | Tessar 2,8/50 | Industar 50-2 | Jupiter 9 | Sonnar 3,5/135 | Some AF stuff | A couple of MF lenses coming... |
|
| Back to top |
|
|
Jieffe
Joined: 04 Nov 2007
Posts: 754
Location: Belgium
|
| Posted: Sun Feb 03, 2008 11:06 am Post subject: |
|
|
Jieffe wrote:
| Jesito wrote: |
Nice findings, Jieffe... I've just seen this thread.
I'm thinking in getting a Zenitar. How do you like it? |
Just love that little lens ! Got it more then 10 years ago to use on my MZ5.
Most of the members of this forum have a Zenitar.
The fisheye effect is still there on crop DSLR, just not as dramatic as with a full frame camera.
| Quote: |
| Could you please post same samples? |
Not at home right now ... I just took a few pics to illustrate my answer but I can't find my GF card reader  It will have to wait 'till she comes back home. It will have to wait 'till she comes back home. |
|
| Back to top |
|
|
Jieffe
Joined: 04 Nov 2007
Posts: 754
Location: Belgium
|
| Posted: Sun Feb 03, 2008 11:50 am Post subject: |
|
|
Jieffe wrote:
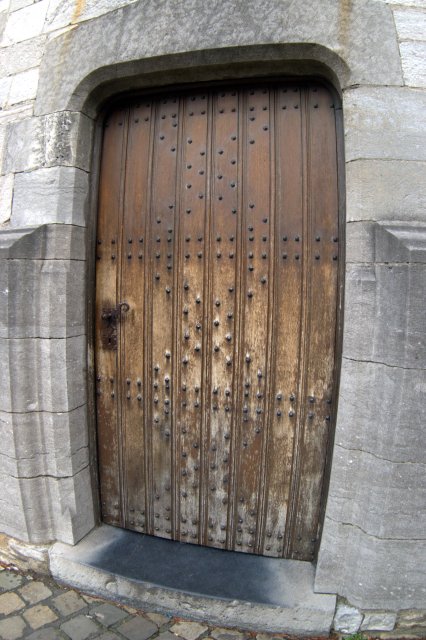
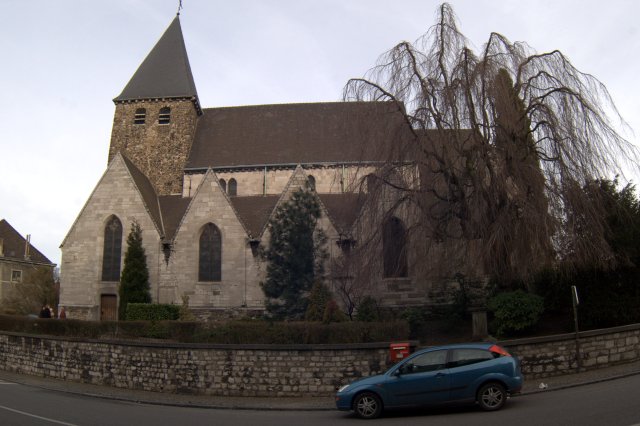
She came back quickly !
Here it goes ... No masterpieces, just some quick and dirty samples, no sharpening.

 |
|
| Back to top |
|
|
iridium

Joined: 16 Jan 2009
Posts: 50
|
| Posted: Tue Feb 17, 2009 7:22 pm Post subject: |
|
|
iridium wrote:
Jieffe, your tutorial is very good, but please can you give me more info about lens hood?
questions:
1 - i must buy simply a "step-up ring 60 to 62"?
(your link to ebay is to a not still avaible auction: can you give me a good link?)
2 - to put the step-ring on the lens, i can simply screw the step-ring on the lens?
or i must use also the 2 fine strips of electrician tape?
3 - i don't understand very well how and where i must place the 2 fine strips of electrician tape.
please, can you gie me info in other easy words? |
|
| Back to top |
|
|
Jieffe
Joined: 04 Nov 2007
Posts: 754
Location: Belgium
|
| Posted: Tue Feb 17, 2009 8:19 pm Post subject: |
|
|
Jieffe wrote:
The link is dead because my article is 1 year old. You can find a ring here : Click here to see on Ebay
Don't be distracted by the fact it says "Leica". Just means that 60mm is not a common size, except for some Leica lenses.
Any 60 to 62 ring (or 60 to a bigger size) will do (as long as it doesn't says "Hasselblad").
In fact, the thread you can see inside the little hood has a diameter between 60 and 61 mm.
You use the electrician tape to reduce the inside diameter of the little hood, so the ring can be screwed in the thread with a tight fit. Just put the strips on the hood's thread and screw the ring.
You could also forget the tape and use some epoxy glue to fix the ring on the hood but then it won't be reversible.
The ring also acts as the new hood. You can use a Cokin P adapter as I did (Cokin A is too narrow and causes vignetting). |
|
| Back to top |
|
|
iridium
Joined: 16 Jan 2009
Posts: 50
|
| Posted: Tue Feb 17, 2009 10:23 pm Post subject: |
|
|
iridium wrote:
Jieffe very very very very very thanks! 
but a question: are you afraid that glue can drain out from the electrician tape?
(in particular when you must use zenitar lens in a hot summer day)
(i dont' like a sticky zenitar) |
|
| Back to top |
|
|
Jieffe
Joined: 04 Nov 2007
Posts: 754
Location: Belgium
|
| Posted: Tue Feb 17, 2009 10:34 pm Post subject: |
|
|
Jieffe wrote:
Well, I live in Belgium, hot summers are not that common 
No problem until now with the tape ... but I wouldn't leave lenses baking under the sun, with or without sticky tape
Glad I could help |
|
| Back to top |
|
|
Poolhall
Joined: 25 Feb 2008
Posts: 1296
|
| Posted: Wed Feb 18, 2009 1:00 pm Post subject: |
|
|
Poolhall wrote:
Very useful tip thanks |
|
| Back to top |
|
|
|
|
|
You cannot post new topics in this forum
You cannot reply to topics in this forum
You cannot edit your posts in this forum
You cannot delete your posts in this forum
You cannot vote in polls in this forum
|


