| View previous topic :: View next topic |
| Author |
Message |
stevemark

Joined: 29 Apr 2011
Posts: 3926
Location: Switzerland
|
 Posted: Sat Aug 24, 2024 1:47 pm Post subject: Nikkor AiS 2.8/105mm Micro Repair Posted: Sat Aug 24, 2024 1:47 pm Post subject: Nikkor AiS 2.8/105mm Micro Repair |
 |
|
stevemark wrote:
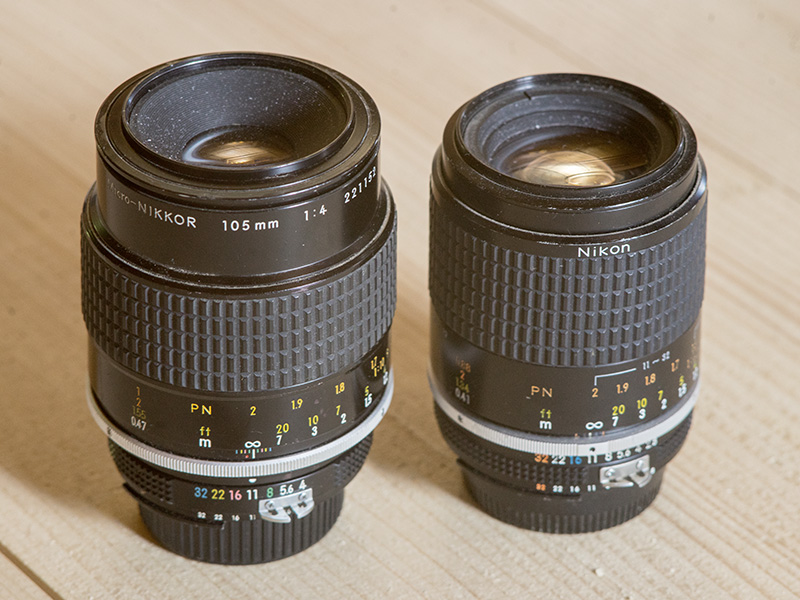
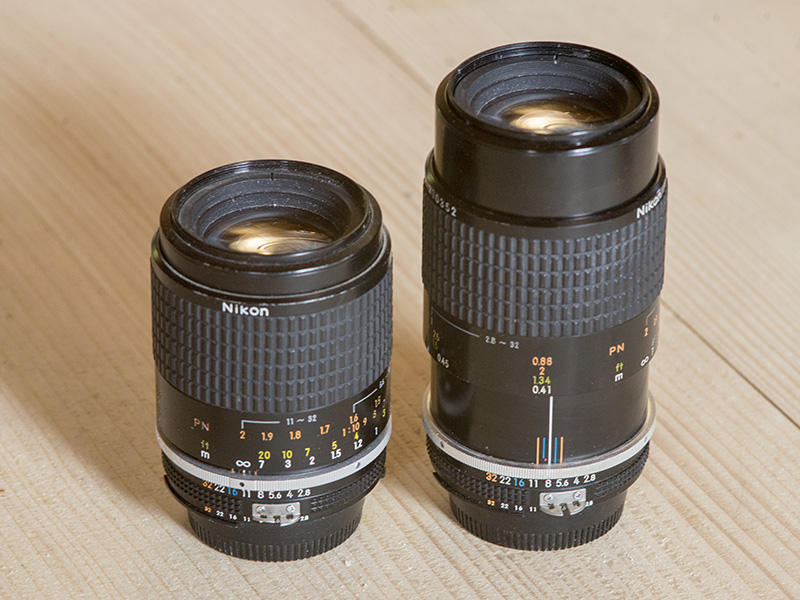
The Micro Nikkor AiS 2.8/105mm introduced in 1985 was Nikons replacement for the earlier Micro Nikkor 4/105mm. The progress made was pretty substantial:
1) twice as much light (f2.8 vs f4)
2) close range correcting (CRC) system with one stationary lens group at the rear, and two more lens groups in front moving independently
3) smaller than the Micro 4/105mm (!!)
4) not really heavier than the Micro 4/105mm (515g vs 500g)
Here's an image of the two lenses side-by-side:

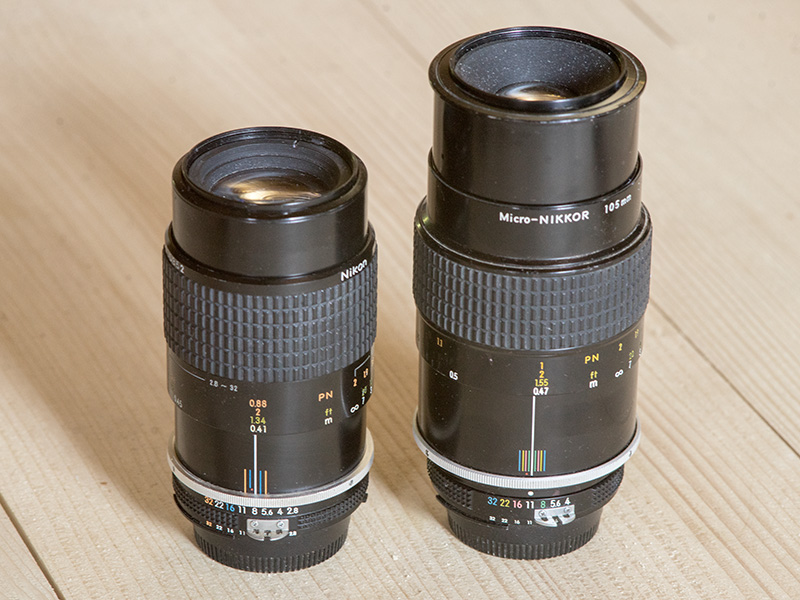
Here are two samples of the Micro Nikkor 2.8/105mm - one at infinity (left), the other at 1:2 (right):
Due to a skillful optical construction (more about that later), the 2.8/105mm doesn't extend as much as the 4/105mm when going from infinity to 1:2
The basic invention which made this possible didn't come from Nikon. It was Tamrons SP 2.5/90mm Macro lens (the 52B) from 1979 which was groundbreaking. The Tamron was the first macro lens in the 100mm range combining a fast double gauss master lens (yellow) with a rear negative group acting as a tele converter (red):
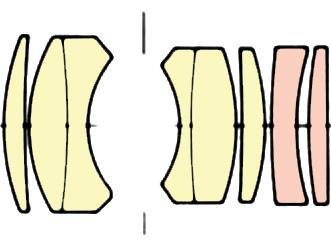
For focusing, only the (yellow) double gauss (basically a 2/70mm lens) would move, and the (red) teleconverter would stay fixed.
Nikon did improve the Tamron lens design by splitting the first doublet of the double gauss into two separate lenses, and by refining the rear teleconverter (now four instead of two lenses):
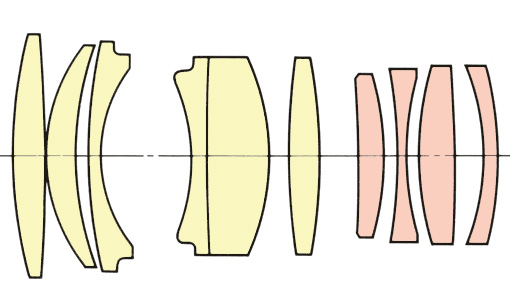
In addition, the close range correction (CRC) system introduced with the AiS Micro Nikkor 2.8/55mm was used also for the AiS 2.8/105mm, moving the two halves of the double gauss separately. This of course results in a pretty complicated mechanical construction, especially since the relative positions of all three groups are critical for an optimal performance.
The AiS 2.8/105mm Micro lens is said to be one of the most complicated MF primes, and Richard Haw strongly advises against repaining the lens unless one is pretty seasoned with Nikkor lens repairs.
About 15 years ago I got a sample with a completely stuck focus (no way to move it at all!), and I tried to repair it. I wasn't successful since
1) I didn't have the right tools to completely dismantle it, and
2) since I hadn't marked properly where the different (several) helicoids came apart.
After that the lens was kept "as is", and completely inoperable. Two years ago I got another - working - sample for free, and last week I finally decided to repair the original first sample. I knew it would be difficult since the correct markings for re-assembling the three heliciods were missing, but ... let's try!
_________________
www.artaphot.ch
Last edited by stevemark on Sat Aug 24, 2024 2:38 pm; edited 1 time in total |
|
| Back to top |
|
 |
Doc Sharptail


Joined: 23 Nov 2020
Posts: 1161
Location: Winnipeg Canada
|
| Posted: Sat Aug 24, 2024 2:04 pm Post subject: |
|
|
Doc Sharptail wrote:
These are lenses that I had not seen before.
The markings for extension tube ratios are completely new to me.
The only other that I'm aware of is two versions of the A/I 55 2.8 that are marked either P/K or P/K 13.
-D.S.
_________________
D-810, F2, FTN.
35mm f2 O.C. nikkor
50 f2 H nikkor, 50 f 1.4 AI-s, 135 f3.5 Q,
50 f2 K nikkor 2x, 28-85mm f3.5-4.5 A/I-s, 35-105 3.5-4.5 A/I-s, 200mm f4 Micro A/I, partial list.
"Ain't no half-way" -S.R.V.
"Oh Yeah... Alright" -Paul Simon |
|
| Back to top |
|
|
stevemark
Joined: 29 Apr 2011
Posts: 3926
Location: Switzerland
|
| Posted: Sat Aug 24, 2024 2:44 pm Post subject: |
|
|
stevemark wrote:
OK - let's start.
BEFORE STARTING THE REPAIR BE SURE TO SET THE LENS TO "INFINITY" !!
(not properly shown here since my own lens had been disassembled and re-assembled incorrectly before taking the images below!)
First we remove the bayonet. Be sure to loosen the screws
1) soaking them with a few drop of acetone for a few minutes and
2) using the correct screwdriver (very important - see here: https://richardhaw.com/2015/12/29/best-practices-part-1/#more-421)
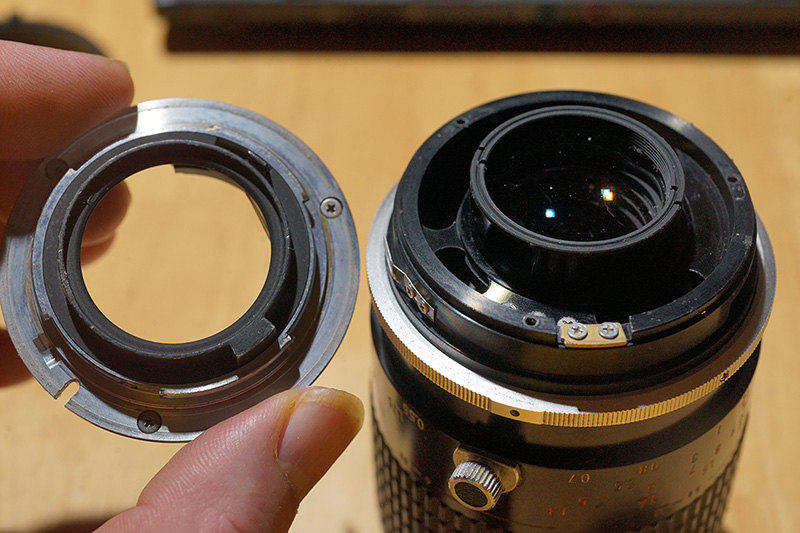
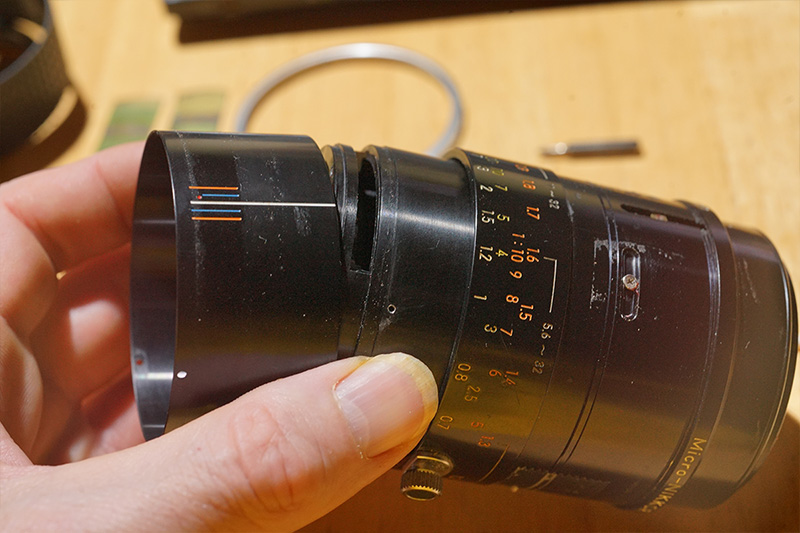
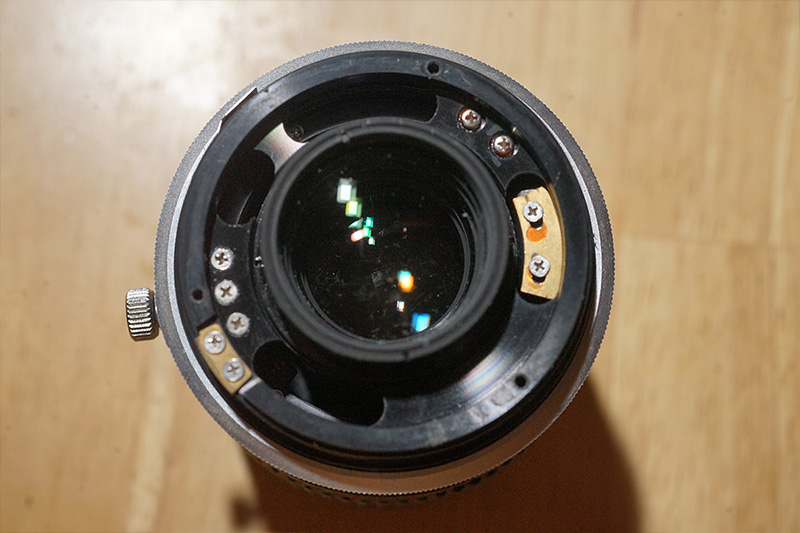
After soaking the two tiny black screws on the aperture ring with acetone for a few minutes and removing them, we can remove the aperture ring as well. ATTENTION - they usually are difficult to remove; the corect screwdrivers MUST be used, and a fair amount of pressure is needed. You may want to "wiggle" a bit before actually turning the screw/screwdriver counterclockwise; this helps to loosen the tiny screws.
The rear of the lens now looks as follows (note that several screws are secured wiuth a reddish laquer!):
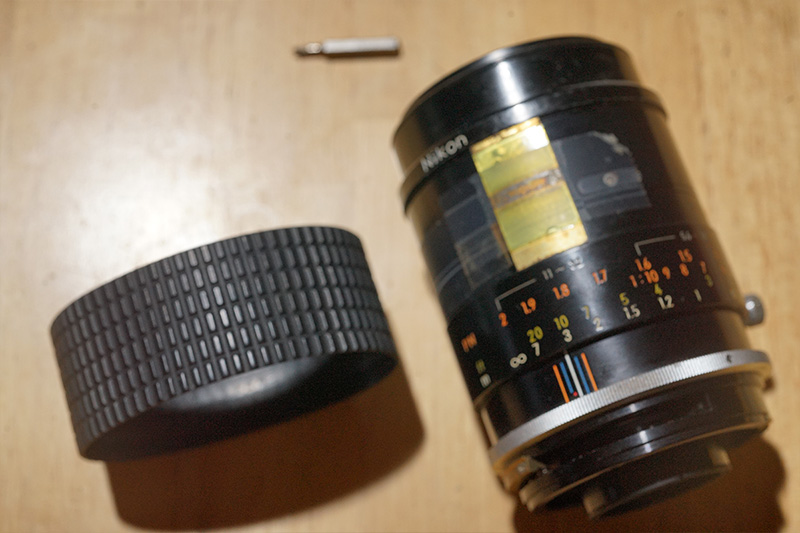
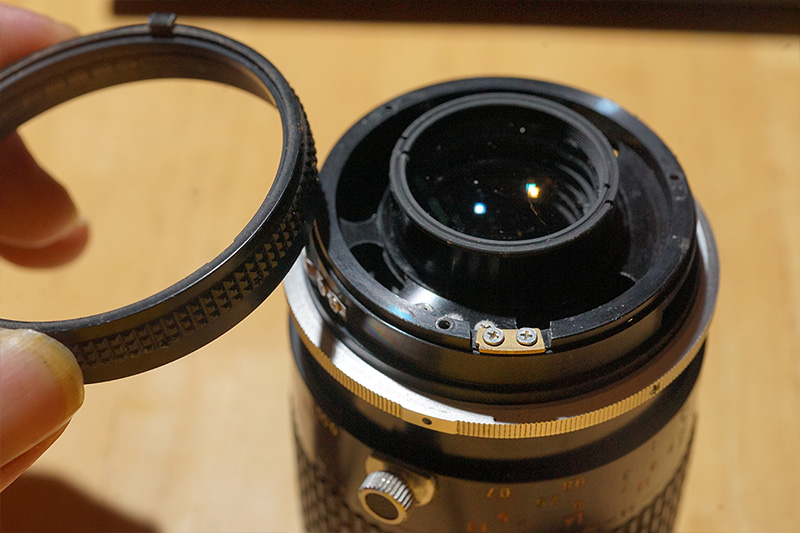
Next let's remove the rubber focusing grip. Use some thin sticks (e. g. a thin screwdriver) to loosen the rubber, and carefully push/pull it off the lens.

_________________
www.artaphot.ch
Last edited by stevemark on Sat Aug 24, 2024 3:29 pm; edited 1 time in total |
|
| Back to top |
|
|
stevemark
Joined: 29 Apr 2011
Posts: 3926
Location: Switzerland
|
| Posted: Sat Aug 24, 2024 3:27 pm Post subject: |
|
|
stevemark wrote:
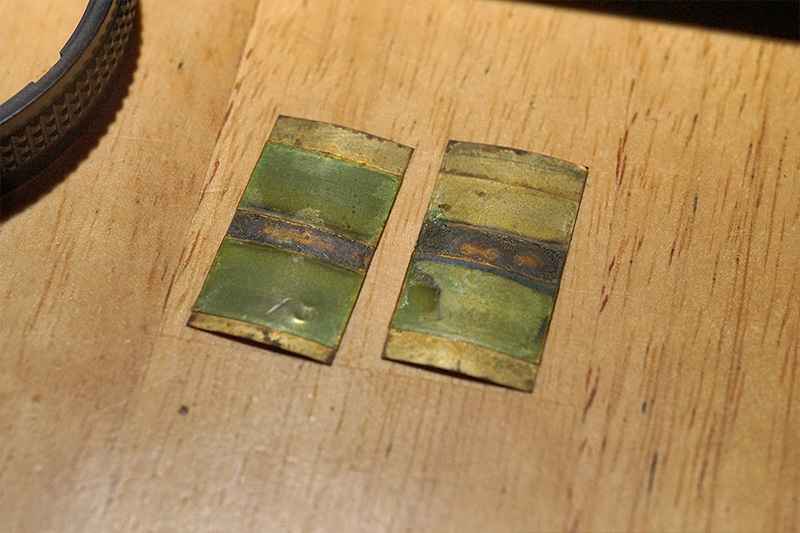
Remove the scotchtape and the thin brass protective sheets.

Under those protective sheets there are the guides for the main focusing helicoid (outer part):

Now remove the three tiny screws holding the silver ring in position, and remove the silver ring:
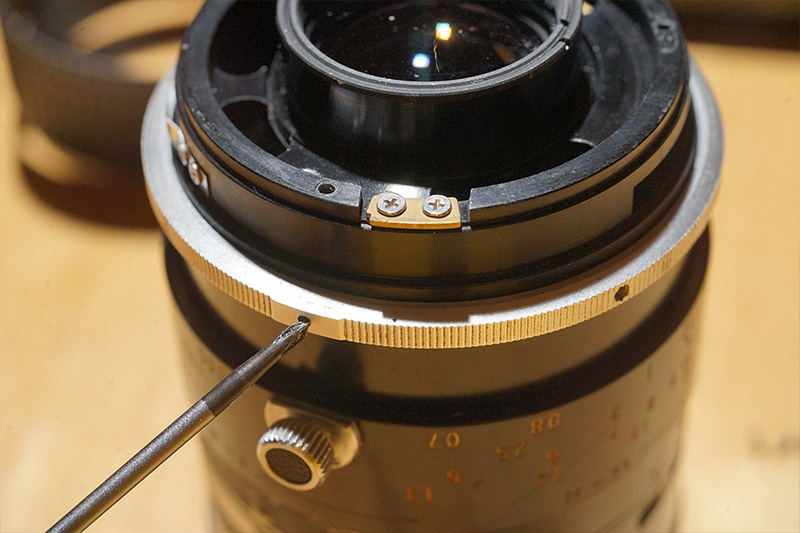
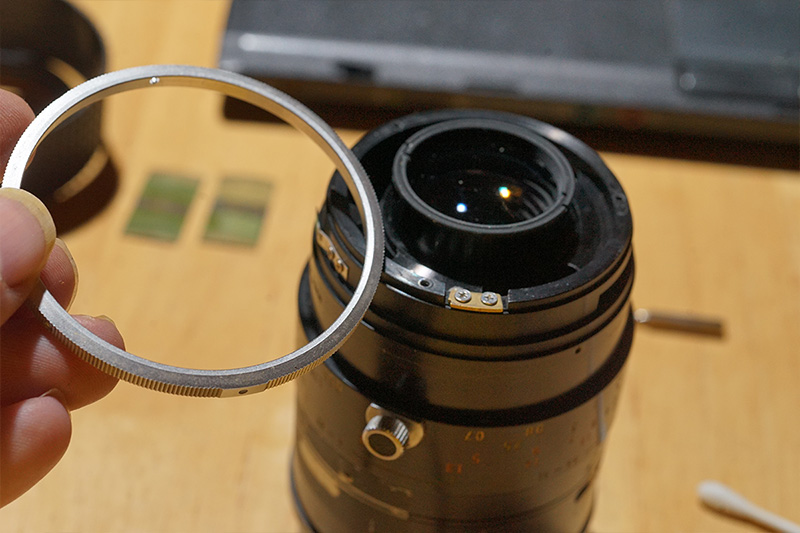
This black ring comes off s well, without removing any additional screws:

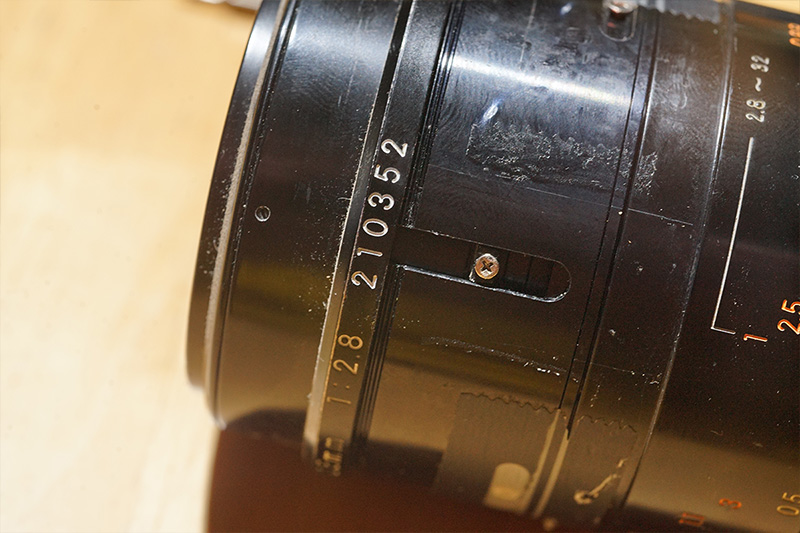
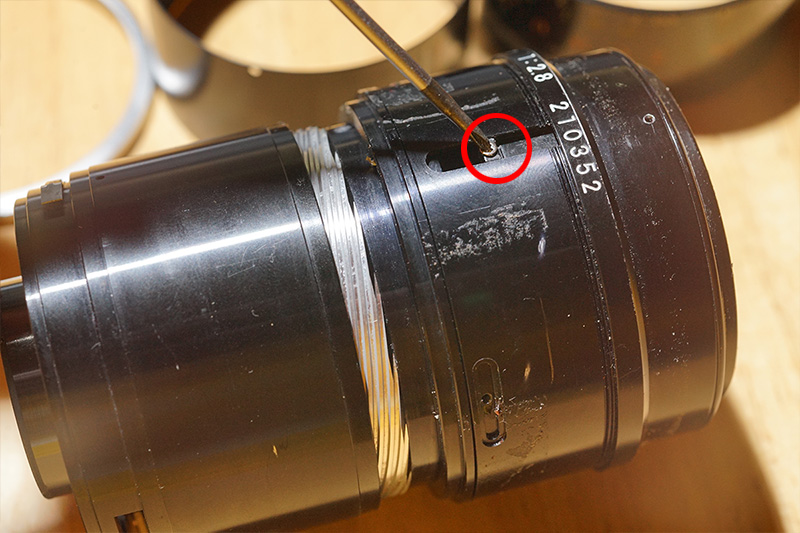
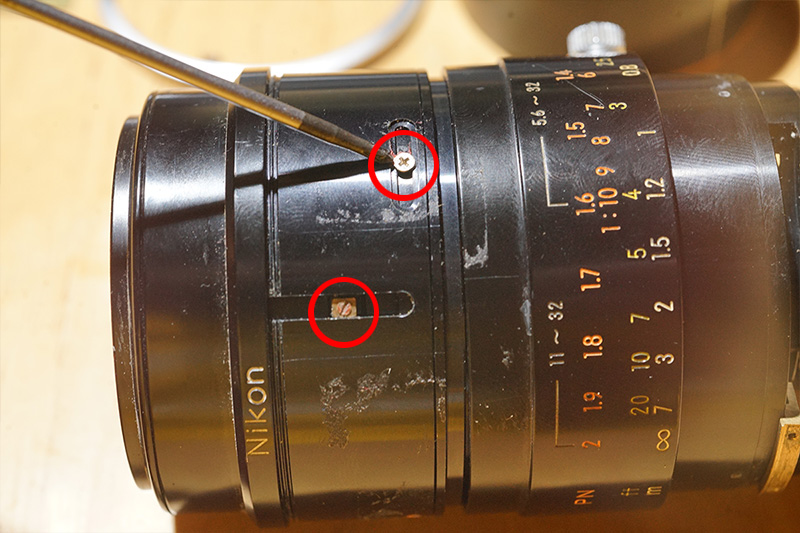
Mark the position of the two screws - this is necessary to re-assemble the lens correctly. ATTENTION - the position shown here is NOT correct!!
Remove the ring with the distance markings:
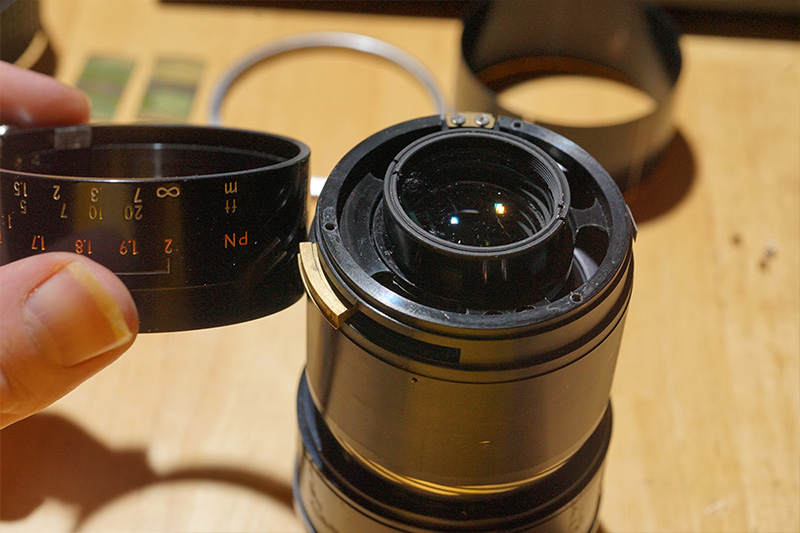
Remove the corresponding screws on both sides of the lens:

_________________
www.artaphot.ch |
|
| Back to top |
|
|
stevemark
Joined: 29 Apr 2011
Posts: 3926
Location: Switzerland
|
| Posted: Sat Aug 24, 2024 5:46 pm Post subject: |
|
|
stevemark wrote:
FURTHER INFORMATION WILL FOLLOW TOMORROW!
s
_________________
www.artaphot.ch |
|
| Back to top |
|
|
|
|
|
You cannot post new topics in this forum
You cannot reply to topics in this forum
You cannot edit your posts in this forum
You cannot delete your posts in this forum
You cannot vote in polls in this forum
|