| View previous topic :: View next topic |
| Author |
Message |
Jesito


Joined: 24 Aug 2007
Posts: 5745
Location: Olivella, Catalonia, (Spain)
Expire: 2015-01-07
|
 Posted: Sat Mar 31, 2012 10:35 pm Post subject: Dedicated to Xpres: Cleaning the Tokina 300mm 5.6 Posted: Sat Mar 31, 2012 10:35 pm Post subject: Dedicated to Xpres: Cleaning the Tokina 300mm 5.6 |
 |
|
Jesito wrote:
Tudor was so kind of providing me a patient coming from his lens hospital to have it treated in this sunny area. I received this lens at the beginning of the past week, but until this morning I've been unable to look at it.
At the end, the lens was simply dirty. No fungus at all, only some dust and debris everyhere, including the corpse of a small inhabitant who did live inside for a while.
Both lens elements (front and back) needed cleaning. And also the inside of the lens.
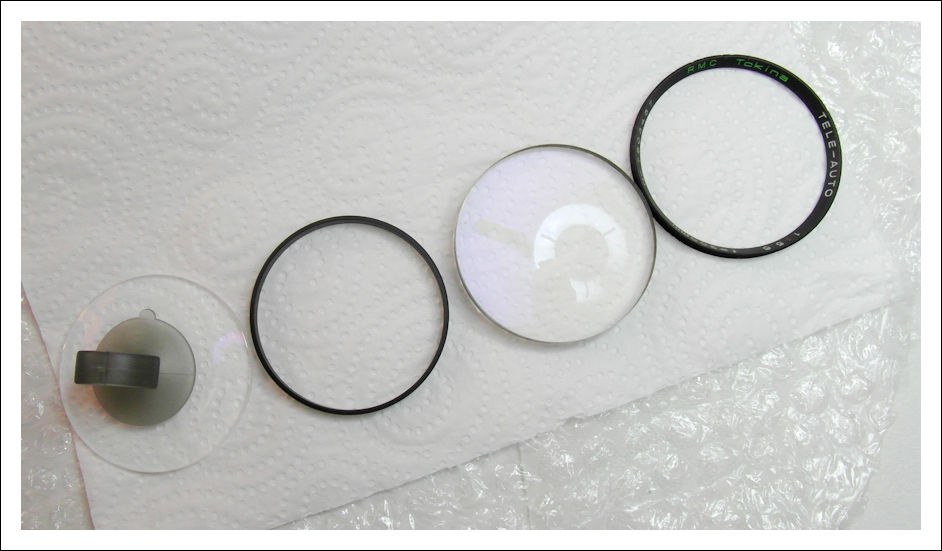
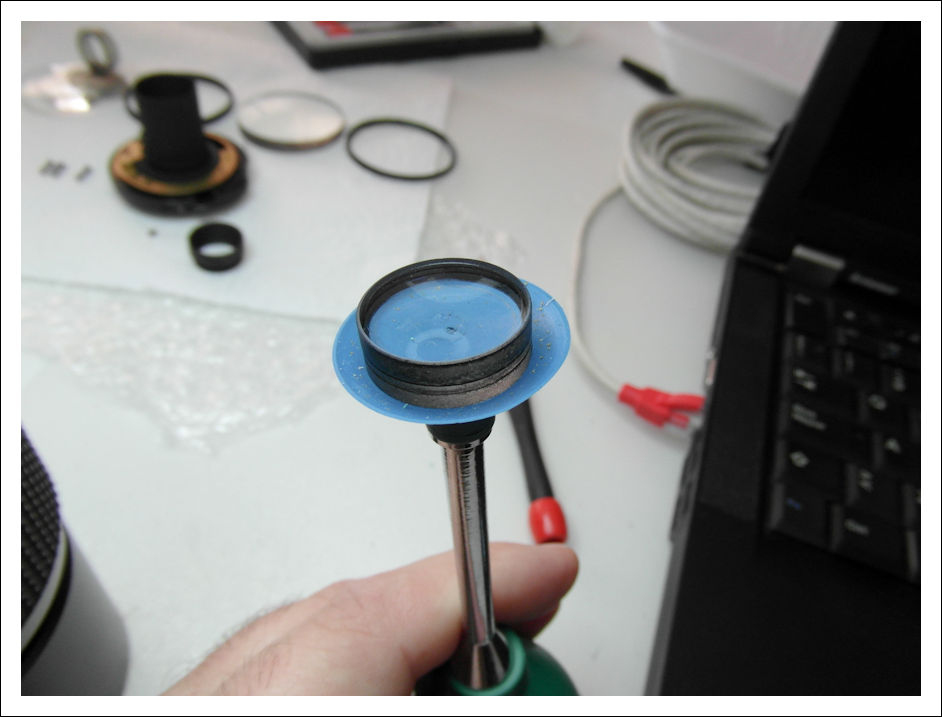
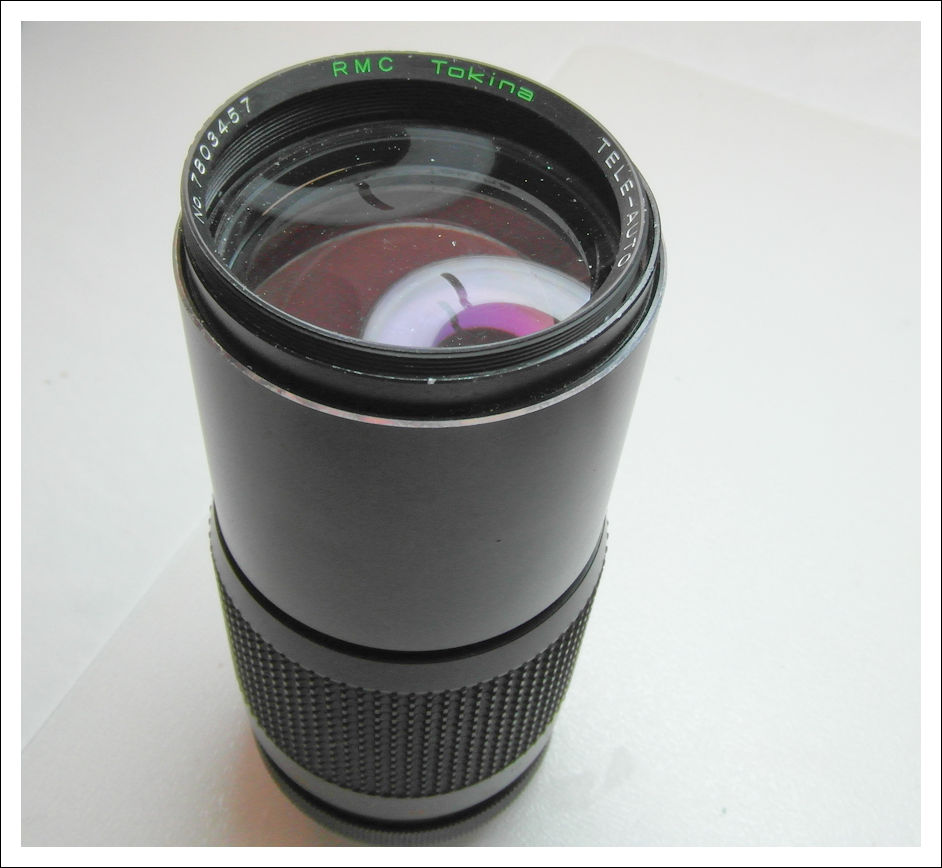
But let's begin from the front element: As usual the first step is to remove the nameplate. In this case it has been a little harder than usual, because the lens had a little ding on the border that puts some difficulties when unscrewing, but at the end it went out:
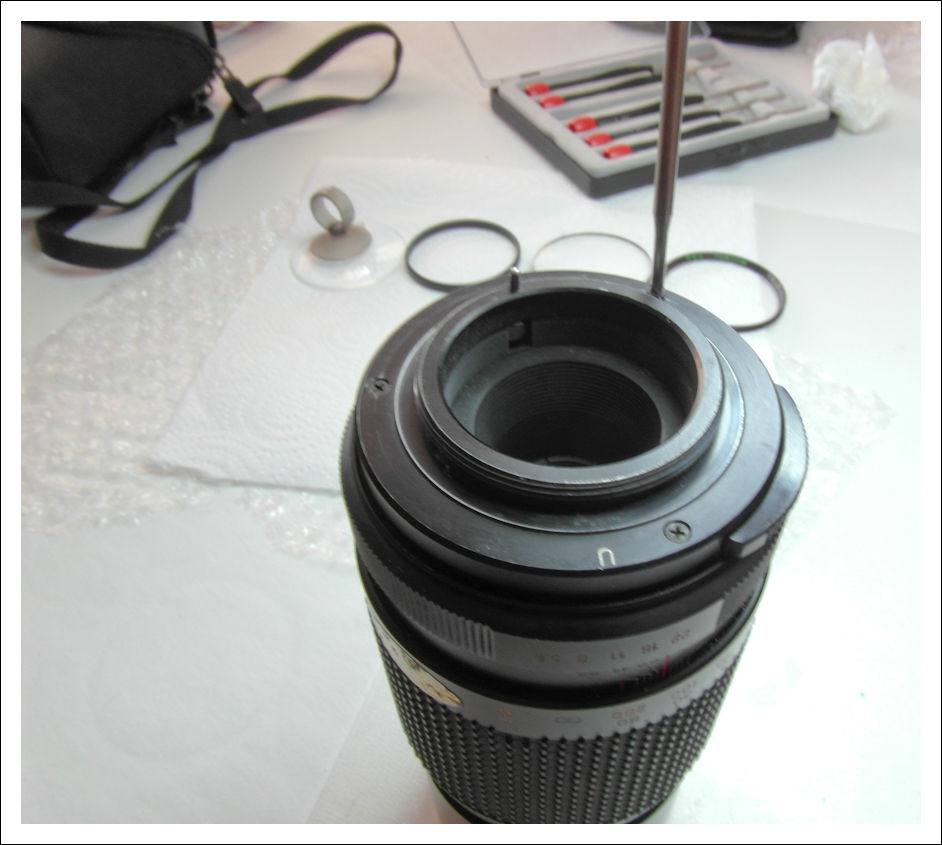
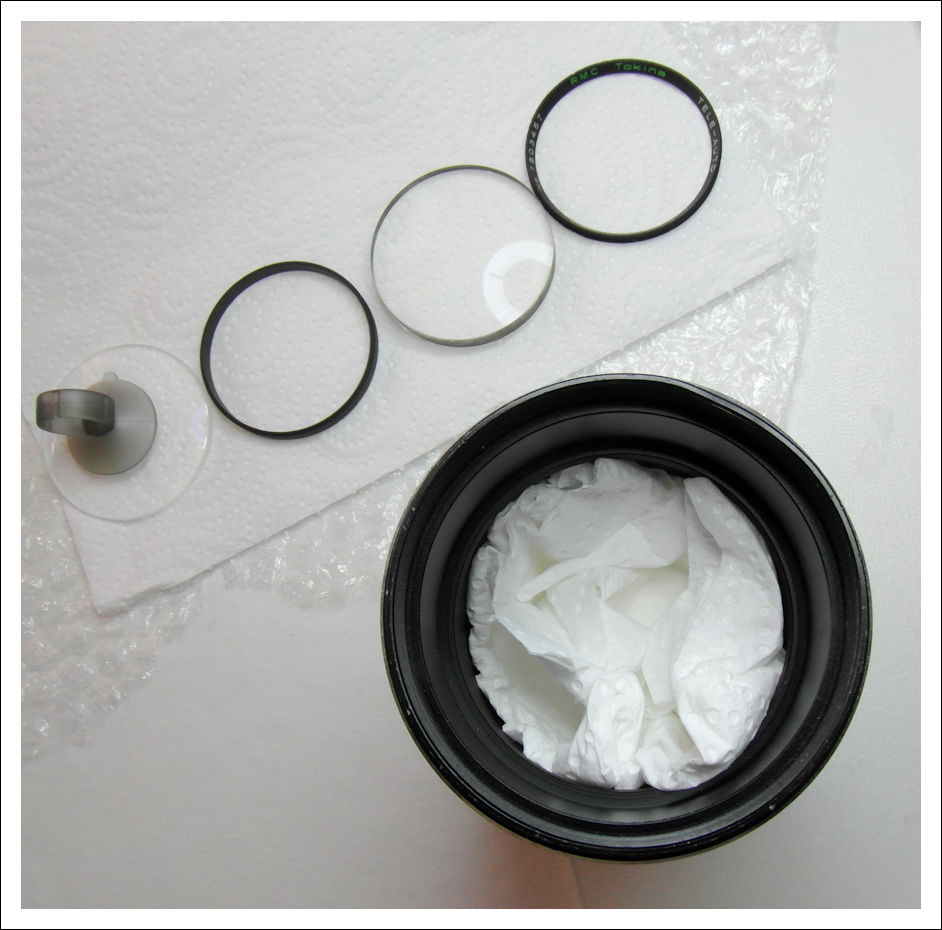
With a suction cup I took out all the elements from the top, including a spacer between the first and second lens:

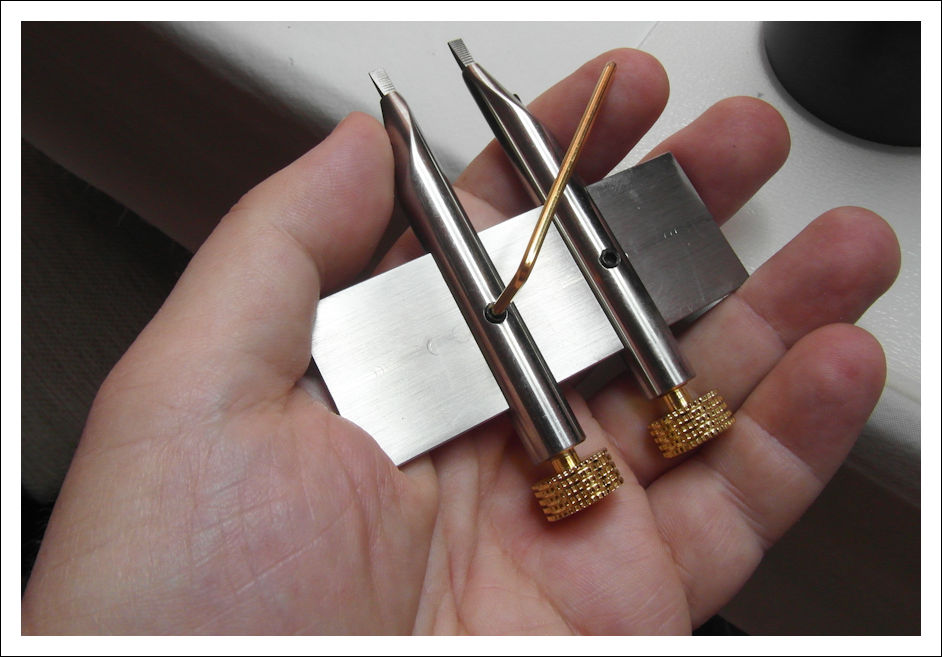
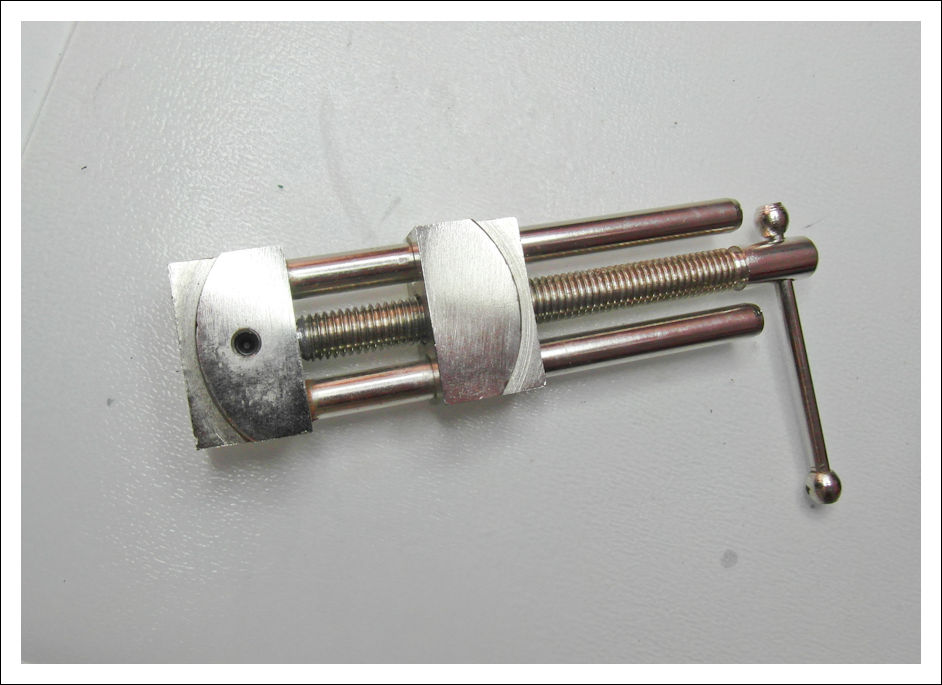
Before cleaning these elements, I decided to fix the ding a little, to allow an easier rebuild and used the vise lens tool:
I use to fill the body with kitchen paper, to catch the small particles that can fall when undinging:
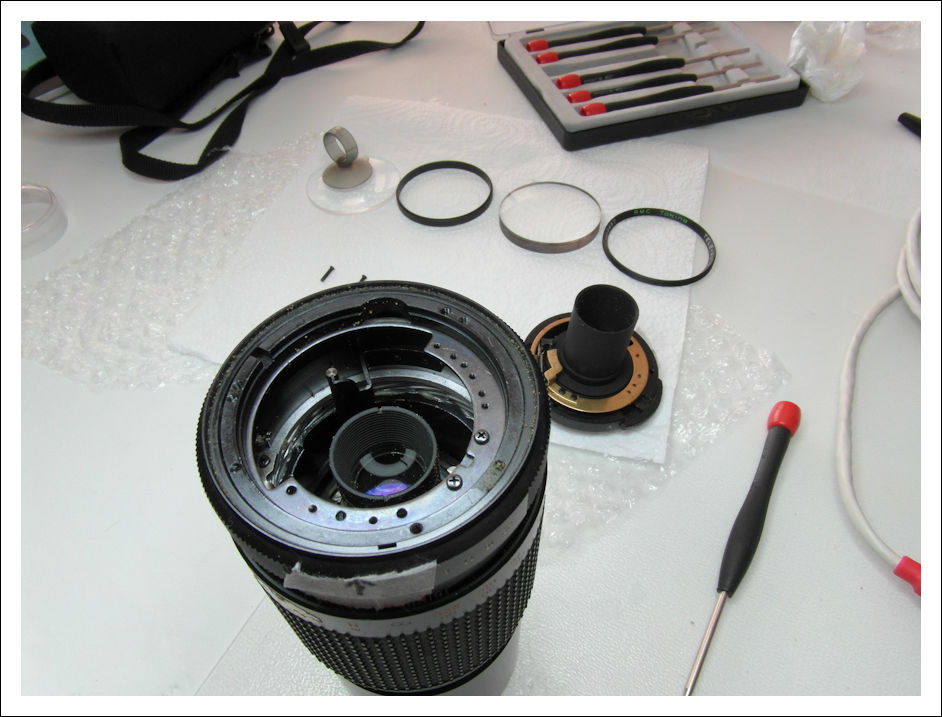
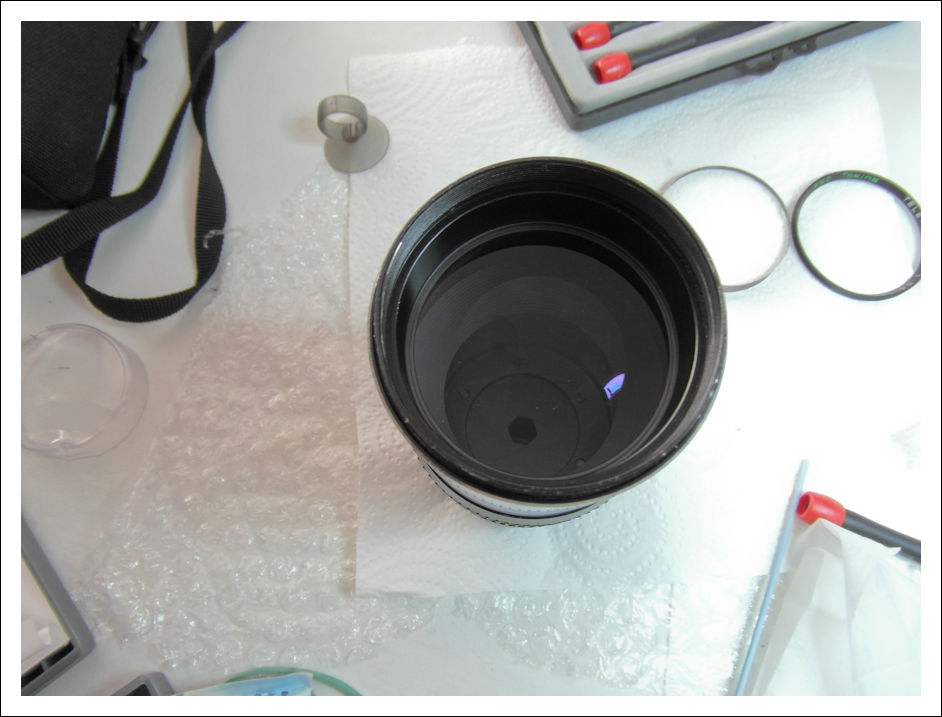
Once this fixed, I decided to attack the backside to access the back elements: Three screws fix the mount and the auto-manual mechanism:


Then the back element gets exposed, it has to be removed with a lens tool:

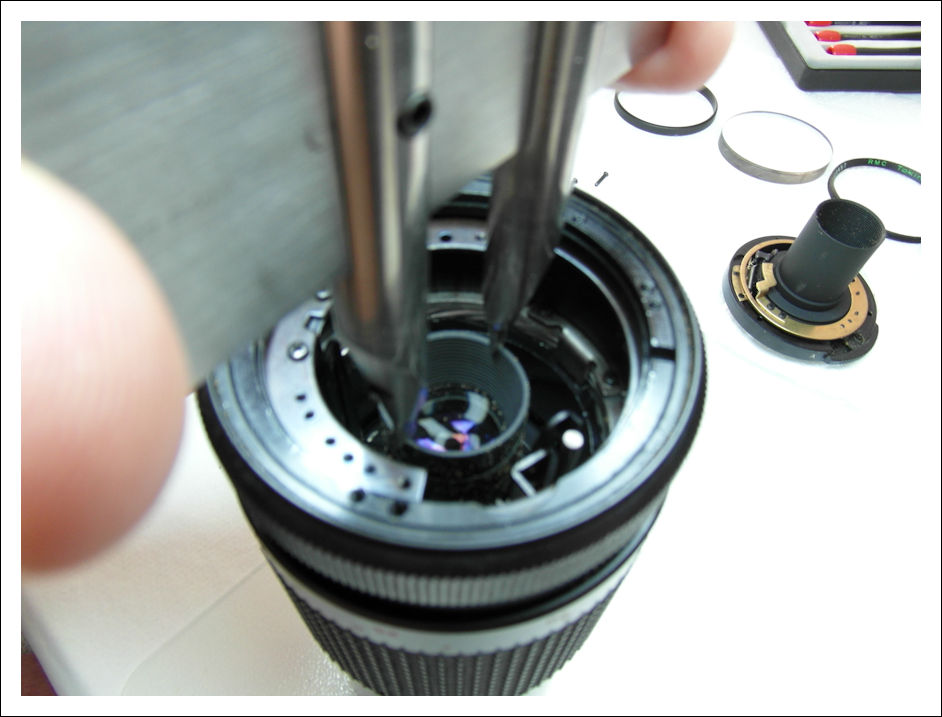
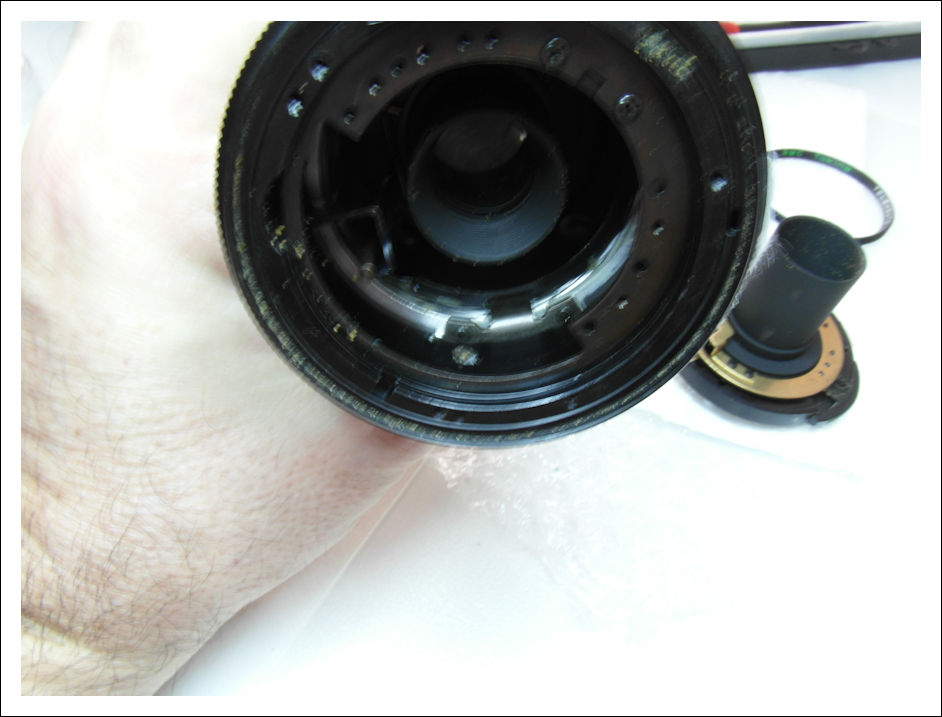
Then cleaning everything, glasses and the internals of the lens, where a small bug had a happy life until it died and left some traces of its living: You can watch it at the bottom side of the picture, lying inside the lens:
And the bug corpse itself:

The back lens group:

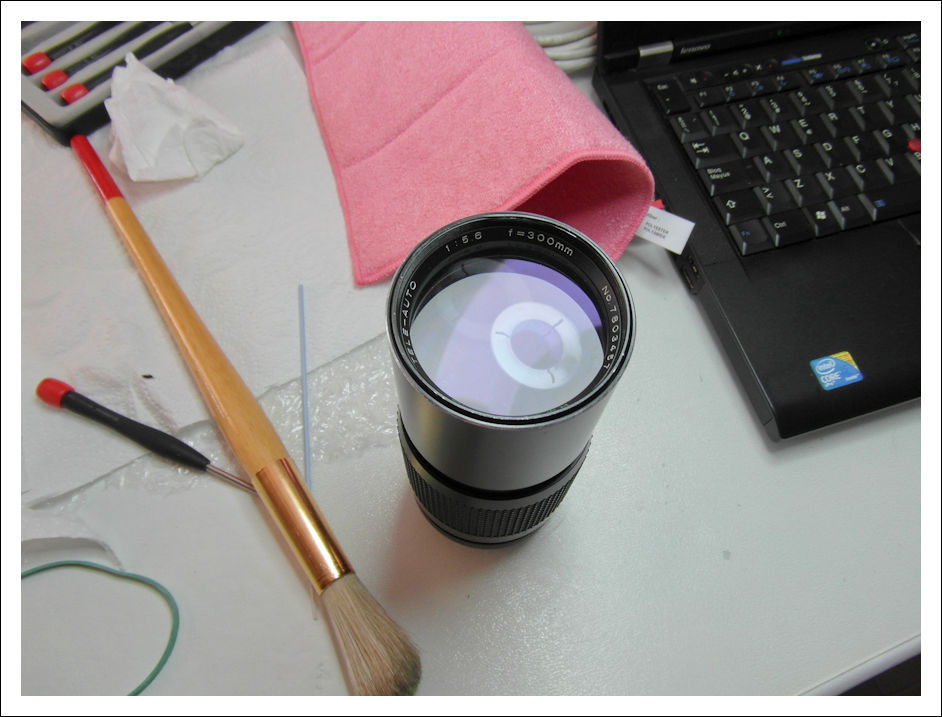
Once cleaned everything, assembly back in reverse order:

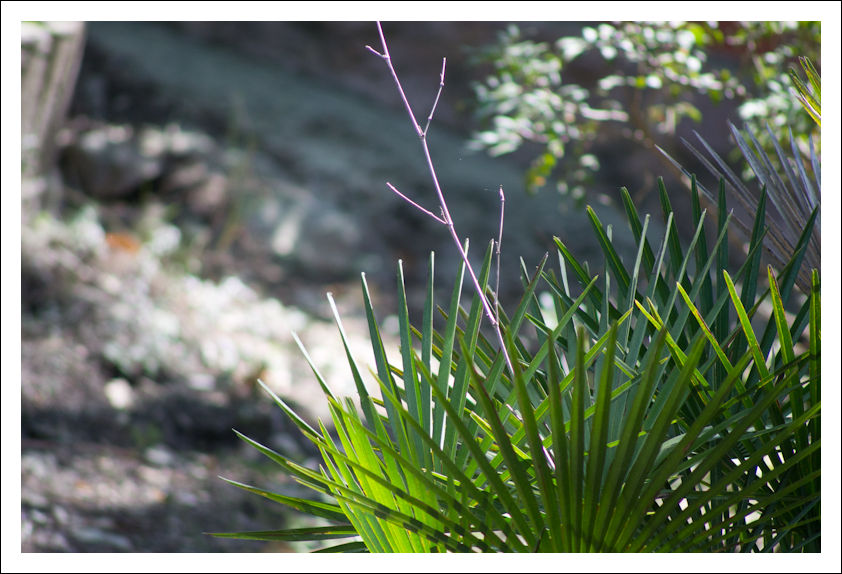
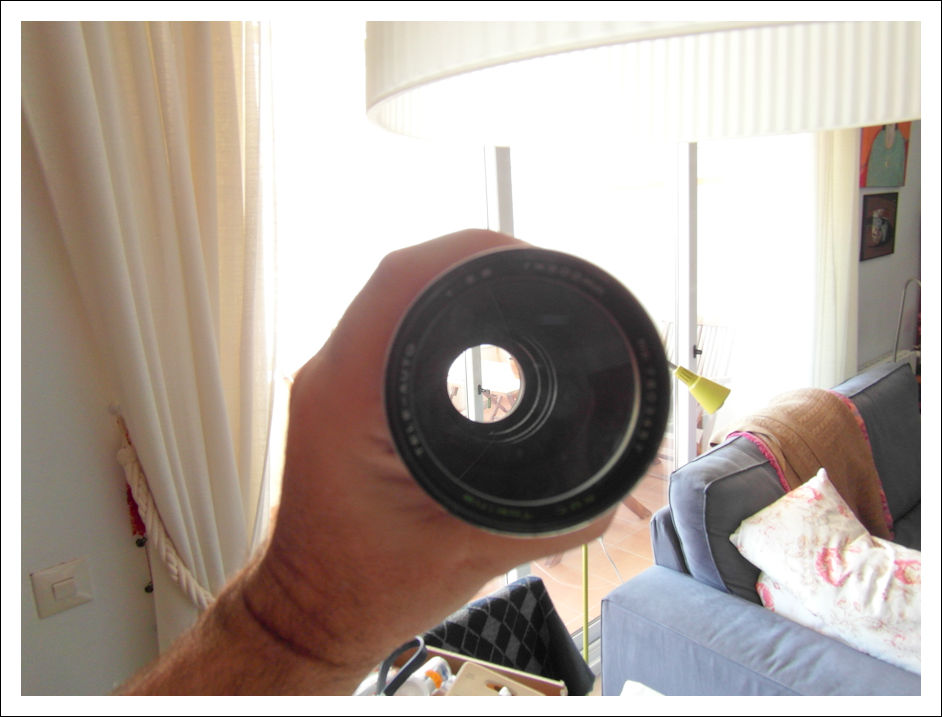
At the end, we have a pristine RMC Tokina 300mm f/5.6 ready to be tested... 

Again thanks to Xpres for this learning opportunity
Regards.
Jes.
_________________
Jesito, Moderator 
Jesito's backsack:
Zooms Sigma 70-300, Tamron 35-135 and 70-210 short, 70-210 long, 28-70 CF Macro, 35-70, 35-80, Vivitar 70-210 KA, Tamron 70-250.
Fixed Industar-50, , Tamron 24mm, Tamron 135mm, Sands Hunter 135mm, Pancolar 50mm, Volna-3, many Exakta lenses
DSLR SIGMA SD9 & SD14, EOS 5D, Sony A700 and NEXF3, Oly E-330, E-400, E-450, E-1
TLR/6x6/645 YashicaMat, Petri 6x45, Nettar, Franka Solida, Brilliant
SLR Minolta X300, Fuji STX II, Praktica VLC3, Pentax P30t, EXA500, EXA 1A, Spotmatic(2), Chinon CM-4S, Ricoh, Contax, Konica TC-X , Minolta 5000, 7000i, 3Sxi, EOS 500 and CX
Rangefinders Chinon 35EE, Konica C35 auto, Canonet 28, Yashica Lynx, FED-2, Yashica electro 35, Argus C3 & C4, Regula Cita III, Voigtlander Vitoret (many), Welta Welti-I, Kodak Signette 35, Zorki-4, Bessa-R & L, Minolta Weathermatic, olympus XA2
Compact Film Konica C35V, Voigtlander Vitorets, Canon Prima Super 105, Olympus XA2 and XA3
Compact Digital Olympus C-5050, Aiptek Slim 3000, Canon Powershot A540, Nikon 5200, SIGMA DP1s, Polaroid X530, IXUS55, Kodak 6490, Powershot G9 and G10
CSCCanon EOS-M, Samsung NX100 and NX210, Lumix G5, NEX-F3 |
|
| Back to top |
|
 |
Xpres


Joined: 11 Dec 2007
Posts: 964
Location: UK
Expire: 2014-10-28
|
| Posted: Sun Apr 01, 2012 1:37 pm Post subject: |
|
|
Xpres wrote:
Jes, what an outstanding tutorial and great job. I had totally missed that bug!
Should be a fine performer now.
_________________
Film... and sometimes SD14, 5D2 and some other suff! |
|
| Back to top |
|
|
DigiChromeEd

Joined: 29 Dec 2009
Posts: 3460
Location: Northern Ireland
|
| Posted: Sun Apr 01, 2012 3:33 pm Post subject: |
|
|
DigiChromeEd wrote:
Hi Jes
This is a great tutorial. I have never tried this myself yet but would like to have a go. What do you use to clean the lens elements?
_________________
"I've got a Nikon camera, I like to take a photograph" - Paul Simon |
|
| Back to top |
|
|
Jesito
Joined: 24 Aug 2007
Posts: 5745
Location: Olivella, Catalonia, (Spain)
Expire: 2015-01-07
|
| Posted: Sun Apr 01, 2012 4:44 pm Post subject: |
|
|
Jesito wrote:
| Xpres wrote: |
Jes, what an outstanding tutorial and great job. I had totally missed that bug!
Should be a fine performer now. |
Thanks, Tudor!
I've been trying it this morning. I'll upload some pictures later
And yes, it seems to be a good performer 
Jes.
_________________
Jesito, Moderator
Jesito's backsack:
Zooms Sigma 70-300, Tamron 35-135 and 70-210 short, 70-210 long, 28-70 CF Macro, 35-70, 35-80, Vivitar 70-210 KA, Tamron 70-250.
Fixed Industar-50, , Tamron 24mm, Tamron 135mm, Sands Hunter 135mm, Pancolar 50mm, Volna-3, many Exakta lenses
DSLR SIGMA SD9 & SD14, EOS 5D, Sony A700 and NEXF3, Oly E-330, E-400, E-450, E-1
TLR/6x6/645 YashicaMat, Petri 6x45, Nettar, Franka Solida, Brilliant
SLR Minolta X300, Fuji STX II, Praktica VLC3, Pentax P30t, EXA500, EXA 1A, Spotmatic(2), Chinon CM-4S, Ricoh, Contax, Konica TC-X , Minolta 5000, 7000i, 3Sxi, EOS 500 and CX
Rangefinders Chinon 35EE, Konica C35 auto, Canonet 28, Yashica Lynx, FED-2, Yashica electro 35, Argus C3 & C4, Regula Cita III, Voigtlander Vitoret (many), Welta Welti-I, Kodak Signette 35, Zorki-4, Bessa-R & L, Minolta Weathermatic, olympus XA2
Compact Film Konica C35V, Voigtlander Vitorets, Canon Prima Super 105, Olympus XA2 and XA3
Compact Digital Olympus C-5050, Aiptek Slim 3000, Canon Powershot A540, Nikon 5200, SIGMA DP1s, Polaroid X530, IXUS55, Kodak 6490, Powershot G9 and G10
CSCCanon EOS-M, Samsung NX100 and NX210, Lumix G5, NEX-F3 |
|
| Back to top |
|
|
Jesito
Joined: 24 Aug 2007
Posts: 5745
Location: Olivella, Catalonia, (Spain)
Expire: 2015-01-07
|
| Posted: Sun Apr 01, 2012 4:49 pm Post subject: |
|
|
Jesito wrote:
| DigiChromeEd wrote: |
Hi Jes
This is a great tutorial. I have never tried this myself yet but would like to have a go. What do you use to clean the lens elements? |
Just a drop of liquid soap on the ultrasonic tank water. 90 seconds. Dry with a microfiber clean towel.
That's all... (only if the lenses don't have any fungus, just to clean them).
Regards.
Jes.
_________________
Jesito, Moderator
Jesito's backsack:
Zooms Sigma 70-300, Tamron 35-135 and 70-210 short, 70-210 long, 28-70 CF Macro, 35-70, 35-80, Vivitar 70-210 KA, Tamron 70-250.
Fixed Industar-50, , Tamron 24mm, Tamron 135mm, Sands Hunter 135mm, Pancolar 50mm, Volna-3, many Exakta lenses
DSLR SIGMA SD9 & SD14, EOS 5D, Sony A700 and NEXF3, Oly E-330, E-400, E-450, E-1
TLR/6x6/645 YashicaMat, Petri 6x45, Nettar, Franka Solida, Brilliant
SLR Minolta X300, Fuji STX II, Praktica VLC3, Pentax P30t, EXA500, EXA 1A, Spotmatic(2), Chinon CM-4S, Ricoh, Contax, Konica TC-X , Minolta 5000, 7000i, 3Sxi, EOS 500 and CX
Rangefinders Chinon 35EE, Konica C35 auto, Canonet 28, Yashica Lynx, FED-2, Yashica electro 35, Argus C3 & C4, Regula Cita III, Voigtlander Vitoret (many), Welta Welti-I, Kodak Signette 35, Zorki-4, Bessa-R & L, Minolta Weathermatic, olympus XA2
Compact Film Konica C35V, Voigtlander Vitorets, Canon Prima Super 105, Olympus XA2 and XA3
Compact Digital Olympus C-5050, Aiptek Slim 3000, Canon Powershot A540, Nikon 5200, SIGMA DP1s, Polaroid X530, IXUS55, Kodak 6490, Powershot G9 and G10
CSCCanon EOS-M, Samsung NX100 and NX210, Lumix G5, NEX-F3 |
|
| Back to top |
|
|
Jesito
Joined: 24 Aug 2007
Posts: 5745
Location: Olivella, Catalonia, (Spain)
Expire: 2015-01-07
|
| Posted: Sun Apr 01, 2012 9:53 pm Post subject: |
|
|
Jesito wrote:
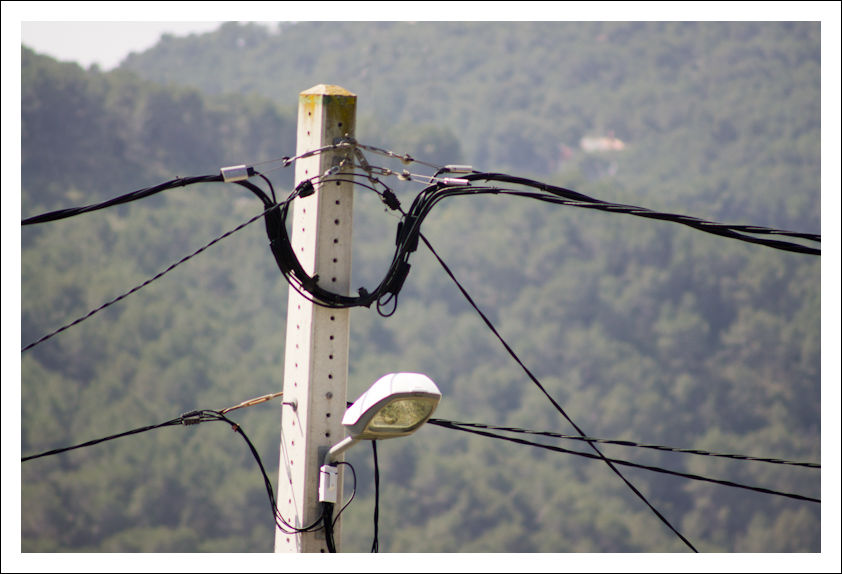
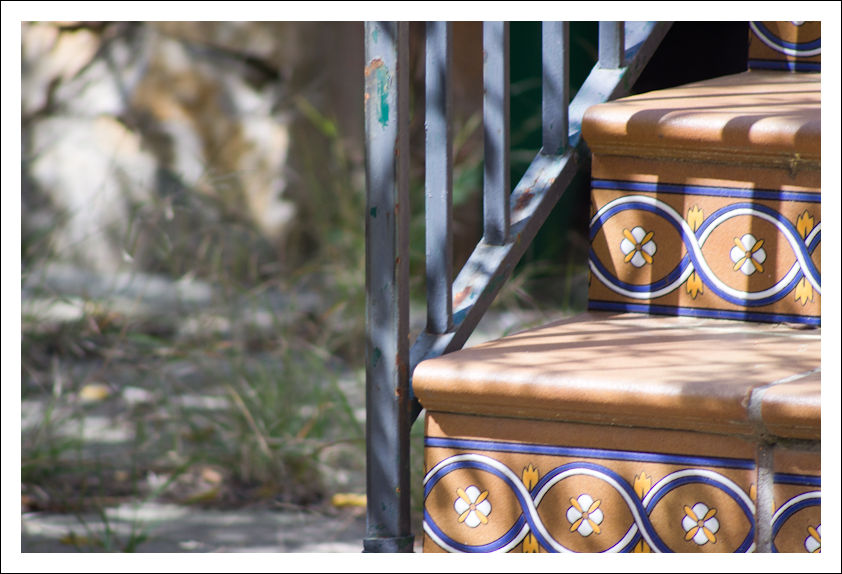
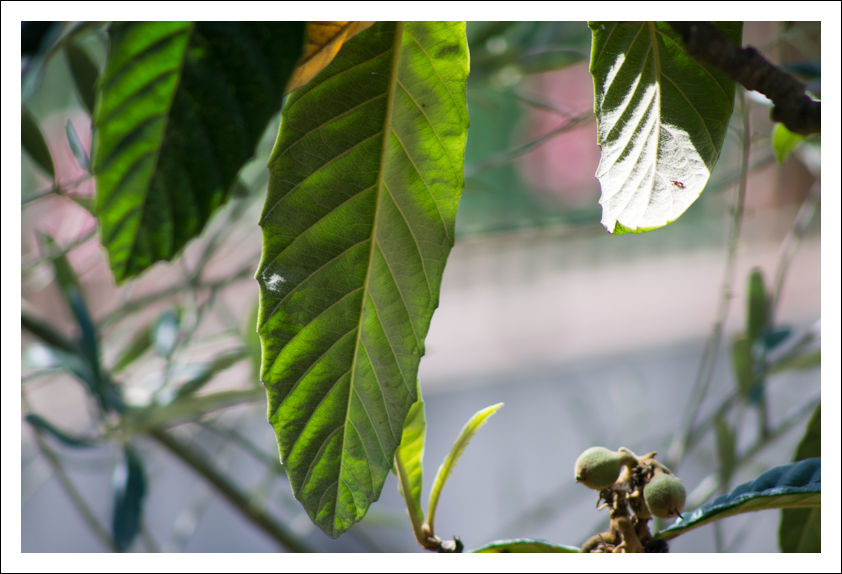
A few samples with the NEX-5:


Regards.
Jes.
_________________
Jesito, Moderator
Jesito's backsack:
Zooms Sigma 70-300, Tamron 35-135 and 70-210 short, 70-210 long, 28-70 CF Macro, 35-70, 35-80, Vivitar 70-210 KA, Tamron 70-250.
Fixed Industar-50, , Tamron 24mm, Tamron 135mm, Sands Hunter 135mm, Pancolar 50mm, Volna-3, many Exakta lenses
DSLR SIGMA SD9 & SD14, EOS 5D, Sony A700 and NEXF3, Oly E-330, E-400, E-450, E-1
TLR/6x6/645 YashicaMat, Petri 6x45, Nettar, Franka Solida, Brilliant
SLR Minolta X300, Fuji STX II, Praktica VLC3, Pentax P30t, EXA500, EXA 1A, Spotmatic(2), Chinon CM-4S, Ricoh, Contax, Konica TC-X , Minolta 5000, 7000i, 3Sxi, EOS 500 and CX
Rangefinders Chinon 35EE, Konica C35 auto, Canonet 28, Yashica Lynx, FED-2, Yashica electro 35, Argus C3 & C4, Regula Cita III, Voigtlander Vitoret (many), Welta Welti-I, Kodak Signette 35, Zorki-4, Bessa-R & L, Minolta Weathermatic, olympus XA2
Compact Film Konica C35V, Voigtlander Vitorets, Canon Prima Super 105, Olympus XA2 and XA3
Compact Digital Olympus C-5050, Aiptek Slim 3000, Canon Powershot A540, Nikon 5200, SIGMA DP1s, Polaroid X530, IXUS55, Kodak 6490, Powershot G9 and G10
CSCCanon EOS-M, Samsung NX100 and NX210, Lumix G5, NEX-F3 |
|
| Back to top |
|
|
|
|