Carlsson


Joined: 26 Jul 2008
Posts: 793
Location: Portugal
|
 Posted: Sat Oct 03, 2009 2:29 pm Post subject: Droughtland Details - Kodak Ektar 100 Posted: Sat Oct 03, 2009 2:29 pm Post subject: Droughtland Details - Kodak Ektar 100 |
 |
|
Carlsson wrote:
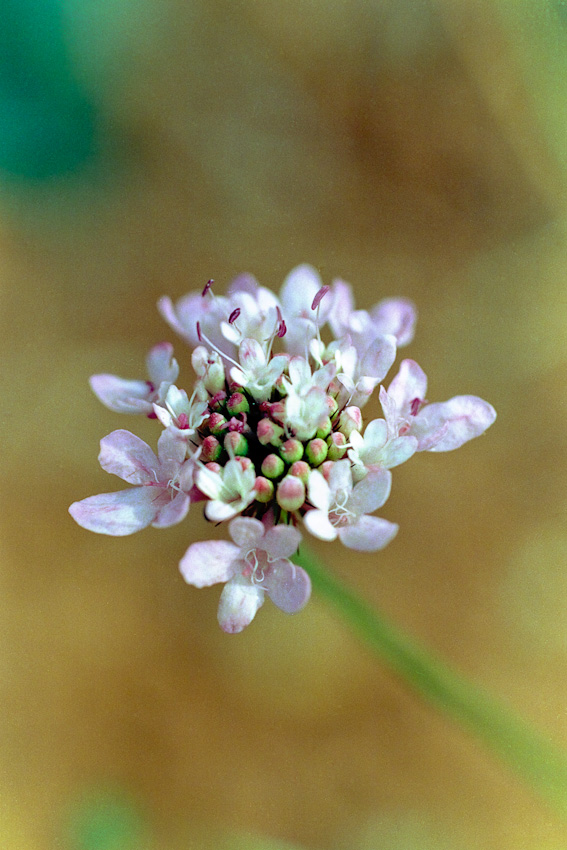
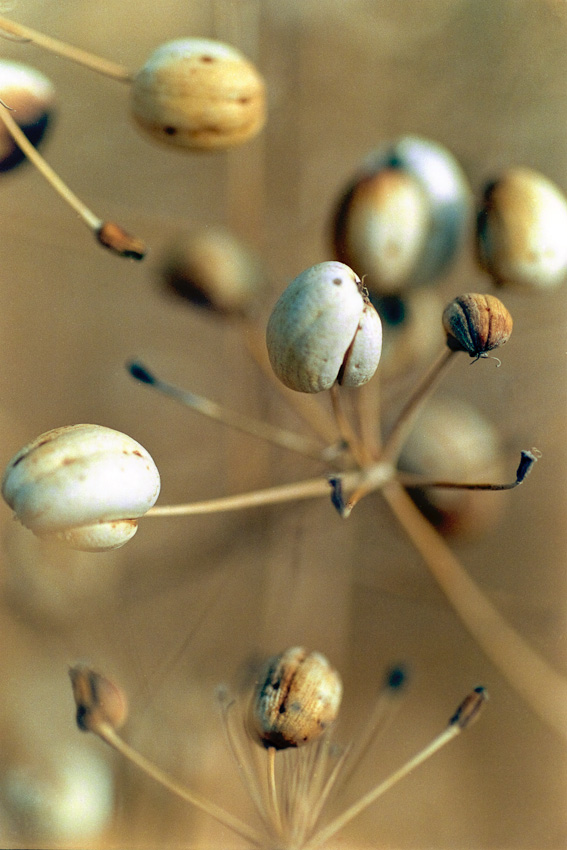
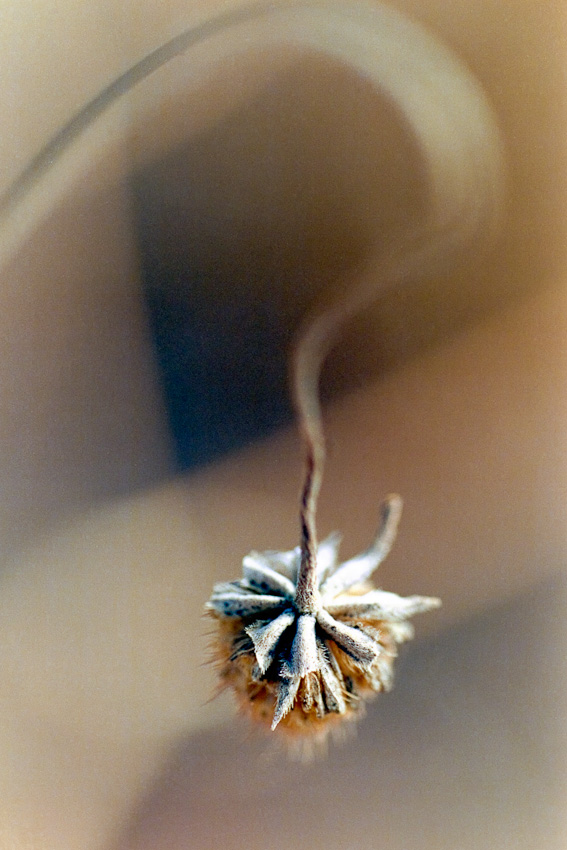
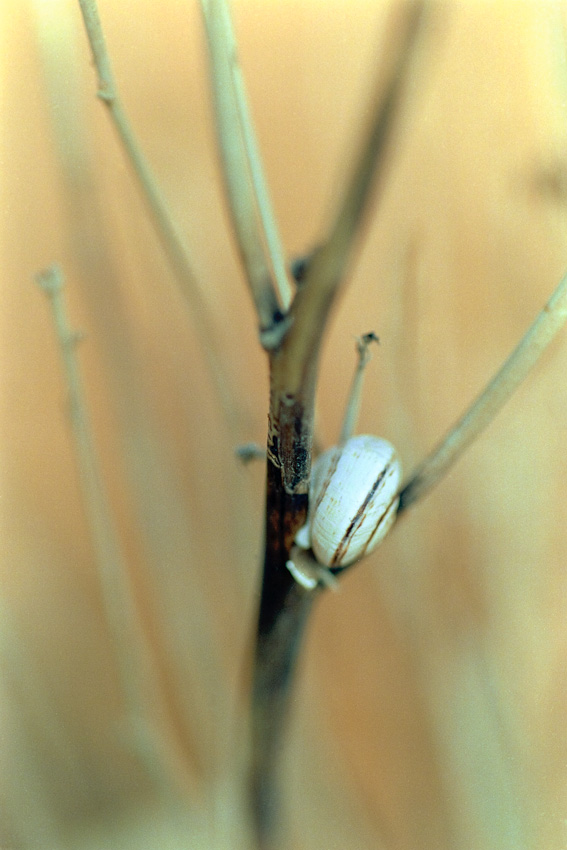
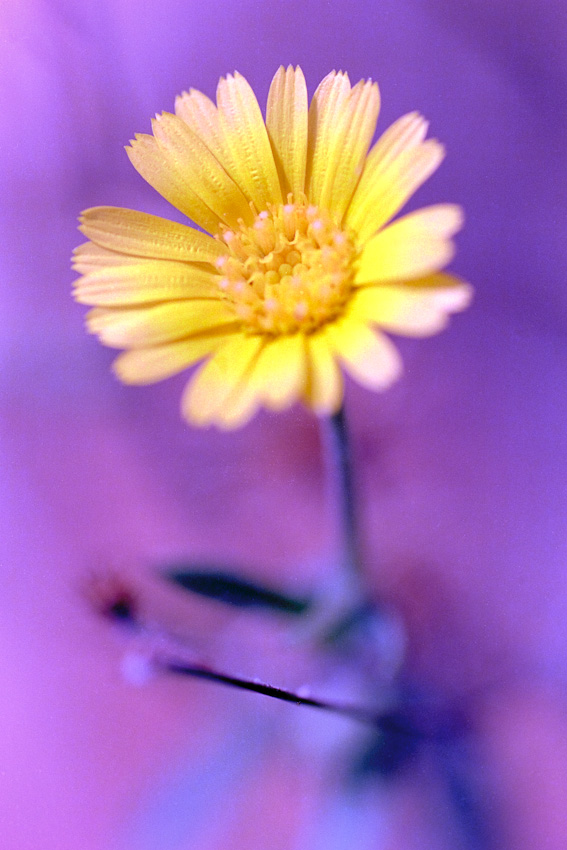
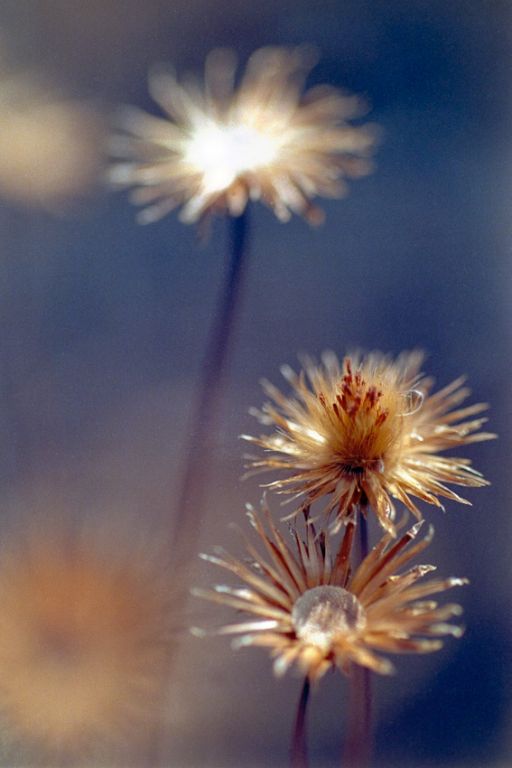
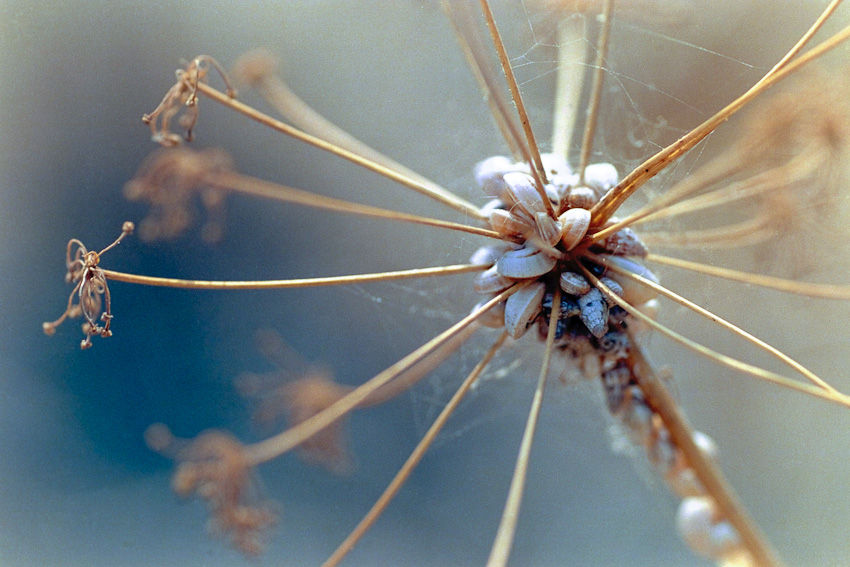
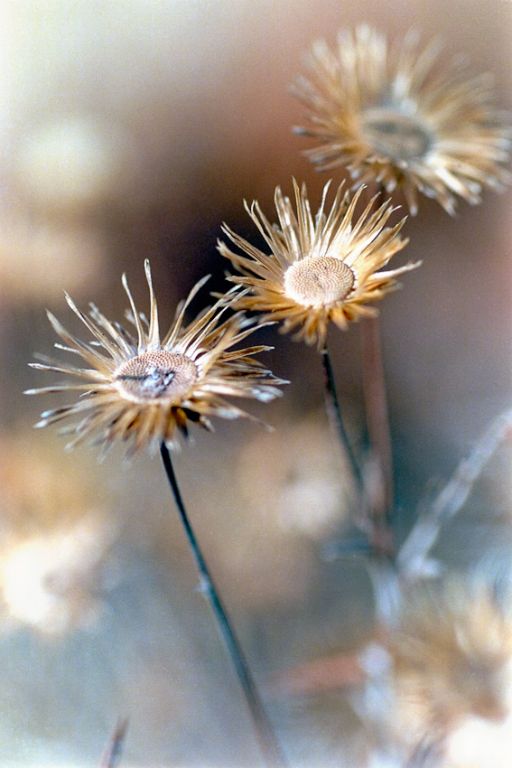
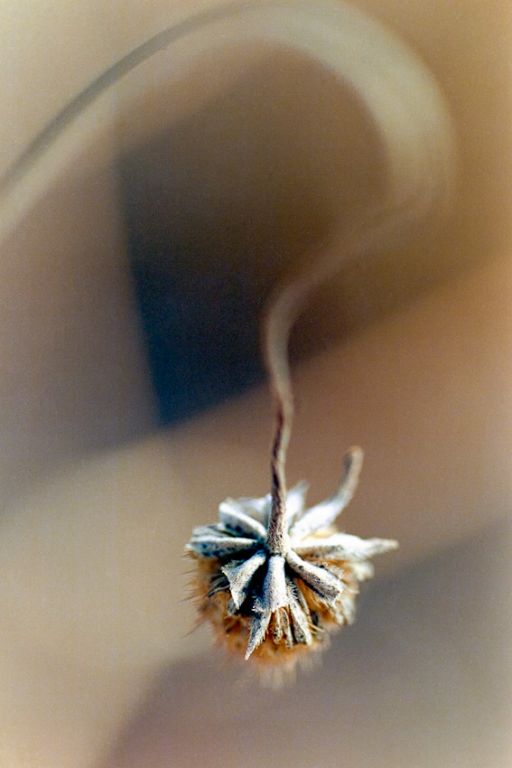
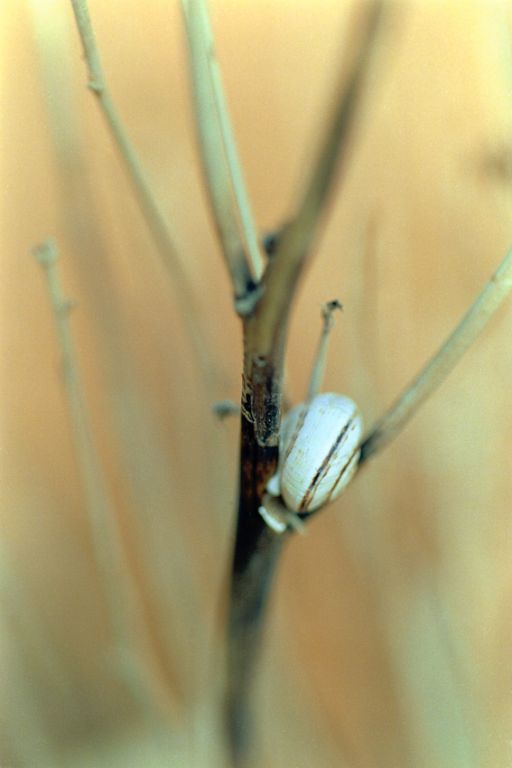
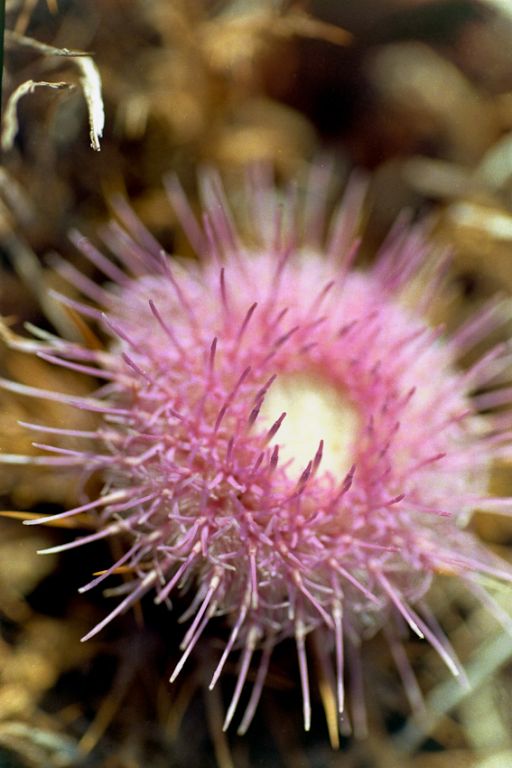
Taken with Contax AX and Makro-Planar 2.8/100, some details from the portuguese droughtland, which received no rain for almost five months. Fortunately the last week started with a little rain, I need more green! 
This was my first attempt with Ektar 100 and my last visit at the local lab. Diagonal scratches, tons of dust and spots and a big fat fingerprint on every second image 
A C41 developing kit is already ordered.
Scanning was done with Contax Bellow system, 5D and Zeiss Planar 74mm.
As a quick guide, as requested by Attila, a more detailed one will follow:
Before "scanning" with the bellow, set the camera to manual white balance. Then, insert the first part of the film, which should be blank (orange), ask the lab not to remove the blank frames.
Then take a picture with the complete frame filled by the orange negative.
Now set the white balance to manual and select the orange picture.
For me (I always use manual mode for "scanning negatives") 11" of exposure time is the best for the orange frame. Take another picture of the orange frame and check the white balance, it should be nearly grey or white.
In the last months I started to collect pices of empty negatives, (B+W, color neg...) to have the exact color of the film material.
Now insert the first negative. Adjust the exposure time for the stopped down lens, for me it's 3" at f11. Adjust the focus, live view might help a lot (I don't have it).
Take the picture and check the histogram. Do not expose to the right! It works best when the peak is on the right side from the center of the histogram.
Remove the card from the cam and open the file in Photoshop. The white balance in camera raw must be set to "as shot"! This is important.
Do not adjust anything else.
Invert the image in Photoshop by pressing "crtl+I". The positive is there.
Duplicate the layer and add to the new layer a "threshold layer" (by clicking the half moon logo on the bottom on the layer panel, then select "Threshold..."
This will bring up a simple histogram on the adjustment panel. If you can't see it, enable it by clicking on the main menu "Windows" -> "Adjustments"
Below the Threshold hsitogram is a slider, move it to the left and to the right. You can see the image changing. The slider tio the right is showing the brightest spot, to the left the darkest. Find them and keep them in mind (or use a marker on your monitor  ) We will need the spots in a few seconds. ) We will need the spots in a few seconds.
Disable the threshold layer in the layer panel and enable the second layer of the image (which was our copy). Press "crtl+M", this will bring up the curves dialog.
With another histogram and three eydroppers. From left to right: black grey white.
Double click on the black picker and set the folllowing colors for RGB: 7,7,7. Double click the white eydropper and set: 254, 254 ,252. Done (forever).
Now remember the brightest spot in the image, selecht the white point picker and select the brightest/whitest spot. The same for the black eydropper, try to hit the blackest spot. Have a look at the image, does it look natural? If not, then play with the black eydropper, select other black spots. In the Curves histogram you can see the adjustment, red, green and blue.
The black eydropper removes the color cast very good. The white eydropper can adjust the white point, be careful, this one will affect the image brightness, watch out for burned areas, avoid this. Usually clouds have the brightest spot in images.
When you are satisfied, you can save the curve to use it later on similiar images (useful for a series of images). Then hit ok.
There is our corrected positive. Now you can make small adjustmenst, contrast, brightness, spots...
Btw., the eyedropper procedure works for every color correction.


_________________
Contax III, Zeiss Ikon ZM, Contax AX, EOS 5D, R-D1
https://mariaeero.com/contax/ |
|
hexi

Joined: 01 Jul 2009
Posts: 1631
Location: France
Expire: 2011-11-18
|
| Posted: Sat Oct 03, 2009 5:06 pm Post subject: |
|
|
hexi wrote:
Interesting shots, but i think that your lab screwed up the dev, of what i saw Ektar color are quite ... shiny, punchy whatever. not that . You've done well to order C41 i'm sure the difference will be massive compare to your lab.
_________________
Happy owner and user of :
SLR's > Contax Aria - RX
DSLR > Canon 5D
Lenses : C/Y Planar 1.4/50 - Distagon 2.8/35 - Planar 1.4/85
http://www.flickr.com/photos/sonnar85 |
|
supahmario

Joined: 18 Mar 2009
Posts: 615
Location: Berlin, Germany
|
| Posted: Sat Oct 03, 2009 5:17 pm Post subject: |
|
|
supahmario wrote:
#6 for me!... amazing! for something like that... you need film!
_________________
EOS 5D, EOS 30
Leica-R: Summicron 2/50
QBM: Distagon 2.8/35
PK: Tokina 3.5/17, Porst 1.2/55
M42: S-M-C Takumar 3.5/24, S-M-C Takumar 1.8/55, CZJ MC Sonnar 3.5/135, Jupiter 21M 4/200
|
|
Carlsson
Joined: 26 Jul 2008
Posts: 793
Location: Portugal
|
| Posted: Sat Oct 03, 2009 5:27 pm Post subject: |
|
|
Carlsson wrote:
Thanks.
Yes, I think so, something in the lab went very wrong, I don't know what, but i'm angry. It was no fun to crawl in the heat, over thistles and thorns.
Do they have to change the chemicals or is this done automatically by the machine?
Regarding the punch, it could be the subject too, compared to digital shots, the ektar showed in this case a lot more contrast and color.
In the droughtland all the colors are flattened.

_________________
Contax III, Zeiss Ikon ZM, Contax AX, EOS 5D, R-D1
https://mariaeero.com/contax/ |
|