| View previous topic :: View next topic |
| Author |
Message |
mareinke
Joined: 14 Nov 2013
Posts: 33
Location: LA, CA
|
 Posted: Mon Feb 18, 2019 6:56 am Post subject: Stuck focus ring-carl zeiss jena 50mm f3.5 Tessar - Solved Posted: Mon Feb 18, 2019 6:56 am Post subject: Stuck focus ring-carl zeiss jena 50mm f3.5 Tessar - Solved |
 |
|
mareinke wrote:
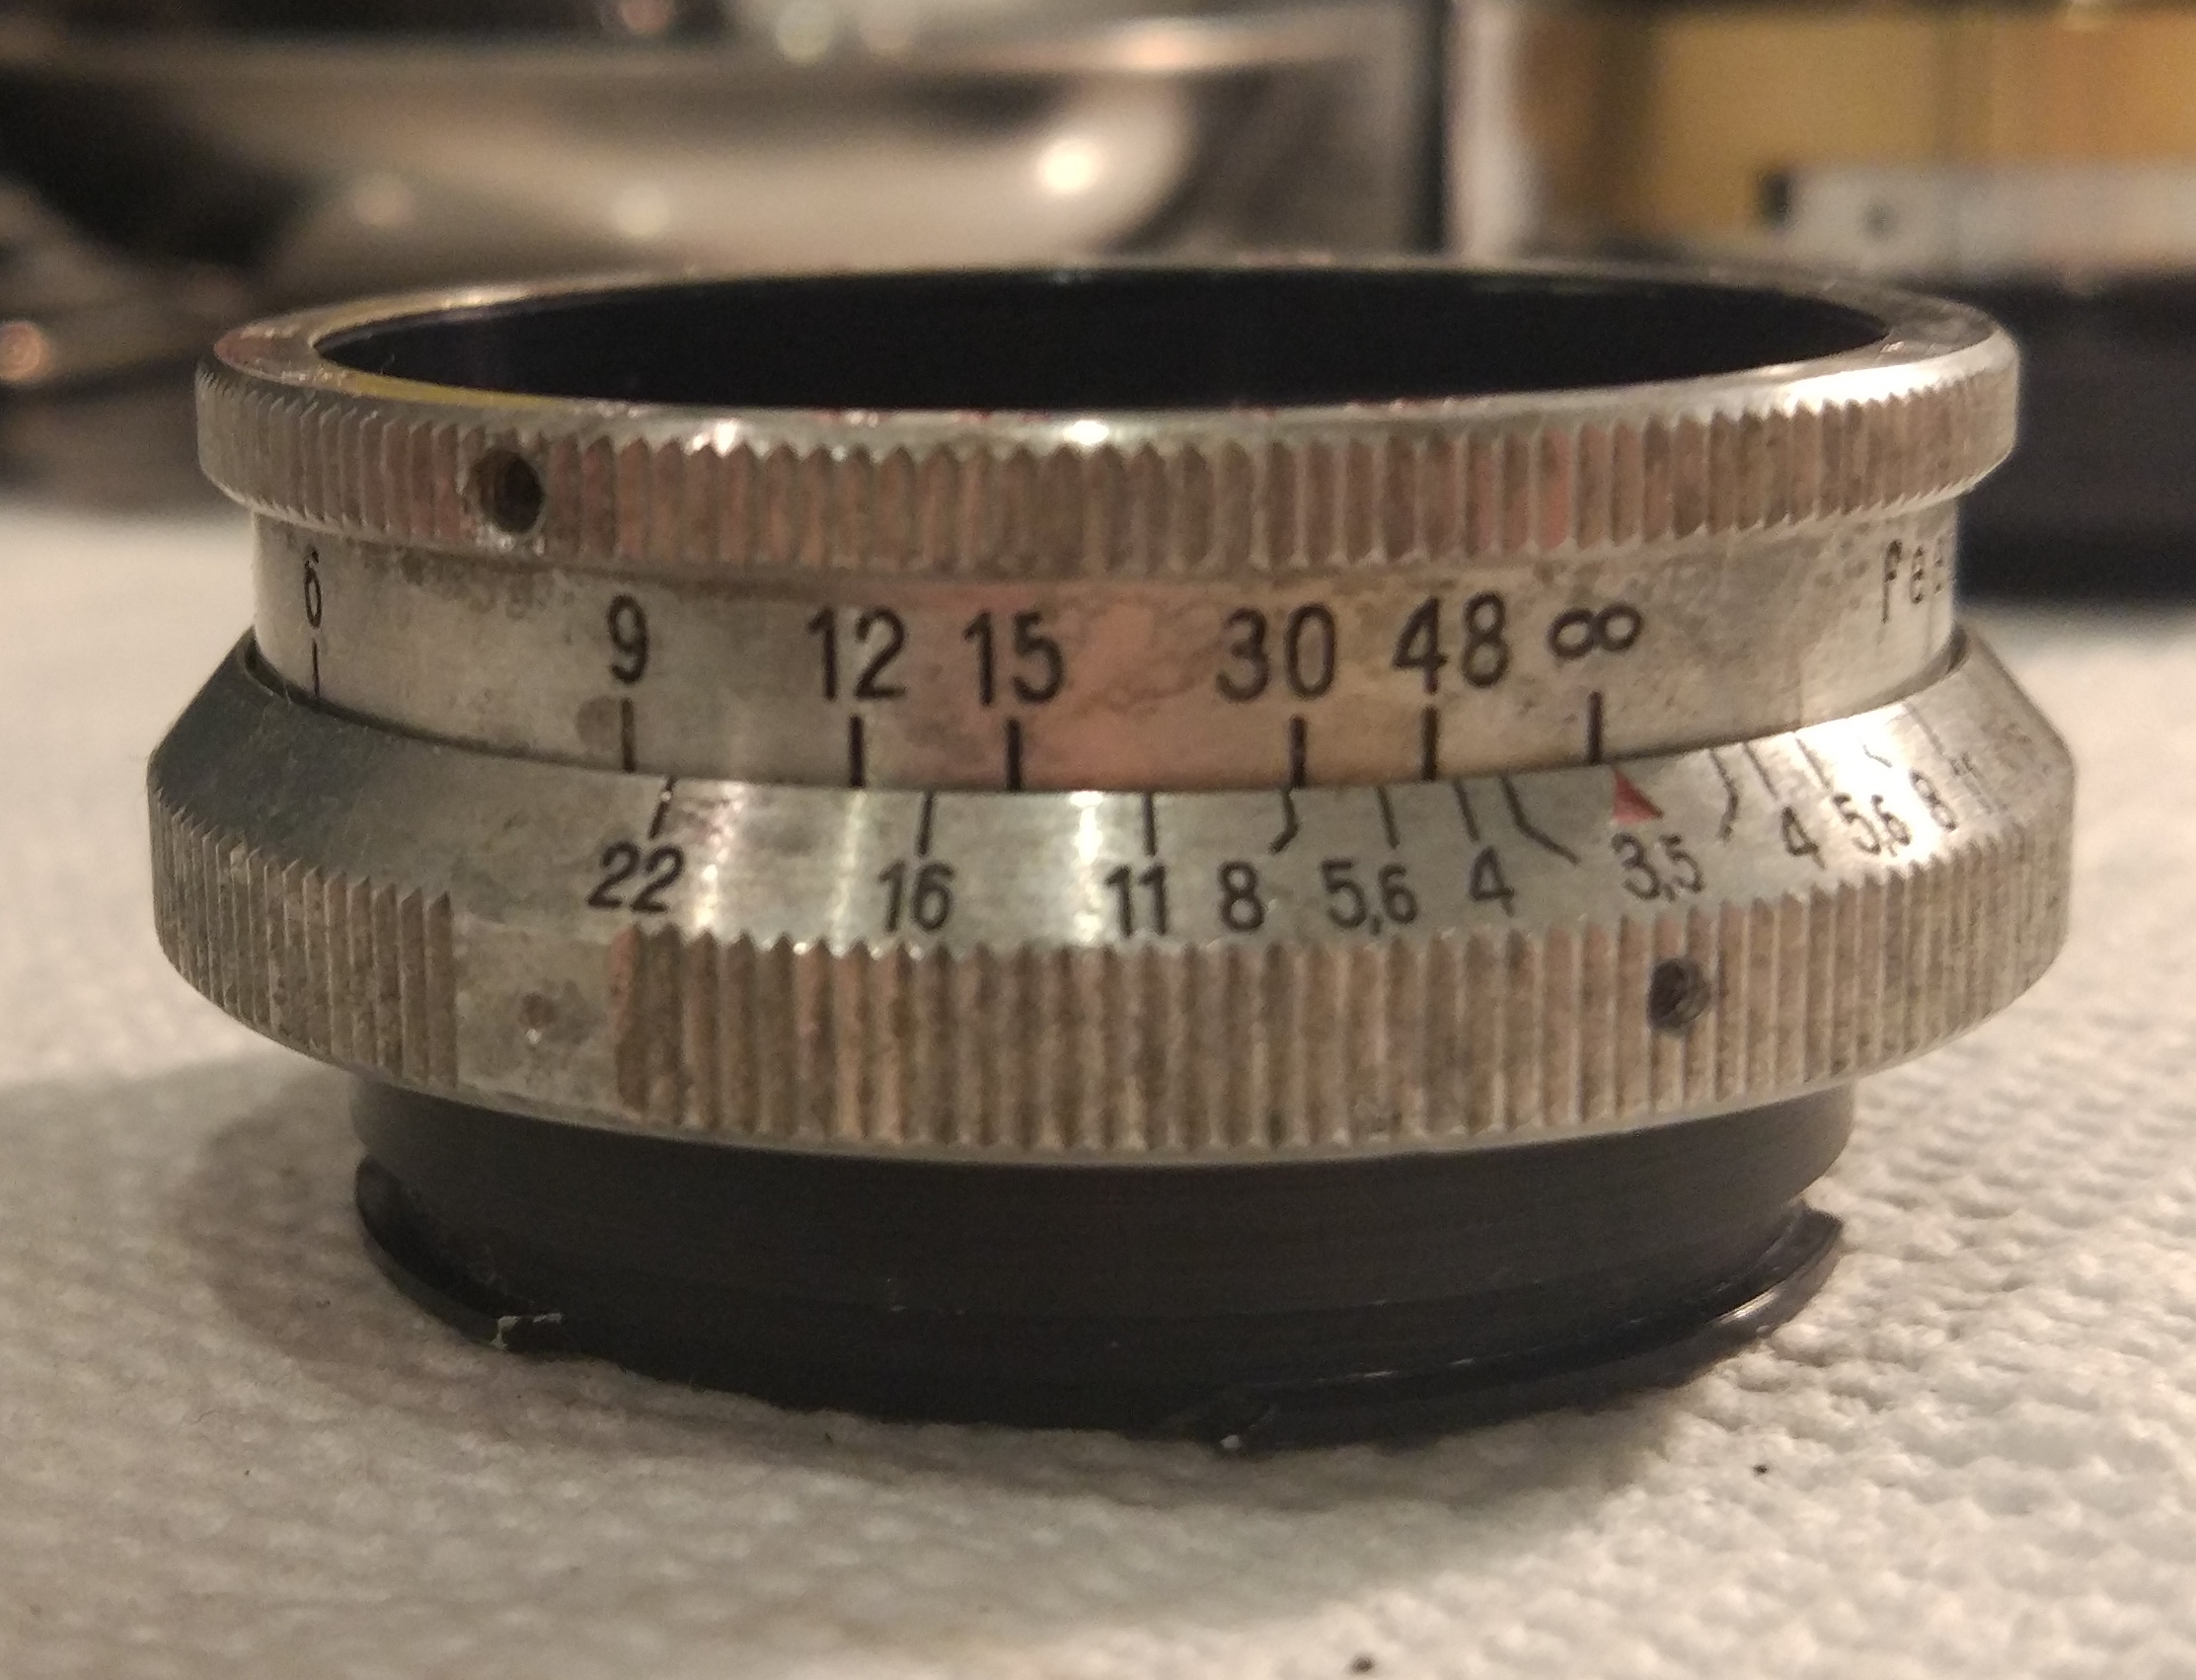
In Carl zeiss jena 50mm f3.5 exa project, I've almost cleaned the glasses and aperture blades, but unfortunately failed to figure out how to
remove the focusing ring, because there's no stopper pin or screw at all.
any clue about how to do this?
your help is appreciated.
marco.

Last edited by mareinke on Wed Mar 13, 2019 8:15 pm; edited 2 times in total |
|
| Back to top |
|
 |
jhayashileite
Joined: 19 Sep 2018
Posts: 29
Location: São Paulo, Brasil
|
| Posted: Thu Feb 21, 2019 4:36 pm Post subject: |
|
|
jhayashileite wrote:
I see some screw holes in the rings. Were you able to take them off? I have a Biotar and its focus ring is removed by releasing some screws and pulling it upwards.
_________________
@hayashileite
24, São Paulo, Brasil |
|
| Back to top |
|
|
mareinke
Joined: 14 Nov 2013
Posts: 33
Location: LA, CA
|
| Posted: Thu Feb 21, 2019 8:14 pm Post subject: |
|
|
mareinke wrote:
| jhayashileite wrote: |
| I see some screw holes in the rings. Were you able to take them off? I have a Biotar and its focus ring is removed by releasing some screws and pulling it upwards. |
Hi jhayashileite,
All screws have been previously removed, but there's no visible notch or pin that secures the ring, so I just watch it turns & stops in a weird way (inside the rear part), lol. Hope I could solve the puzzle.
Thank you for the response.
Have a nice day.
Marco |
|
| Back to top |
|
|
gi0rgi0ba
Joined: 16 Nov 2017
Posts: 38
|
| Posted: Wed Mar 06, 2019 8:30 am Post subject: |
|
|
gi0rgi0ba wrote:
| mareinke wrote: |
| jhayashileite wrote: |
| I see some screw holes in the rings. Were you able to take them off? I have a Biotar and its focus ring is removed by releasing some screws and pulling it upwards. |
Hi jhayashileite,
All screws have been previously removed, but there's no visible notch or pin that secures the ring, so I just watch it turns & stops in a weird way (inside the rear part), lol. Hope I could solve the puzzle.
Thank you for the response.
Have a nice day.
Marco |
Hi Marco,
is your lens similar to this?

removing the 2 screws you should be able to disassemble the helicoid. Be careful to put a sign where the helicoid will disengage.
Could you post some more images of the helicoid (the back and the inside view)?
Cheers
Giorgio
_________________
lenses:
CZJ Biotar 58mm f/2 silver (M42),CZJ Biotar 58mm f/2 black (M40),CZJ Flektogon 20mm f/4 (M42),CZJ Flektogon 35mm f/2.4 (M42),
Staeble Kata 45mm f/2.8 (M39-Paxette), Staeble Choro 38mm f/3,5 (M39-Paxette),
Schneider-Kreuznach Xenar 50mm f/2.8 (M39-Paxette)
Asahi Pentax SMC Takumar 50mm f/1.4 (M42)
Asahi Pentax SMC Pentax-M 28mm f/2.8 |
|
| Back to top |
|
|
mareinke
Joined: 14 Nov 2013
Posts: 33
Location: LA, CA
|
| Posted: Fri Mar 08, 2019 7:01 pm Post subject: inside the helicoid |
|
|
mareinke wrote:
Hi gi0rgi0ba,
Thank you for the response.
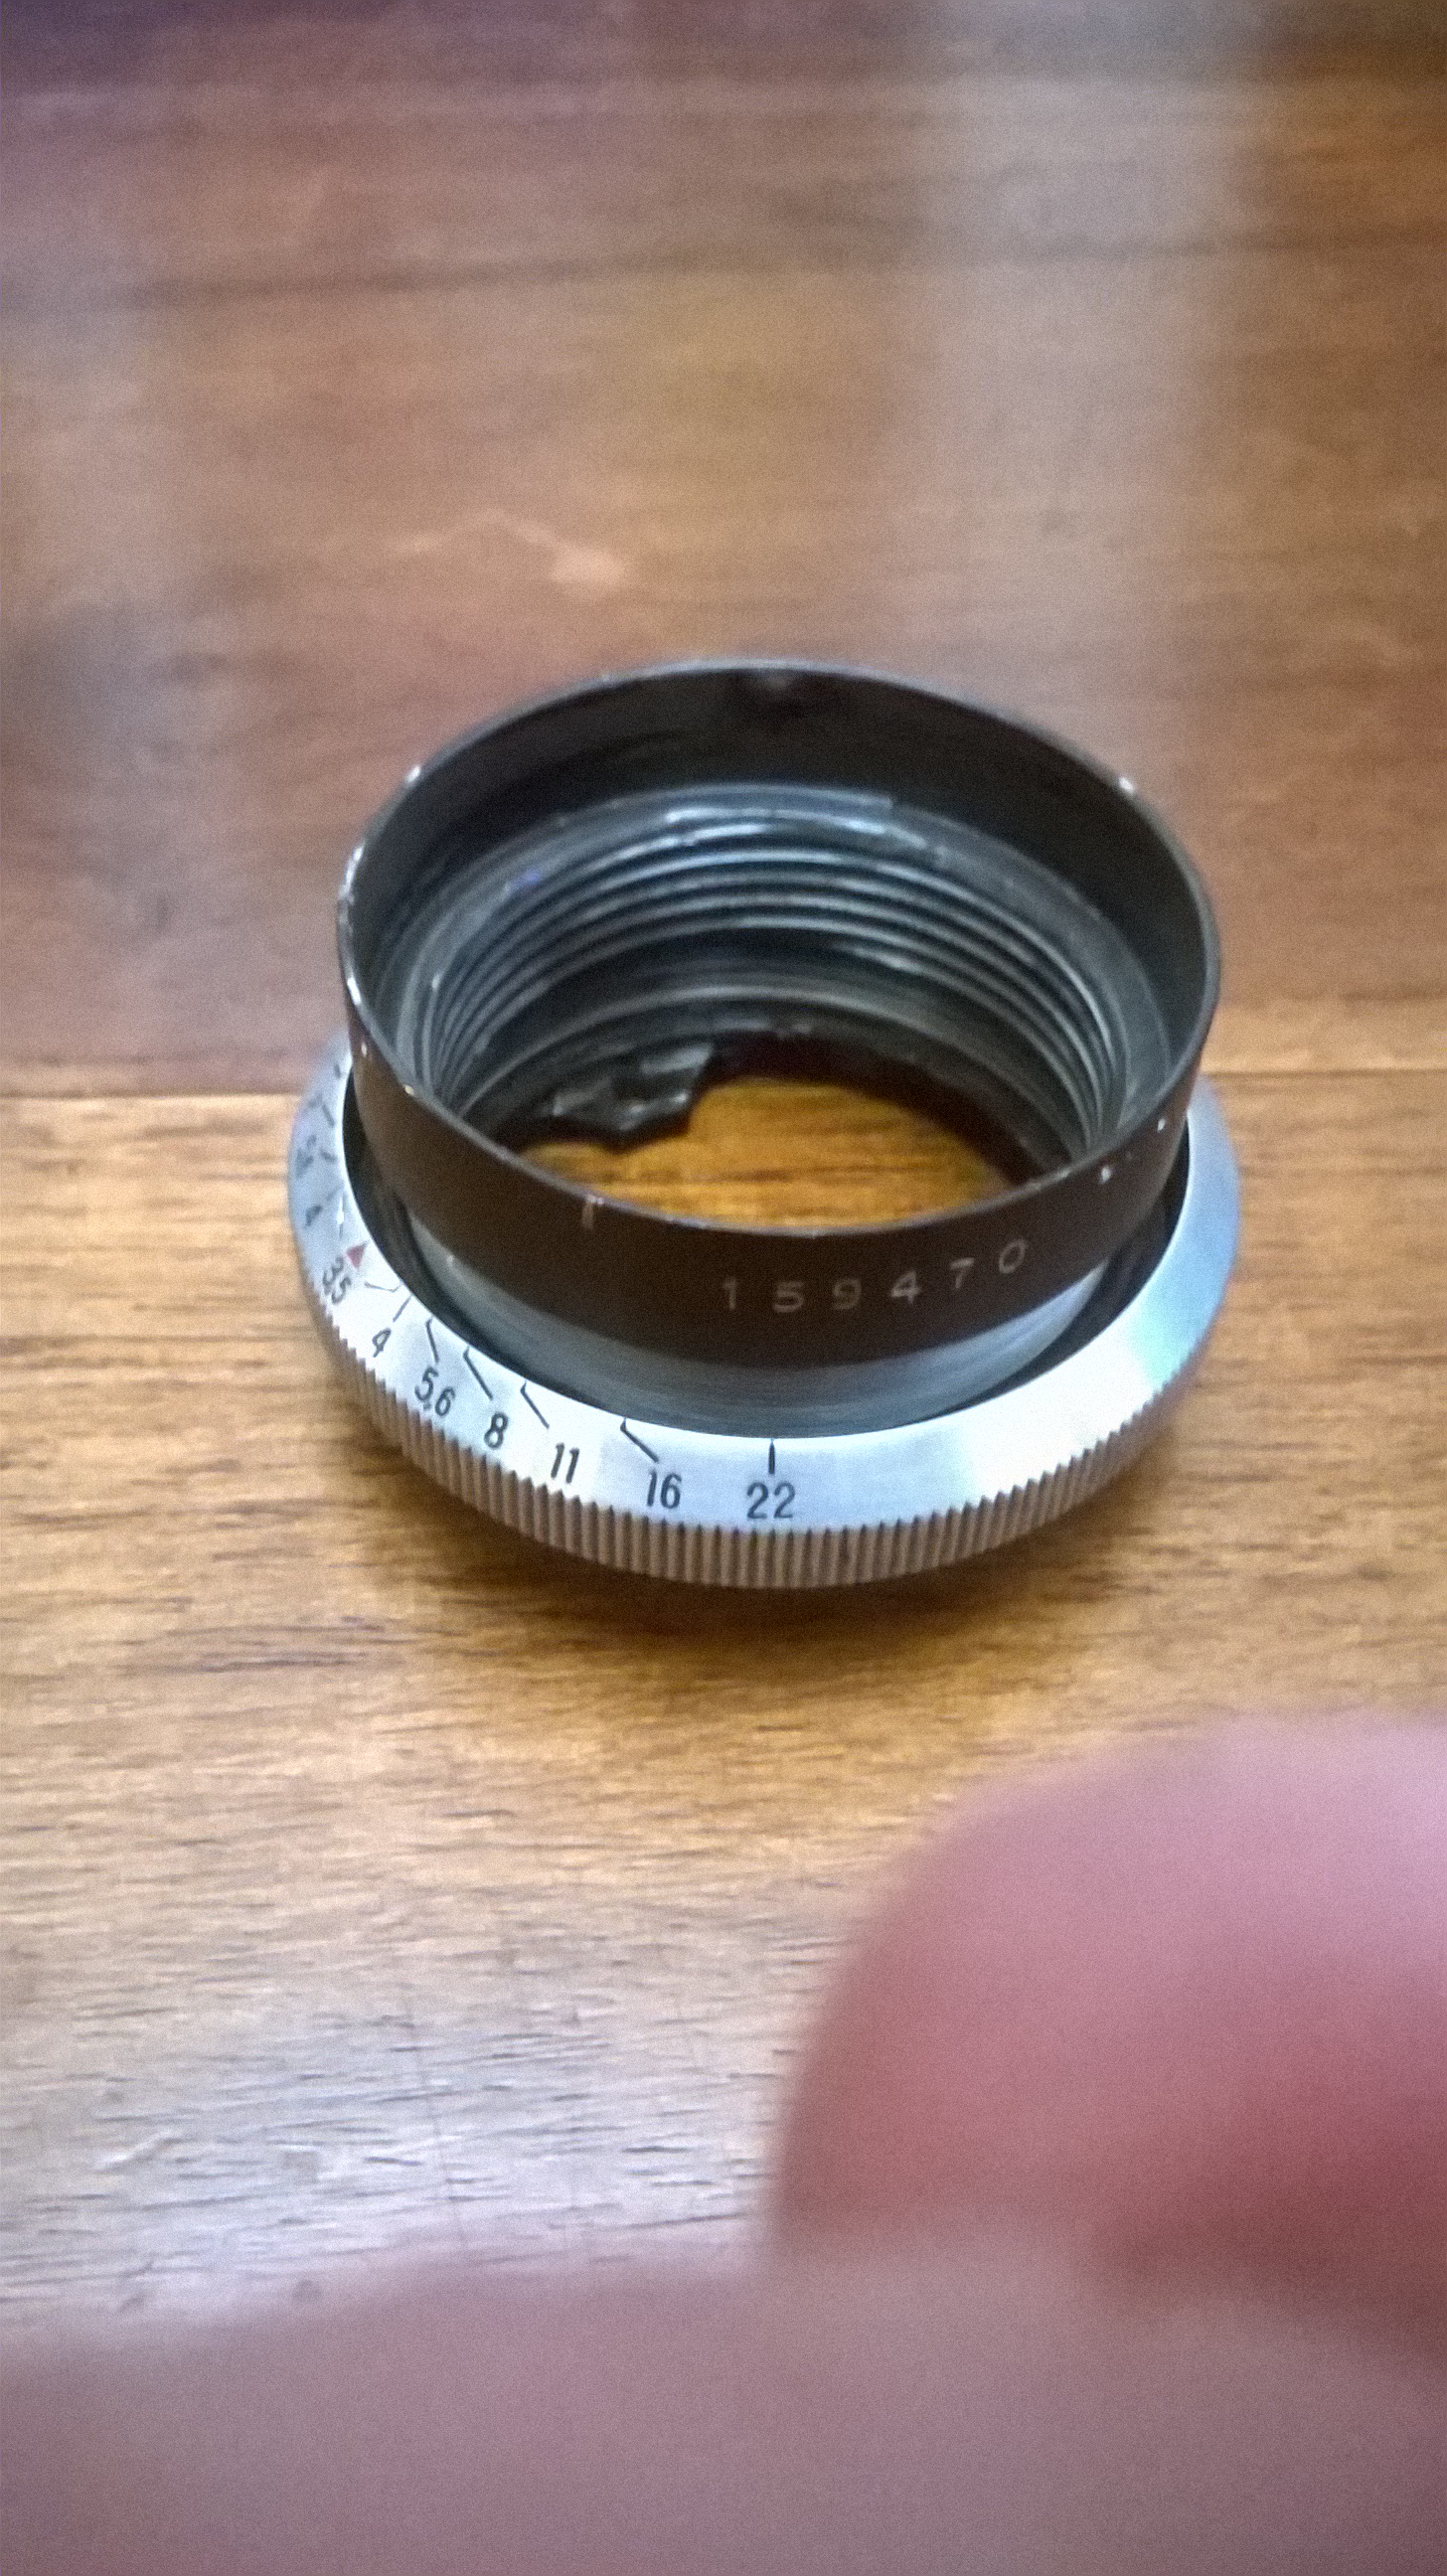
Currently, the rear assy (left one) is still a puzzle to me, I couldn't separate the focus ring from the bottom part. there's a focusing stop pin working inside, but don't know how to reach it, so I did simply pour some lighter fluid from outside, hope this works.
The process log for somebody else.
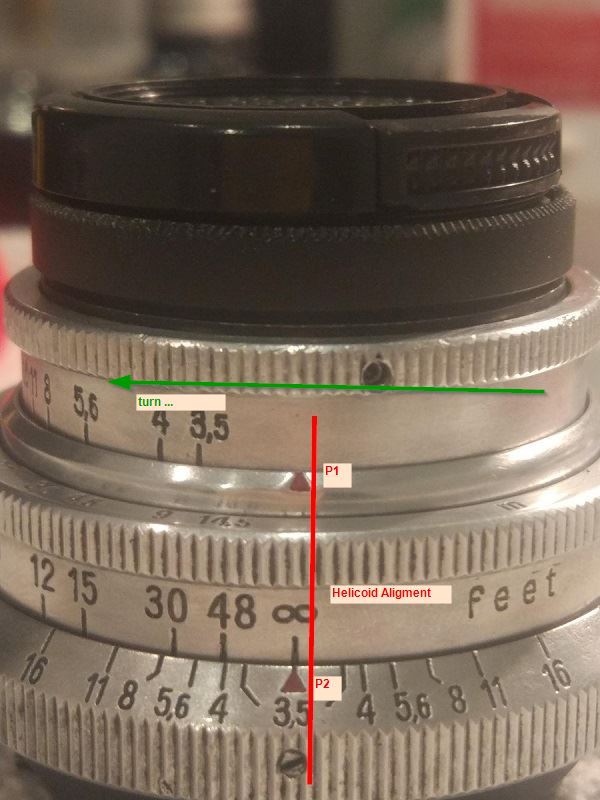
1. Unscrew the 2 helicoid alignment screws, rotate the front assy clockwise to take it out.
BTW, align the 2 red triangles(mark 1 and mark 2) will simply assure the helicoid position.

2. After front element is separated from rear assy, you can start lubricate the helicoid.
3. Aperture assy
step 1: unscrew 3 secure screws in the top aperture ring and then pull it out.
step 2: unscrew the other 3 screws in the retaining ring, and rotate it counterclockwise. it was not easy, if too tight, apply lighter fluid, if still not work, special wrench might be required.
Step 3: reach the front assy, take out the front cell using spanner wrench
Step 4: you are about to see the blade nest and the relevant coupling pin that secures it. unscrew the pin screw, take out the nest.
Step 5: Now, you can see 10+ aperture blades laying on the bottom of barrel, pour them out and do what you want.


Marco
Last edited by mareinke on Wed Mar 13, 2019 7:55 pm; edited 1 time in total |
|
| Back to top |
|
|
gi0rgi0ba
Joined: 16 Nov 2017
Posts: 38
|
| Posted: Mon Mar 11, 2019 12:08 pm Post subject: |
|
|
gi0rgi0ba wrote:
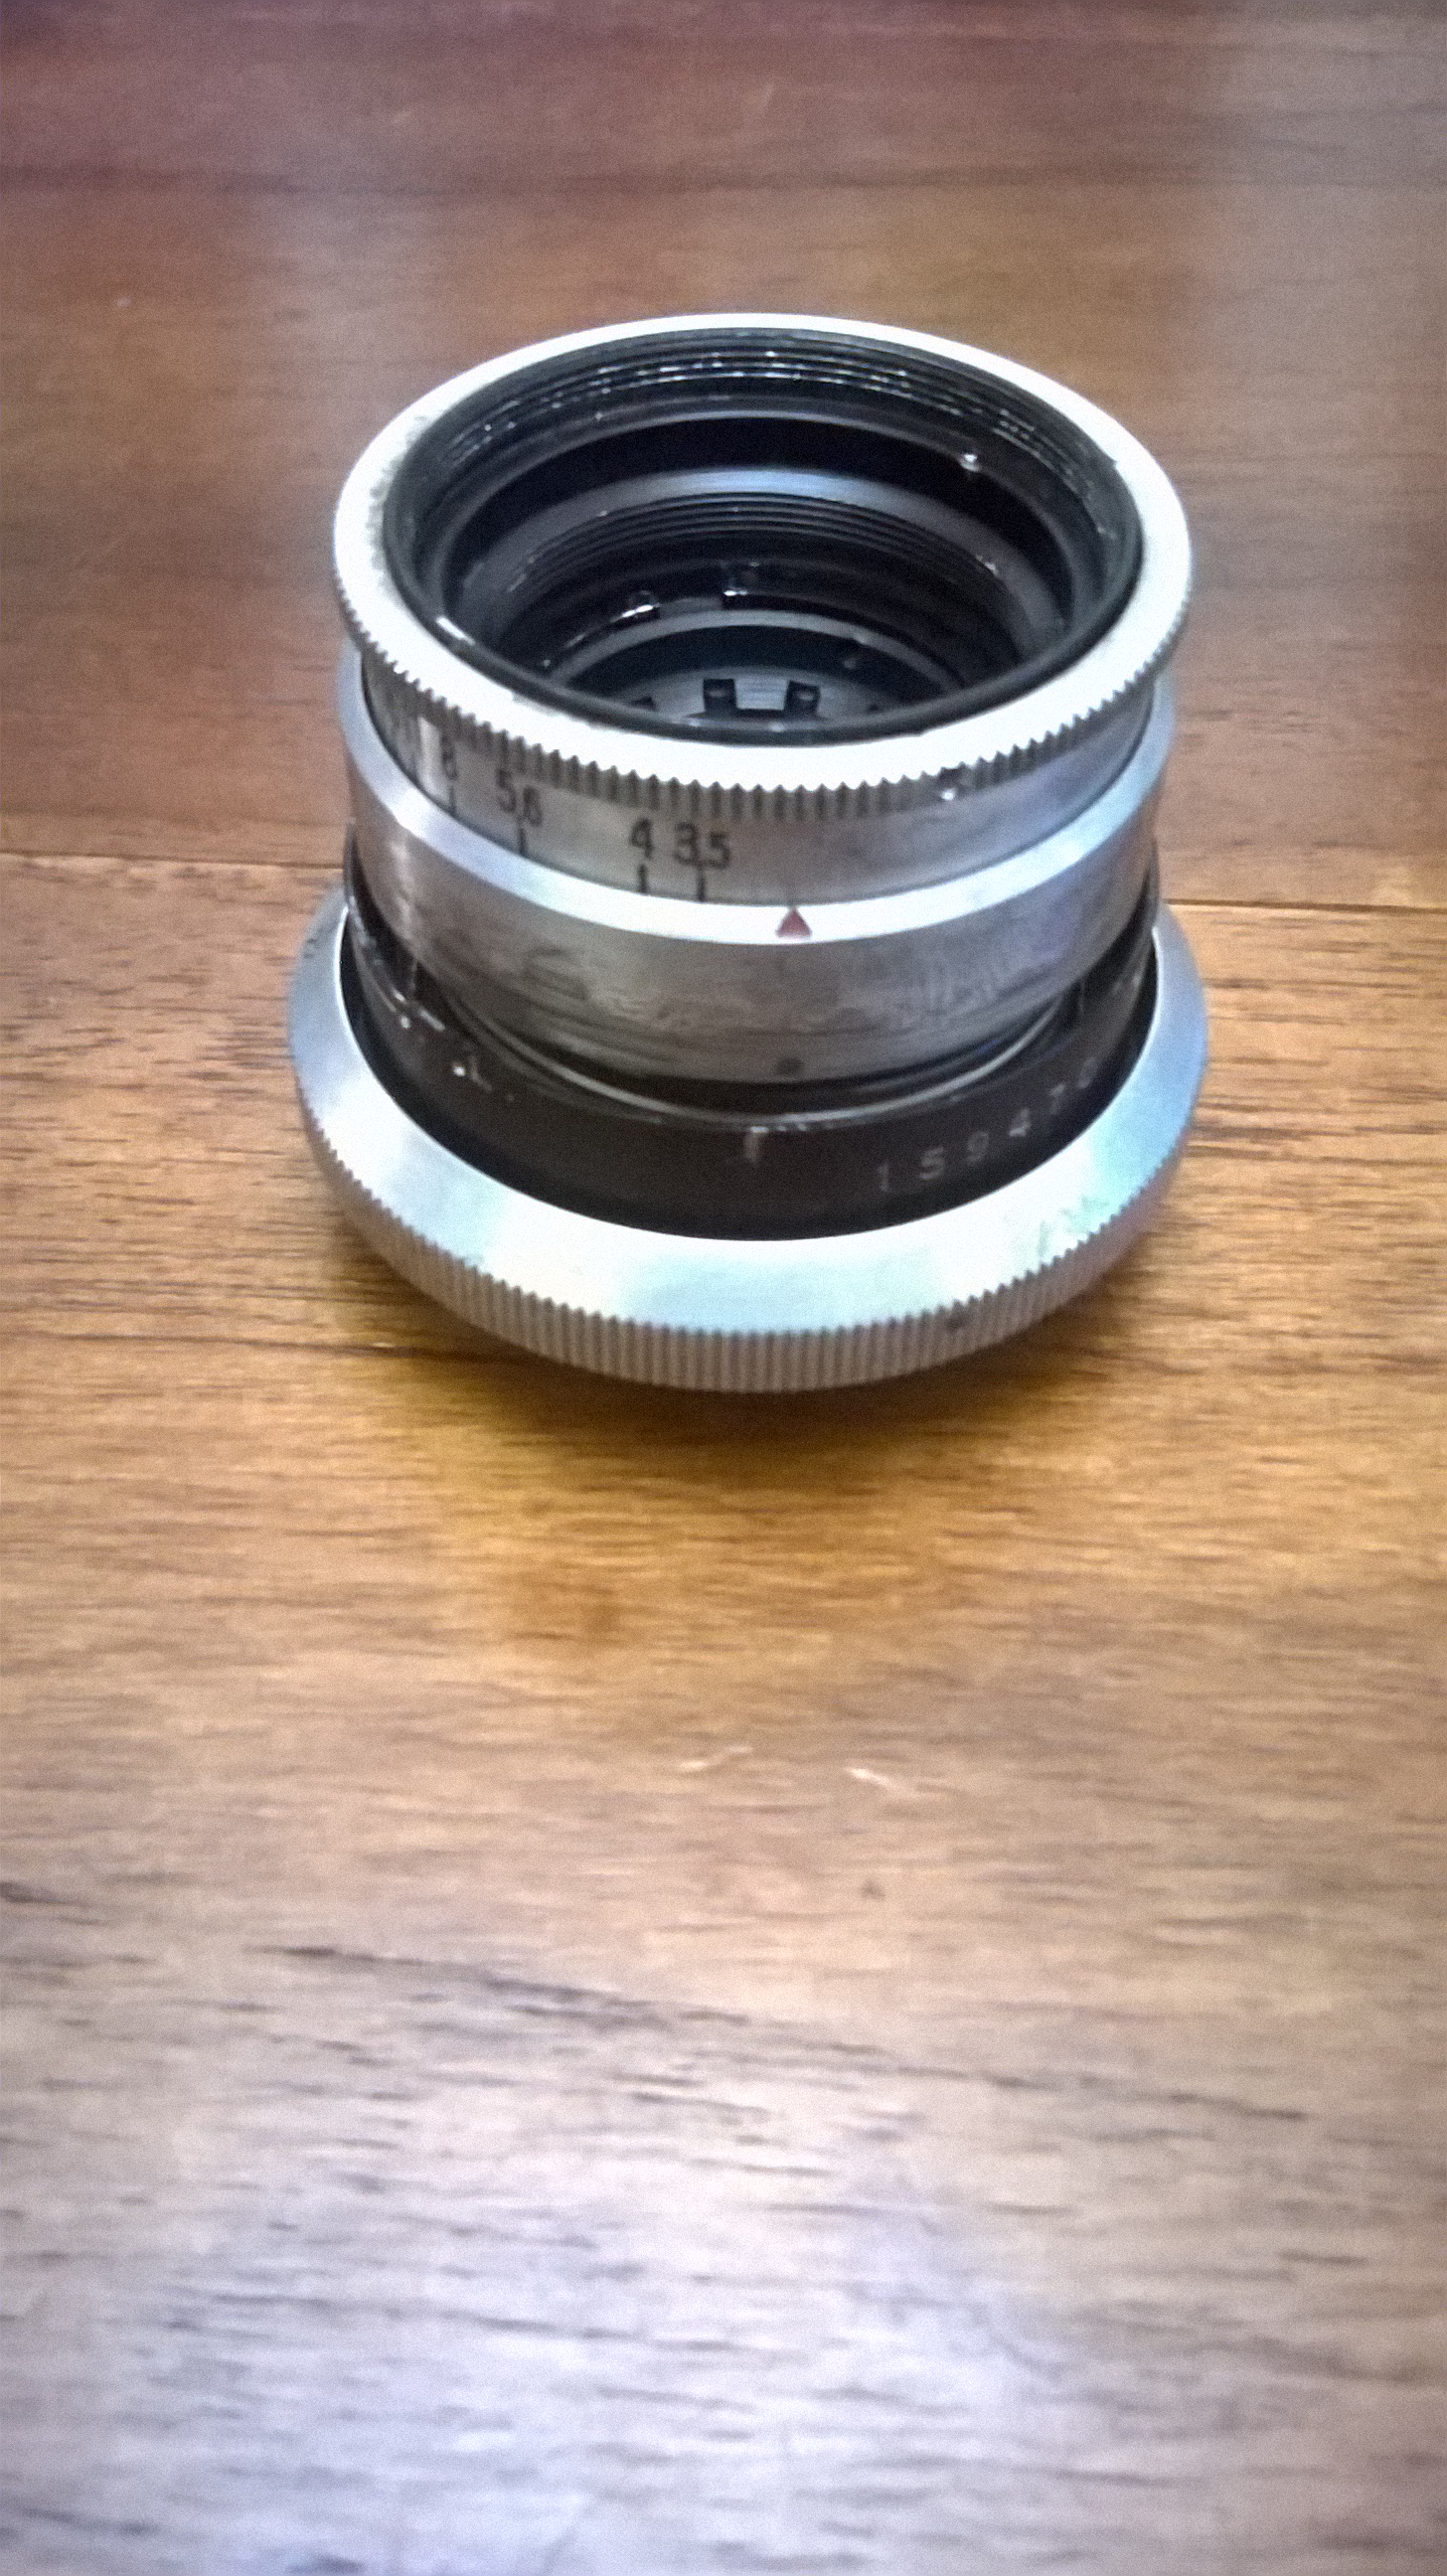
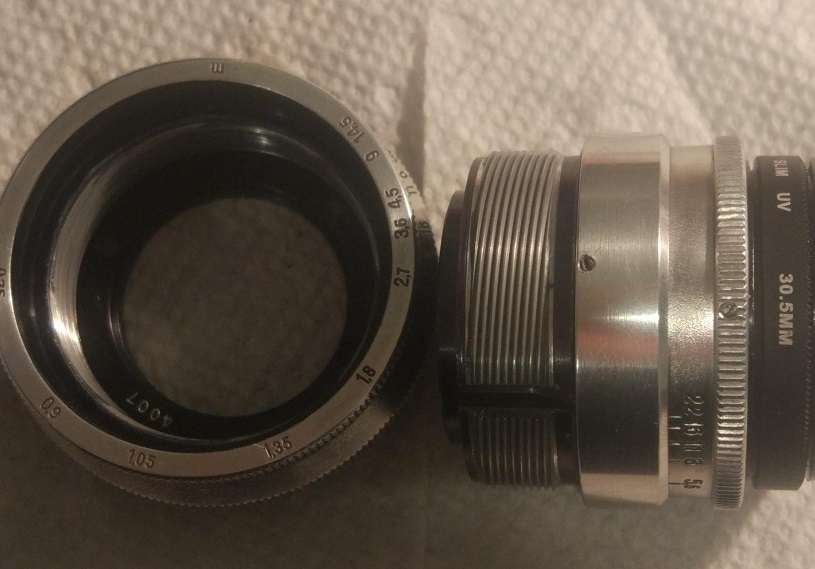
hi Marco, could you send me the image of the rear part of the lens?
I separated the helicoid by removing the 2 screws (see my picture above)


here are some images of the lens during the cleaning.
Let me updated
Cheers
Giorgio
_________________
lenses:
CZJ Biotar 58mm f/2 silver (M42),CZJ Biotar 58mm f/2 black (M40),CZJ Flektogon 20mm f/4 (M42),CZJ Flektogon 35mm f/2.4 (M42),
Staeble Kata 45mm f/2.8 (M39-Paxette), Staeble Choro 38mm f/3,5 (M39-Paxette),
Schneider-Kreuznach Xenar 50mm f/2.8 (M39-Paxette)
Asahi Pentax SMC Takumar 50mm f/1.4 (M42)
Asahi Pentax SMC Pentax-M 28mm f/2.8 |
|
| Back to top |
|
|
mareinke
Joined: 14 Nov 2013
Posts: 33
Location: LA, CA
|
| Posted: Tue Mar 12, 2019 6:55 pm Post subject: |
|
|
mareinke wrote:
Hi Giorgio,
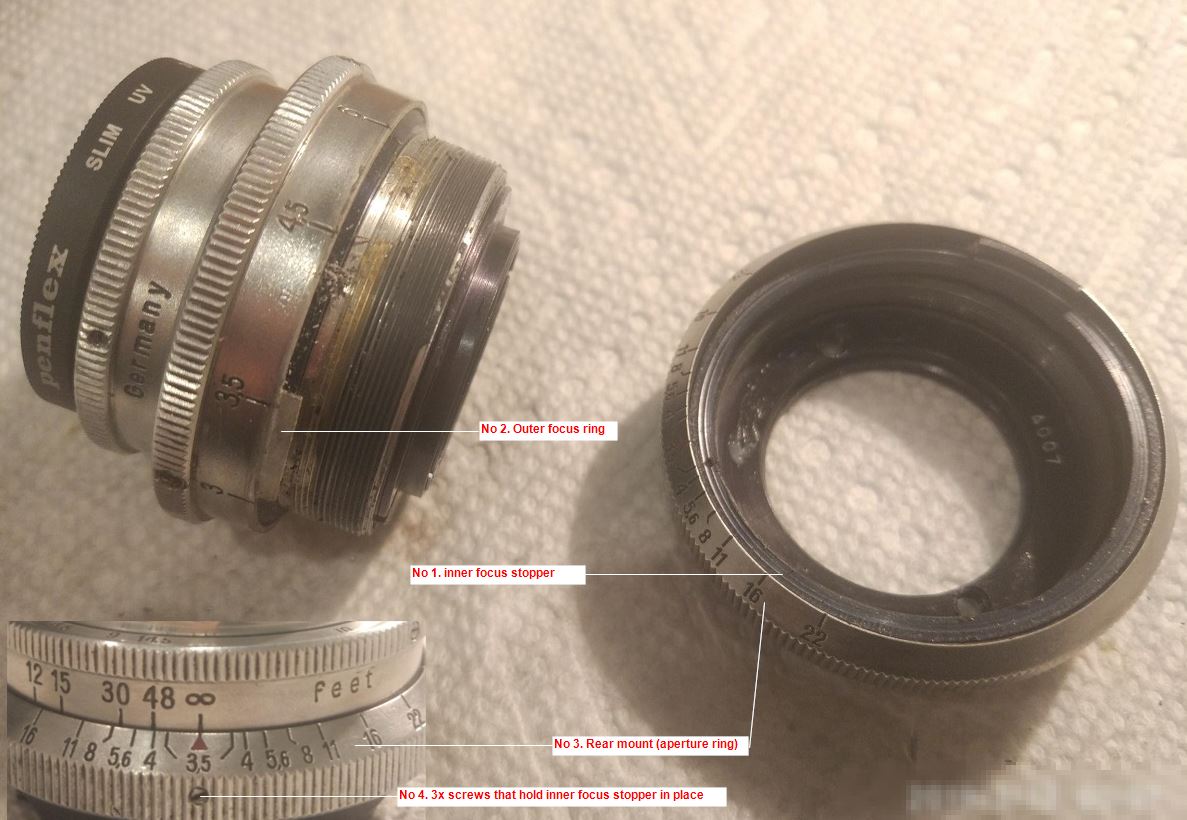
It looks like no1 is locked by no2, and no2 is probably movable and could be secured by the 3 screws in the bottom part, am I right?
I guess my 'no1' and 'no2' are probably stuck together, that's why the focus ring works normally but never got a chance to come out.
I'll try more Naphtha to turn it out.
Thank you so much for doing this, it's really helps.
Marco

| gi0rgi0ba wrote: |
hi Marco, could you send me the image of the rear part of the lens?
I separated the helicoid by removing the 2 screws (see my picture above)
here are some images of the lens during the cleaning.
Let me updated
Cheers
Giorgio |
|
|
| Back to top |
|
|
gi0rgi0ba
Joined: 16 Nov 2017
Posts: 38
|
| Posted: Tue Mar 12, 2019 8:36 pm Post subject: |
|
|
gi0rgi0ba wrote:
Hi Marco, did you unscrew the three little screws from the no1? probably your no1 is stuck as you said. Use and leave act for a couple of days specific lubricant to unstick it. then gently move left/right the n01.
BR
Giorgio
_________________
lenses:
CZJ Biotar 58mm f/2 silver (M42),CZJ Biotar 58mm f/2 black (M40),CZJ Flektogon 20mm f/4 (M42),CZJ Flektogon 35mm f/2.4 (M42),
Staeble Kata 45mm f/2.8 (M39-Paxette), Staeble Choro 38mm f/3,5 (M39-Paxette),
Schneider-Kreuznach Xenar 50mm f/2.8 (M39-Paxette)
Asahi Pentax SMC Takumar 50mm f/1.4 (M42)
Asahi Pentax SMC Pentax-M 28mm f/2.8 |
|
| Back to top |
|
|
mareinke
Joined: 14 Nov 2013
Posts: 33
Location: LA, CA
|
| Posted: Tue Mar 12, 2019 9:52 pm Post subject: |
|
|
mareinke wrote:
| gi0rgi0ba wrote: |
| did you unscrew the three little screws from the no1? |
I didn't, there's a stripped screw(in no1) which was treated by a precision screw extractor, but not completely done, I guess so.
 
Will let you know the final result.
Thank you so much.
Marco |
|
| Back to top |
|
|
mareinke
Joined: 14 Nov 2013
Posts: 33
Location: LA, CA
|
| Posted: Wed Mar 13, 2019 7:33 pm Post subject: I made it! |
|
|
mareinke wrote:
Hi Giorgio,
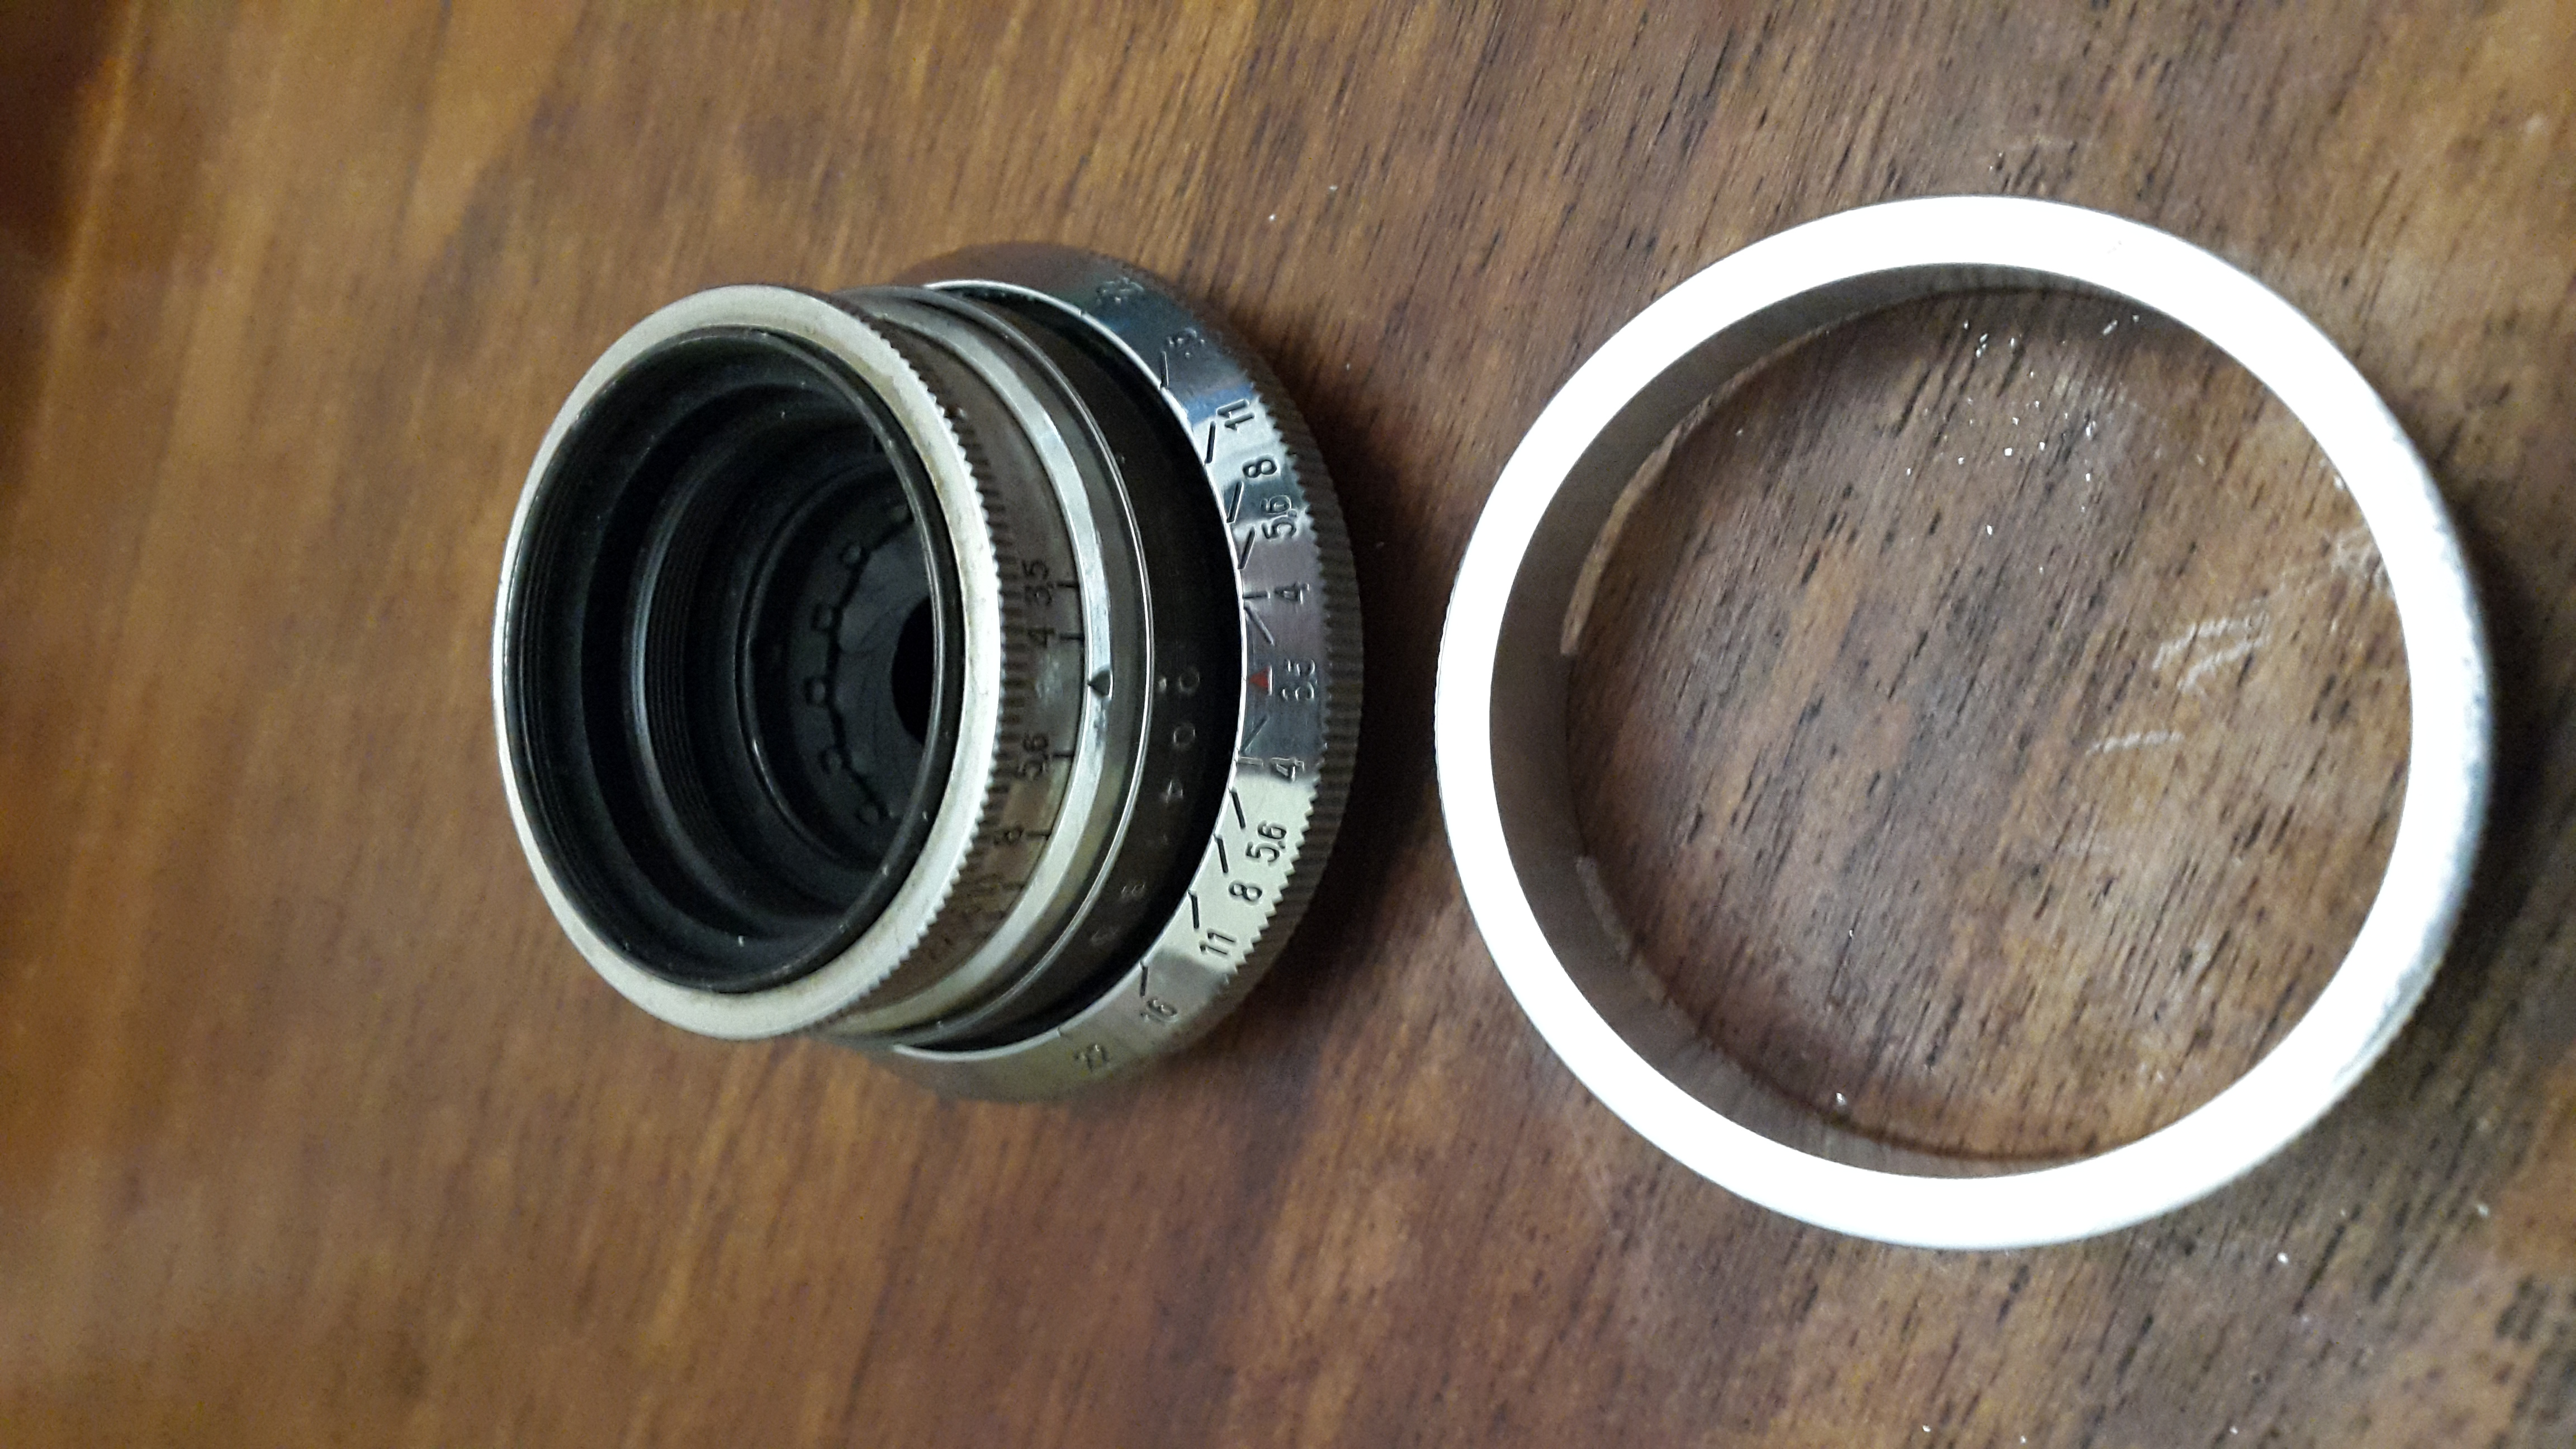
After pouring enough naphtha and acetone, the whole process turned out to be easier. I held the back assy tightly, twisted the outer focus ring with enough force, and then it came off.
Focus stopper(No1) is a movable ring with no screw thread, 3x screw holes can be found.
Side screw(No4) in rear mount(No3) is to hold the focus stopper(No1) in place.
Thank you again for everything you’ve done.
Marco |
|
| Back to top |
|
|
gi0rgi0ba
Joined: 16 Nov 2017
Posts: 38
|
| Posted: Fri Mar 15, 2019 7:48 am Post subject: |
|
|
gi0rgi0ba wrote:
Good job, Congratulation!!!
_________________
lenses:
CZJ Biotar 58mm f/2 silver (M42),CZJ Biotar 58mm f/2 black (M40),CZJ Flektogon 20mm f/4 (M42),CZJ Flektogon 35mm f/2.4 (M42),
Staeble Kata 45mm f/2.8 (M39-Paxette), Staeble Choro 38mm f/3,5 (M39-Paxette),
Schneider-Kreuznach Xenar 50mm f/2.8 (M39-Paxette)
Asahi Pentax SMC Takumar 50mm f/1.4 (M42)
Asahi Pentax SMC Pentax-M 28mm f/2.8 |
|
| Back to top |
|
|
|
|
|
You cannot post new topics in this forum
You cannot reply to topics in this forum
You cannot edit your posts in this forum
You cannot delete your posts in this forum
You cannot vote in polls in this forum
|