| View previous topic :: View next topic |
| Author |
Message |
tomasg

Joined: 01 Nov 2009
Posts: 1135
Expire: 2014-04-28
|
 Posted: Thu Oct 07, 2010 11:26 am Post subject: Tutorial: how to open and clean a Nikkor 105/2.5 AiS... Posted: Thu Oct 07, 2010 11:26 am Post subject: Tutorial: how to open and clean a Nikkor 105/2.5 AiS... |
 |
|
tomasg wrote:
...and to put it back again of course 
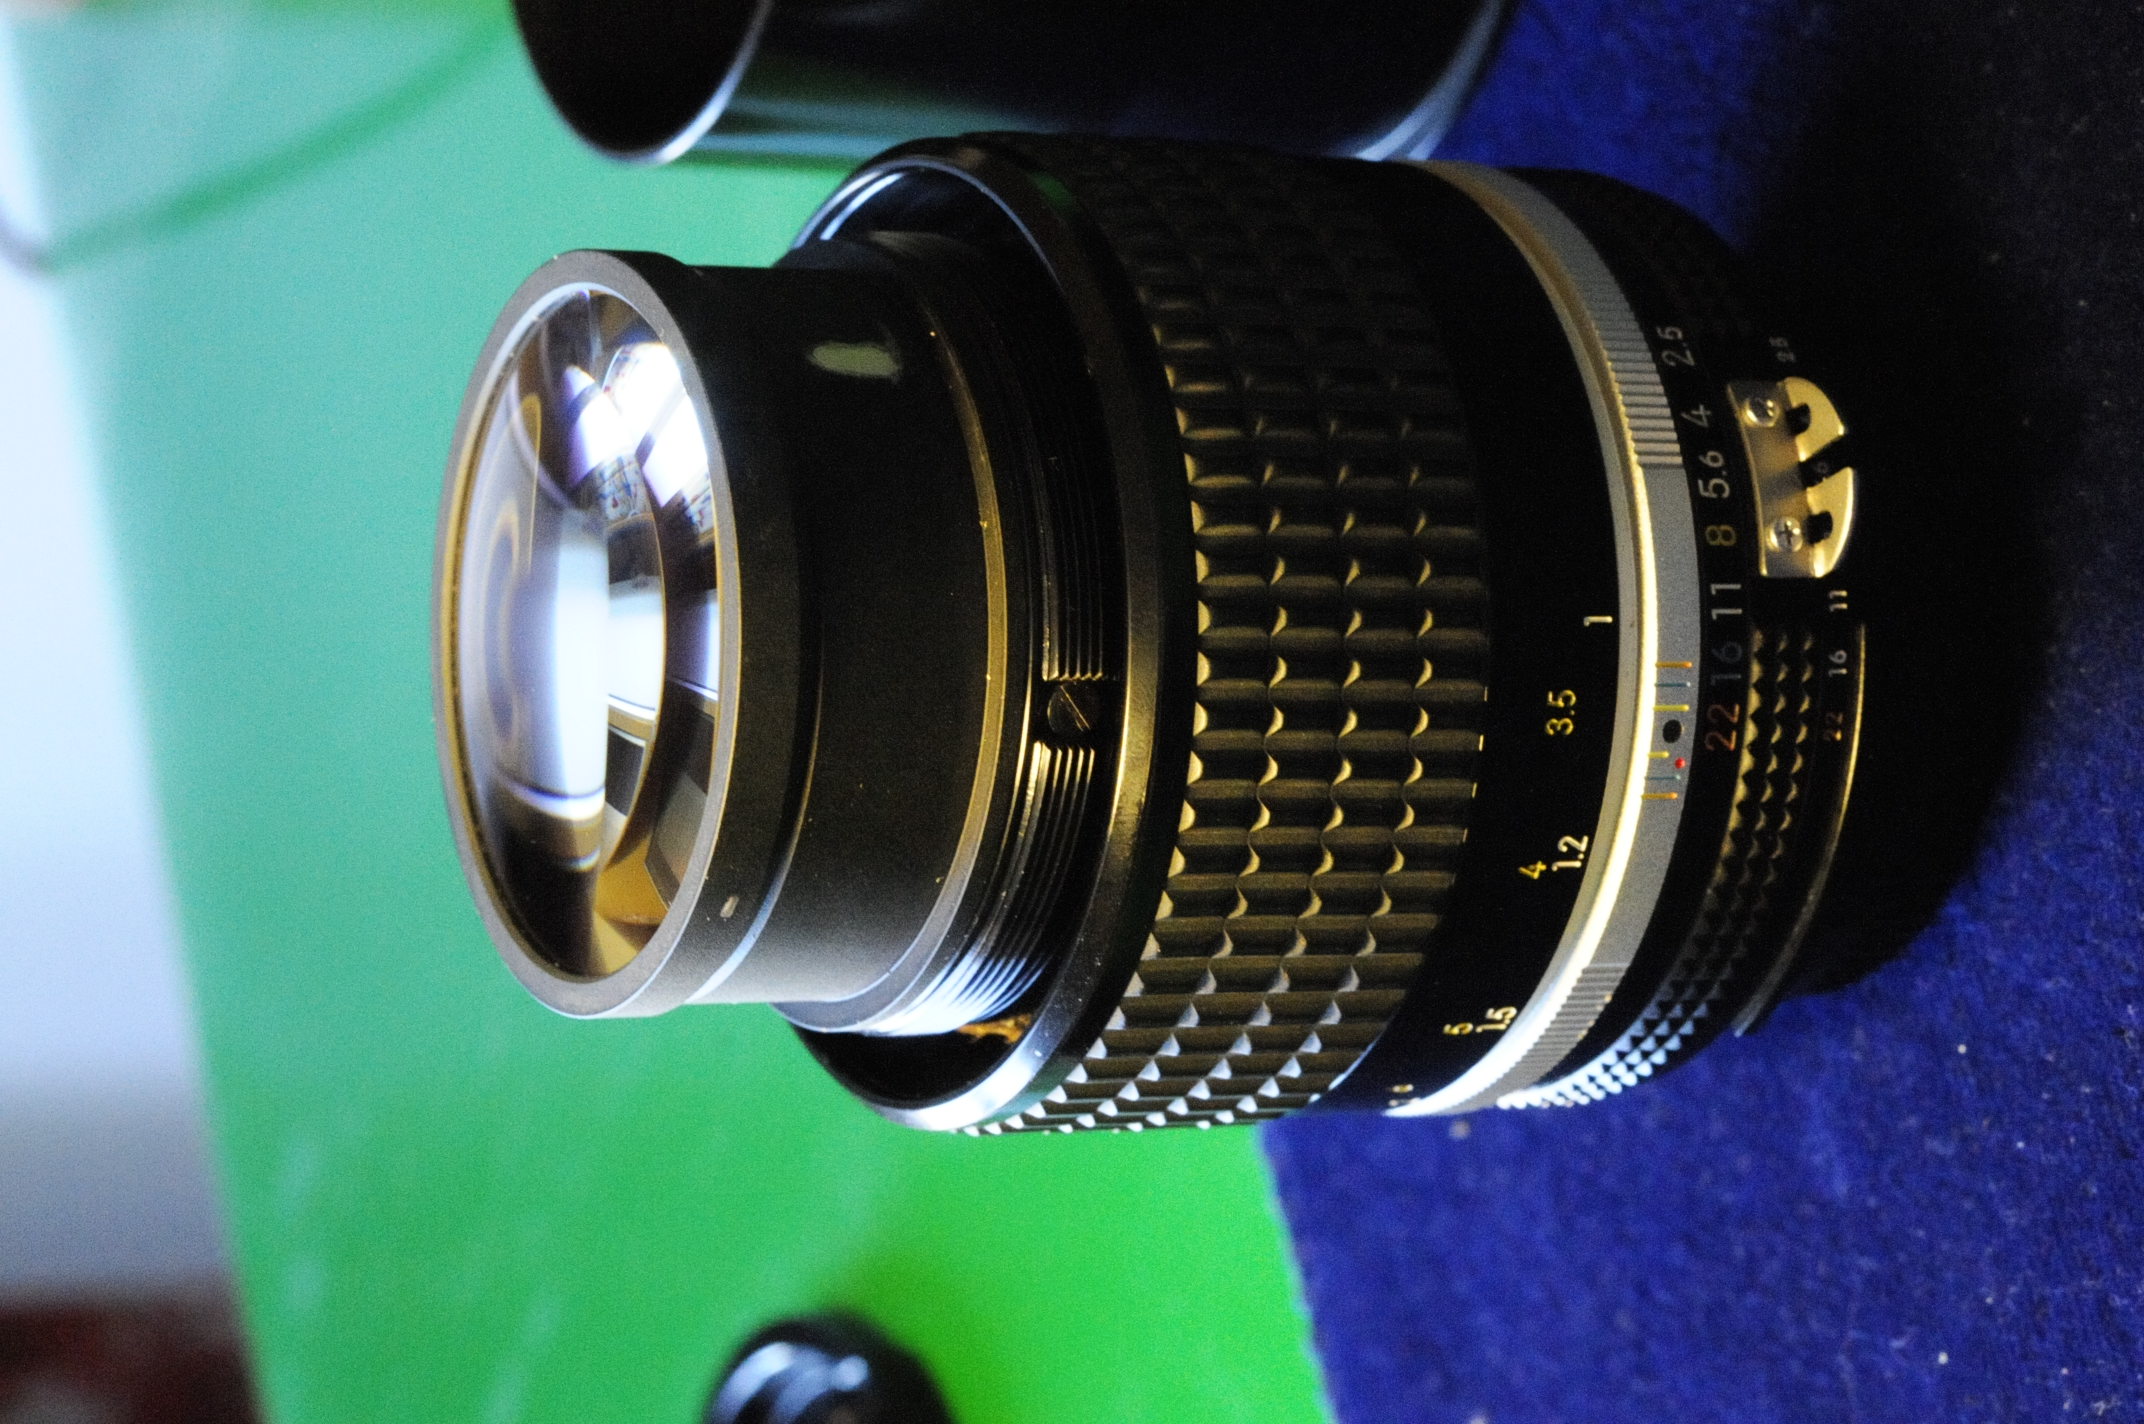
Some time ago i got this lens from Attila, it just had a few hair like fungi, (i guess?), on the rear element, no influence on image quality, but the lens was quite dirty inside also so...here it goes:
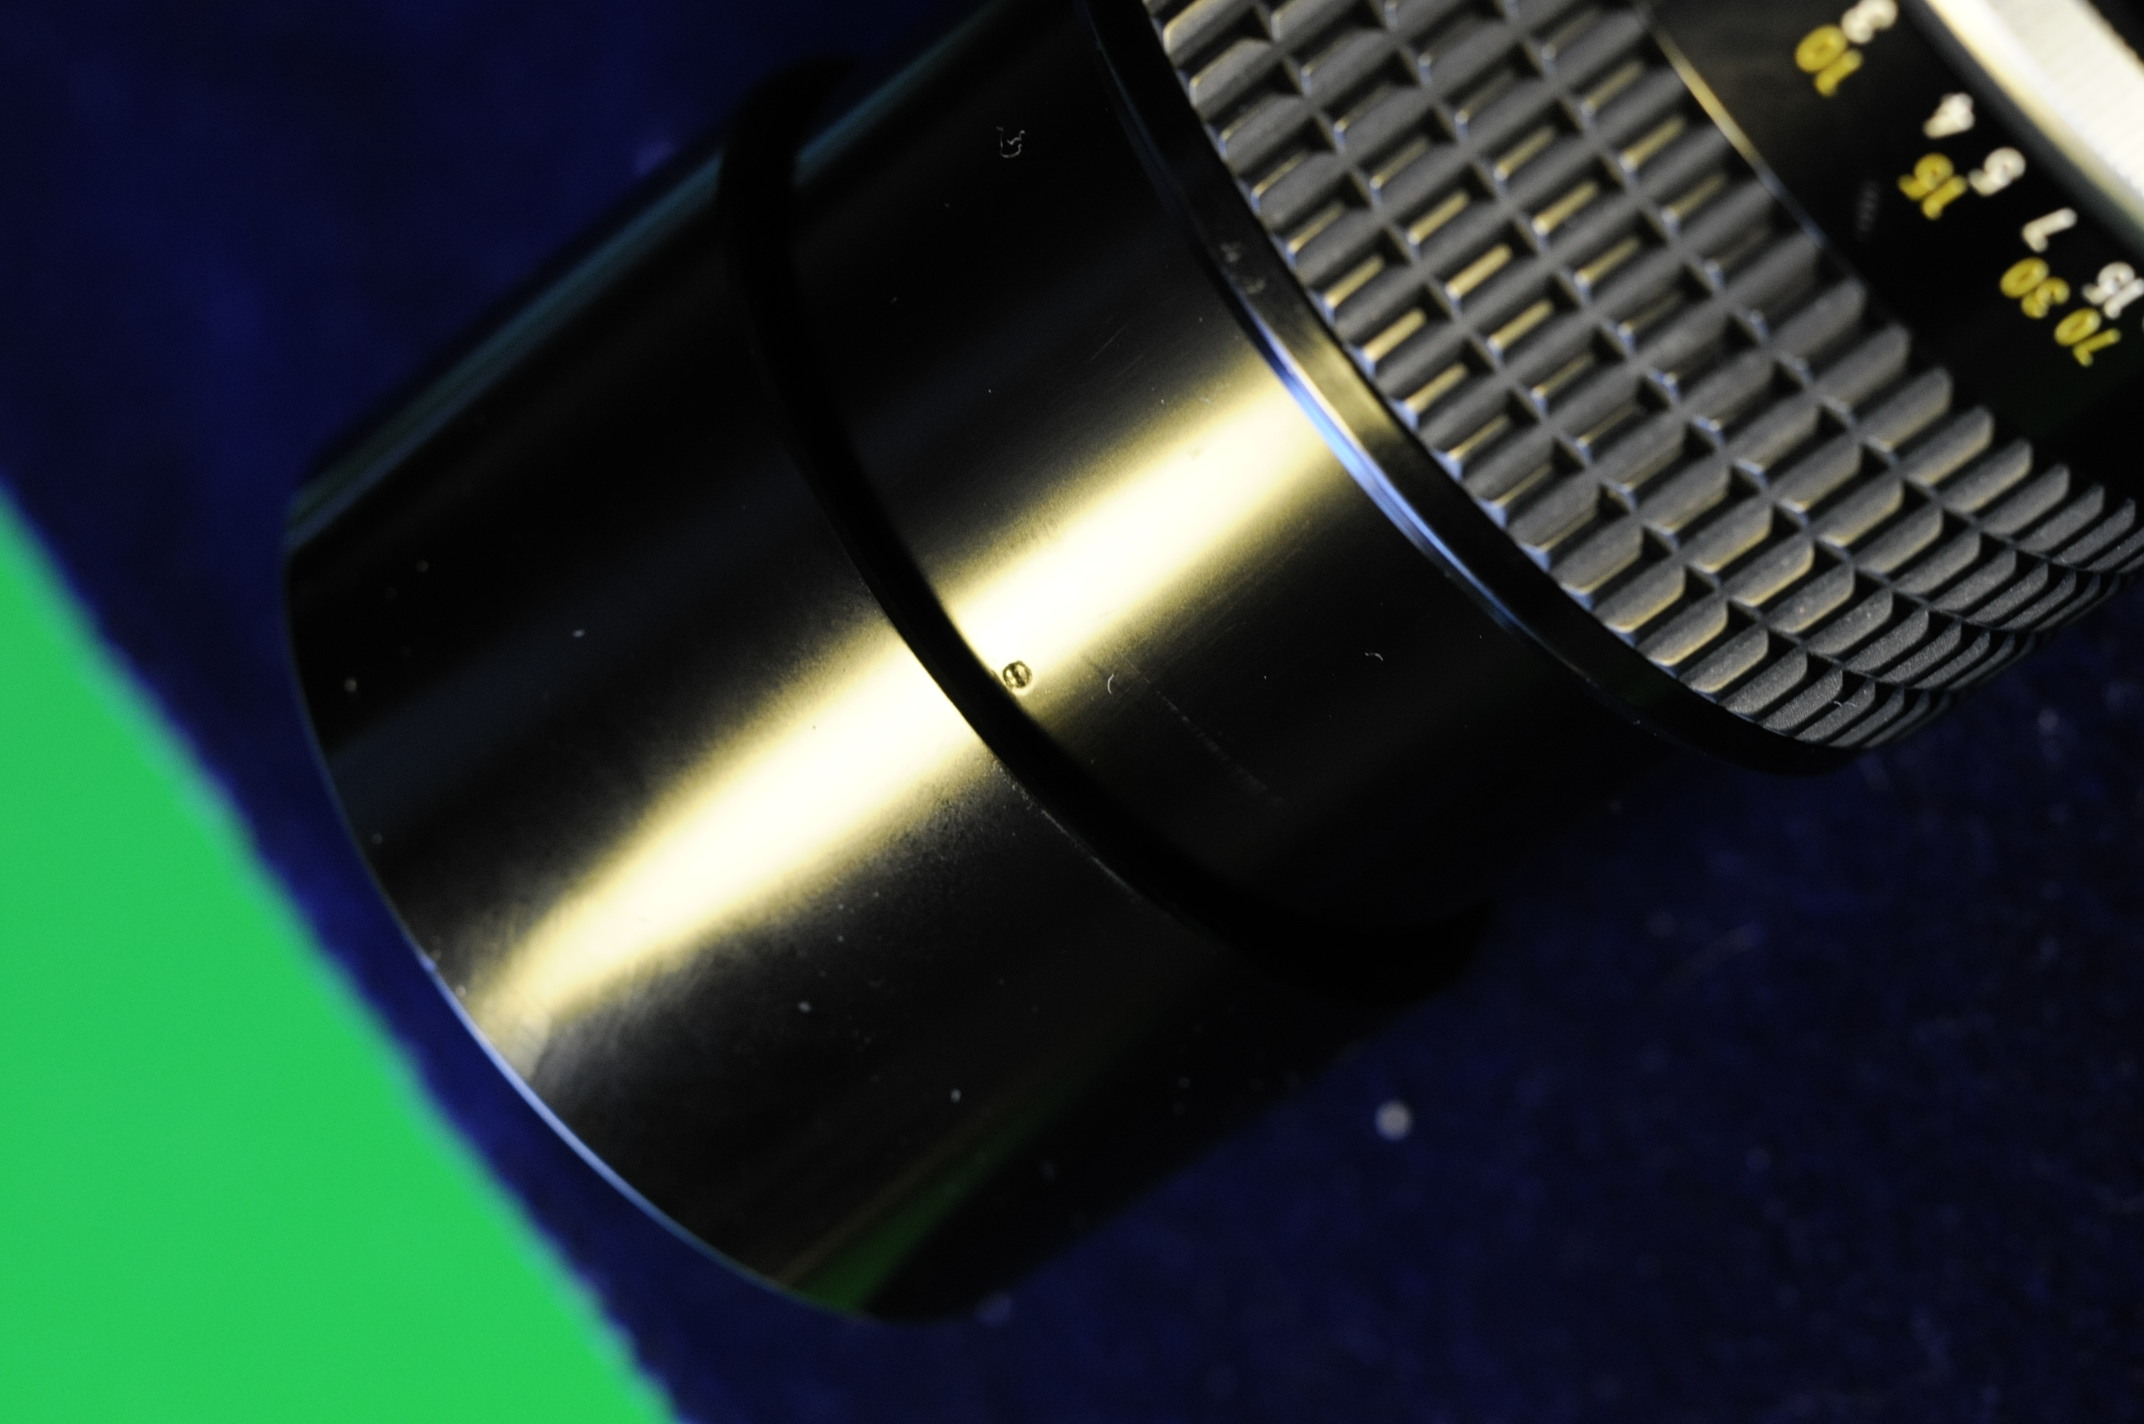
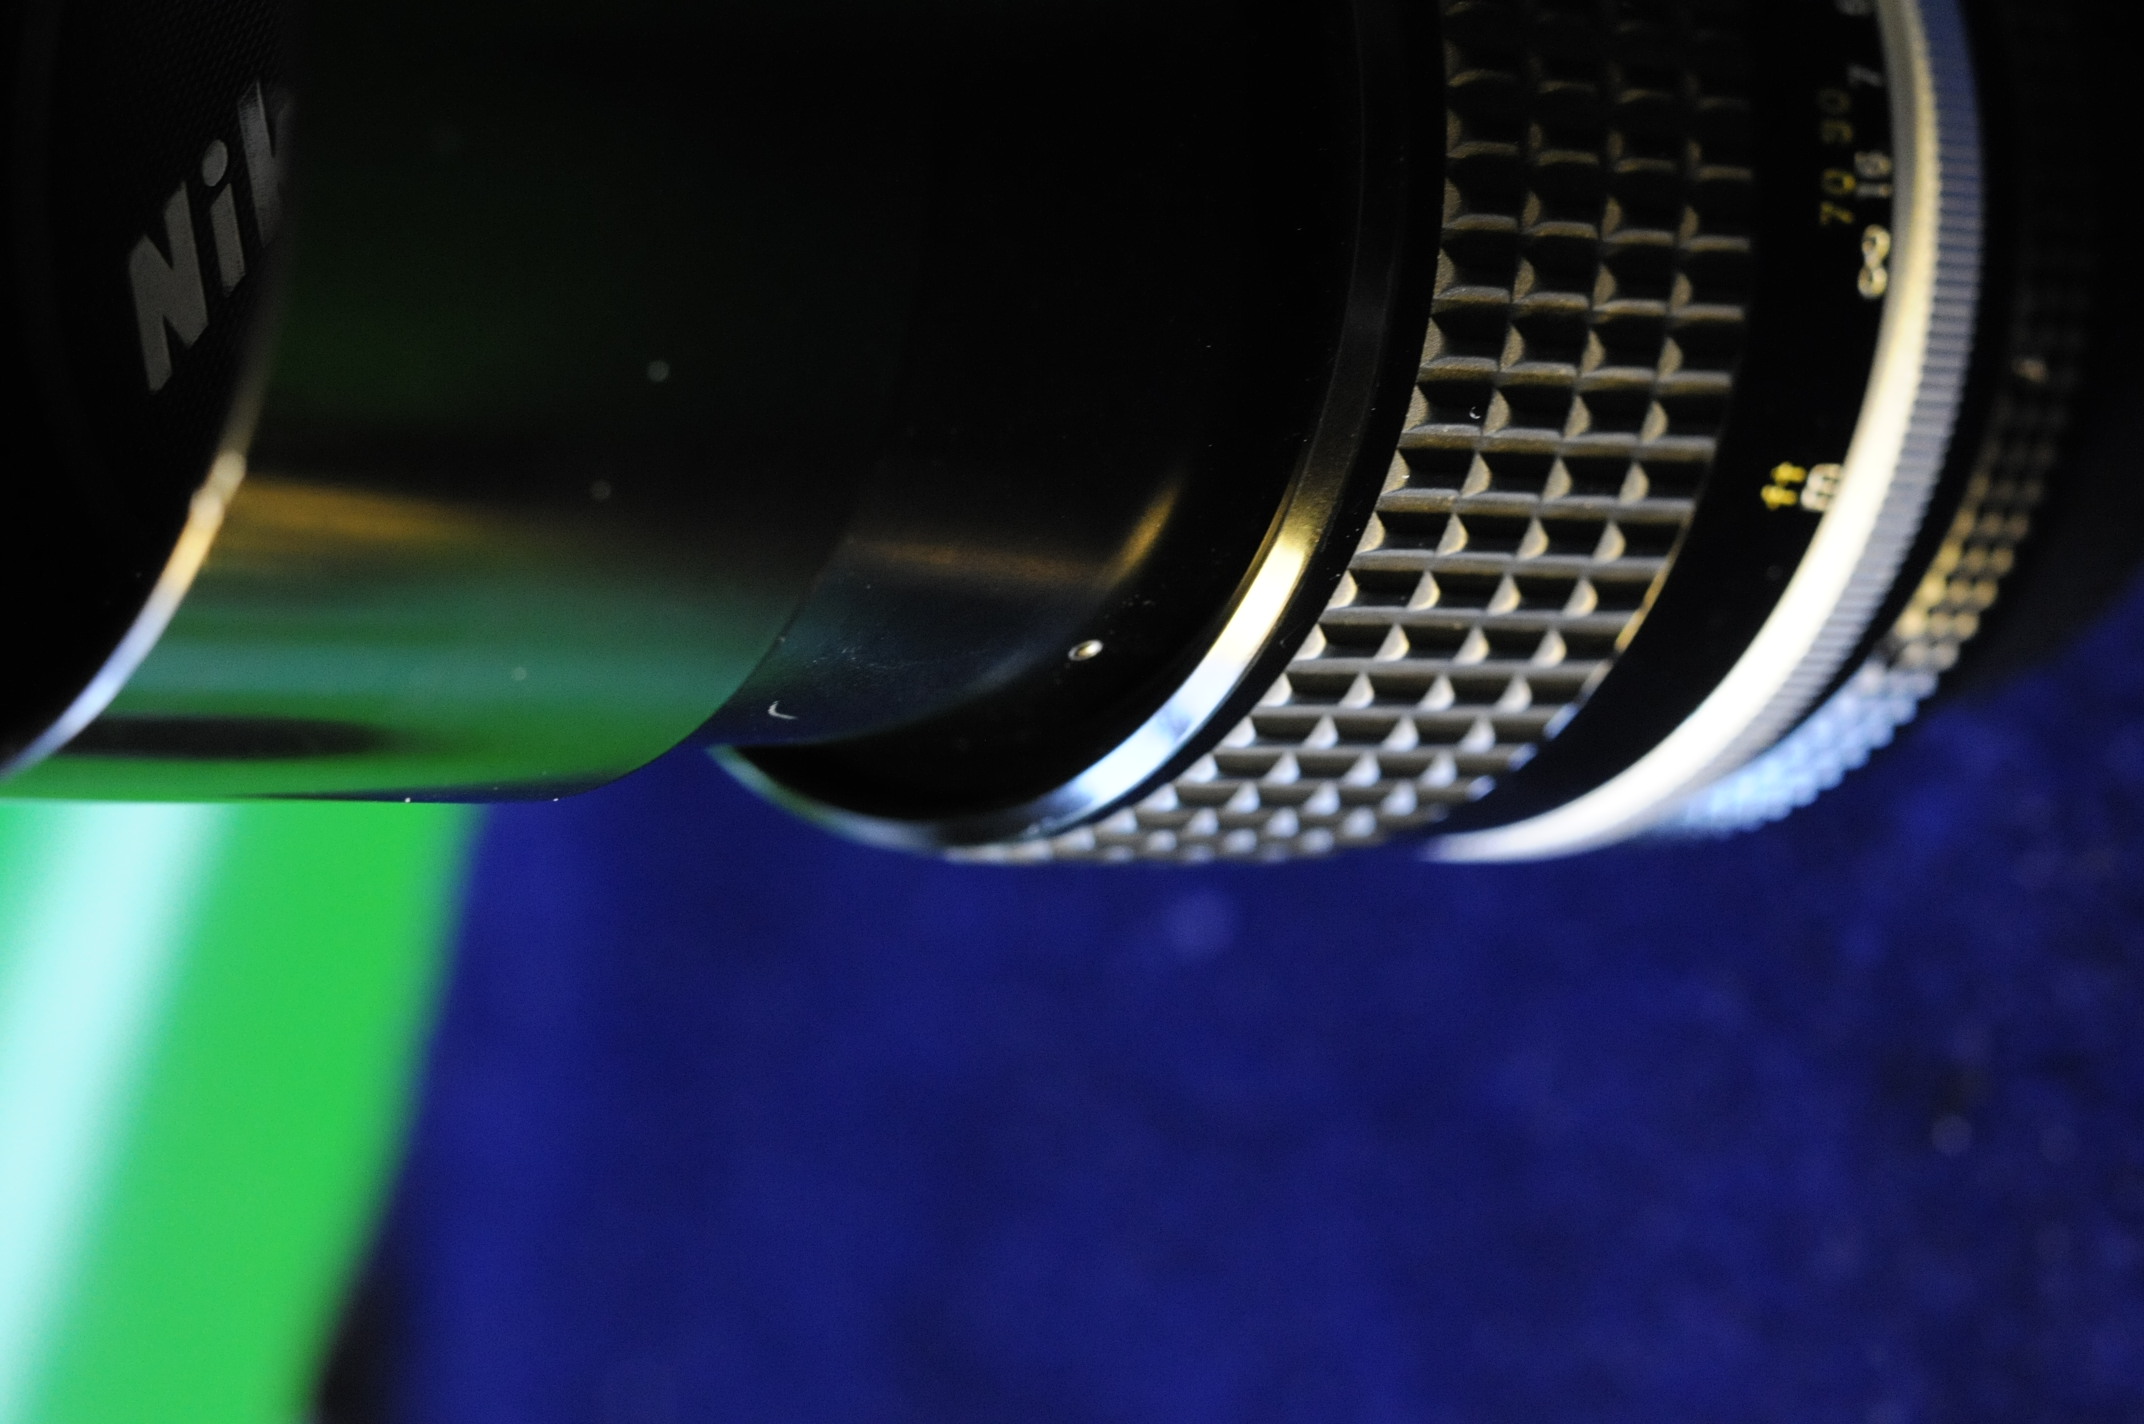
1 Set the aperture to f22, turn the lens to the closest focus position, this will give you acess to the 3 screws you need to remove, side note: i had to drill out one of the screws it was too stuck to get out


2 Unscrew (Counter Clock Wise) the complete front part, where the hood is, it will maybe need some force the first time
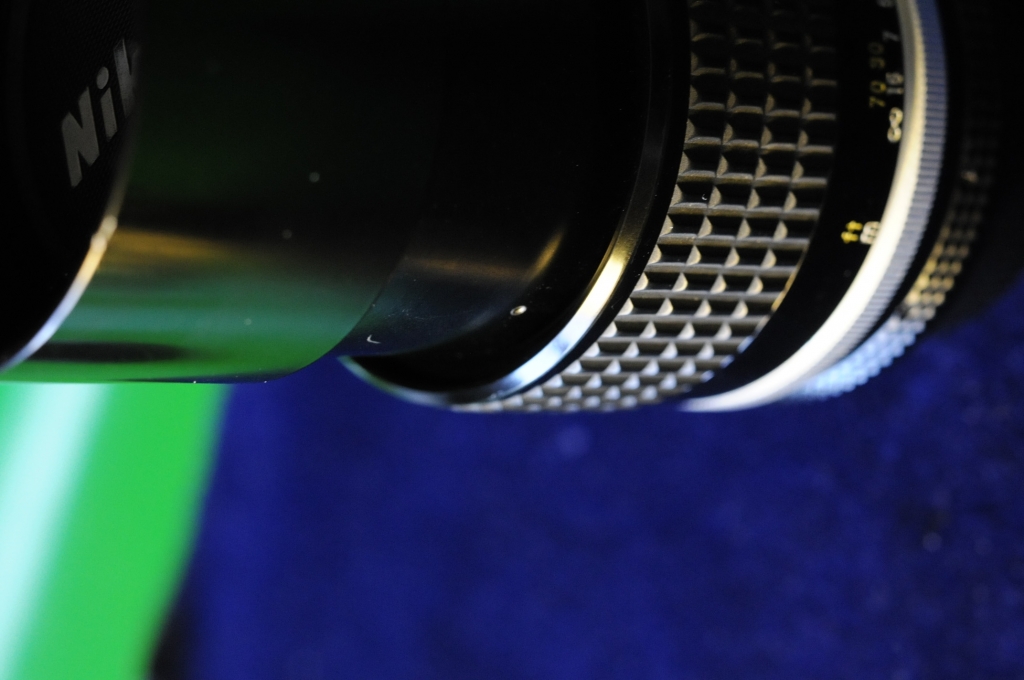

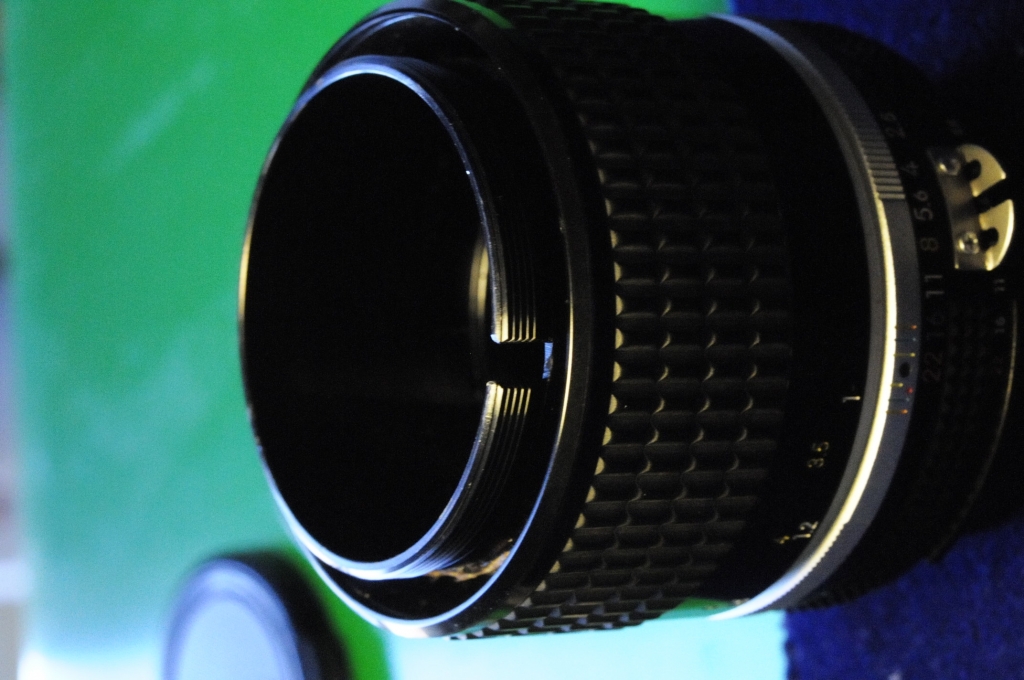
3 Simply gently pull up the complete lens assembly

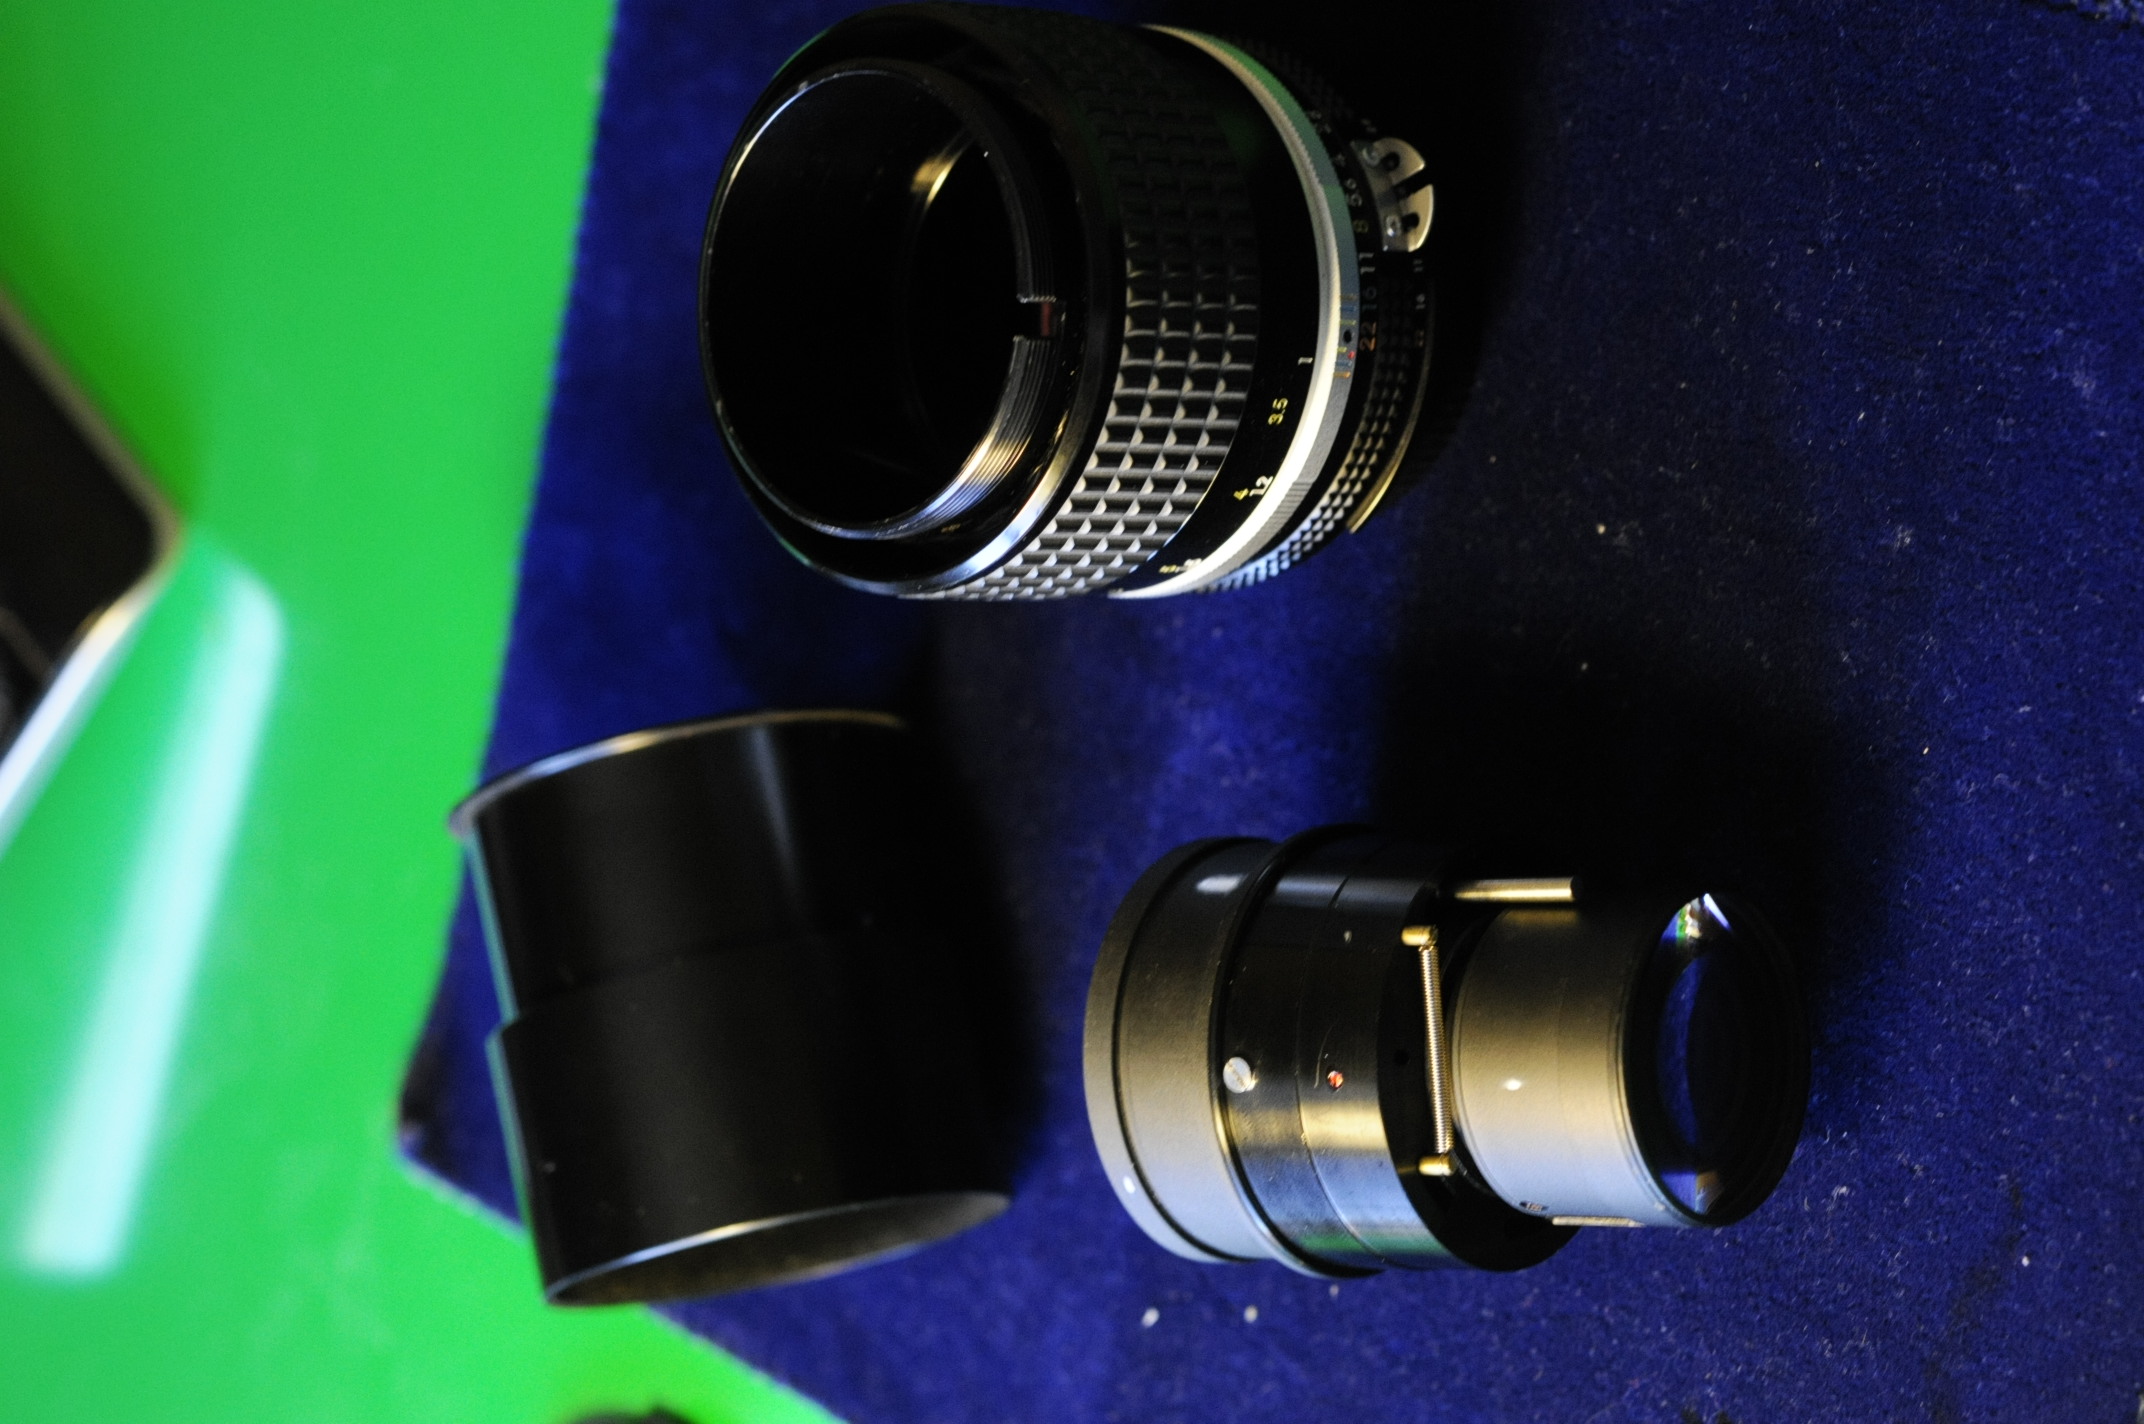
4 Unscrew the front group CCW, in my case it was enough to clean the last element in the group, so i didn t need to open it up further, it looks well sealed, but i think it can be opened if needed


5 The rear group can be opened for easyer acess, it s where my lens had fungi, simply unscrew the last part of it

6 Just in case, if the ring that commands the aperture falls out, that s the correct position, if it falls out be careful, there a less then 1 mm �stair� around the aperture hole, the ring must fit perfectly in it, otherwise you won t be able to screw back the rear group


7 As the front group, the rear one can probbably be opened (look at the screw), again in my case it was not needed, i managed to clean the �fungi� that was inside...

8 Ok, back it goes...first screw back on the rear group, make sure the ring for the aperture is in it s correct place, screw all the way down, ckeck if the mechanism for the aperture works fine.
Screw back the front group, nothing too difficlt here...


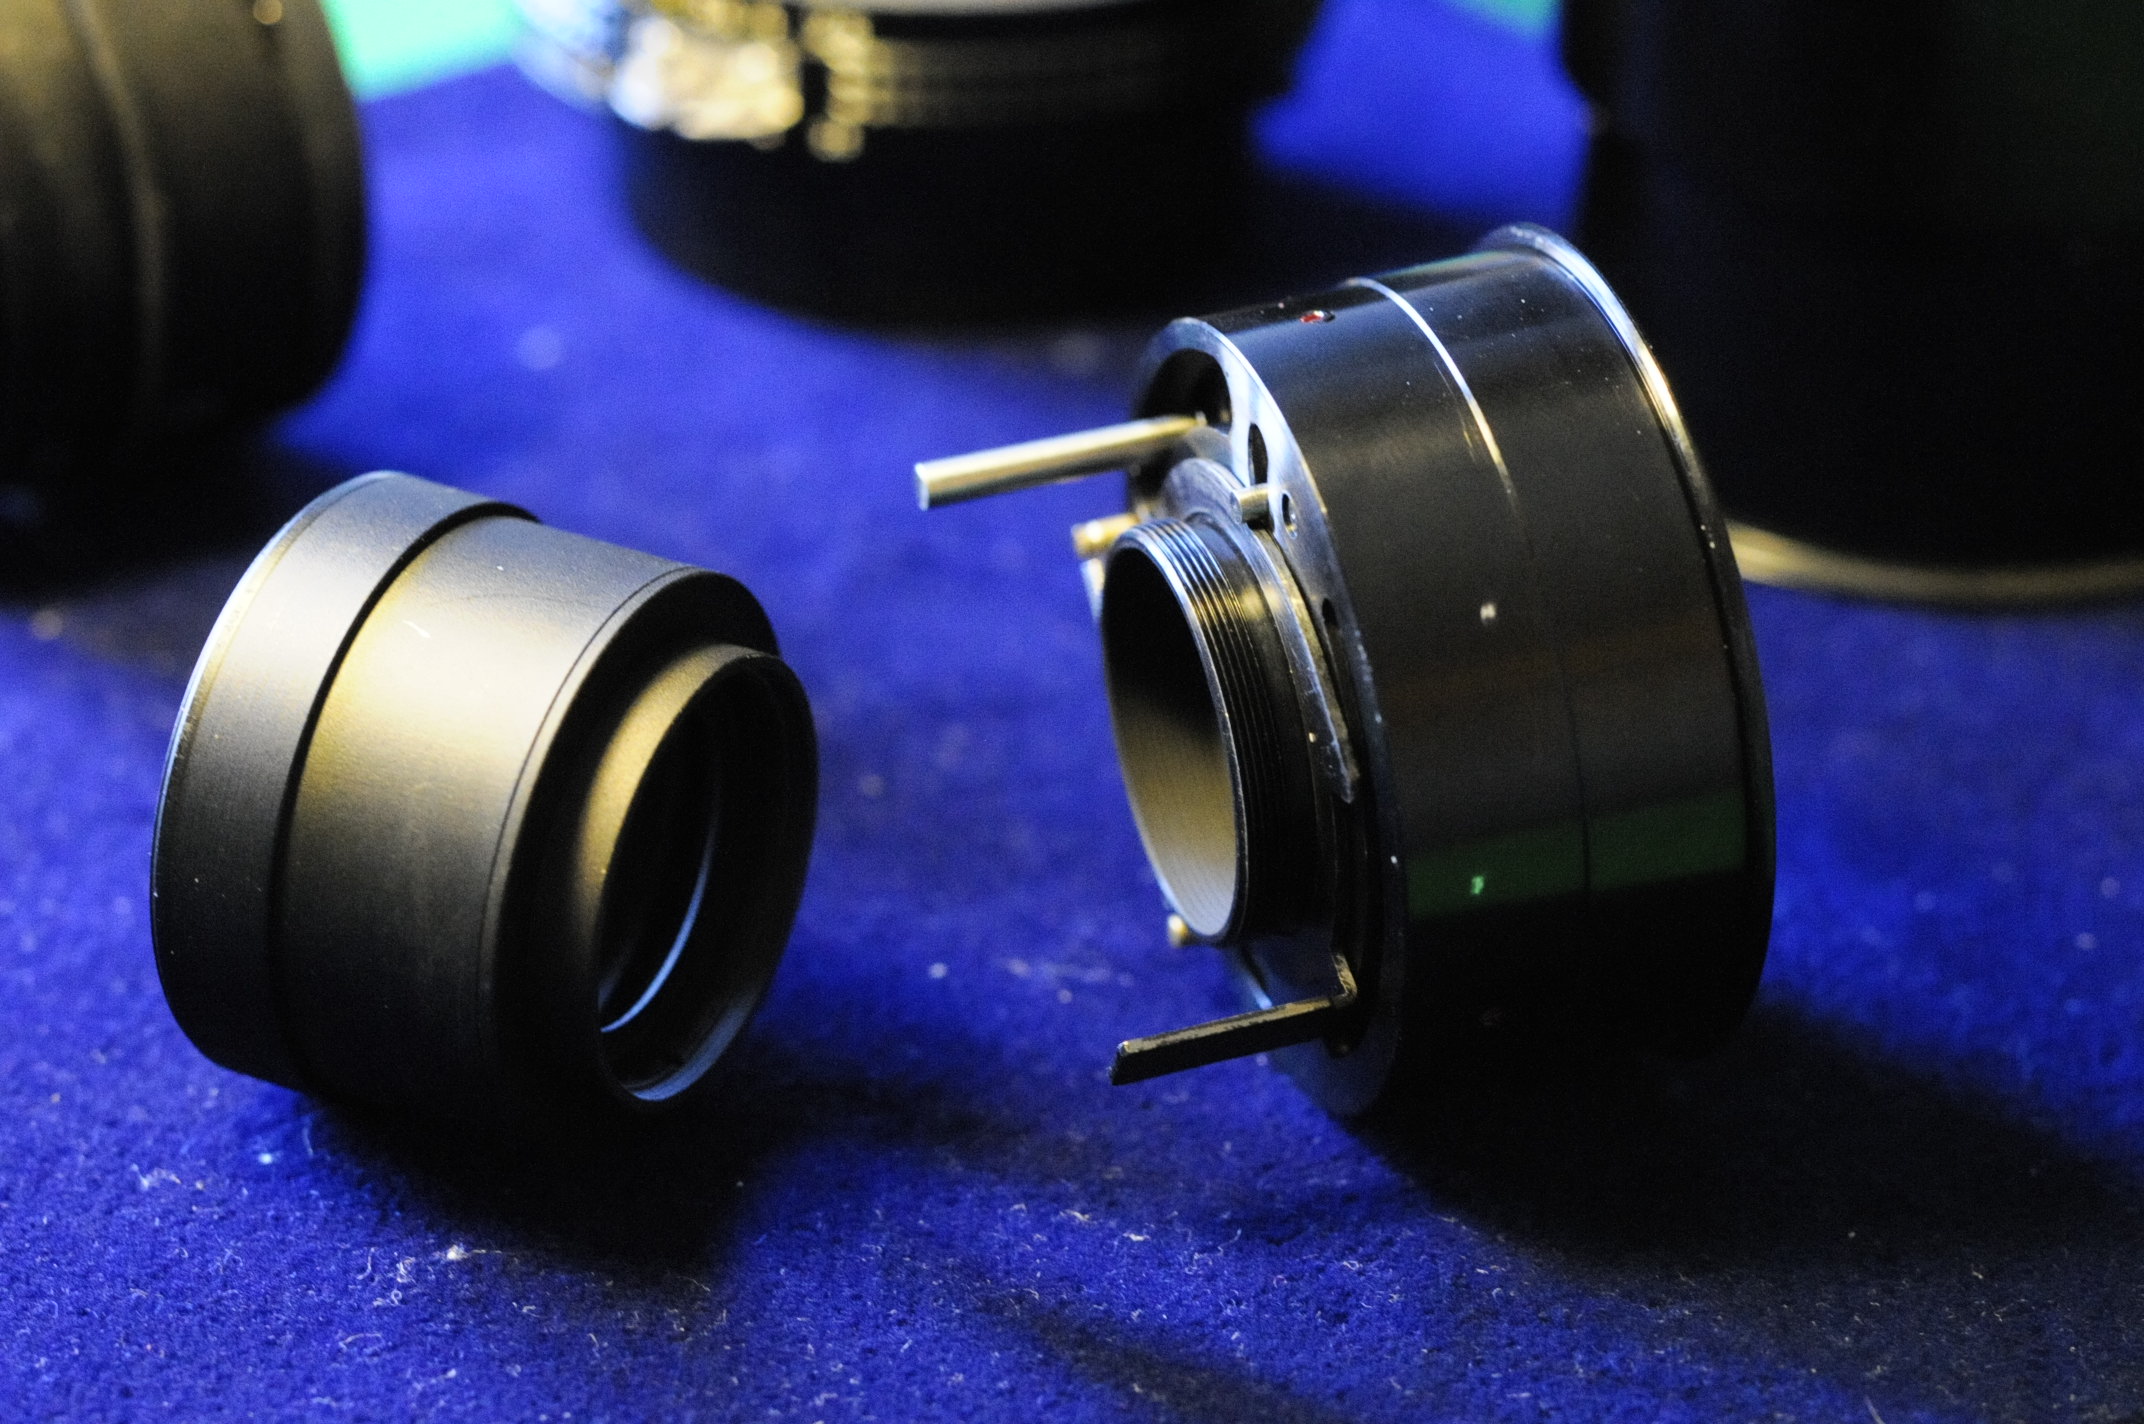
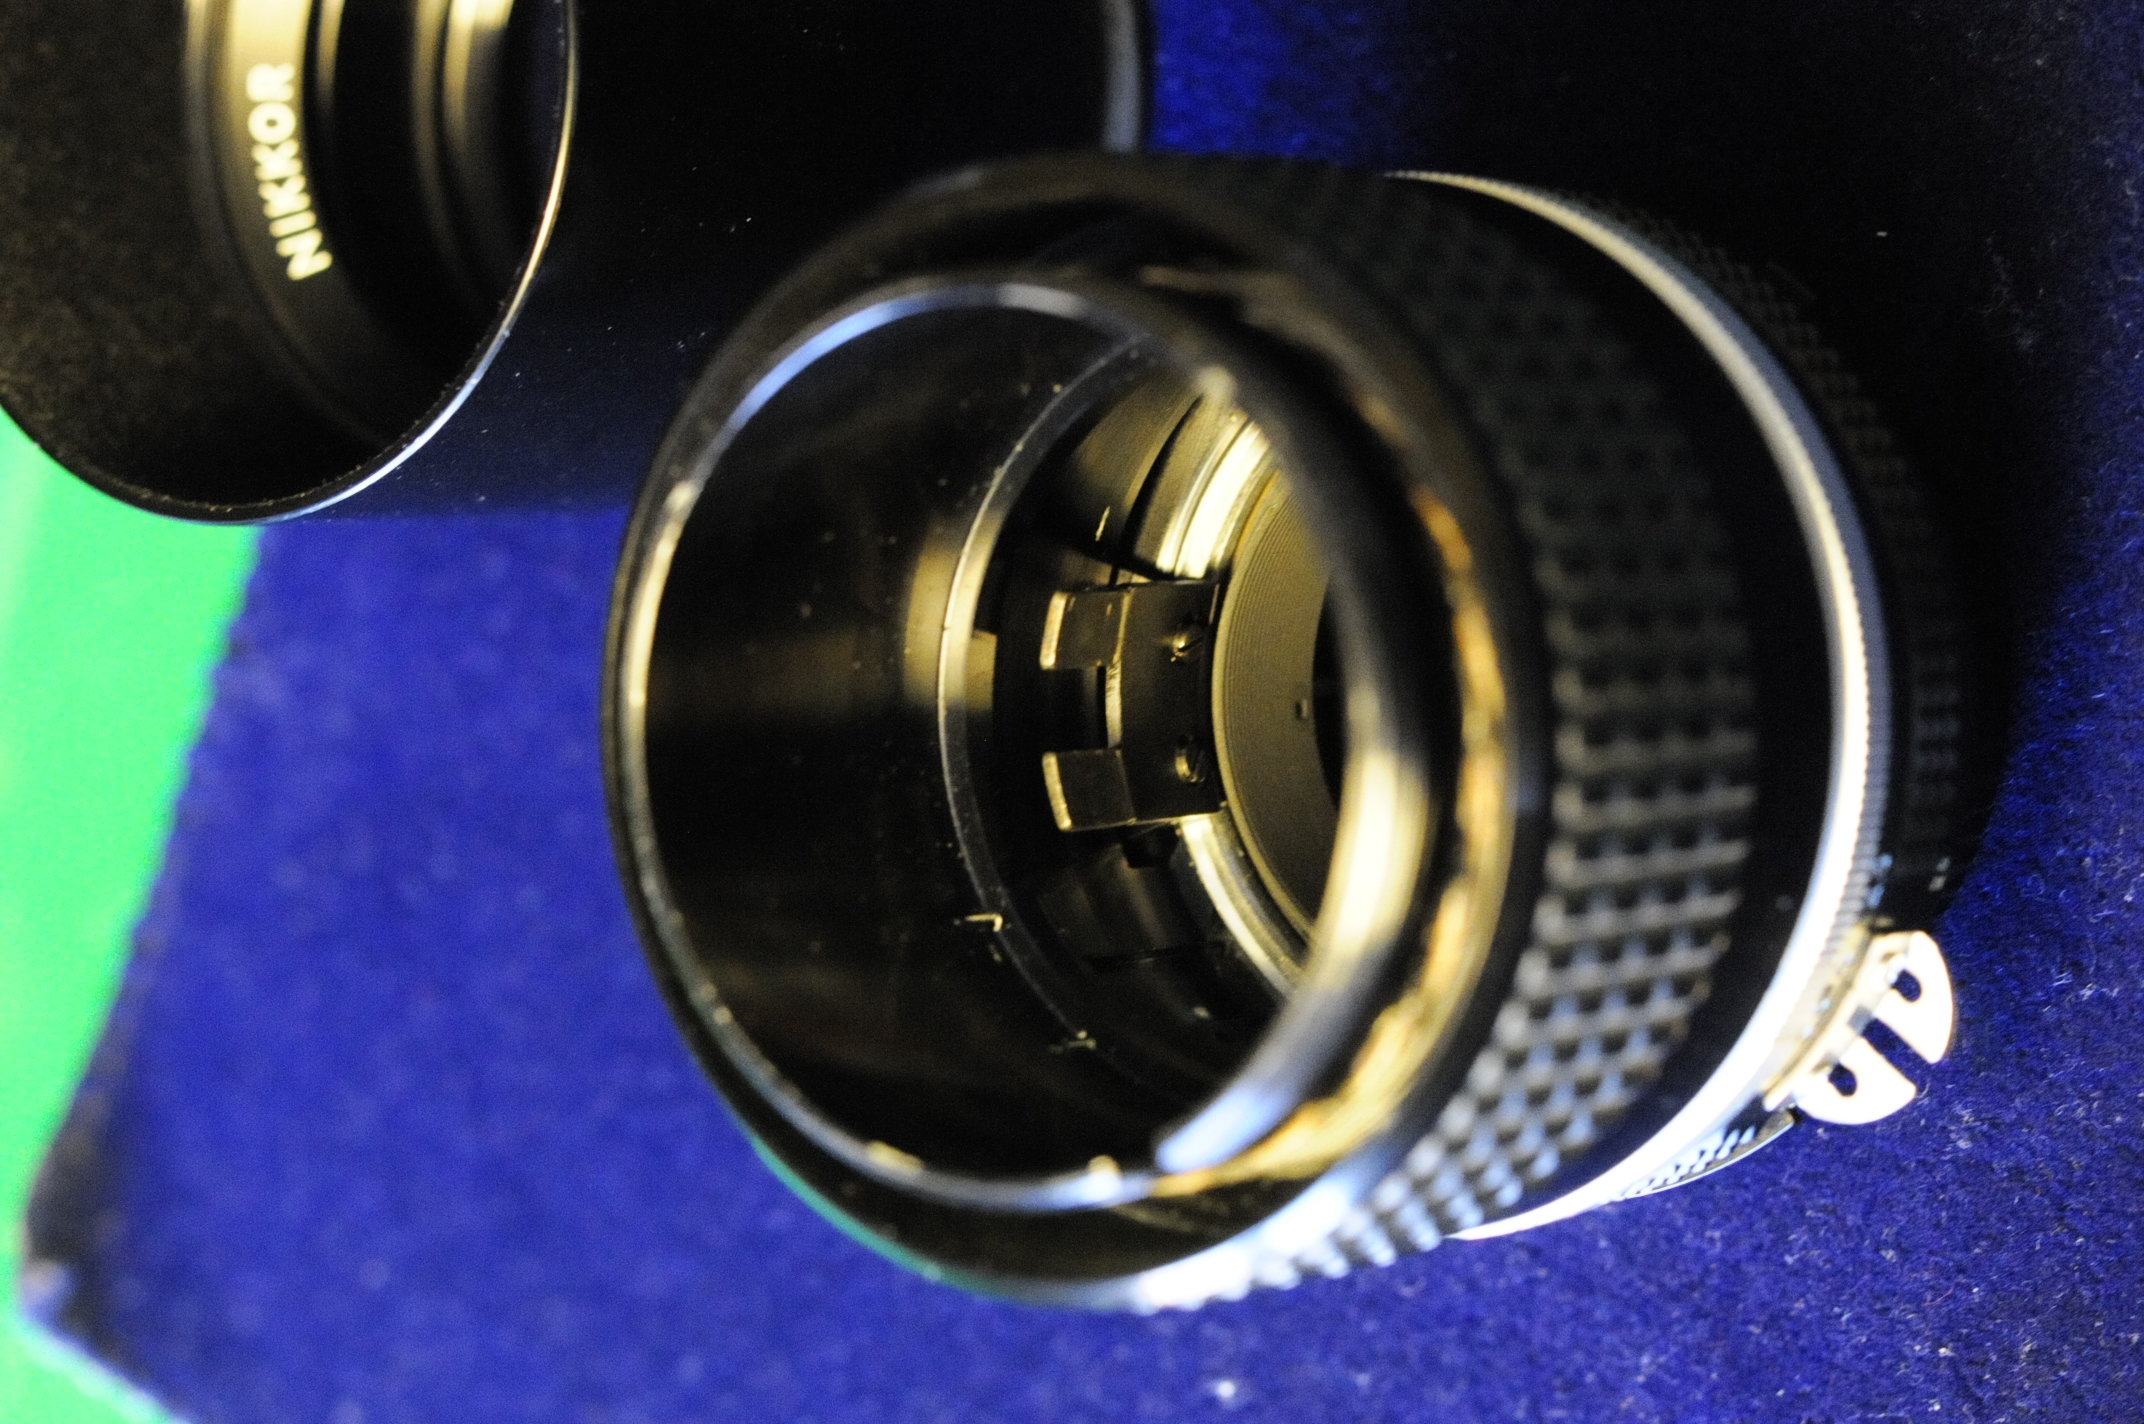
9 Now the tricky part...putting back the lens group back into his helicoid. Make sure the aperture is still set on f22, both on the helicoid (lens aperture ring) and on the aperture mechanism...
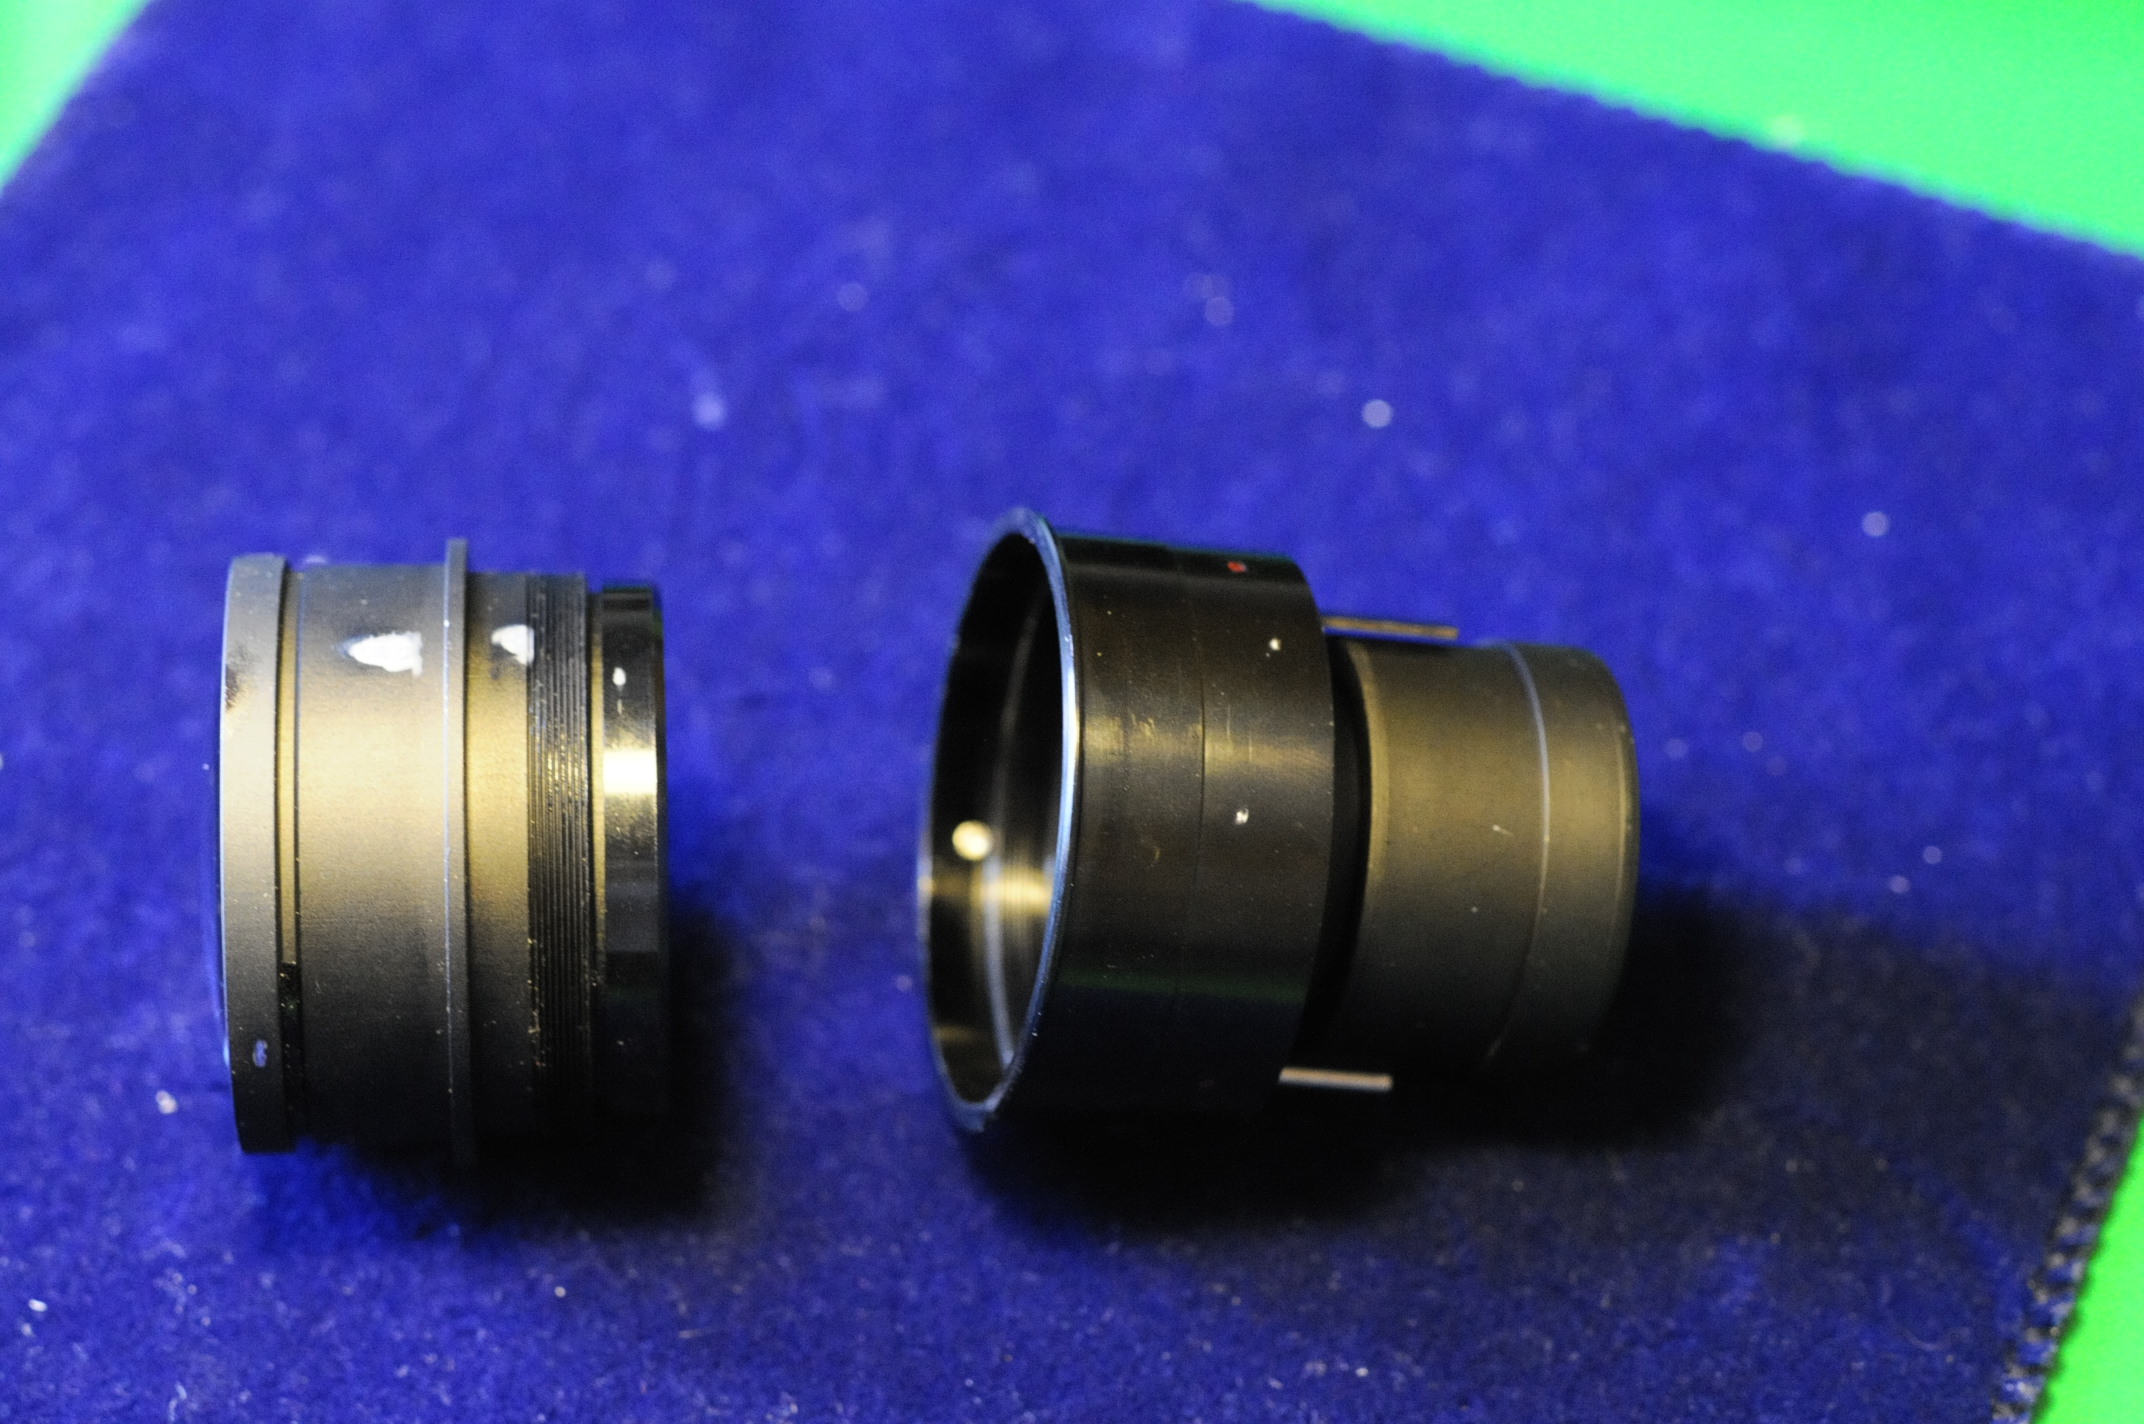
10 This one...wich i will call the MALE

11 Wants to meet this one, the FEMALE, they really love each other

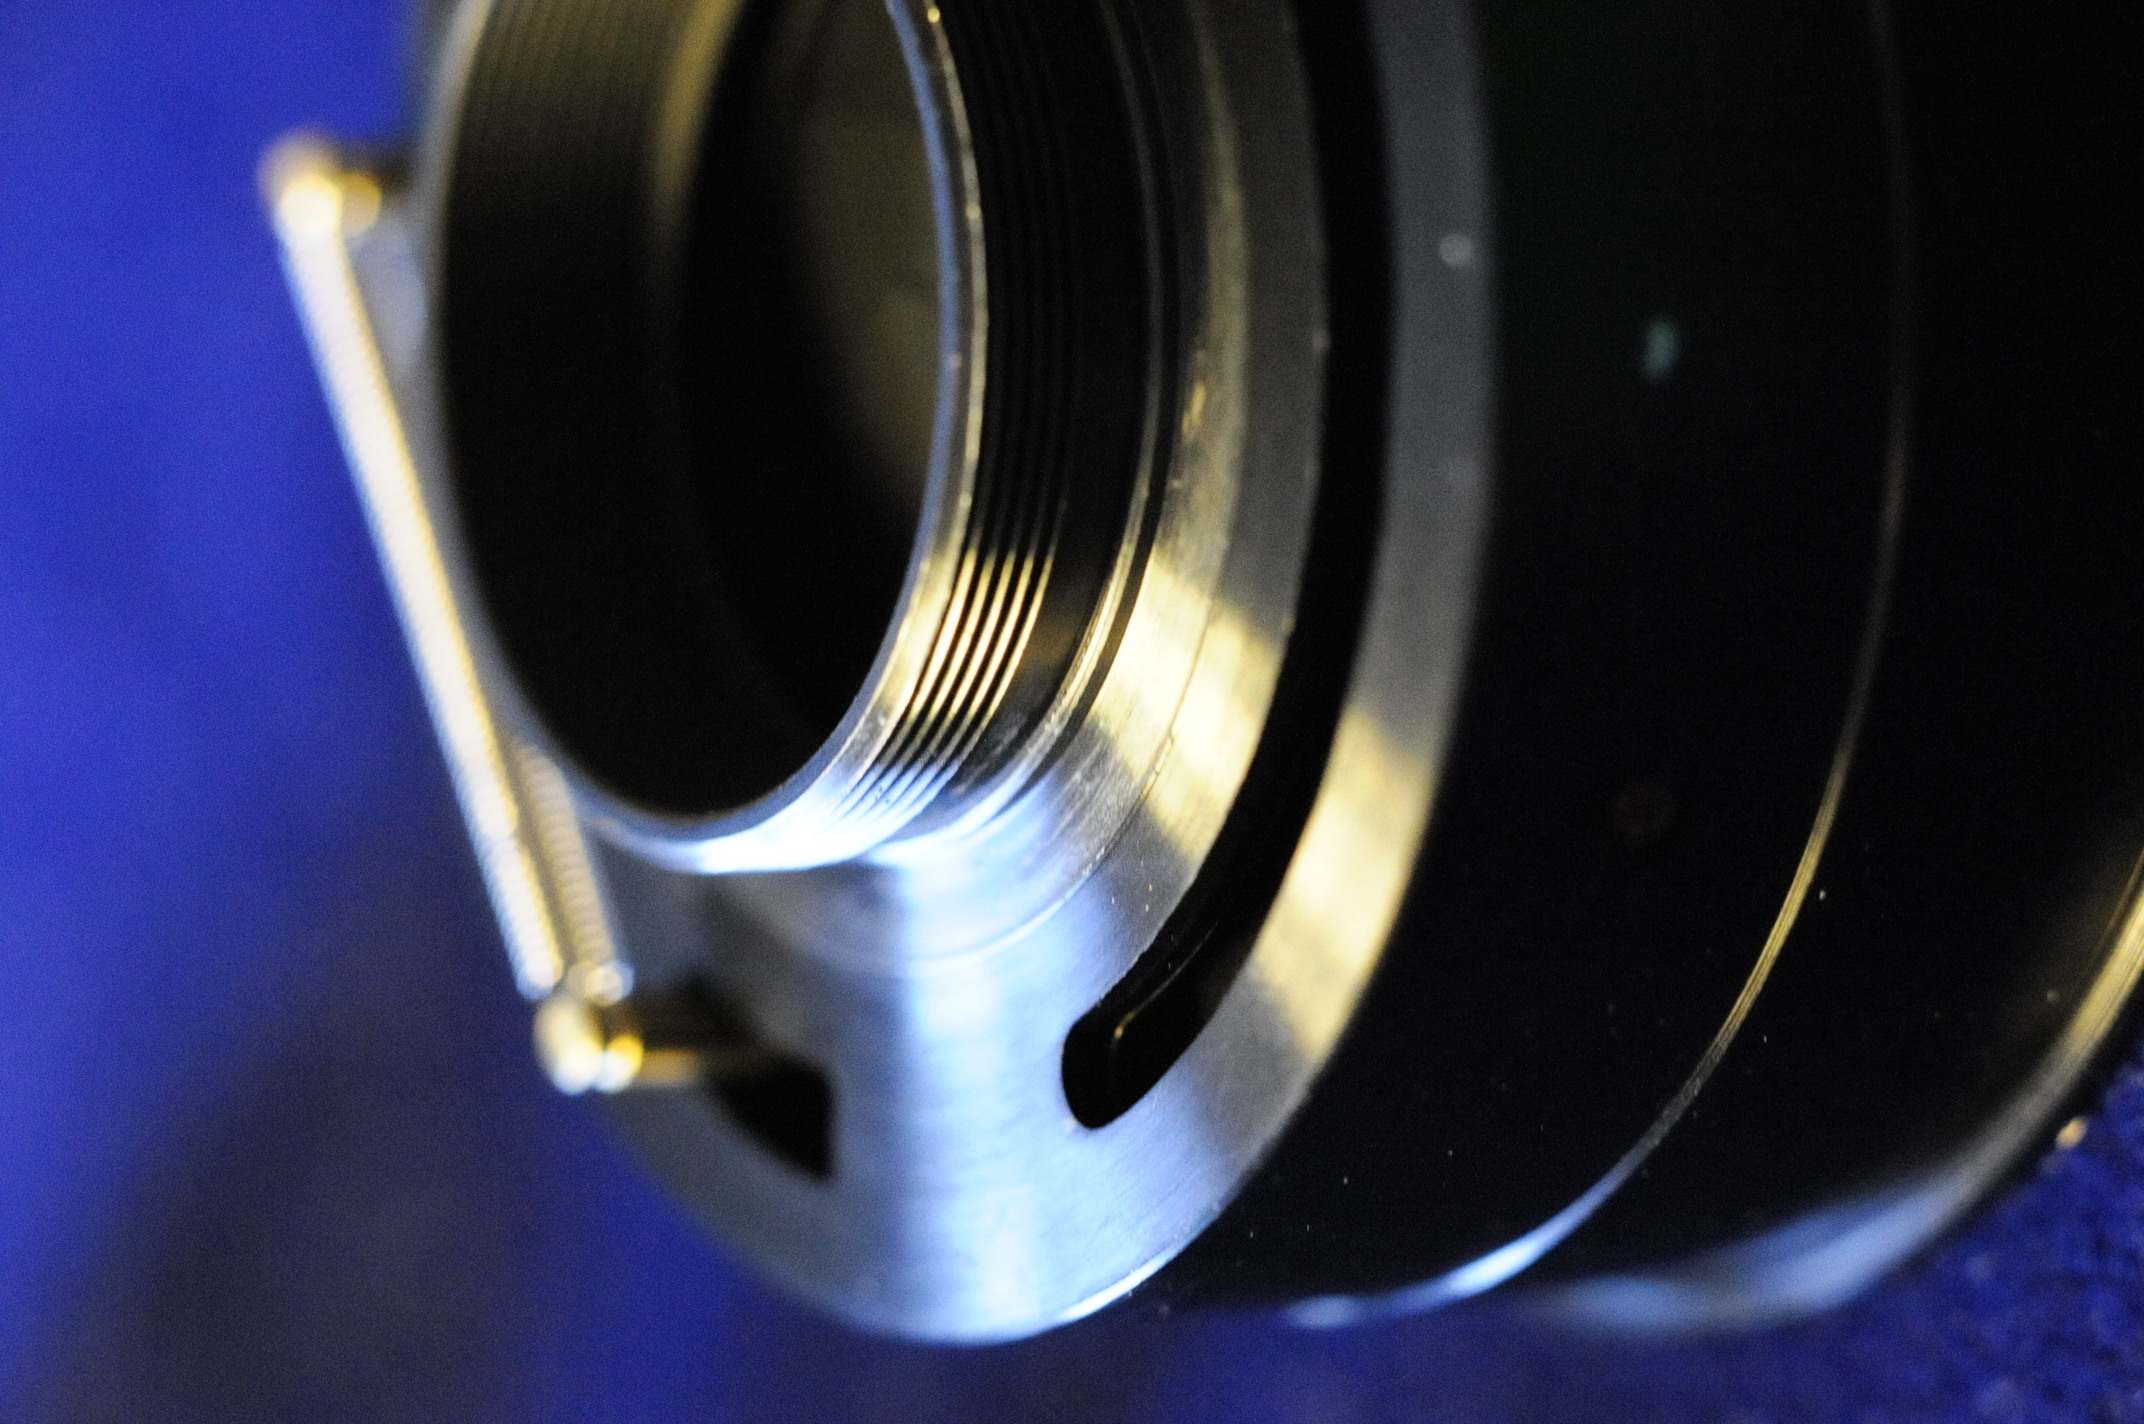
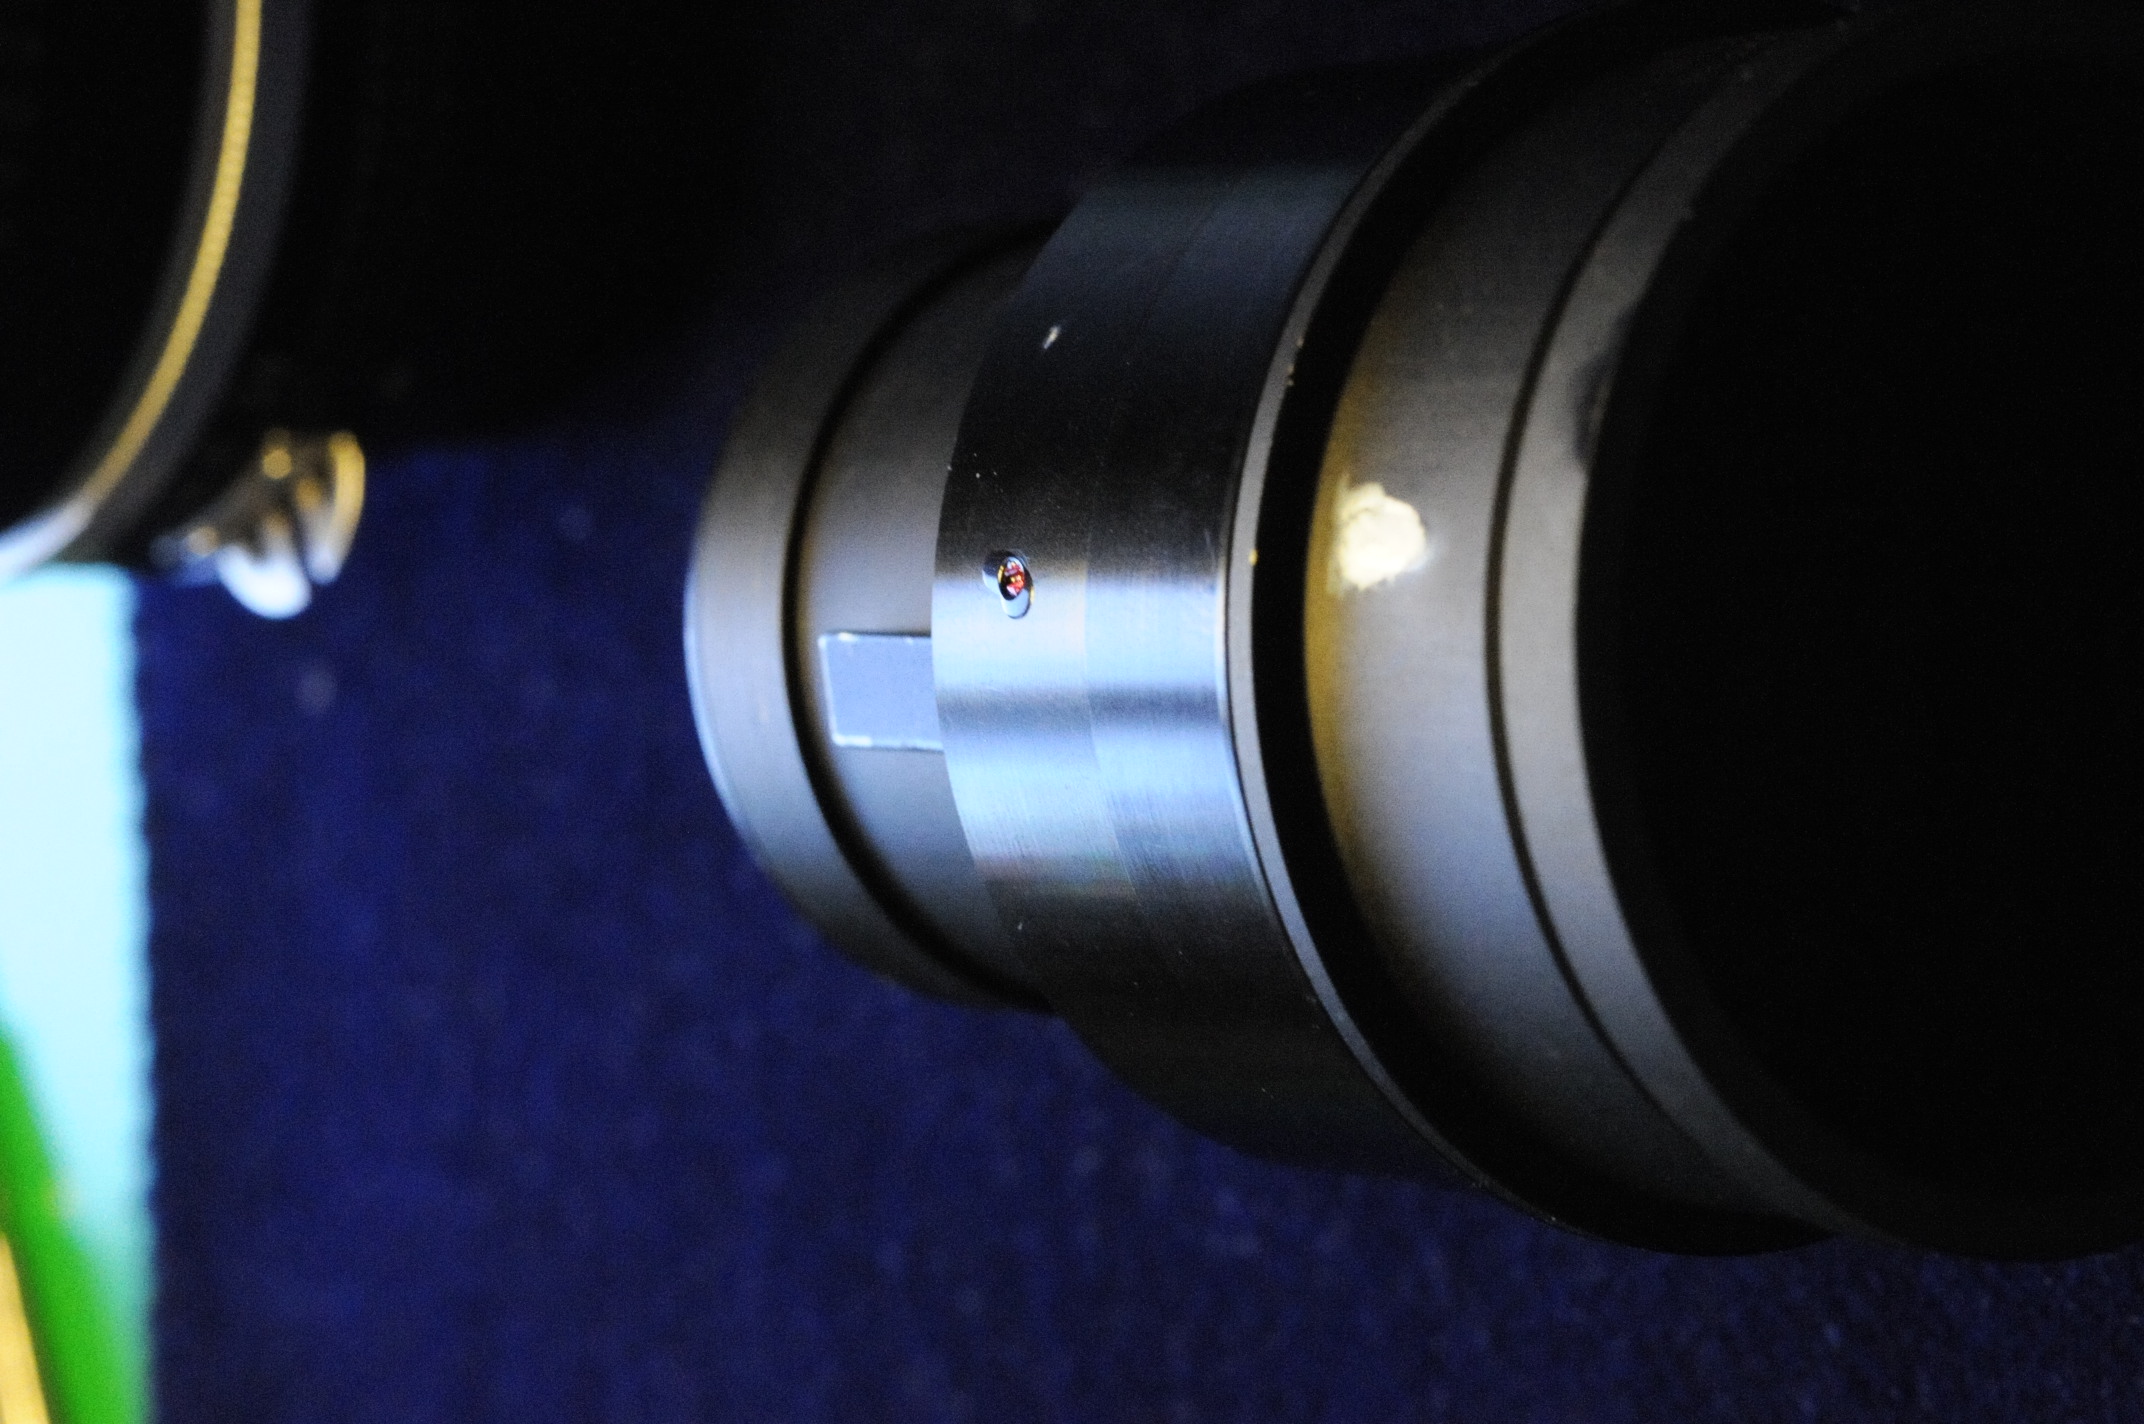
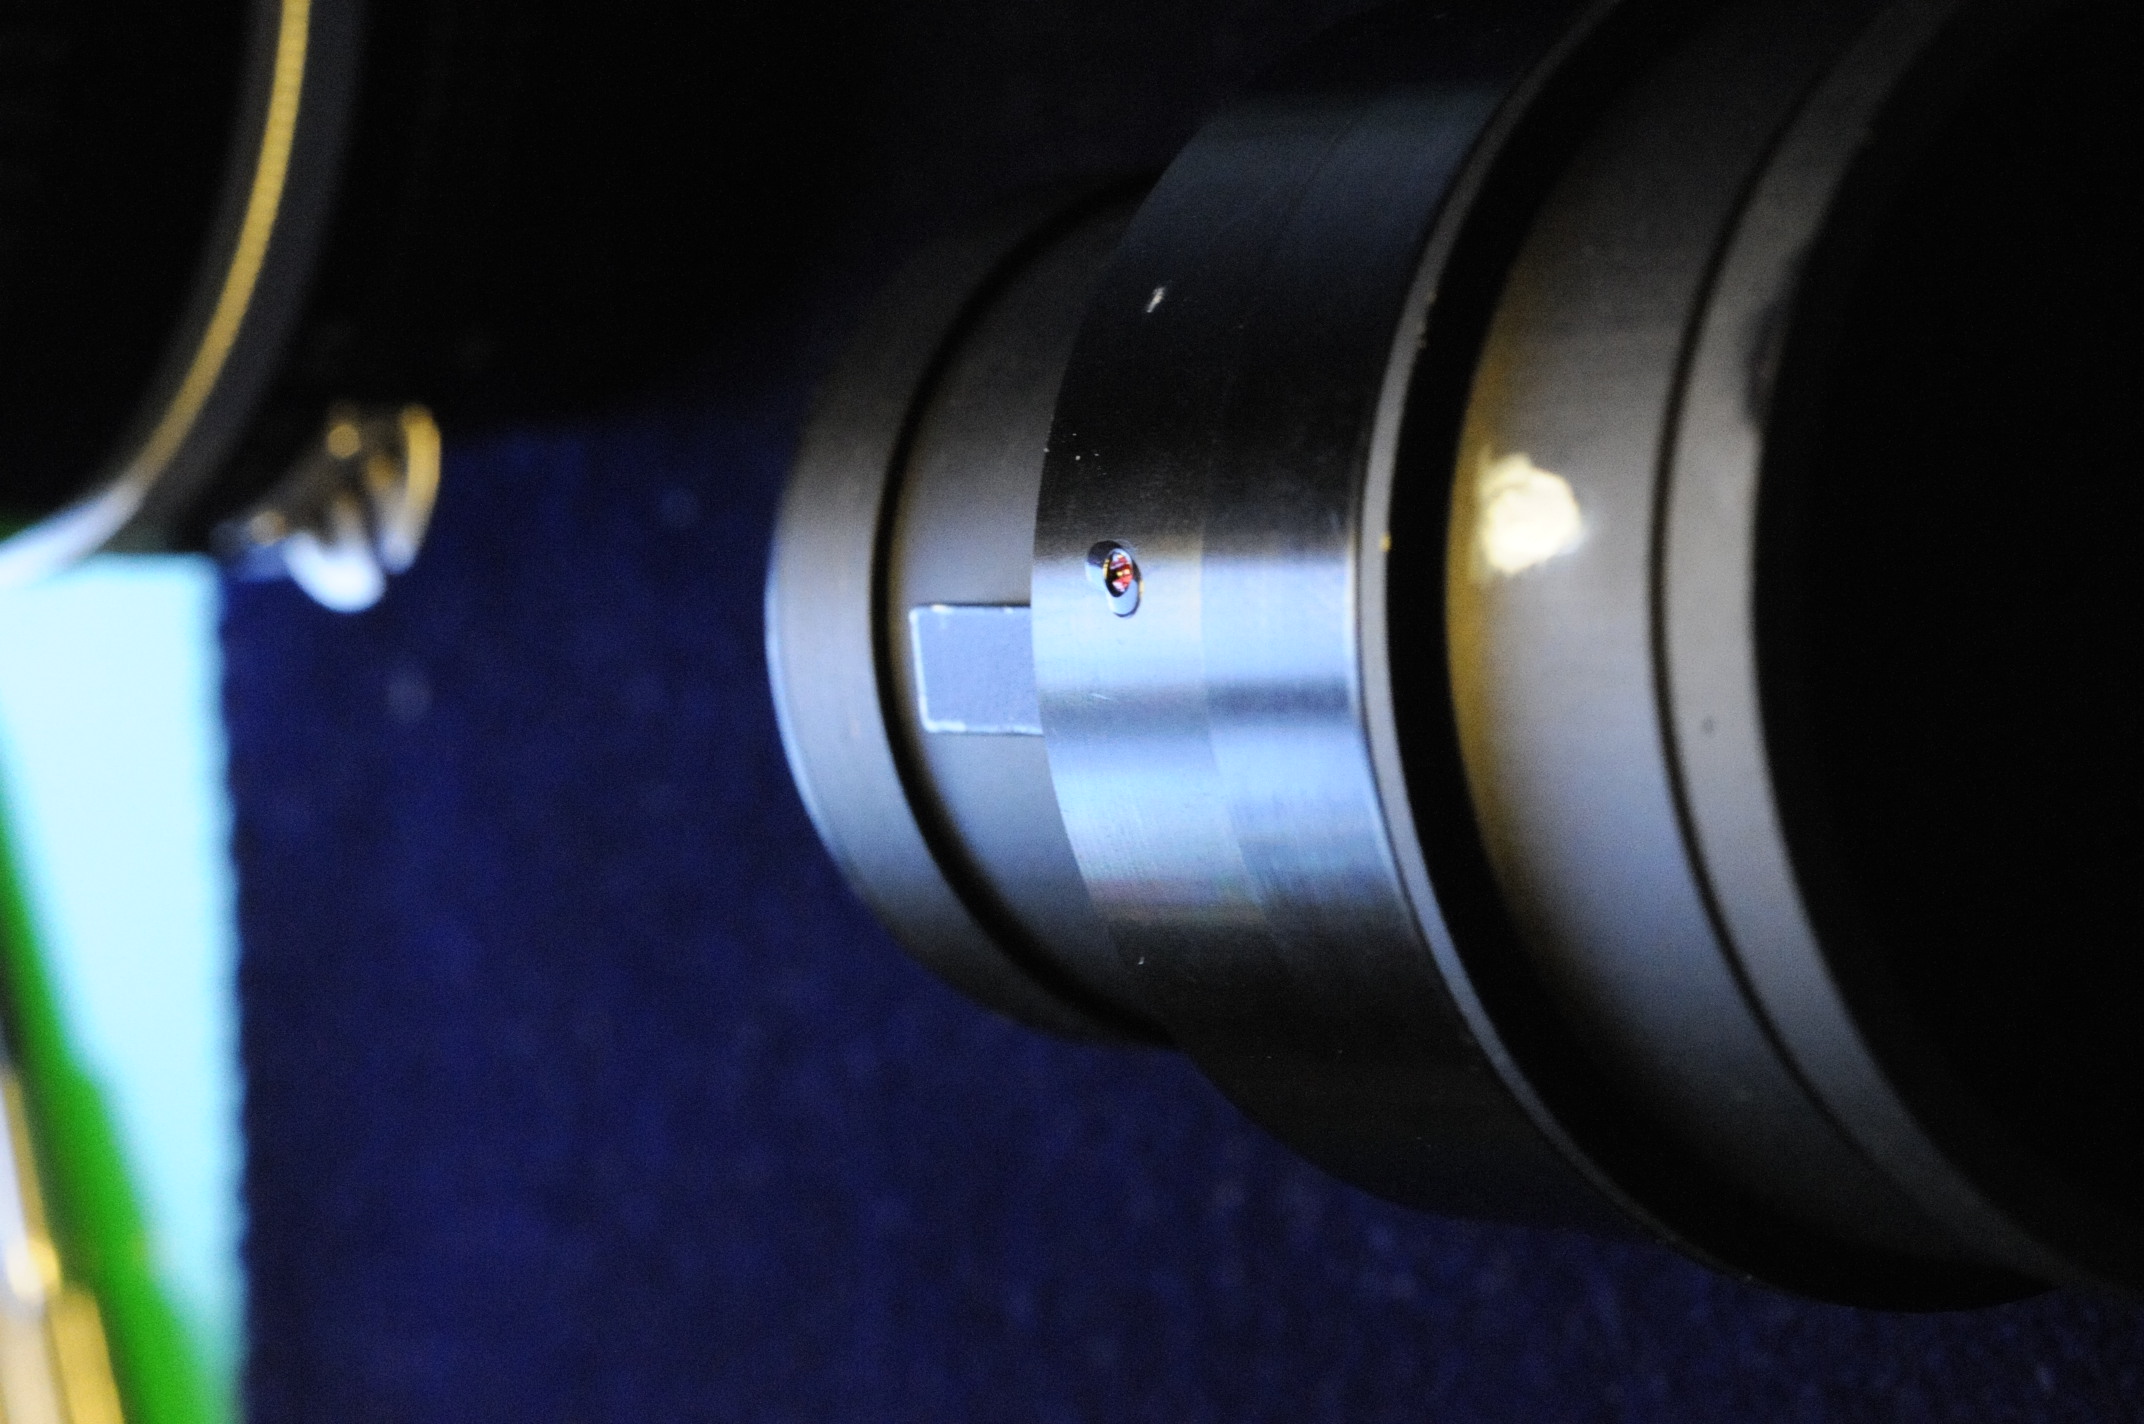
12 Now with the MALE, close down again the aperture mechanism (not the aperture ring on the helicoid), BUT then reopen it JUST a bit, with my lens i had to allign the Male to the �red� screw, look at the two pics, first closed all the way down than alligned , simply you have to open up the aperture mechanism, this may vary (or not be necessary at all!), in my case i moved it 2 mm or so.


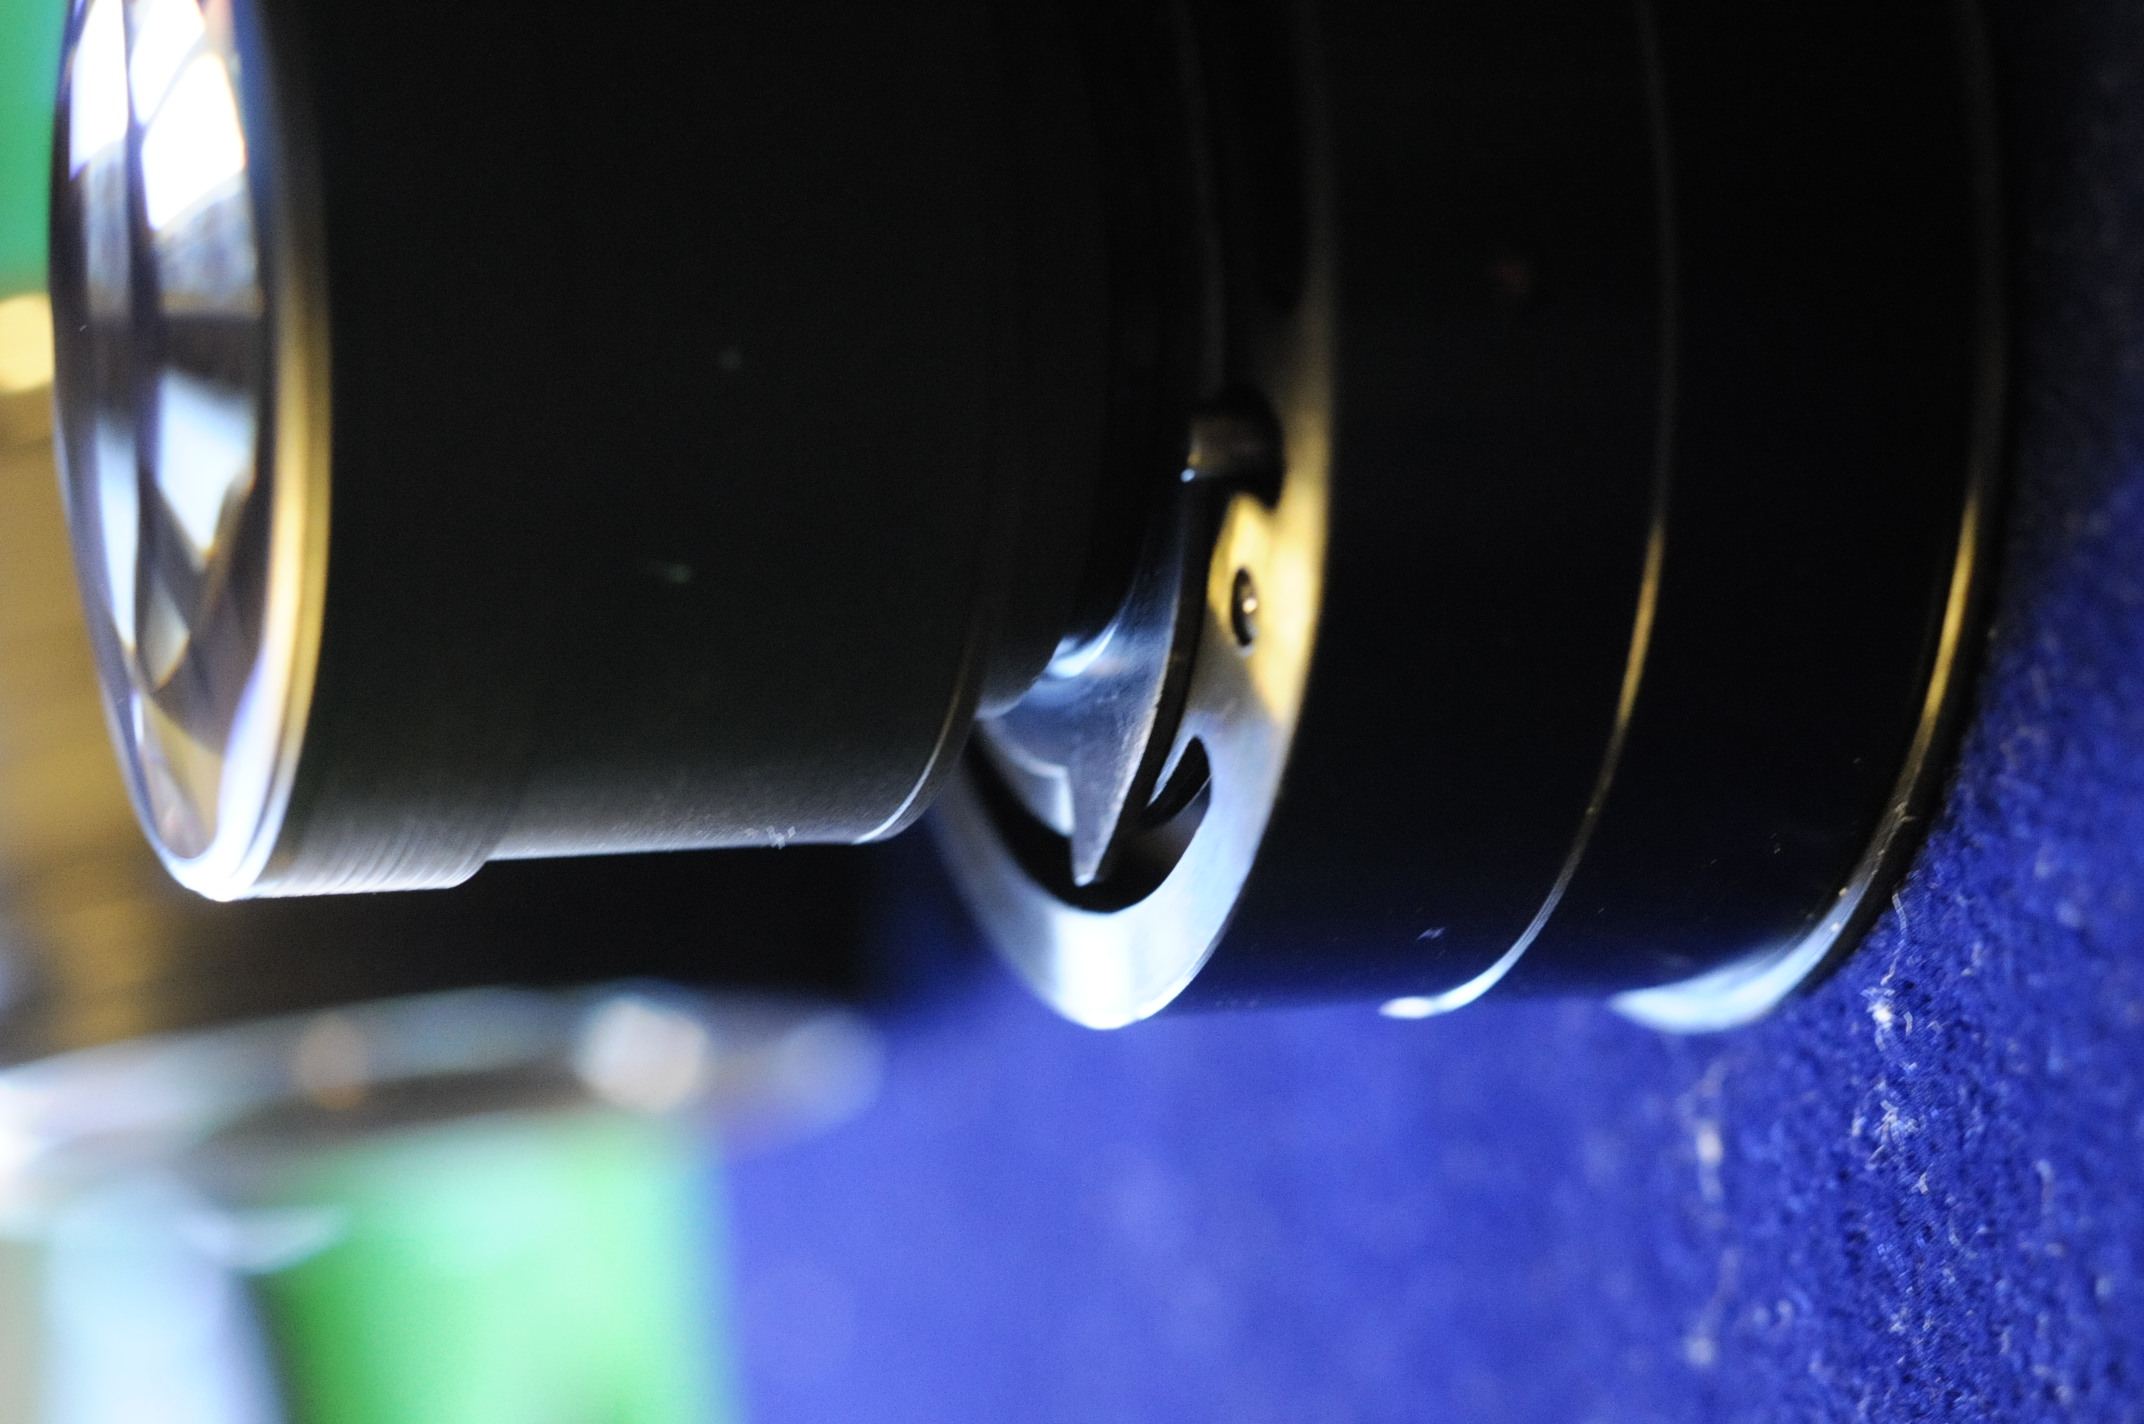
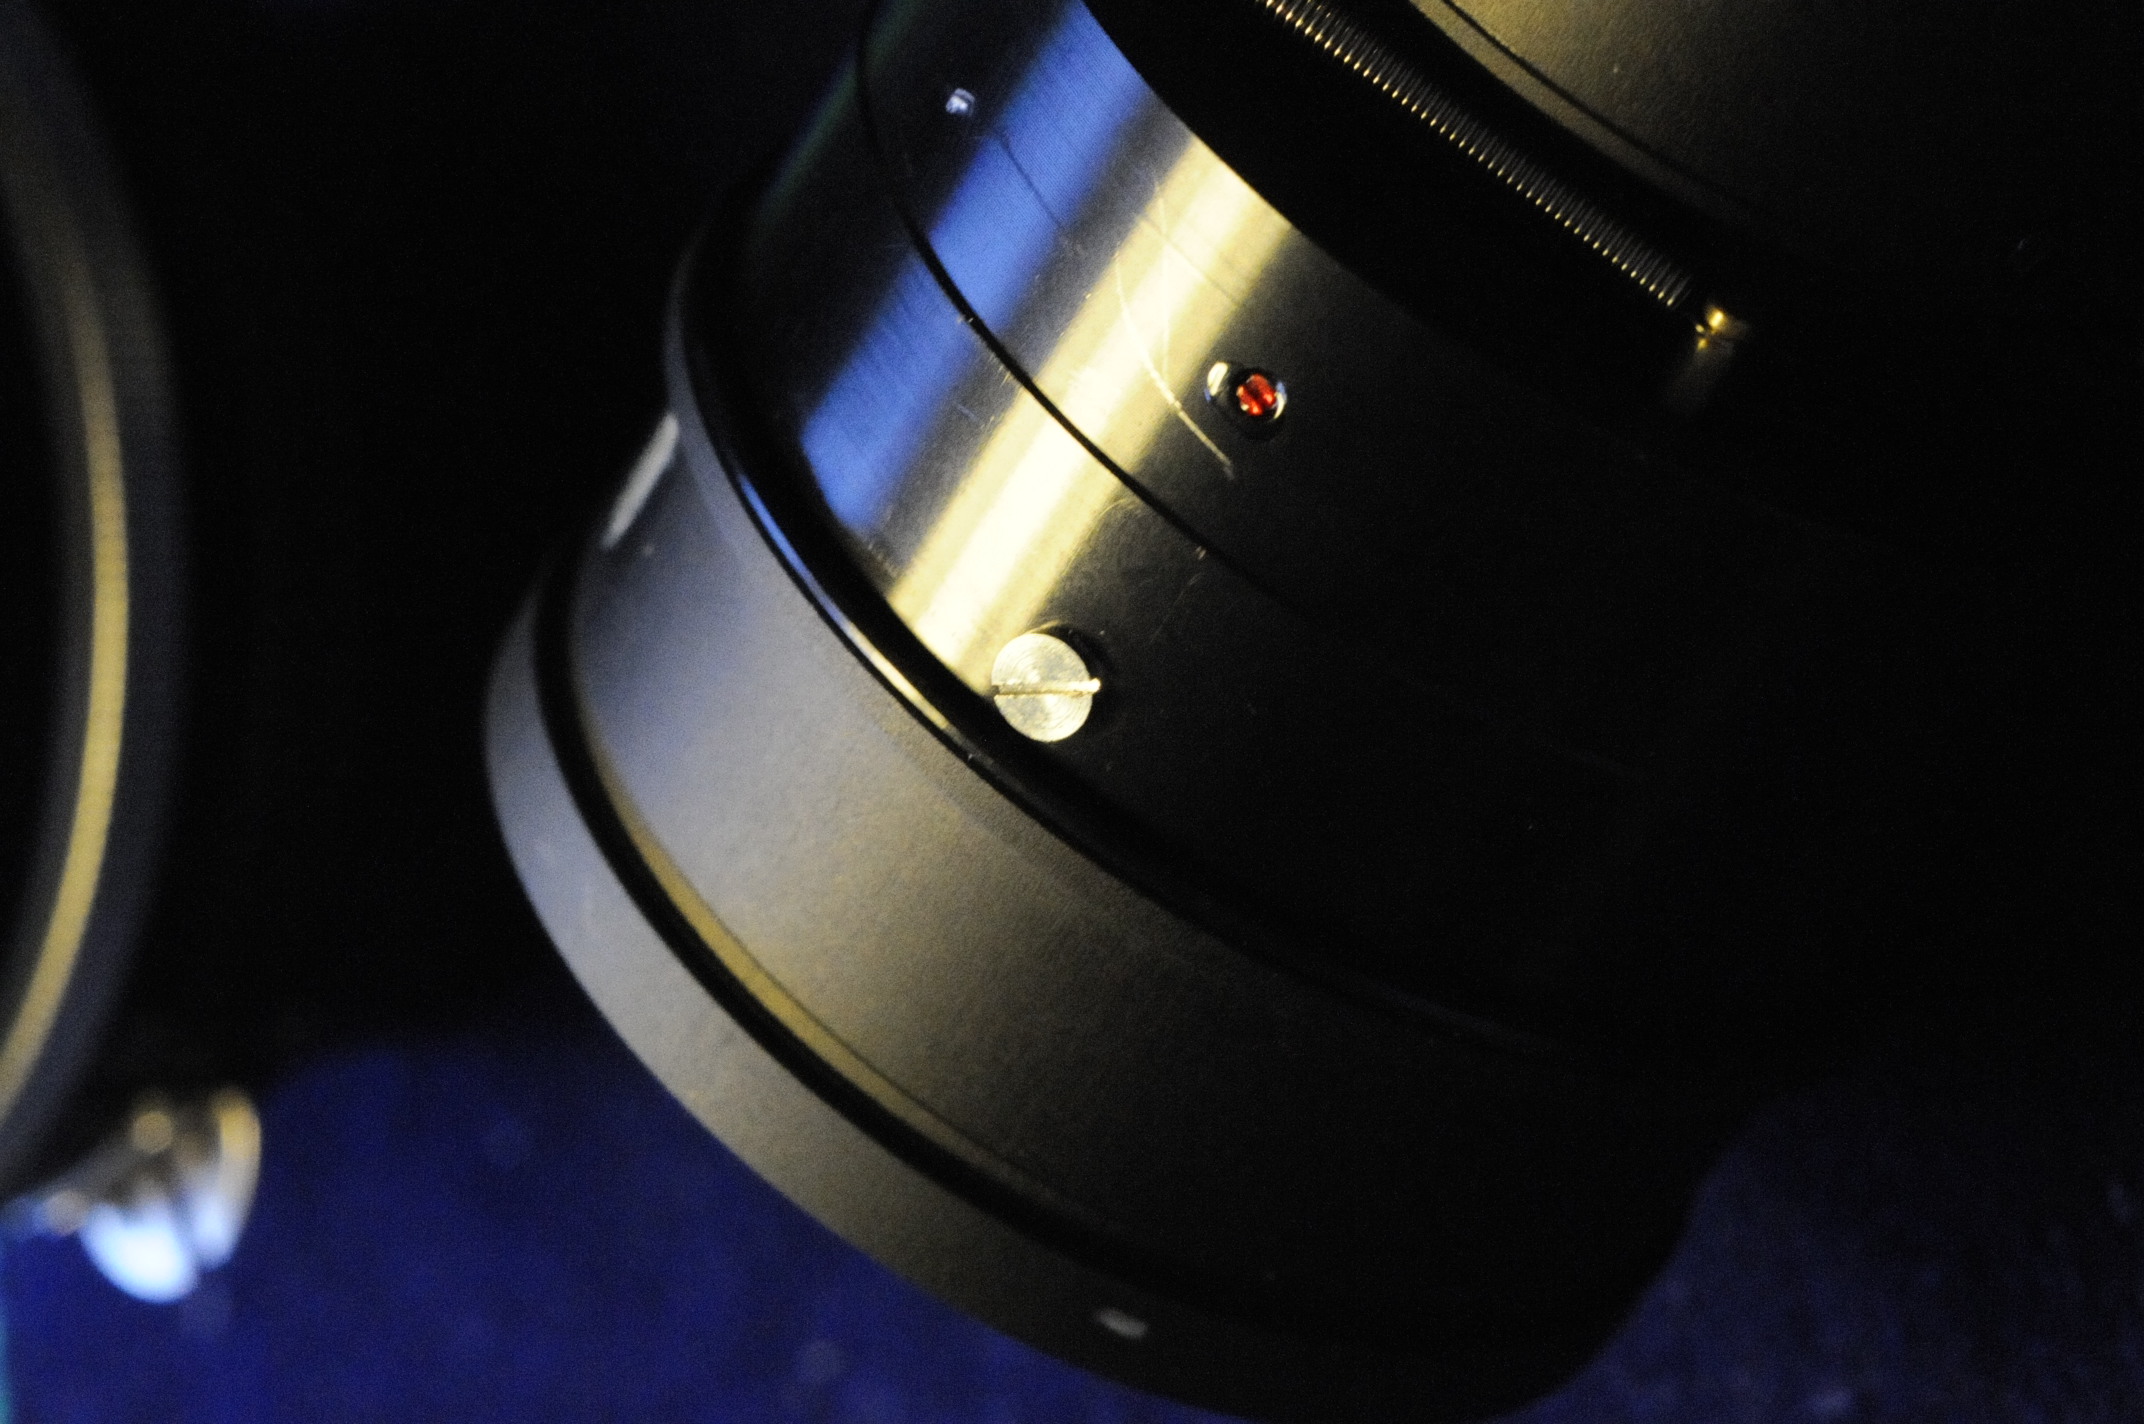
13 Now that you ve done that and the aperture on the helicoid is set to f22 look at this slot in the picture
14 ...you have to allign this screw into the slot

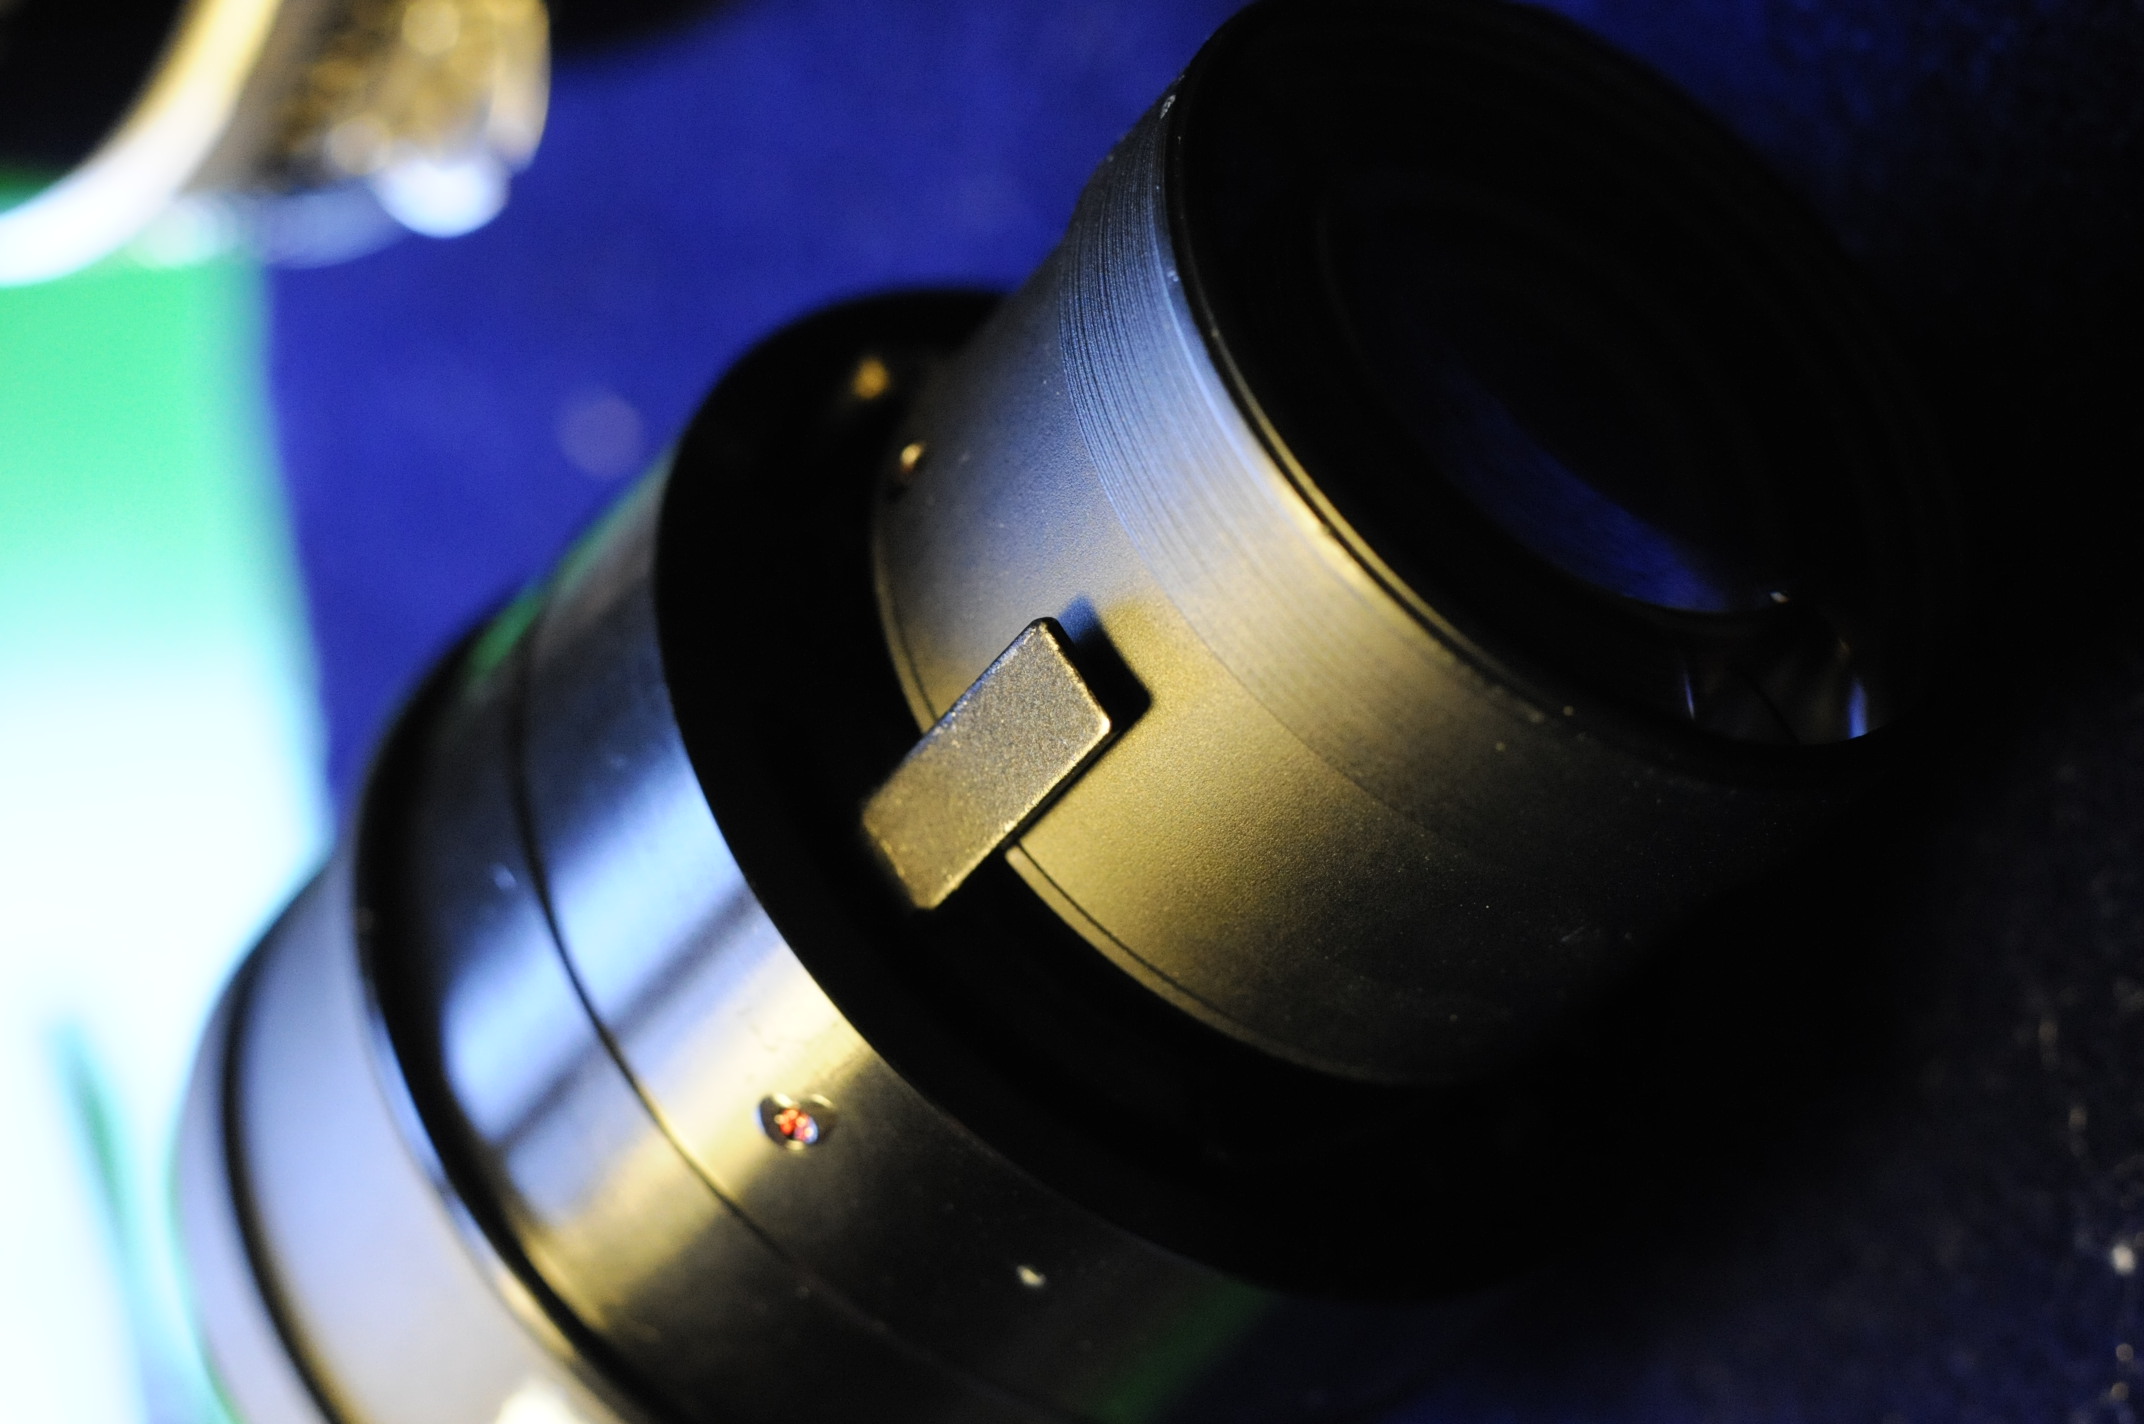
15 Put the lens group into the helicoid, alligning the screw to the slot BEFORE putting it in, don t turn it once inside, slowly lover the lens group, if you find the right position of the MALE everything will go in place all the way down. When this happens, turn SLOWLY, gently, the aperture ring on the helicoid, if you got it right it will open it up. This may recquire some trials before finding out the position for the MALE to match the FEMALE

16 Screw back the front part that holds the hood, if you look close at the end you ll be able to see the marks that where left by the 3 tiny screws, this way you can reposition the whole lens group exactly where it was...i tighten it a bit more, i think it doesn t make any difference, as the whole group moves together. Put back the 3 tiny screws and you re done!
ok...i hope it s not been already done by someone else
i opened and cleaned my Vivitar 85/1.8, my Tair 11a and my Nikkor Micro 55/3.5!
if there is some interest in those lenses i can reopen them and make a similar tutorial
best regards
tomas |
|
| Back to top |
|
 |
Attila


Joined: 24 Feb 2007
Posts: 57849
Location: Hungary
Expire: 2025-11-18
|
| Posted: Thu Oct 07, 2010 12:57 pm Post subject: |
|
|
Attila wrote:
Thank you for your excellent tutorial , a bit sad to see this lens in parts 
_________________
-------------------------------
Items on sale on Ebay
Sony NEX-7 Carl Zeiss Planar 85mm f1.4, Minolta MD 35mm f1.8, Konica 135mm f2.5, Minolta MD 50mm f1.2, Minolta MD 250mm f5.6, Carl Zeiss Sonnar 180mm f2.8
|
|
| Back to top |
|
|
indianadinos

Joined: 06 Jul 2008
Posts: 1310
Location: Toulouse, France
Expire: 2011-12-05
|
| Posted: Thu Oct 07, 2010 6:12 pm Post subject: |
|
|
indianadinos wrote:
Hi,
Thanks for sharing your great tutorial ...
Cheers
_________________
Please visit my blogs Shooting with a Pentax K10D / FF Visions
Takumar: 24/3.5, 28/3.5, 35/2, 35/3.5, 50/1.4, 55/1.8, 85/1.8, 105/2.8, 120/2.8, 135/3.5, 150/4, 200/4
Pentax-K: M28/2.8, K28/3.5, M50/1.4, A50/1.7, M50/4 Macro, K85/1.8, K105/2.8, K135/2.5, M200/4, M70-150/4
Zeiss: Flektogon 20/2.8, 20/4, 35/2.4, 35/2.8, Tessar 50/2.8, Pancolar 50/1.8, Biotar 58/2, Sonnar 135/3.5, Sonnar 180/2.8
Meyer: Primagon 35/4.5, Domiplan 50/2.8, Oreston 50/1.8, Primoplan 58/1.9, Trioplan 100/2.8, Orestor 100/2.8, Orestor 135/2.8
Schacht/Steinheil: Travenar 90/2.8, Travenon 135/4.5, Quinar 135/2.8, Quinar 135/3.5
Russian: MIR 37B, Industar 50/3.5, Helios 44M & 44M-2, Jupiter 37A
P6: Flektogon 50/4, Biometar 80/2.8, Orestor 300/4
Nikkor: Nikkor-O 35/2, Micro 55/3.5, Nikkor-S 50/1.4, Nikkor-Q 135/2.8
Fuji: EBC 28/3.5, EBC 55/3.5 Macro, EBC 135/2.5
Misc Lenses: Kiron 105/2.8 Macro, Tamron SP90/2.5
... and a few other Vivitar, Tamron, Sigma and Soligor lenses ...
|
|
| Back to top |
|
|
Himself
Joined: 01 Mar 2007
Posts: 3214
Location: Montreal
Expire: 2013-05-30
|
| Posted: Thu Oct 07, 2010 6:25 pm Post subject: |
|
|
Himself wrote:
Excellent, neat job!
Well documented!
_________________
Moderator Himself |
|
| Back to top |
|
|
martyn_bannister

Joined: 23 May 2010
Posts: 1151
|
| Posted: Thu Oct 07, 2010 7:17 pm Post subject: |
|
|
martyn_bannister wrote:
I know how long it takes to describe (and take such quality shots) of this sort of process. Many thanks for posting a valuable resource. Perhaps we should set up a database of this and similar?
The screw you had to drill out. Where did you get a replacement? Do you or anyone else know what sizes are the norm in lenses and where they can be bought from? It is common to have to do this, as well as losing screws in the carpet  |
|
| Back to top |
|
|
tomasg
Joined: 01 Nov 2009
Posts: 1135
Expire: 2014-04-28
|
| Posted: Sun Oct 10, 2010 9:06 am Post subject: |
|
|
tomasg wrote:
Well, i had to drill just one of the 3 screws (the last one), wich function is to prevent the unscrewing of the front part of the lens, i put back the other two, but even without them the front part is securly enough screwed on.
As for the spare screws...i have no idea where to order them, i guess if one does a search on the net they can be bought. There s still a watch repairman in the city i live in, i guess he can be a good supplay...
tomas |
|
| Back to top |
|
|
martyn_bannister
Joined: 23 May 2010
Posts: 1151
|
| Posted: Sun Oct 10, 2010 9:59 am Post subject: |
|
|
martyn_bannister wrote:
| tomasg wrote: |
Well, i had to drill just one of the 3 screws (the last one), wich function is to prevent the unscrewing of the front part of the lens, i put back the other two, but even without them the front part is securly enough screwed on.
As for the spare screws...i have no idea where to order them, i guess if one does a search on the net they can be bought. There s still a watch repairman in the city i live in, i guess he can be a good supplay...
tomas |
I am not sure whether lenses use metric standard or not. I think watches use a number system for their threads i.e. they are specific to watches. I won't hijack your thread, I'll post a new one. Thanks. |
|
| Back to top |
|
|
ks73
Joined: 14 Oct 2015
Posts: 45
Location: Kokkola, Finland
|
| Posted: Thu Sep 29, 2016 4:11 pm Post subject: |
|
|
ks73 wrote:
This guide is excellent! I managed to clean fungus spots from my copy. 
_________________
Kalle
Flickr: https://www.flickr.com/photos/140575793@N08/ |
|
| Back to top |
|
|
tomasg
Joined: 01 Nov 2009
Posts: 1135
Expire: 2014-04-28
|
| Posted: Fri Sep 30, 2016 7:06 am Post subject: |
|
|
tomasg wrote:
| ks73 wrote: |
| This guide is excellent! I managed to clean fungus spots from my copy. |
Your`re welcome, good that i posed this here, as i no longer have the lens! |
|
| Back to top |
|
|
56 DIN

Joined: 24 Apr 2010
Posts: 1656
Location: Germany Erbach /ODW
Expire: 2021-11-18
|
| Posted: Fri Sep 30, 2016 8:56 am Post subject: |
|
|
56 DIN wrote:
thanks a lot for the time you spend to show us how to do
at the moment my 2.5 105´s are clean, but who knows
small screws you get from opticiens or wrecking old cams/lenses
_________________
Thomas
NEX & manual lenses
Nikon & manual lenses |
|
| Back to top |
|
|
kds315*

Joined: 12 Mar 2008
Posts: 16541
Location: Weinheim, Germany
Expire: 2021-03-09
|
| Posted: Fri Sep 30, 2016 2:39 pm Post subject: |
|
|
kds315* wrote:

_________________
Klaus - Admin
"S'il vient a point, me souviendra" [Thomas Bohier (1460-1523)]
http://www.macrolenses.de for macro and special lens info
http://www.pbase.com/kds315/uv_photos for UV Images and lens/filter info
https://www.flickr.com/photos/kds315/albums my albums using various lenses
http://photographyoftheinvisibleworld.blogspot.com/ my UV BLOG
http://www.travelmeetsfood.com/blog Food + Travel BLOG
https://galeriafotografia.com Architecture + Drone photography
Currently most FAV lens(es):
X80QF f3.2/80mm
Hypergon f11/26mm
ELCAN UV f5.6/52mm
Zeiss UV-Planar f4/60mm
Zeiss UV-Planar f2/62mm
Lomo Уфар-12 f2.5/41mm
Lomo Зуфар-2 f4.0/350mm
Lomo ZIKAR-1A f1.2/100mm
Nikon UV Nikkor f4.5/105mm
Zeiss UV-Sonnar f4.3/105mm
CERCO UV-VIS-NIR f1.8/45mm
CERCO UV-VIS-NIR f4.1/94mm
CERCO UV-VIS-NIR f2.8/100mm
Steinheil Quarzobjektiv f1.8/50mm
Pentax Quartz Takumar f3.5/85mm
Carl Zeiss Jena UV-Objektiv f4/60mm
NYE OPTICAL Lyman-Alpha II f1.1/90mm
NYE OPTICAL Lyman-Alpha I f2.8/200mm
COASTAL OPTICS f4/60mm UV-VIS-IR Apo
COASTAL OPTICS f4.5/105mm UV-Micro-Apo
Pentax Ultra-Achromatic Takumar f4.5/85mm
Pentax Ultra-Achromatic Takumar f5.6/300mm
Rodenstock UV-Rodagon f5.6/60mm + 105mm + 150mm
|
|
| Back to top |
|
|
nikonpinoy
Joined: 19 Feb 2017
Posts: 1
|
| Posted: Sun Feb 19, 2017 9:26 am Post subject: |
|
|
nikonpinoy wrote:
Thank you for making this guide. I was able to clean my lens. |
|
| Back to top |
|
|
tomasg
Joined: 01 Nov 2009
Posts: 1135
Expire: 2014-04-28
|
| Posted: Sun Feb 19, 2017 12:49 pm Post subject: |
|
|
tomasg wrote:
Nice to see that it s still useful for someonne after so much time. |
|
| Back to top |
|
|
Eddie46

Joined: 05 Dec 2016
Posts: 135
Location: cardiff,UK
|
| Posted: Sun Feb 19, 2017 4:42 pm Post subject: |
|
|
Eddie46 wrote:
Those mini-grub screws are a pain on many lenses.They appear to have been 'set in' with paint or lacquer.I had some success on a Chinon lens using a tiny drop of nail varnish remover dropped of the end of a (Wooden) cocktail stick so as to minimise damage to surrounding paintwork.Leave it for a minute or two to do its work. |
|
| Back to top |
|
|
tomasg
Joined: 01 Nov 2009
Posts: 1135
Expire: 2014-04-28
|
| Posted: Sun Feb 19, 2017 5:27 pm Post subject: |
|
|
tomasg wrote:
On the Nikkors i had CLA-ed and had glue in various parts of the construction i was able to remove it with dimetil alcohol. |
|
| Back to top |
|
|
|
|
|
You cannot post new topics in this forum
You cannot reply to topics in this forum
You cannot edit your posts in this forum
You cannot delete your posts in this forum
You cannot vote in polls in this forum
|