| View previous topic :: View next topic |
| Author |
Message |
ForenSeil


Joined: 15 Apr 2011
Posts: 2726
Location: Kiel, Germany.
|
 Posted: Fri Nov 08, 2013 1:42 pm Post subject: Minolta M-Rokkor 28/2.8 spotting corrosion - Advice needed Posted: Fri Nov 08, 2013 1:42 pm Post subject: Minolta M-Rokkor 28/2.8 spotting corrosion - Advice needed |
 |
|
ForenSeil wrote:
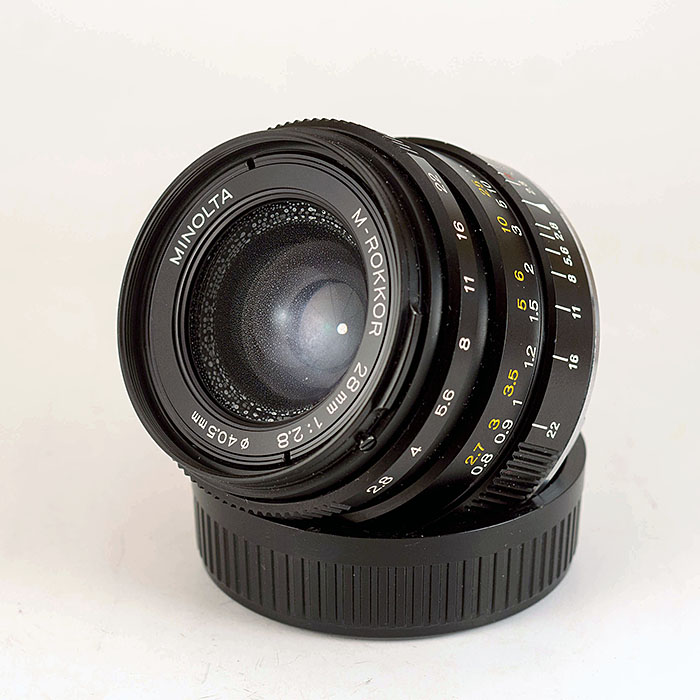
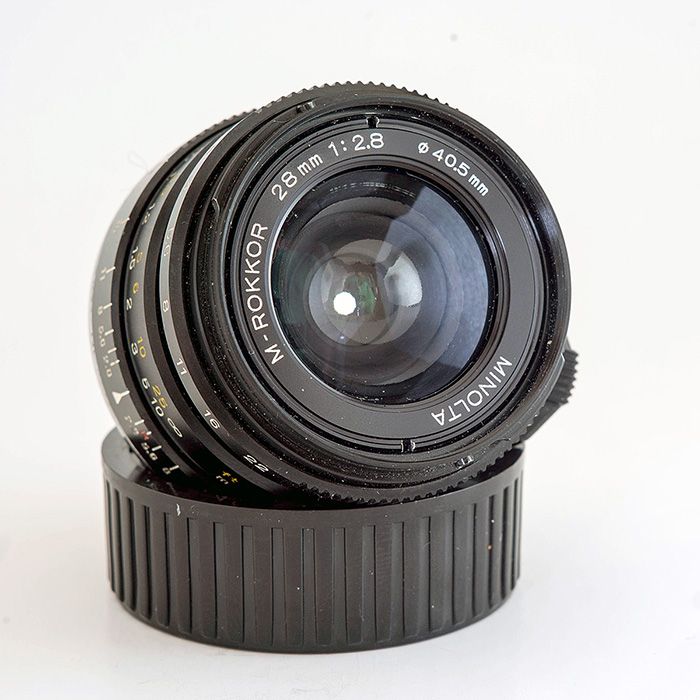
I have bought an Minolta M-Rokkor 28/2.8 in Leica-M Mount.
What a beauty! Build quality is almost Leitz-like.
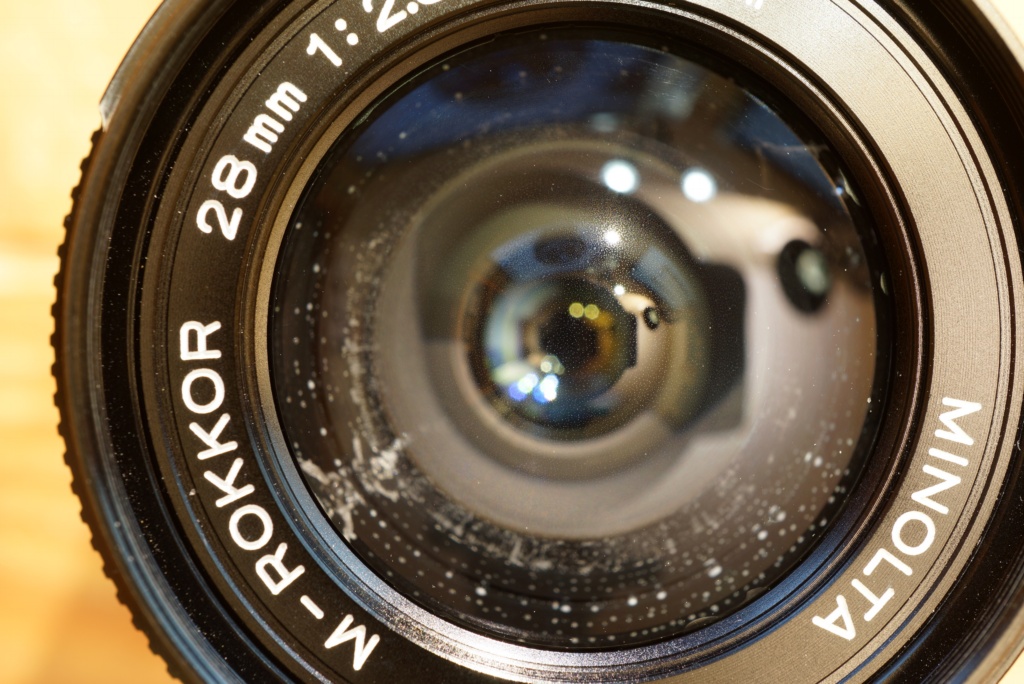
No Schneideritis, condition is VERY good, except some spotting corrosion on the rearside of the front element.
According to some guys on the web it may damage the glass if it's not removed.
According to this thread (third post) it's easy to repair and it costs about 75�
http://www.l-camera-forum.com/leica-forum/leica-collectors-historica/241026-minolta-m-rokkor-dusty-second-element.html
Here's one service which offers repair for this, together with shipment it would cost about 100� effectivly.
http://www.kamera-service.info/index.php/de/
But I wonder if the front element can be easily removed buy unsrewing the ring and cleaned without disassembling of the whole lens by an amateur like me. I have an spanner tool which could be easily modified to fit into the wholes seen pic #3
Would you risk to try it?


(on this pic it looks worse than it actually is)[list=][/list]
_________________
I'm not a collector, I'm a tester 
My camera: Sony A7+Zeiss Sonnar 55/1.8
Current favourite lenses (I have many more):
A few macro-Tominons, Samyang 12/2.8, Noritsu 50.7/9.5, Rodagon 105/5.6 on bellows, Samyang 135/2, Nikon ED 180/2.8, Leitz Elmar-R 250/4, Celestron C8 2000mm F10
Most wanted: Samyang 24/1.4, Samyang 35/1.4, Nikon 200/2 ED
My Blog: http://picturechemistry.own-blog.com/
(German language)
Last edited by ForenSeil on Fri Nov 22, 2013 1:00 pm; edited 3 times in total |
|
| Back to top |
|
 |
kuuan

Joined: 14 Jan 2008
Posts: 4572
Location: right now: Austria
Expire: 2014-12-26
|
| Posted: Fri Nov 08, 2013 4:21 pm Post subject: |
|
|
kuuan wrote:
great buy, super bargain!
Just unscrewing the name ring should allow you to take off the front glass, if the damage, need of cleaning only is there it should be very easy to do
_________________
my photos on flickr: https://www.flickr.com/photos/kuuan/collections |
|
| Back to top |
|
|
ForenSeil
Joined: 15 Apr 2011
Posts: 2726
Location: Kiel, Germany.
|
| Posted: Fri Nov 08, 2013 8:14 pm Post subject: |
|
|
ForenSeil wrote:

My spanner wrench had to be sharpened to fit into the tiny holes. Luckily my spanner wrench is made of steel and I have a very good 120 sharpening stone


DEAD END. Anything in front of the aperture seems to be glued into one block. Any Idea how to go further?
_________________
I'm not a collector, I'm a tester
My camera: Sony A7+Zeiss Sonnar 55/1.8
Current favourite lenses (I have many more):
A few macro-Tominons, Samyang 12/2.8, Noritsu 50.7/9.5, Rodagon 105/5.6 on bellows, Samyang 135/2, Nikon ED 180/2.8, Leitz Elmar-R 250/4, Celestron C8 2000mm F10
Most wanted: Samyang 24/1.4, Samyang 35/1.4, Nikon 200/2 ED
My Blog: http://picturechemistry.own-blog.com/
(German language)
Last edited by ForenSeil on Fri Nov 08, 2013 11:38 pm; edited 1 time in total |
|
| Back to top |
|
|
hoanpham
Joined: 31 Jan 2011
Posts: 2575
Expire: 2015-01-18
|
| Posted: Fri Nov 08, 2013 9:05 pm Post subject: |
|
|
hoanpham wrote:
i never have this lens, but my rokkor 35/2.8 has this kind of solid block.
when i look closely from the front, there might be possible to open up the largest element.
the inner glass elements fit inside the metal house, smallest at bottom, then close all by the largest.
i dont think it affects the image, but annoying to look at. |
|
| Back to top |
|
|
kuuan
Joined: 14 Jan 2008
Posts: 4572
Location: right now: Austria
Expire: 2014-12-26
|
| Posted: Fri Nov 08, 2013 10:28 pm Post subject: |
|
|
kuuan wrote:
I'd simply try if there aren't parts that can be screwed apart, not using the spanner but the fingers and maybe some cloth or alike to get a better grip.
_________________
my photos on flickr: https://www.flickr.com/photos/kuuan/collections |
|
| Back to top |
|
|
ForenSeil
Joined: 15 Apr 2011
Posts: 2726
Location: Kiel, Germany.
|
| Posted: Fri Nov 08, 2013 11:35 pm Post subject: |
|
|
ForenSeil wrote:
I already tried that - no chance, nothing is moving.
What do you think - keeping as is, reselling or repair (75�+shipment)?
Is it worth a try if you already have a ZM Biogon 35/2?
_________________
I'm not a collector, I'm a tester
My camera: Sony A7+Zeiss Sonnar 55/1.8
Current favourite lenses (I have many more):
A few macro-Tominons, Samyang 12/2.8, Noritsu 50.7/9.5, Rodagon 105/5.6 on bellows, Samyang 135/2, Nikon ED 180/2.8, Leitz Elmar-R 250/4, Celestron C8 2000mm F10
Most wanted: Samyang 24/1.4, Samyang 35/1.4, Nikon 200/2 ED
My Blog: http://picturechemistry.own-blog.com/
(German language)
Last edited by ForenSeil on Fri Nov 22, 2013 1:01 pm; edited 2 times in total |
|
| Back to top |
|
|
DR.JUAN

Joined: 08 Feb 2013
Posts: 661
|
| Posted: Sat Nov 09, 2013 6:08 am Post subject: |
|
|
DR.JUAN wrote:
http://www.rangefinderforum.com/forums/showthread.php?t=115677
Good luck. |
|
| Back to top |
|
|
kds315*

Joined: 12 Mar 2008
Posts: 16541
Location: Weinheim, Germany
Expire: 2021-03-09
|
| Posted: Sat Nov 09, 2013 9:55 am Post subject: |
|
|
kds315* wrote:
I had that lens and similar spots. Used it, was great, did not get worse over the years.
Some people just bugs that kind of stuff and they need to get "rid of it" no matter what.
I for my side know that I'm human and have a lot of flaws, still "work pretty well", so
I give that same credit to the stuff I use... (as long as it works) 
_________________
Klaus - Admin
"S'il vient a point, me souviendra" [Thomas Bohier (1460-1523)]
http://www.macrolenses.de for macro and special lens info
http://www.pbase.com/kds315/uv_photos for UV Images and lens/filter info
https://www.flickr.com/photos/kds315/albums my albums using various lenses
http://photographyoftheinvisibleworld.blogspot.com/ my UV BLOG
http://www.travelmeetsfood.com/blog Food + Travel BLOG
https://galeriafotografia.com Architecture + Drone photography
Currently most FAV lens(es):
X80QF f3.2/80mm
Hypergon f11/26mm
ELCAN UV f5.6/52mm
Zeiss UV-Planar f4/60mm
Zeiss UV-Planar f2/62mm
Lomo Уфар-12 f2.5/41mm
Lomo Зуфар-2 f4.0/350mm
Lomo ZIKAR-1A f1.2/100mm
Nikon UV Nikkor f4.5/105mm
Zeiss UV-Sonnar f4.3/105mm
CERCO UV-VIS-NIR f1.8/45mm
CERCO UV-VIS-NIR f4.1/94mm
CERCO UV-VIS-NIR f2.8/100mm
Steinheil Quarzobjektiv f1.8/50mm
Pentax Quartz Takumar f3.5/85mm
Carl Zeiss Jena UV-Objektiv f4/60mm
NYE OPTICAL Lyman-Alpha II f1.1/90mm
NYE OPTICAL Lyman-Alpha I f2.8/200mm
COASTAL OPTICS f4/60mm UV-VIS-IR Apo
COASTAL OPTICS f4.5/105mm UV-Micro-Apo
Pentax Ultra-Achromatic Takumar f4.5/85mm
Pentax Ultra-Achromatic Takumar f5.6/300mm
Rodenstock UV-Rodagon f5.6/60mm + 105mm + 150mm
|
|
| Back to top |
|
|
kuuan
Joined: 14 Jan 2008
Posts: 4572
Location: right now: Austria
Expire: 2014-12-26
|
| Posted: Sat May 17, 2014 4:18 pm Post subject: |
|
|
kuuan wrote:
ForenSeil may I ask, have you done somthing about the lens, did you succeed in repairing it or did you have it repaired?
I also got this lens. It has both Schneideritis and spotting corrosion to a high degree. IQ certainly suffers and it needs repair.
thank you, andreas
_________________
my photos on flickr: https://www.flickr.com/photos/kuuan/collections |
|
| Back to top |
|
|
kuuan
Joined: 14 Jan 2008
Posts: 4572
Location: right now: Austria
Expire: 2014-12-26
|
| Posted: Tue Jul 29, 2014 10:28 am Post subject: |
|
|
kuuan wrote:
mine is a quite severe case, besides the bigger white points around the rim there also are small white points throughout the front lens.
Photos suffer from rather strong ghosting, specially at wider apertures, only @f8 it's getting acceptable. My lens certainly needs repair!
| ForenSeil wrote: |
DEAD END. Anything in front of the aperture seems to be glued into one block. Any Idea how to go further? |
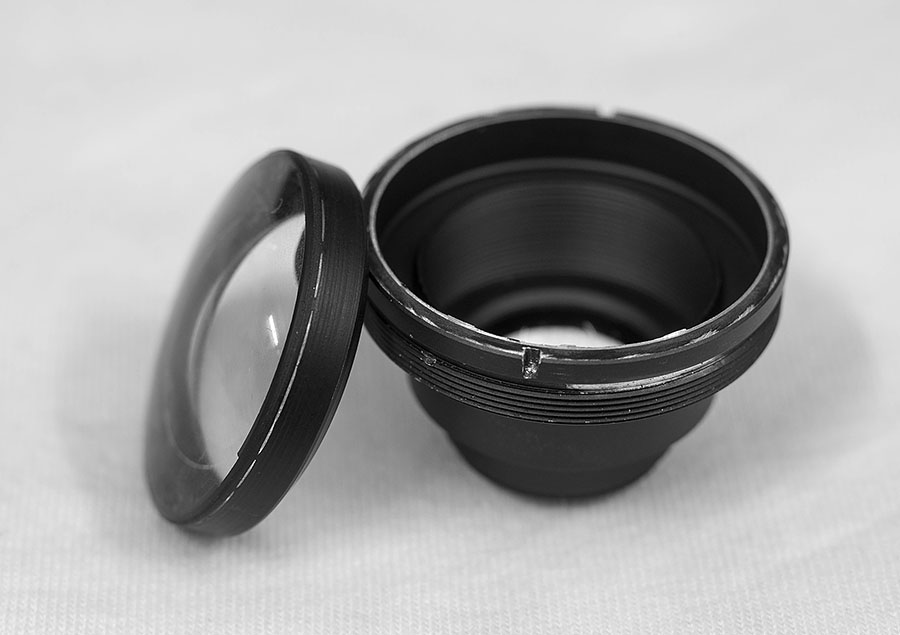
Just visited my 'lens repair man'. I have seen him doing similar things before and he did not hesitate to take the front block apart. After inspecting the housing with a strong magnifying glass he cut off a very thin metal ring from the outer rim of the housing with a very fine saw, see yourself: ( not for the fainthearted )

he did that very carefully and precisely, finally a full, very thin metal ring came off. ( forgot to take a photo of the ring he cut off, amazing how he achieved cutting it so that it came off in one solid, but very thin piece ) The front lens still did not fall out but stayed fit inside it's housing of which it had to be pulled out using a suction cup tool. This guarantees that it easily can be reinstalled in it's exact position ( which, for now, I also did )

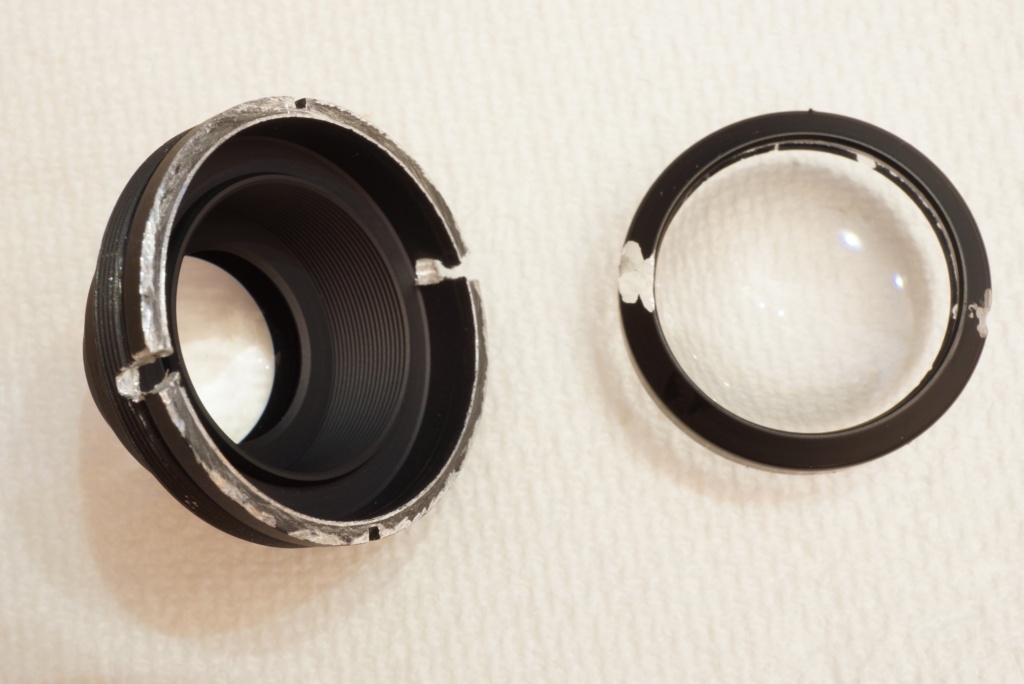
almost there, I thought, but then came the bad surprise: cleaning the rear of the removed front element did not change anything!
see the front element:


oviously there still is no access to the Schneideritis and as I had to find out neither to where the small white points in the center are located. I only can think of this front element actually not being a single element as reported e.g. at Olypedia ( the only place where I had found the lens scheme of this lens )

( source: http://olypedia.de/Leica_CL )
but that it must be a group of two elements that have a free space in between them and this is where the problems are located. The elements thus could not be cemented together 'entirely' but only around their outer rim leaving, for the bigger part, a free space between them. Or is there any other possible explanation? All the spots coming from faulty cementation?? Is that feasable? But certainly it couldn't be just a single element, right?
Originally I had taken the white line around the outer rim as another indication that it was made out of two elements, after reinstalling it I realized that most likely it is a mark from cutting the housing though

my lens repair man has done separating cemented elements but he is very hesitant to do it. He says he would have 50/50% chance to have success and the glass might end up broken. Actually he does not want to do it, explained me his technique how he would try to separate them, wanting me to dare it instead. He then would have the material to recement them and do that. hm..
his technique to separate them sounds quite obscure but also logical, however I am really hesitant to try, therefore I ask you guys:
what do you think?:
do you also think that the shown defects, the Schneideritis around the edge and the additional white points in the middle of the lens, necessarily mean that there actually must be two elements with free space in between them?
and that they will be cemented or glued together only at their outer rim?
and most importantly:
if so, how best to separate them??
if not so, which other explanation and suggestion for solution do you have?
if there are really two elements that are clued or cemented together at their very outer ring only separating them should not be all 'that' difficult, at least less than separating fully cemented elements, right? I should say that to my lens repair man, though I guess that he knows it
But first shall wait for your opinions and suggestions!
thank you,
cheers, andreas
_________________
my photos on flickr: https://www.flickr.com/photos/kuuan/collections |
|
| Back to top |
|
|
itsdoable
Joined: 04 Dec 2009
Posts: 4
Location: Canada
|
| Posted: Sat Sep 13, 2014 8:13 pm Post subject: |
|
|
itsdoable wrote:
I just stumbled on this thread as I was looking for ideas on how to dismantle the front cell. As the last post was only a month and a half old, this might be useful. I have not dismantled the front cell yet, I need to find a proper fine saw.
If the front element is a doublet, you should see 3 (or 4) reflections, a small flash light in a dark room will tell you pretty quickly. I only see 3 elements in 2 groups in the front cell.
The white spots (Schneideritis) is under the black flocking paint around the edge of the element, the result of contamination on the glass and oxidation of the paint. You have to remove the paint (without affecting the AR coating) to remove the white spots (I have not done that yet, so I'm not sure what solvents to use, but you can also sand it off). Once you have done that, check to see if you still have spots in the center, they may be reflections of the spots on the edge.
My problem is condensate on the inside of the front element. It only has a few mild white spots. |
|
| Back to top |
|
|
kuuan
Joined: 14 Jan 2008
Posts: 4572
Location: right now: Austria
Expire: 2014-12-26
|
| Posted: Sun Sep 14, 2014 7:46 am Post subject: |
|
|
kuuan wrote:
Hi and welcome to the forum.
Removing the paint is very easy, I just scratched it off. With the paint removed it was easy to see that the front "element' in deed only is a single element, not a cemented group of two. without the paint the glass still shows spots because of etching, but if repainted propperly ( which is not easy and I have not done yet, only tried parts ) the white points aroud the rim should have disapeared.
The small spots throughtout the middle of the lens are very difficult to come by though! They are all etchings of the glass resp. possibly only it's coating. I have polished quite some hours by now, trying various glass and metal polishers, which made the lens, if looked at it from the front, look clean by now, but if looked at it from the back and with flashlight shining through one can still see them quite prominentely. Performance is improved but unfortunately still far from good, not sharp, worse at wider apertures.
So far i have only polished by hand. I will try again, most likely with cerium oxide, once I have access to a dremel or similar machine
_________________
my photos on flickr: https://www.flickr.com/photos/kuuan/collections |
|
| Back to top |
|
|
itsdoable
Joined: 04 Dec 2009
Posts: 4
Location: Canada
|
| Posted: Mon Sep 22, 2014 3:01 am Post subject: |
|
|
itsdoable wrote:
A little cruder than the above, but I did not have as fine a saw.


A close inspection after cutting off the ring shows that it really did not have to be cut off, as the part that was removed does not hold the element (but it does make it a lot easier to access). The lens appears to be glued in, or has a very tight fit, but the aluminium sleeve is open at both ends, and the front element and rear doublet are simply pushed in and fixed buy a cement.
Question for Kuuan: how did you pull the element out of the sleeve, the suction cups I have cannot pull it out, and prying has not budged it. |
|
| Back to top |
|
|
kuuan
Joined: 14 Jan 2008
Posts: 4572
Location: right now: Austria
Expire: 2014-12-26
|
| Posted: Mon Sep 22, 2014 5:41 am Post subject: |
|
|
kuuan wrote:
| itsdoable wrote: |
...
Question for Kuuan: how did you pull the element out of the sleeve, the suction cups I have cannot pull it out, and prying has not budged it. |
congrats on the successful cut, it looks as if you did it very well, the fine ring that is left over looks very much like the one that was left over after cutting mine.
As for how to take out the front glass now..hm..it should be possible now. I did not do it, it was my lens repair man who also cut the housing, but I was with him when he did it, and he successfully had used a suction tool.
_________________
my photos on flickr: https://www.flickr.com/photos/kuuan/collections |
|
| Back to top |
|
|
animaux

Joined: 30 Nov 2014
Posts: 1
Location: Weimar, Germany
|
| Posted: Sun Nov 30, 2014 6:22 pm Post subject: |
|
|
animaux wrote:
@itsdoable Did you succeed in removing the front element?
I was not able to remove it at all, even after sawing off the notorious ring too. I suspect my front element was opened before and somebody glued it back into place.
I had sent a macro image of the haze on the back of my front element to www.kamera-service.info in the Netherlands. They replied �It looks like the front element has severe �pitting corrosion�. That cannot be helped/repaired. And indeed, there are no longer spare lens units available. (�) In this case, we think it is not worthwhile to do something about it.�
That left me less frightened about using more drastic measures :) especially since the coating on the outside of the front element was severely damaged since i bought it as well.
In the end I widened the hole in the side to about 5mm with a drill. This way I was able to access the inside and clean it with pure alcohol. The result is quite good. Effects are hardly visible in the images anymore. So it might not have been that severe case of pitting corrosion after all. I still need to cover the newly exposed aluminum with matte black paint though. |
|
| Back to top |
|
|
itsdoable
Joined: 04 Dec 2009
Posts: 4
Location: Canada
|
| Posted: Sat Dec 20, 2014 6:38 pm Post subject: |
|
|
itsdoable wrote:
I should post an update, clearly I don't visit here often enough.
There was no way I could get the front element out of that cell with a suction cup device (I tried a few), although in retrospect, if I had a custom jig and cup designed for this specific lens cell, and maybe some knowledge of the bond used on the element (both front and rear elements are bonded into the aluminium tube, the ring really did not have to be cut off), maybe I could have gotten it off.
So I went the next step, I drilled down past the front element so I could pry out the element from below. It took a bit of force before it popped loose, and then I could work it out. In the process, I chipped the edge of the element (and in retrospect, I believe I can now repeat this without chipping the lens).

The chip on the edge does not extend into the optical surface, so despite the ugliness, it's optically still functional.
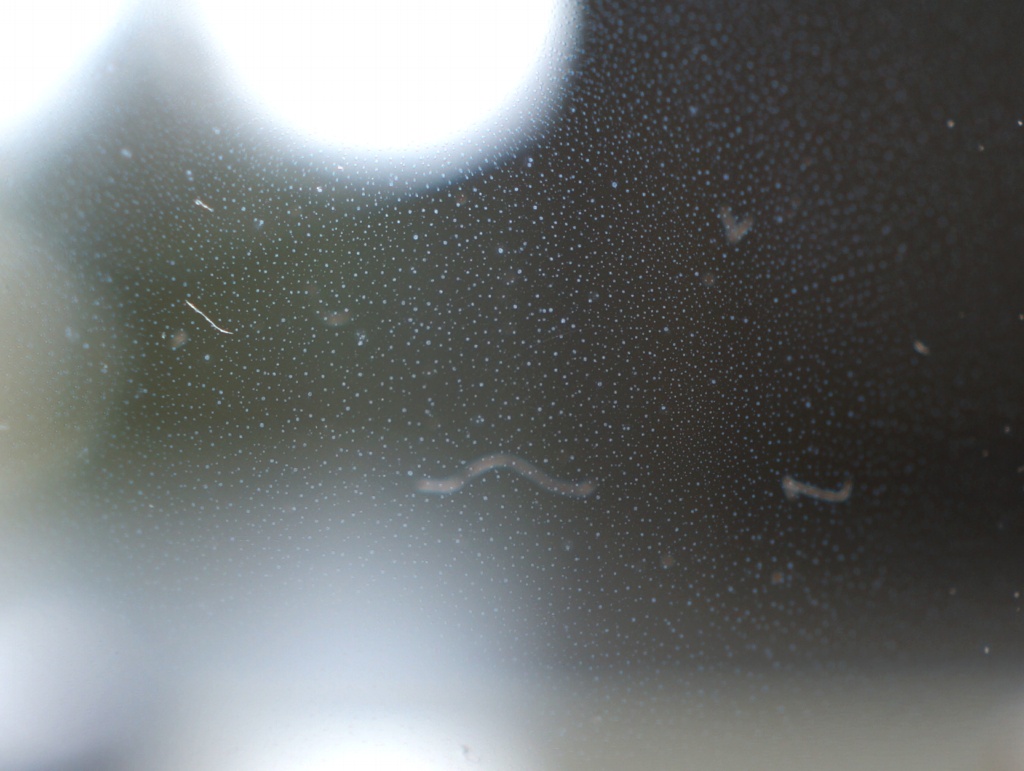
The inside of this element was covered with tiny droplets of liquid that was slightly caustic to the touch - I wish I had taken a proper picture of that before I wiped them off. In the center of each droplet was a tiny pit or white deposit. I was hoping that it was a deposit, but that does not seem to be the case, I tried various cleaning and reducing agents (they resembled calcium/oxide like deposits) but I'm not sure they had much effect, they may have reduced the spots a bit. This is the best close up I have of what the pits look like after 2 cleanings:

This is what the element looks like after the lens was reassembled, you can see the chip on the lower left edge where my blackening did not completely hide it. You can see some of the pits on the inside of the front element.

Here is a sample image taken with the lens, it has slightly reduced contrast, but still much better than it was prior to the cleaning.

@animaux: My front cell did not have a hole in the side. Maybe that is why the liquid droplets remained. I'm sure that the liquid would eventually evaporate as leave the circular pits that ForenSeil and others have. Of course my cell now has 2 holes... |
|
| Back to top |
|
|
kuuan
Joined: 14 Jan 2008
Posts: 4572
Location: right now: Austria
Expire: 2014-12-26
|
| Posted: Mon Jun 29, 2015 10:19 am Post subject: |
|
|
kuuan wrote:
finally got some "Cerium Oxide', polished the effected surface and successfully removed the white spots and repainted the black, outer rim.
unlike comments found on the net my impression had been that the lens, with the white spots, lacked sharpness and I believe that now, after removing the spots, generally both sharpness and contrast are improved.
However removing the white spots most likely actually was removing the coating from the rear of the front lens that had gone bad.
As a result, first test photos show, now it easily blooms around highlights, specially when used against light.
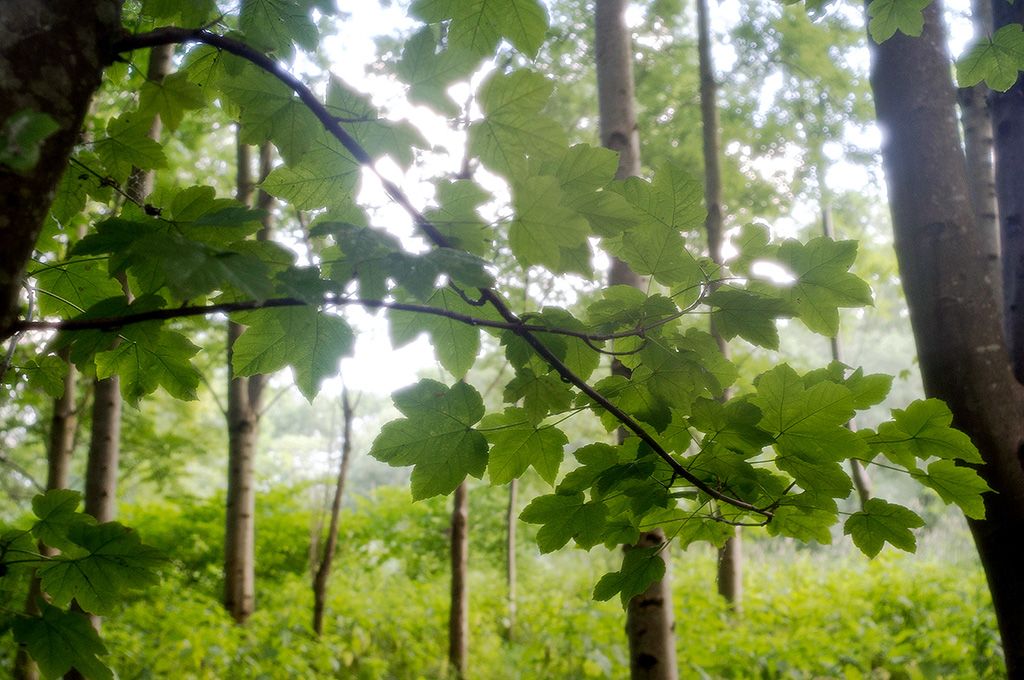
a crop of the 'sensitive' area:
The blooming certainly effects general usefulness of the lens, but I also like the effect and will try to use it.
another trial shot 'not' against light
Untitled by Andreas, on Flickr
_________________
my photos on flickr: https://www.flickr.com/photos/kuuan/collections |
|
| Back to top |
|
|
kds315*
Joined: 12 Mar 2008
Posts: 16541
Location: Weinheim, Germany
Expire: 2021-03-09
|
| Posted: Mon Jun 29, 2015 10:55 am Post subject: |
|
|
kds315* wrote:
Well CeO2 polishing obviously also removed the coating, expectedly. No wonder you have that effect now.
_________________
Klaus - Admin
"S'il vient a point, me souviendra" [Thomas Bohier (1460-1523)]
http://www.macrolenses.de for macro and special lens info
http://www.pbase.com/kds315/uv_photos for UV Images and lens/filter info
https://www.flickr.com/photos/kds315/albums my albums using various lenses
http://photographyoftheinvisibleworld.blogspot.com/ my UV BLOG
http://www.travelmeetsfood.com/blog Food + Travel BLOG
https://galeriafotografia.com Architecture + Drone photography
Currently most FAV lens(es):
X80QF f3.2/80mm
Hypergon f11/26mm
ELCAN UV f5.6/52mm
Zeiss UV-Planar f4/60mm
Zeiss UV-Planar f2/62mm
Lomo Уфар-12 f2.5/41mm
Lomo Зуфар-2 f4.0/350mm
Lomo ZIKAR-1A f1.2/100mm
Nikon UV Nikkor f4.5/105mm
Zeiss UV-Sonnar f4.3/105mm
CERCO UV-VIS-NIR f1.8/45mm
CERCO UV-VIS-NIR f4.1/94mm
CERCO UV-VIS-NIR f2.8/100mm
Steinheil Quarzobjektiv f1.8/50mm
Pentax Quartz Takumar f3.5/85mm
Carl Zeiss Jena UV-Objektiv f4/60mm
NYE OPTICAL Lyman-Alpha II f1.1/90mm
NYE OPTICAL Lyman-Alpha I f2.8/200mm
COASTAL OPTICS f4/60mm UV-VIS-IR Apo
COASTAL OPTICS f4.5/105mm UV-Micro-Apo
Pentax Ultra-Achromatic Takumar f4.5/85mm
Pentax Ultra-Achromatic Takumar f5.6/300mm
Rodenstock UV-Rodagon f5.6/60mm + 105mm + 150mm
|
|
| Back to top |
|
|
kuuan
Joined: 14 Jan 2008
Posts: 4572
Location: right now: Austria
Expire: 2014-12-26
|
| Posted: Mon Jun 29, 2015 10:59 am Post subject: |
|
|
kuuan wrote:
| kds315* wrote: |
| Well CeO2 polishing obviously also removed the coating, expectedly. No wonder you have that effect now. |
right Klaus, which is about what I had written, thank's for expounding. Still performance imo is improved, or in other words, in case the entire surface of the front lens is heavily effected I'd recommend the treatment
Untitled by Andreas, on Flickr
_________________
my photos on flickr: https://www.flickr.com/photos/kuuan/collections |
|
| Back to top |
|
|
kuuan
Joined: 14 Jan 2008
Posts: 4572
Location: right now: Austria
Expire: 2014-12-26
|
| Posted: Sun Dec 20, 2015 8:38 am Post subject: |
|
|
kuuan wrote:
repainted the outer rim once more, that improved the lens a bit further, blooming still there but reduced, I call it "leicable glow"
 Untitled by Andreas, on Flickr Untitled by Andreas, on Flickr
 Untitled by Andreas, on Flickr Untitled by Andreas, on Flickr
 Untitled by Andreas, on Flickr Untitled by Andreas, on Flickr
 Untitled by Andreas, on Flickr Untitled by Andreas, on Flickr
_________________
my photos on flickr: https://www.flickr.com/photos/kuuan/collections |
|
| Back to top |
|
|
ForenSeil
Joined: 15 Apr 2011
Posts: 2726
Location: Kiel, Germany.
|
| Posted: Sun Dec 20, 2015 4:28 pm Post subject: |
|
|
ForenSeil wrote:
I've never seen such a strong glow caused by bad coating.
Maybe front- and rear elements are not 100% parallel?
Btw., you can also use chromium oxide (ingriedient in the paste you can buy for stropping straight razors or as pigment for oil-based dyes, naturally ~0,3-1µm) or better diamond lapping spray/paste (0,5µm/0,25µm) instead of Cer(IV)oxide (~1µm), both are finer and diamond is by far most effective
(Sidenote, I've tried many lapping sprays, powders and pastes for extreme sharpening of hardened high-quality carbon steels - avoid cheap diamond lapping pastes from Ebay like HK-Tools etc., they are crap which could harm your lens(!), but a "quite cheap" source of highest quality diamond paste+spray is Abradia-PS.com(for Europe only) )
_________________
I'm not a collector, I'm a tester
My camera: Sony A7+Zeiss Sonnar 55/1.8
Current favourite lenses (I have many more):
A few macro-Tominons, Samyang 12/2.8, Noritsu 50.7/9.5, Rodagon 105/5.6 on bellows, Samyang 135/2, Nikon ED 180/2.8, Leitz Elmar-R 250/4, Celestron C8 2000mm F10
Most wanted: Samyang 24/1.4, Samyang 35/1.4, Nikon 200/2 ED
My Blog: http://picturechemistry.own-blog.com/
(German language) |
|
| Back to top |
|
|
kuuan
Joined: 14 Jan 2008
Posts: 4572
Location: right now: Austria
Expire: 2014-12-26
|
| Posted: Sun Dec 20, 2015 5:02 pm Post subject: |
|
|
kuuan wrote:
thank you very much for all the info regarding polish!
| ForenSeil wrote: |
I've never seen such a strong glow caused by bad coating.
Maybe front- and rear elements are not 100% parallel? |
is it so bad, also in the last samples?
does this mean that glow is typically produced by misalignment? if so this is important knowledge
the two surfaces of the front lens that go into the housing are painted and I had repainted them. Unevenness of thickness of paint could be responsible for misalignment.
I wonder if polishing itself, regardless of coating but because of the material lost in the process, the change of thickness of the glass however minor it may be, would make a lens glow?
_________________
my photos on flickr: https://www.flickr.com/photos/kuuan/collections |
|
| Back to top |
|
|
ForenSeil
Joined: 15 Apr 2011
Posts: 2726
Location: Kiel, Germany.
|
| Posted: Thu Dec 24, 2015 3:09 pm Post subject: |
|
|
ForenSeil wrote:
| kuuan wrote: |
thank you very much for all the info regarding polish!
| ForenSeil wrote: |
I've never seen such a strong glow caused by bad coating.
Maybe front- and rear elements are not 100% parallel? |
is it so bad, also in the last samples?
does this mean that glow is typically produced by misalignment? if so this is important knowledge
the two surfaces of the front lens that go into the housing are painted and I had repainted them. Unevenness of thickness of paint could be responsible for misalignment.
I wonder if polishing itself, regardless of coating but because of the material lost in the process, the change of thickness of the glass however minor it may be, would make a lens glow? |
It don't know if typical but theoretically possible - I once heavily missaligned an Industar 26m in it glowed extremly - was actually quite funny to use afterwards.
To the second question, I don't know how many µm polished away are actually making a difference - I think it depends on the lens design (which I don't understand in such lenses).
_________________
I'm not a collector, I'm a tester
My camera: Sony A7+Zeiss Sonnar 55/1.8
Current favourite lenses (I have many more):
A few macro-Tominons, Samyang 12/2.8, Noritsu 50.7/9.5, Rodagon 105/5.6 on bellows, Samyang 135/2, Nikon ED 180/2.8, Leitz Elmar-R 250/4, Celestron C8 2000mm F10
Most wanted: Samyang 24/1.4, Samyang 35/1.4, Nikon 200/2 ED
My Blog: http://picturechemistry.own-blog.com/
(German language) |
|
| Back to top |
|
|
kuuan
Joined: 14 Jan 2008
Posts: 4572
Location: right now: Austria
Expire: 2014-12-26
|
| Posted: Thu Dec 24, 2015 3:35 pm Post subject: |
|
|
kuuan wrote:
thank you very much "Forenseil' to come back to answer.
coming back to this thread and looking at my own photos of the lens when freshly taken apart I noticed that I had forgotten to repaint one of the surfaces! Immediately I did that, and now it seems to glow less again
Misalignement seems not to be the problem, the fit in it's housing is very, very tight.
here some latest samples:
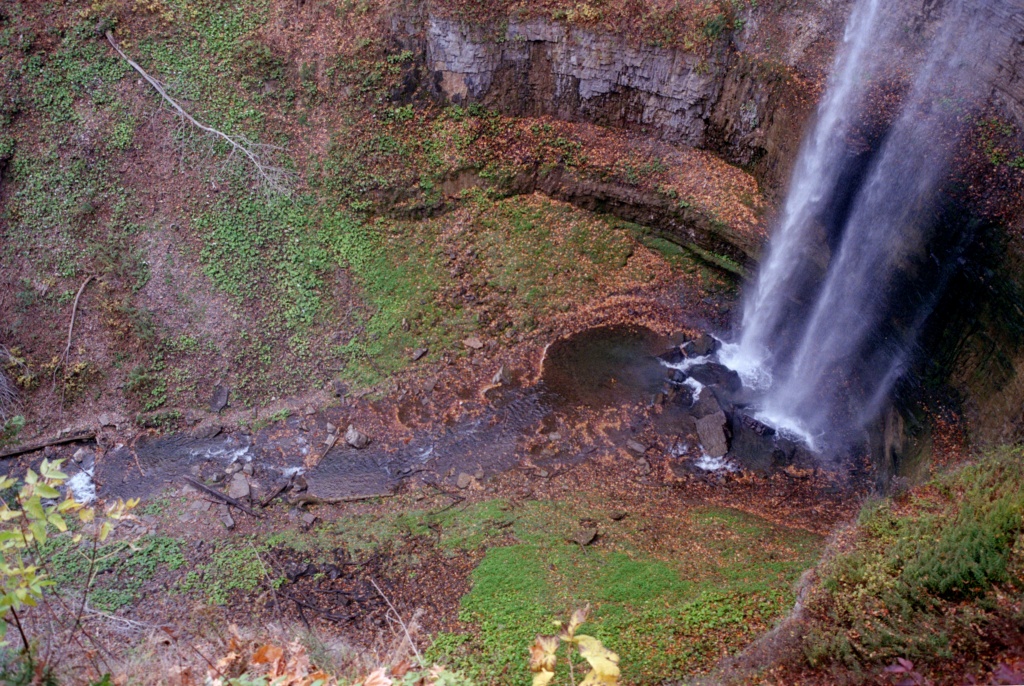
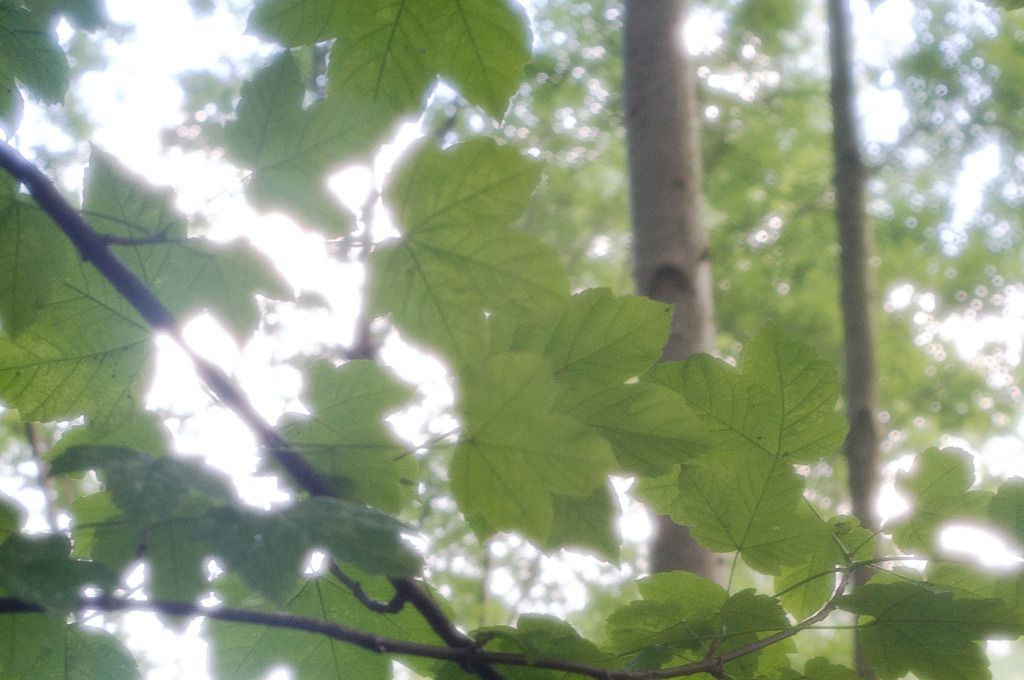
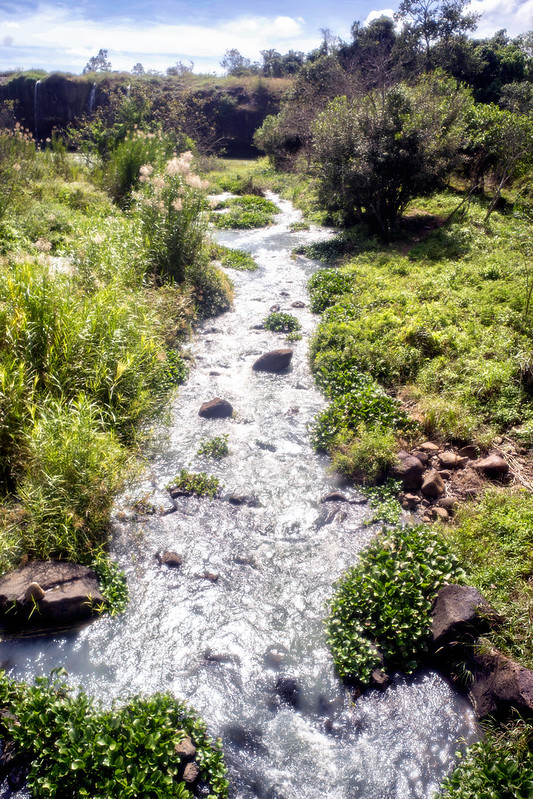
 Dray Nur waterfall by Andreas, on Flickr Dray Nur waterfall by Andreas, on Flickr
a similar photo I also had taken the the M-Rokkor 2/40, and the 40mm handled the highlights of the reflecting sun on the water quite a bit better
 Untitled by Andreas, on Flickr Untitled by Andreas, on Flickr
but that also was quite an extreme situation and generally I like the photos it gives me, just I must be aware of some limitations.
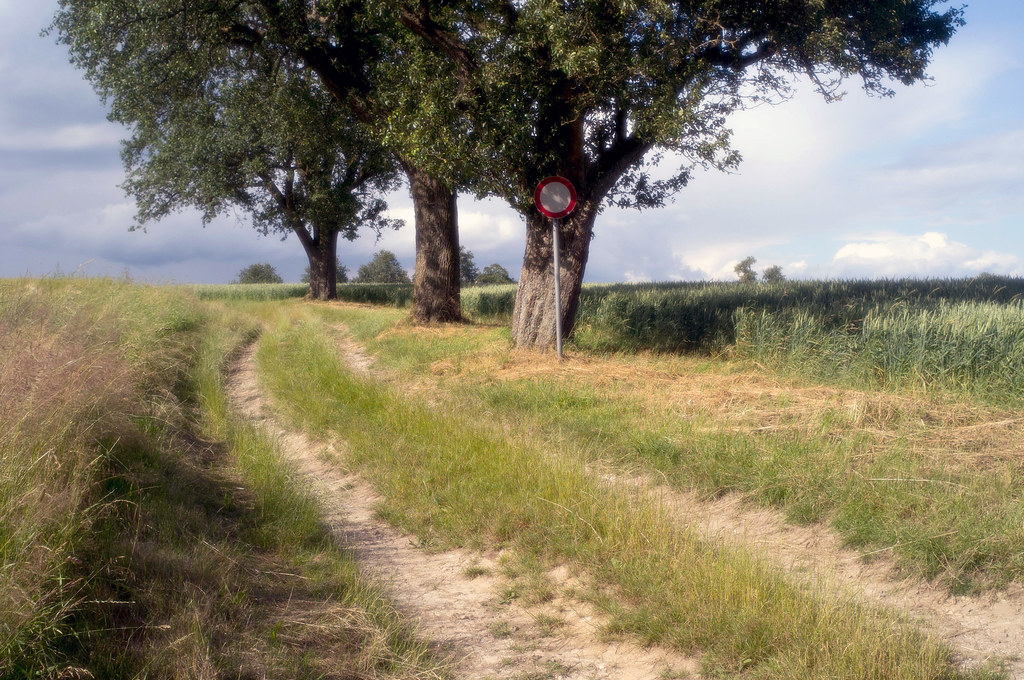
Not 100% sure that this was the 28mm, could have been the 40mm (?), if with the 28mm then this is probably one of my better pics with it where it proves to be behaving quite well
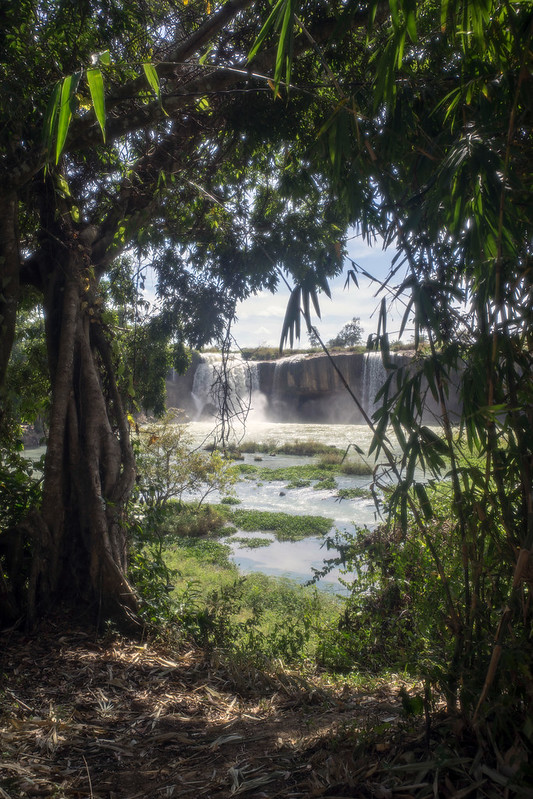 Dray Nur waterfall by Andreas, on Flickr Dray Nur waterfall by Andreas, on Flickr
cheers, andreas
_________________
my photos on flickr: https://www.flickr.com/photos/kuuan/collections |
|
| Back to top |
|
|
kuuan
Joined: 14 Jan 2008
Posts: 4572
Location: right now: Austria
Expire: 2014-12-26
|
| Posted: Sat Dec 26, 2015 8:32 am Post subject: |
|
|
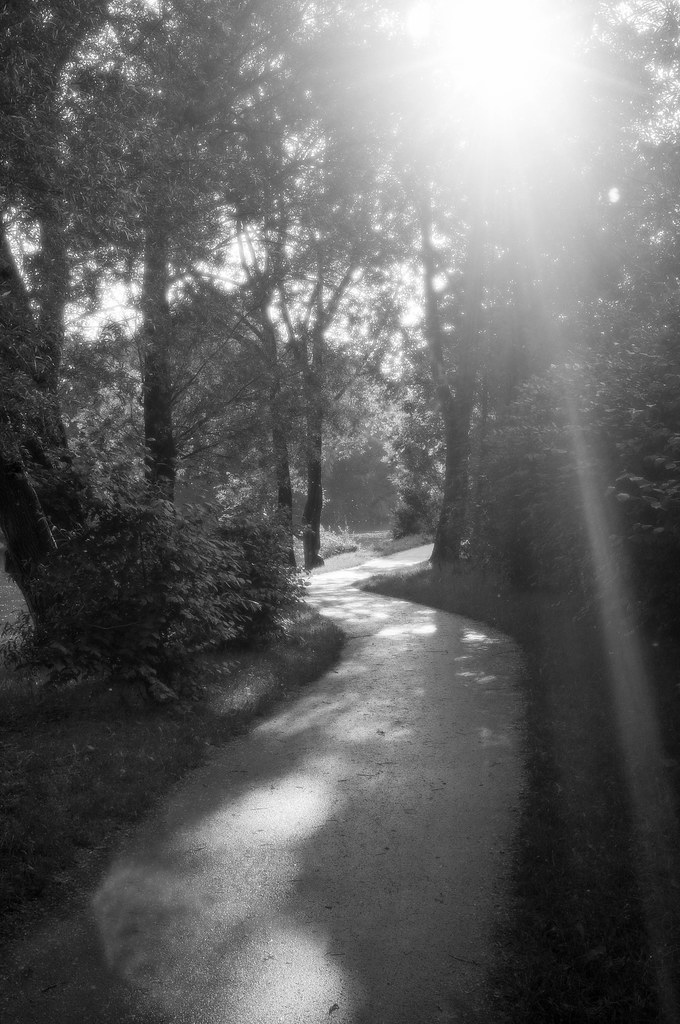
kuuan wrote:
of this one I know for sure that it was taken with the 2.8/28
 Khai Doan Pagoda by Andreas, on Flickr Khai Doan Pagoda by Andreas, on Flickr
_________________
my photos on flickr: https://www.flickr.com/photos/kuuan/collections |
|
| Back to top |
|
|
|
|