| View previous topic :: View next topic |
| Author |
Message |
dbmn
Joined: 02 Feb 2015
Posts: 5
|
 Posted: Mon Feb 02, 2015 9:31 pm Post subject: Cleaning Nikkor 135 2.0 AiS (many images) Posted: Mon Feb 02, 2015 9:31 pm Post subject: Cleaning Nikkor 135 2.0 AiS (many images) |
 |
|
dbmn wrote:
Hi all,
this is my first post in this Forum. I have been a lurker for a long time and decided that today is the day that I will register and share my experiences with the disassebling and cleaning of a Nikkor 135 2.0 AiS that I recently bought.
The Lens was in a bad shape and it was sold as "defective" and "for parts" but I didnt mind and bought it anyway to have some fun with it. On the other hand it was quite cheap, which was nice.
What was defective:
- Apperture Ring didnt work
- Focus was very stiff
- Seller said that there is Fungus (I cannot confirm that so far - it appeared to be just some smudge)
So I decided to take it apart, clean it and put it back together.
Oh and before i forget: dont try this at home, your lens could take serious damage and I am not responsible for of it.
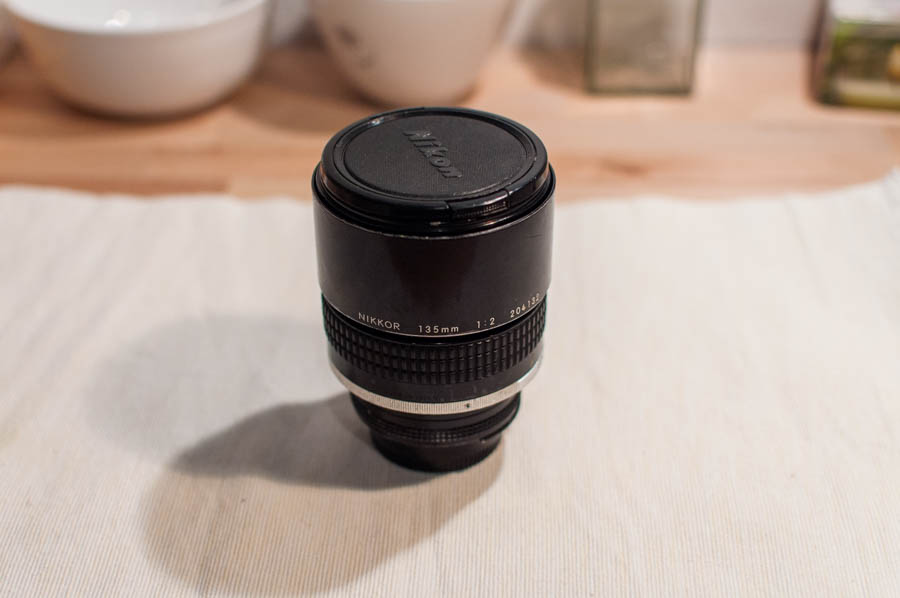
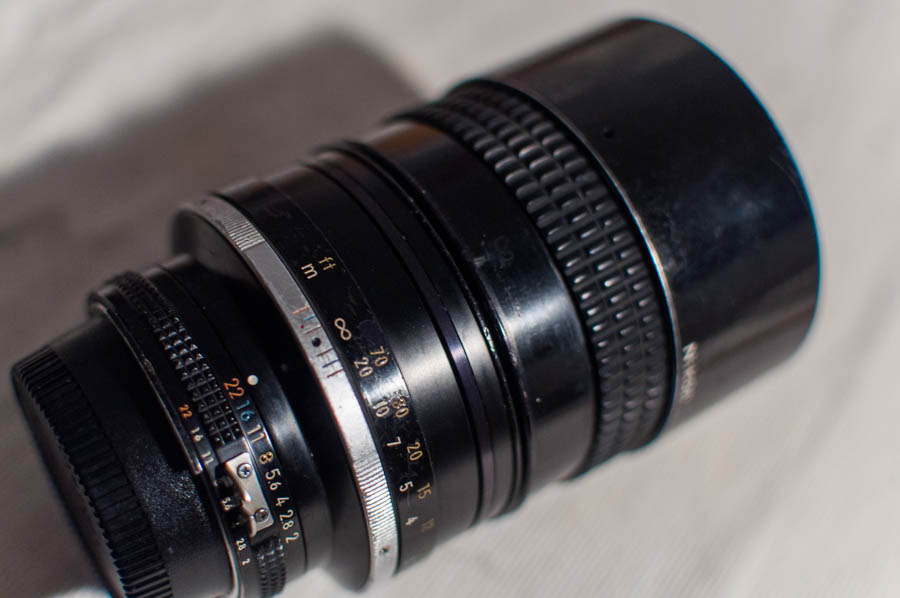
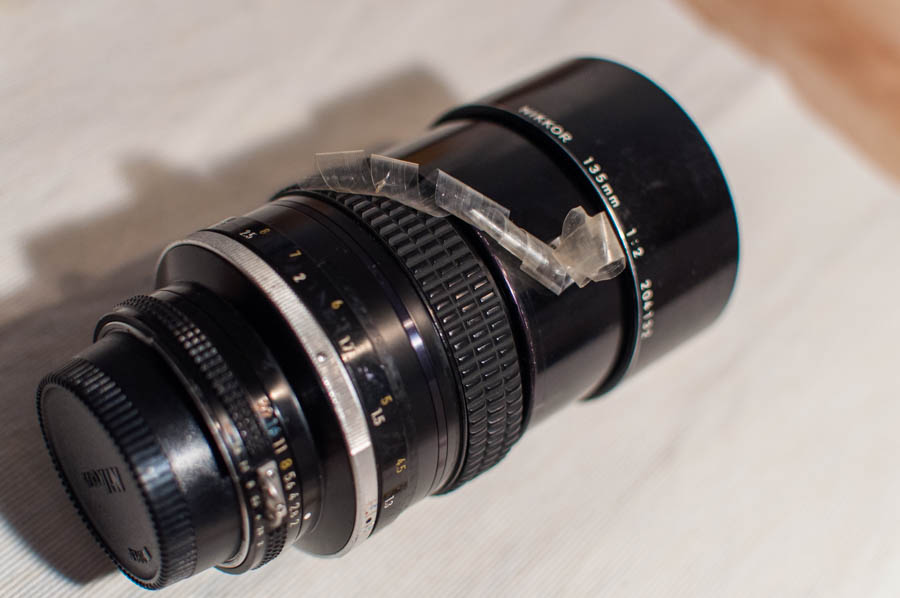
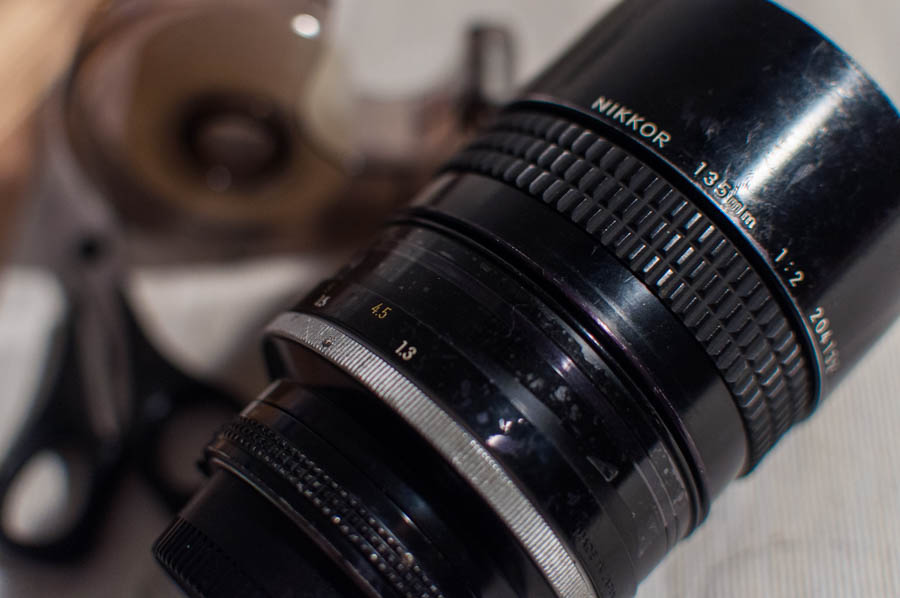
Here can you see the lens before disassebling.

In the beginning I thought the apperture blades would be the problem with the non-turing apperture ring - but i was wrong as it turned out.

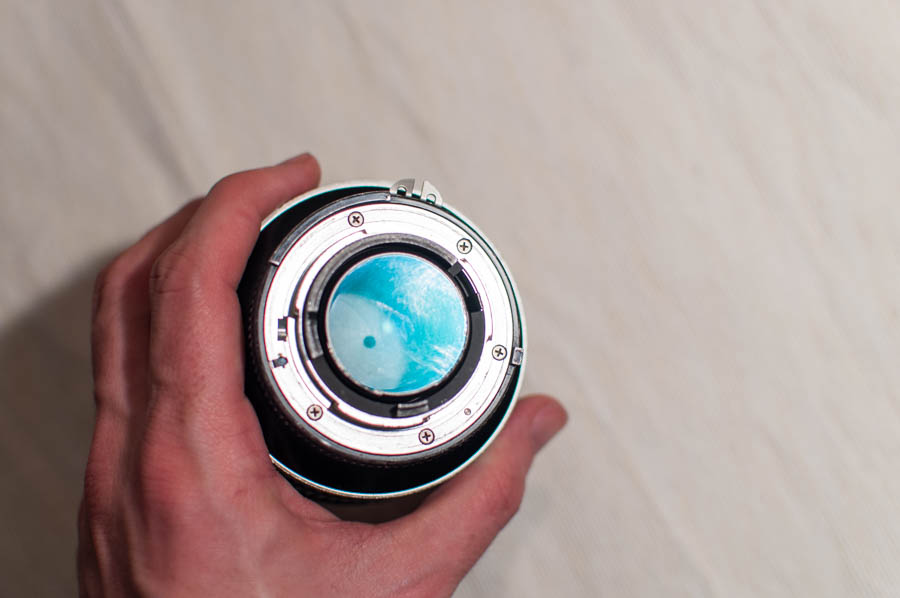
The back-element of the lens seemed to have quite some scratches. Luckily they all went away using q-tips and ethanol. Judging by the color of the q-tip after cleaing I would say a nice mixture of very fine dirt particles and greasy fingermarks.

Before disassembly I marked the infinity point on the front element. Goal was to have it at the same point after the assembly. To mark the focus point i used a normal pencil and wrote directly on the lens barrel.
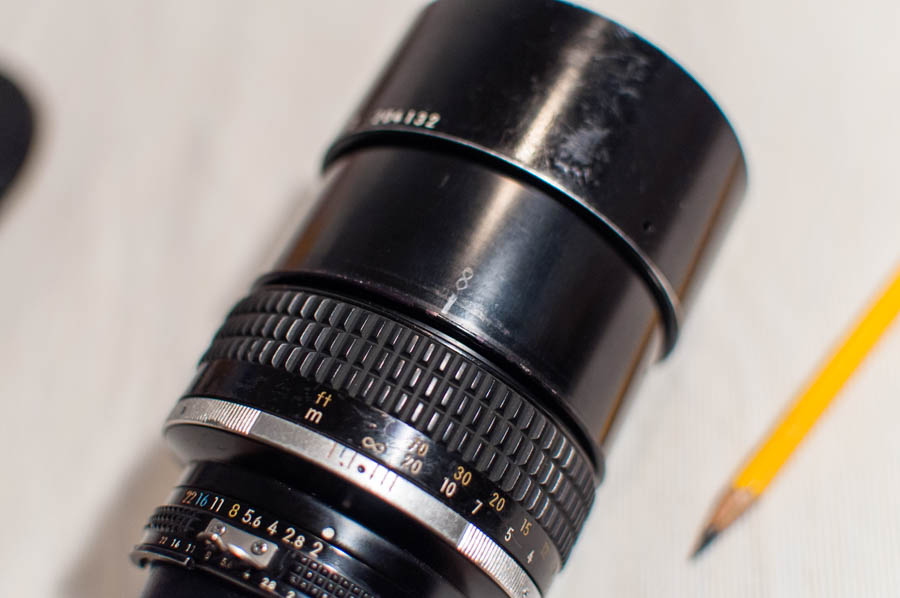
I did the same with the close focus point. In the end I can say that this marking was not necessary but I felt that it wouldn't hurt to have it.

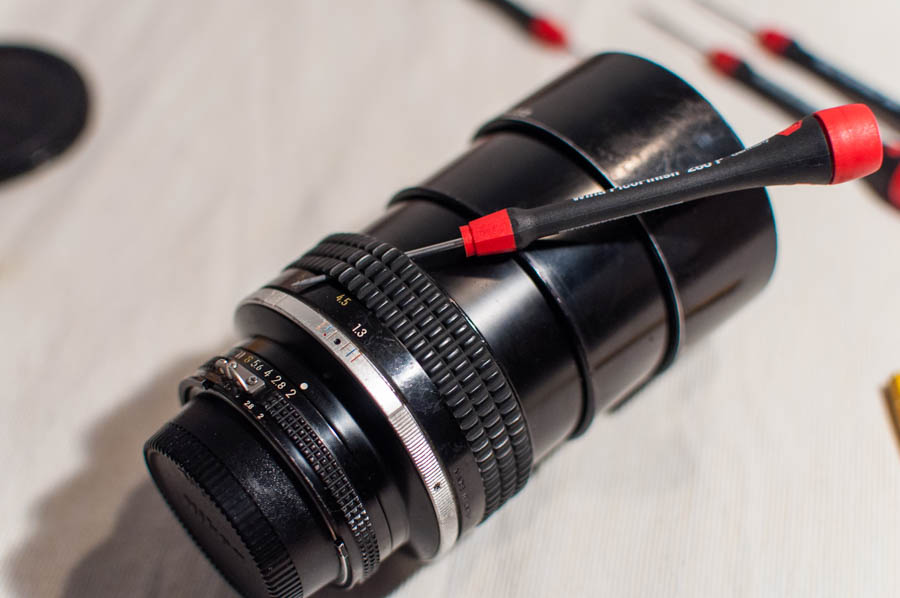
Now the interesting part: In the first step of disassembly i removed the rubber focusing ring with a small screwdriver.

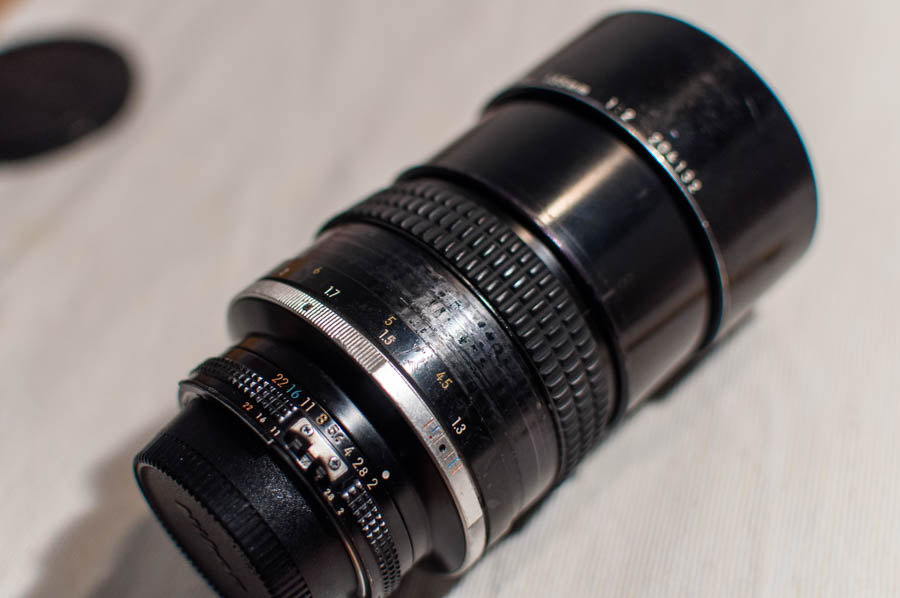
Below the rubber focusing ring, you can find tape that holds the lens together. Here could be a funny joke about cheap tape and expensive lenses.

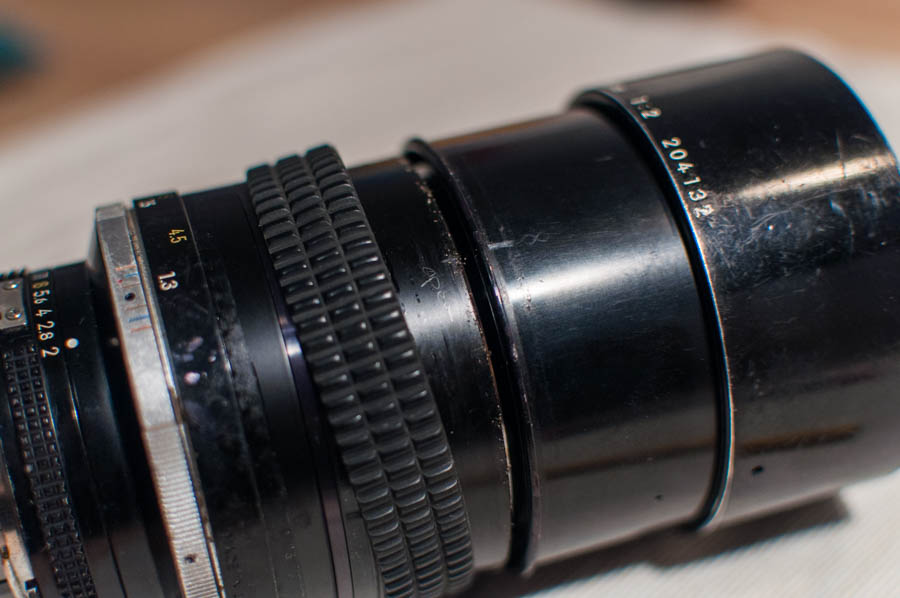
When the tape is removed, you can see the bluish ring that separates the rear element from the focusing unit.
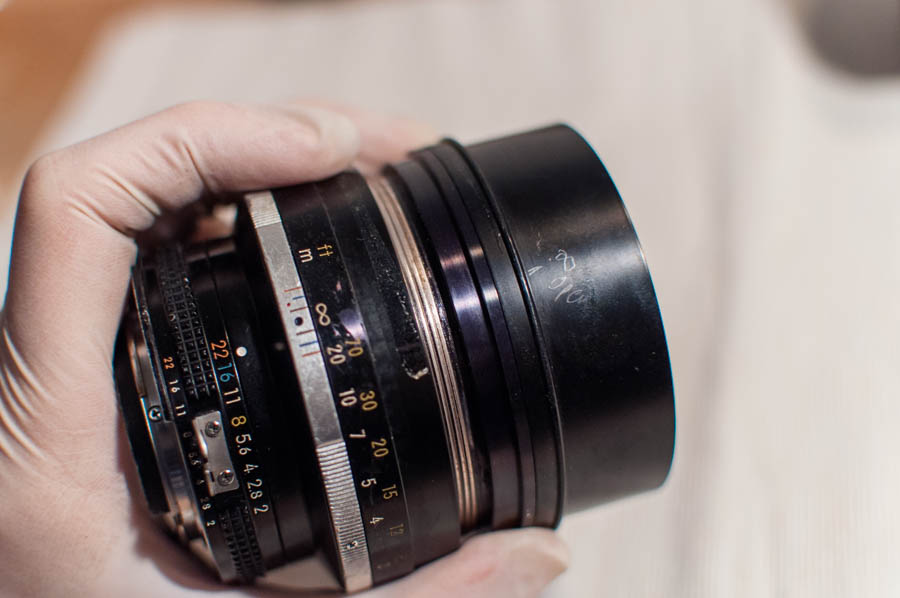
I turned the front element and marked the spot where the previous infinity mark on the front element let go of the focusing unit.
Here you can see both parts of the helicoids. I'm sorry for the picture quality. I was very excited and my hands where shaky and simply didn't care about the picture quality at the point. But you should get the idea of the helicoids nevertheless.

In the next step I removed the back element from the focusing element by turning. Same as above i marked the point where the infinity mark was, when both parts disconected.
Did you notice the gloves? So far i learned that wearing gloves at any step of dismantling greatly simplifies the cleaing of the remains of my own fingerprints.
In the last part you can see the reason for the non-movable apperture ring and stiff focusing. This lens spent quite some time on beaches or very sandy areas.
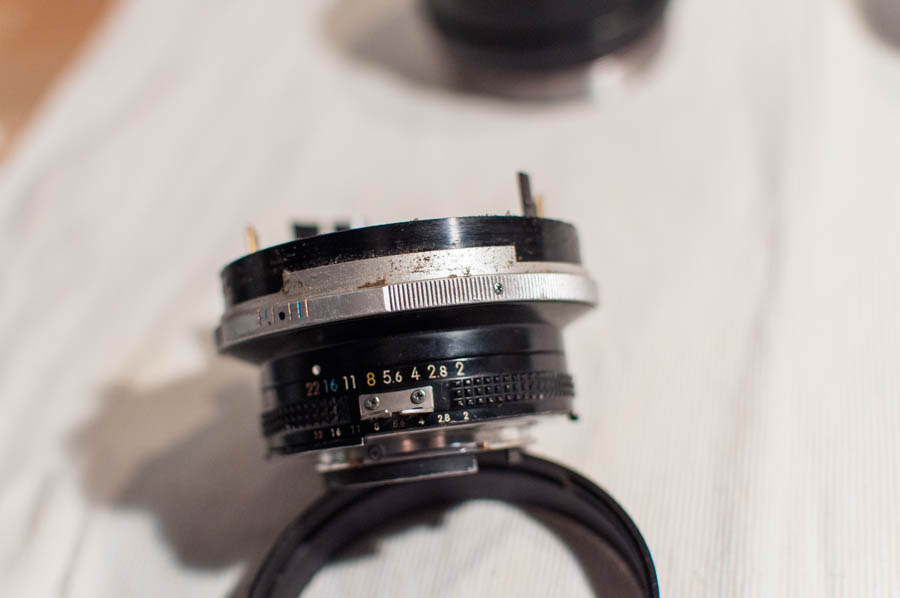
So i removed the sand from the lens using a air-blower, cloths and lots of q-tips.
When I was happy with the result, I reassembled it again and the apperture ring works like a charm. The focusing is a lot better than before, but in the process of cleaning i removed quite a bit of the old grease. So my next step will be to take it apart againg, regrease it and make it like new again (which reminds my of a stiff AiS 105 2.5 that is lying around somewhere).
I will document the greasing - but as the grease arrives only in mid February (i cheaped out on the shipping) you guys need to be patient.
On a sidenote: Reassembling the lens again took more than twice as long as disassembling it. The main point is that the middle "focusing element" needs to have about 2 turns leeway from the rear element. Reason for this is, that by adding the front element on the focusing element again you will tigthen the focusing/rear mechanics.
I hope you enjoyed my post. It was the second lens I disassembled and i am very open for any tips, ideas or suggestions.
Michael |
|
| Back to top |
|
 |
sceptic

Joined: 01 Jun 2013
Posts: 255
|
| Posted: Tue Feb 03, 2015 8:20 am Post subject: Re: Cleaning Nikkor 135 2.0 AiS (many images) |
|
|
sceptic wrote:
Great post! Your first post can�t contain images (anti-spam feature of the forum) so by quoting you, they show up. Welcome to the forum!
| dbmn wrote: |
Hi all,
this is my first post in this Forum. I have been a lurker for a long time and decided that today is the day that I will register and share my experiences with the disassebling and cleaning of a Nikkor 135 2.0 AiS that I recently bought.
The Lens was in a bad shape and it was sold as "defective" and "for parts" but I didnt mind and bought it anyway to have some fun with it. On the other hand it was quite cheap, which was nice.
What was defective:
- Apperture Ring didnt work
- Focus was very stiff
- Seller said that there is Fungus (I cannot confirm that so far - it appeared to be just some smudge)
So I decided to take it apart, clean it and put it back together.
Oh and before i forget: dont try this at home, your lens could take serious damage and I am not responsible for of it.
Here can you see the lens before disassebling.
In the beginning I thought the apperture blades would be the problem with the non-turing apperture ring - but i was wrong as it turned out.
The back-element of the lens seemed to have quite some scratches. Luckily they all went away using q-tips and ethanol. Judging by the color of the q-tip after cleaing I would say a nice mixture of very fine dirt particles and greasy fingermarks.
Before disassembly I marked the infinity point on the front element. Goal was to have it at the same point after the assembly. To mark the focus point i used a normal pencil and wrote directly on the lens barrel.
I did the same with the close focus point. In the end I can say that this marking was not necessary but I felt that it wouldn't hurt to have it.
Now the interesting part: In the first step of disassembly i removed the rubber focusing ring with a small screwdriver.
Below the rubber focusing ring, you can find tape that holds the lens together. Here could be a funny joke about cheap tape and expensive lenses.
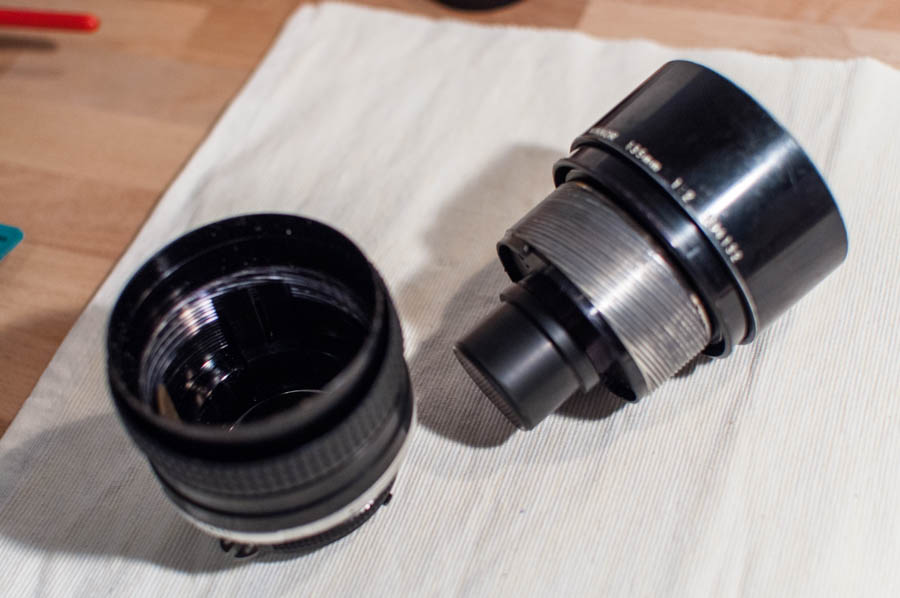
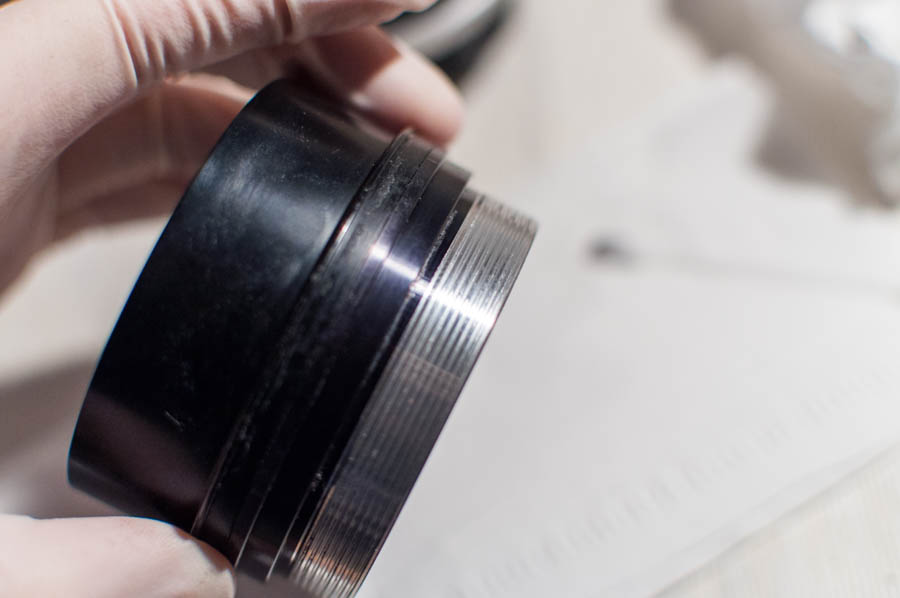
When the tape is removed, you can see the bluish ring that separates the rear element from the focusing unit.
I turned the front element and marked the spot where the previous infinity mark on the front element let go of the focusing unit.
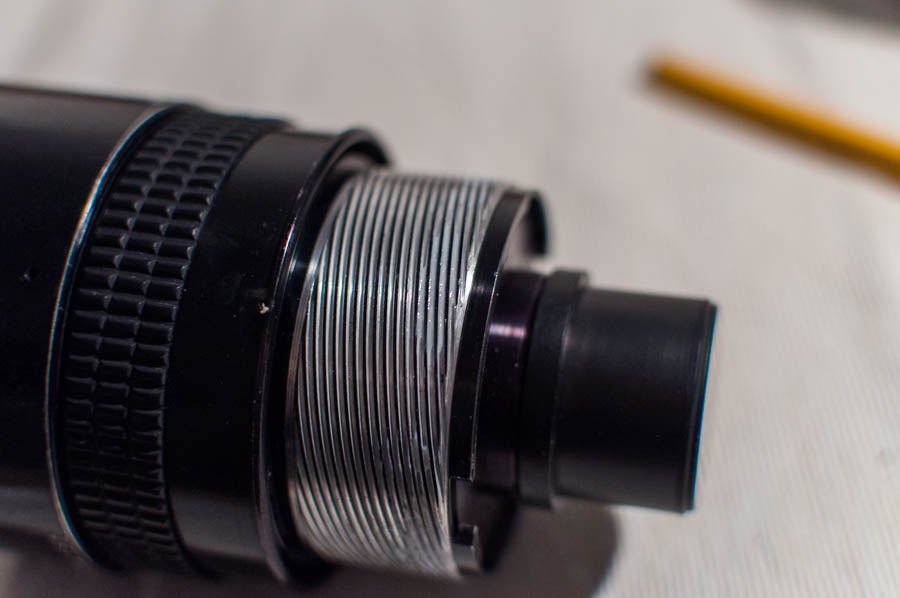
Here you can see both parts of the helicoids. I'm sorry for the picture quality. I was very excited and my hands where shaky and simply didn't care about the picture quality at the point. But you should get the idea of the helicoids nevertheless.
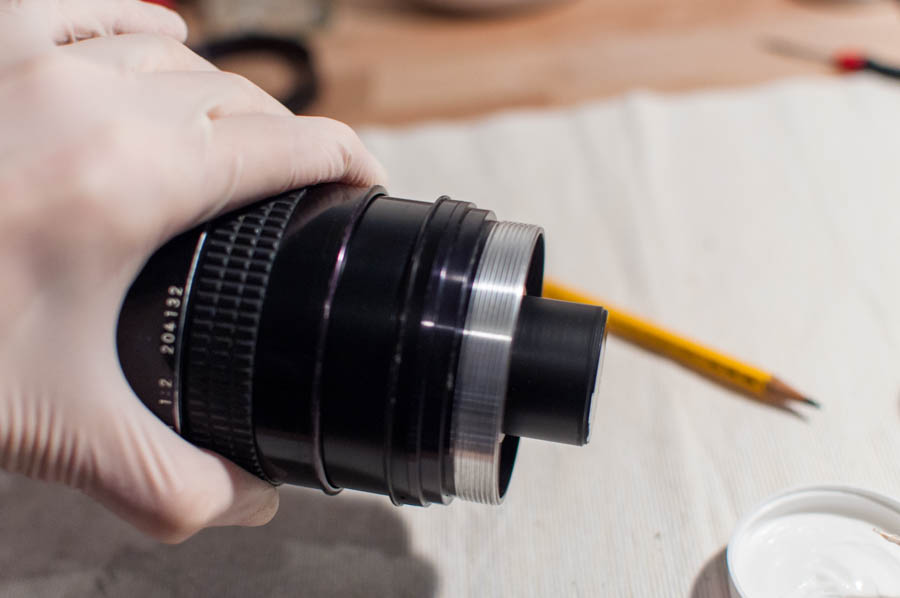
In the next step I removed the back element from the focusing element by turning. Same as above i marked the point where the infinity mark was, when both parts disconected.
Did you notice the gloves? So far i learned that wearing gloves at any step of dismantling greatly simplifies the cleaing of the remains of my own fingerprints.
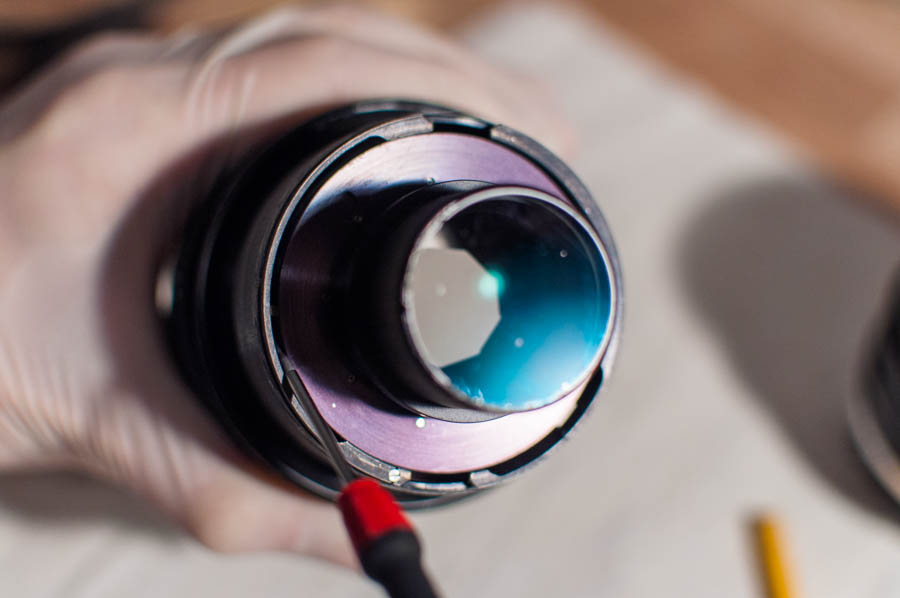
In the last part you can see the reason for the non-movable apperture ring and stiff focusing. This lens spent quite some time on beaches or very sandy areas.
So i removed the sand from the lens using a air-blower, cloths and lots of q-tips.
When I was happy with the result, I reassembled it again and the apperture ring works like a charm. The focusing is a lot better than before, but in the process of cleaning i removed quite a bit of the old grease. So my next step will be to take it apart againg, regrease it and make it like new again (which reminds my of a stiff AiS 105 2.5 that is lying around somewhere).
I will document the greasing - but as the grease arrives only in mid February (i cheaped out on the shipping) you guys need to be patient.
On a sidenote: Reassembling the lens again took more than twice as long as disassembling it. The main point is that the middle "focusing element" needs to have about 2 turns leeway from the rear element. Reason for this is, that by adding the front element on the focusing element again you will tigthen the focusing/rear mechanics.
I hope you enjoyed my post. It was the second lens I disassembled and i am very open for any tips, ideas or suggestions.
Michael |
_________________
Sony A7R and wildly varying flora of lenses |
|
| Back to top |
|
|
hoanpham

Joined: 31 Jan 2011
Posts: 2575
Expire: 2015-01-18
|
| Posted: Tue Feb 03, 2015 8:32 am Post subject: |
|
|
hoanpham wrote:
Thank you Michael.
I have a few nikkor but haven't time to disassemble yet. Very useful info for me. |
|
| Back to top |
|
|
dbmn
Joined: 02 Feb 2015
Posts: 5
|
| Posted: Wed Feb 11, 2015 9:02 pm Post subject: |
|
|
dbmn wrote:
As promised I am back with re-greasing the same lens. I couldn't wait to do this, because the grease I ordered in the US arrived today (im from Europe).
So here is what i did.
First I disassembled my lens again, as shown above....
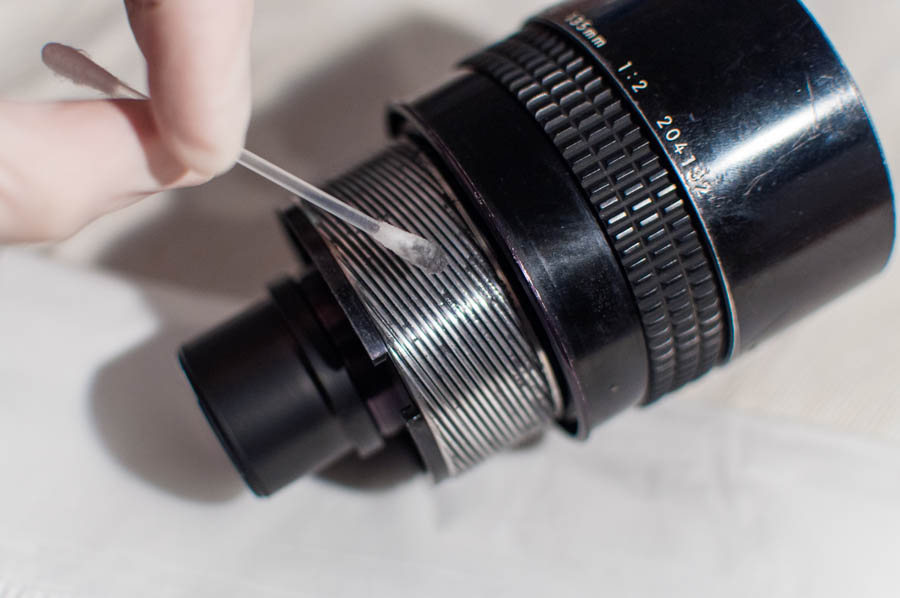
Then I started take off the remaining grease on the bearing of the lens with a cotton swab and some cleaning petrol
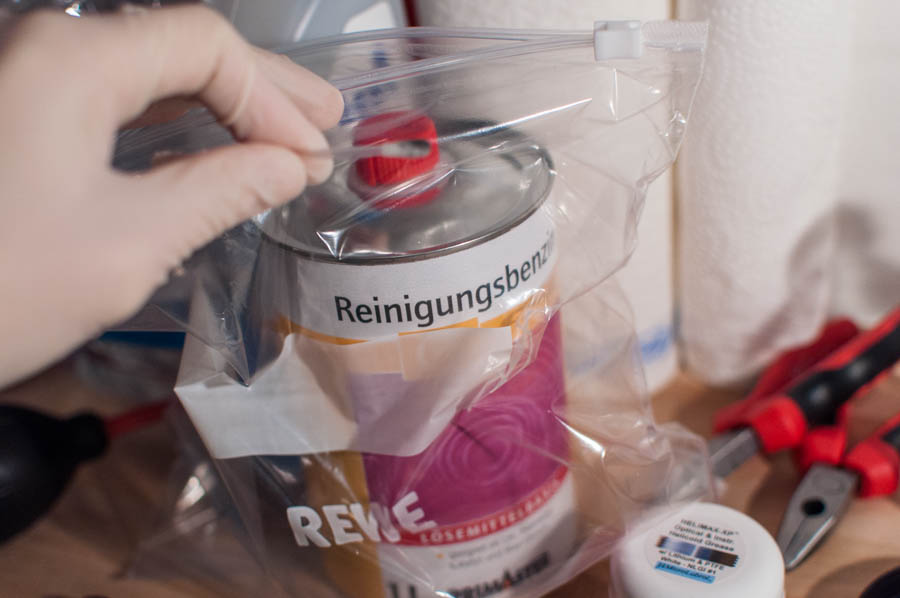
Here is a picture of the cleaning petrol, if you want to know what i used (check out the safety remarks at the end of the post on handling that)
After the cotton swab I used a Kleenex tissue to clean what remained from the bearings
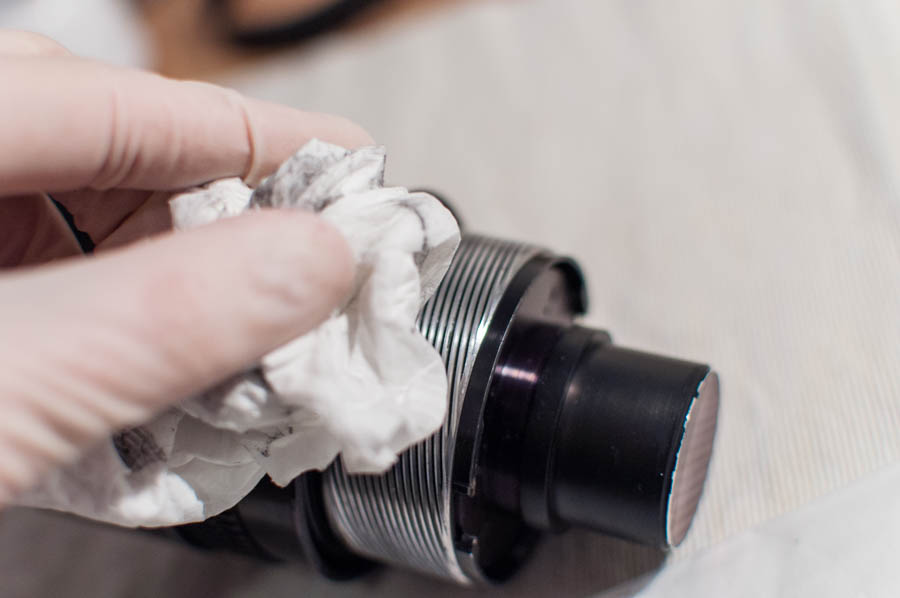
here you can see the clean bearings of the middle part
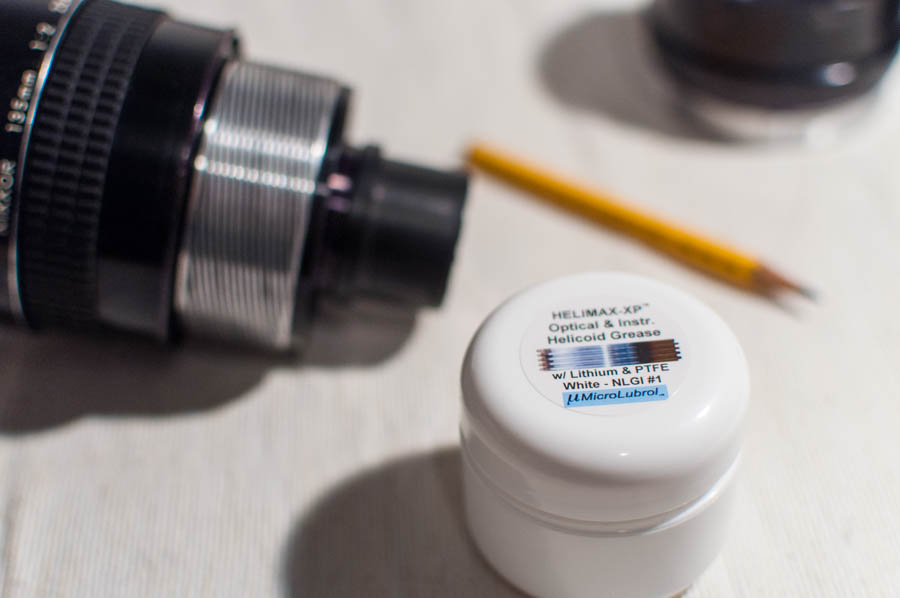
I included a picture of the grease i used. It is called helicoid grease and it arrived just today - so I don't know yet if I like it of not. As far as I can say, it appears to be quite okay.

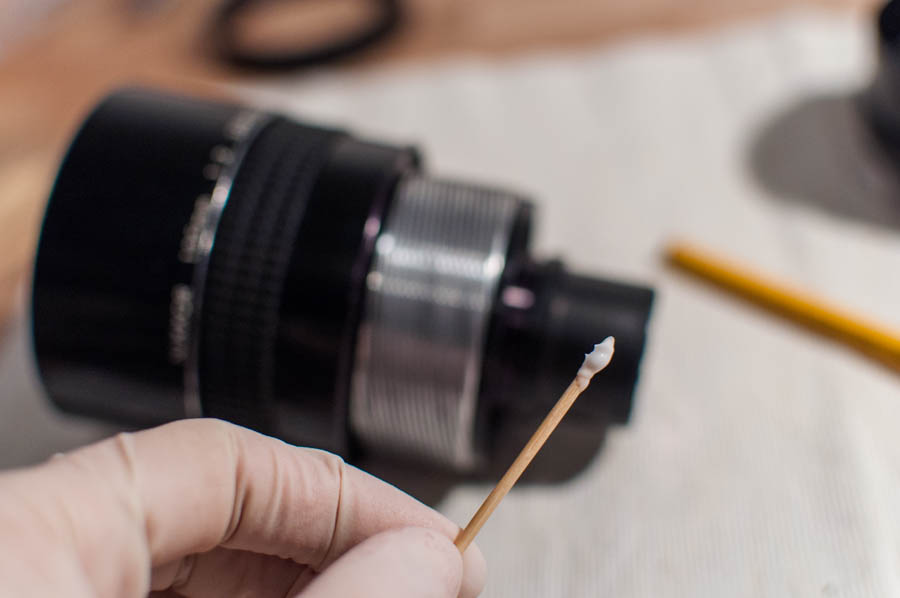
I applied the grease with a toothpick. In the picture below you can see how much grease I put on the lens. I used about 5 swabs of that size for the whole front helicoid.

There is no need to spread the greasy evenly. Just put it there and we will take care of the spreading in the next step.
To spread the grease I coupled the helicoids and turned them for about 20 times forth and back. Because i only have two hands you can only see one helicoid in the picture 
This actually is a great way to find out if the stiffness is how you like it. If it isn't add or remove some grease or change to a more/less stiff grease.
After that I took the helicoids apart again. As you can see there is some grease remaining which means I applied to much. So I removed that remaining grease with a q-tip.

Here you can see the fully greased middle helicoid. Cant see anything? Good - the grease is shiny but it really needs only a little bit.

I repeated the same for the back-helicoid until I was satisfied with the result.
So that's how I regreased the Lens. |
|
| Back to top |
|
|
dbmn
Joined: 02 Feb 2015
Posts: 5
|
| Posted: Wed Feb 11, 2015 9:33 pm Post subject: |
|
|
dbmn wrote:
Because it took quite some time last time to reassemble the lens, I thought I would write how I assembled it. Knowing on what to look out for, it took me 10 Minutes this time to fully assemble it back to working condition again
so let's start with the reassembly:
Again: Do this at your own risk. I am by far no professional - this is the second lens I disassembled....
Take the back helicoid into your left hand.
Take the middle helicoid into your right hand.
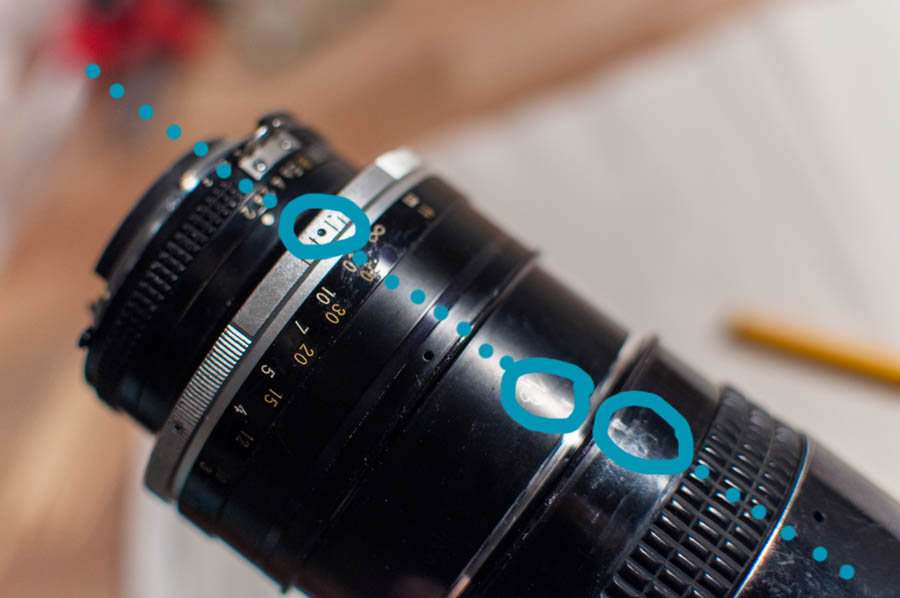
On the middle helicoid you should see a black dot on black metal (blue circle)
Attach the middle helicoid to the back helicoid by aligning the black on black dot of the middle helicoid on the opposite side of the black on silver dot of the back helicoid (blue circle)
Turn 7 and 1/2 times and you should get the same view as on the picutre.

Turn slightly more, until you allign the marked position from the disassembly (red circle) with the black on silver dot
(it all sounds complicated - it really isnt. But I whish i recorded the 7 1/2 turns at the disassembly the first time)

Now before you go on:
Set the apperture ring on the rear element to either the smalles or biggest apperture (it really doesnt matter. I used F/2)
Then take a screwdriver an adjust the apperture of the front element (with the glass) by shifting the small copper(?) lever to either fully open of fully closed (matching your other choice)
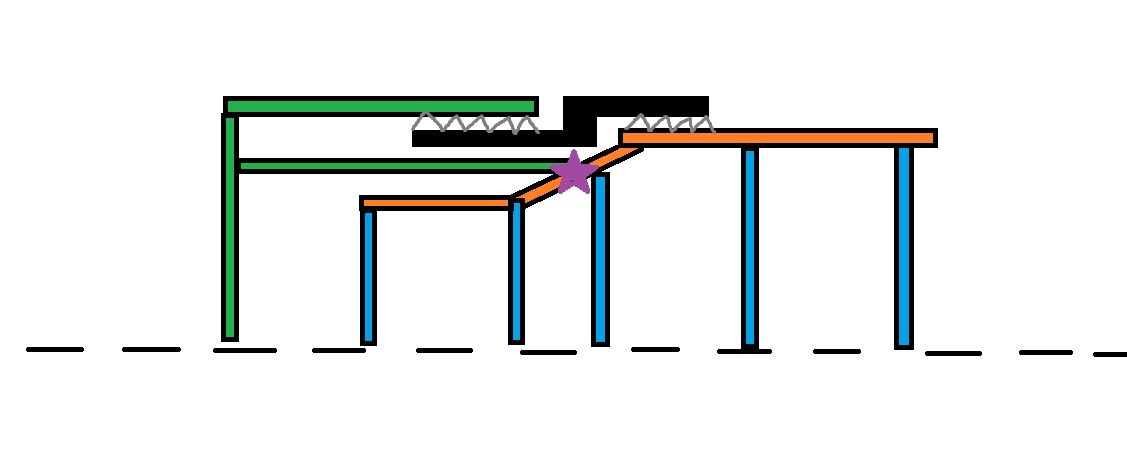
Now comes the tricky part (I added a drawing to explain)
The back helicoid (green) and the front helicoid (orange) are coupled by the apperture lever and TURN TOGETHER at the same time. Because the middle helicoid (black) is in the middle the front and back helicoid change its relative position in axial direction when turned but their relative angle stays the same.
If that sounds too complicated. I will just explain the steps to assemble it

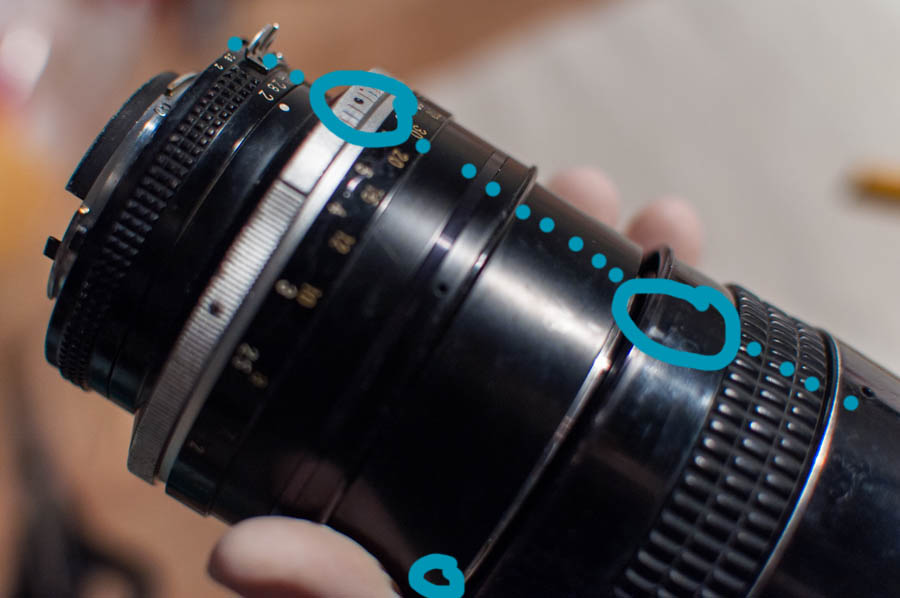
First I aligned all the marks I did in disassembly with the black ond silver dot (all blue circles). the front helicoid should be able to start to grip the middle helicoid.

WITHOUT USING ANY FORCE start sliding the front and the back helicoid simltaneously in one direction while rotating the middle helicoid in the other direction.
Both marks on the front and back helicoid should stay aligned.
At some point (about 1/8th of a revolution) you are able to feel that the levers of the back helicoid are coupling with the front helicoid - dont force it, it should go really smoothly.

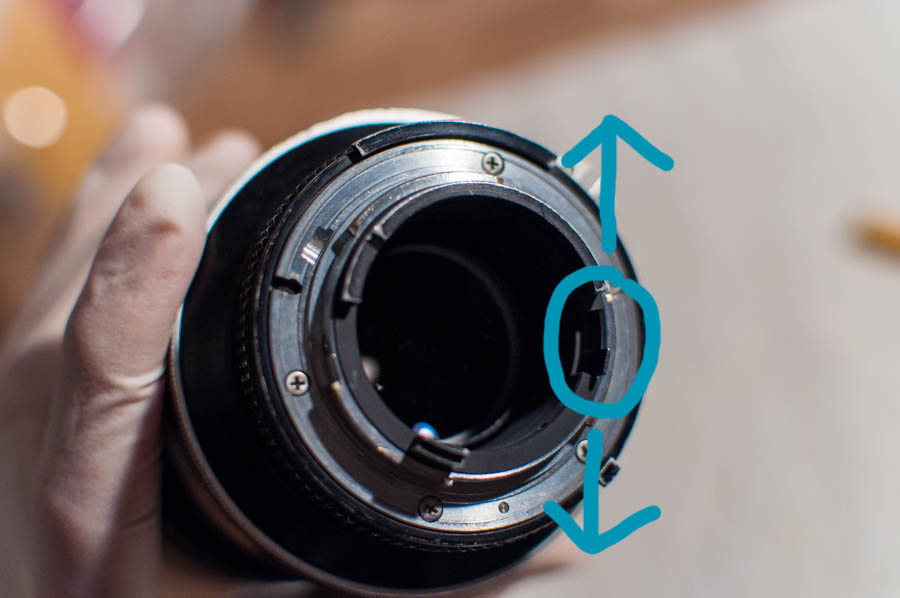
To check if the lever from the back element fits the front element at the right place, you can turn your apperture (it should fully open and close). When moving the blue prong with closed apperture the apperture should fully open.
If either the apperture or the prong dont work as expected. You need to go back one step. No need to detach both elements but turn back to that point before you felt the coupling SLIGHTLY reallign and try again.

When all is aligned it should look something like that, with the infinity mark right on the black on silver dot when moved to the most extreme position.

For the last step you need to put tape, where the tape was in disassembly.
Note: I needed to cut it to fit the width.
put back the plasticky focus thing and you are done
Oh one last thing for your safety concerning the cotton swabs with the cleaning petrol. I read somewhere that they can spontaneously combust. For that reason I put the used cotton swabs in a glass jar during my work. After i was done I filled the glass with water and let is stay like that for the night (with the cotton swabs still inside).

I hope you liked it
When I find some more time, I will disassemble and regrease a Nikkor 105 2.5 AiS that focused way to hard. |
|
| Back to top |
|
|
Nordentro

Joined: 24 Jun 2010
Posts: 4713
Location: Lillehammer, Norway
Expire: 2015-01-29
|
| Posted: Wed Feb 11, 2015 9:42 pm Post subject: |
|
|
Nordentro wrote:
Nice post! 
_________________
Lars | Manuellfokus.no |
|
| Back to top |
|
|
MartinCrabtree

Joined: 10 Jan 2015
Posts: 121
|
| Posted: Thu Feb 12, 2015 1:27 am Post subject: |
|
|
MartinCrabtree wrote:
Nice thread. Did the cleaning/greasing accomplish what you'd hoped it would? |
|
| Back to top |
|
|
dbmn
Joined: 02 Feb 2015
Posts: 5
|
| Posted: Fri Feb 13, 2015 5:45 pm Post subject: |
|
|
dbmn wrote:
@ Martin:
Yes it did.
- The Apperture Ring was not or hardly movable before the cleaning and now turns like butter.
- The Focus was very stiff and "scratchy" (because of the sand) and now moves much better and withouth the scratchy noise. I need two fingers to turn it (thumb and index finger) but I would like the focusing to be movable with only one finger. So I might disassemble the lens again at some point and change the grease? No idea if I will do this anytime soon because it is not something that bothers me too much.
After all I can say, that the lens was a bargain and it was not too hard to repair it. |
|
| Back to top |
|
|
MartinCrabtree
Joined: 10 Jan 2015
Posts: 121
|
| Posted: Fri Feb 13, 2015 6:56 pm Post subject: |
|
|
MartinCrabtree wrote:
Thank you. I just picked up an earlier non-Ai version and it's a little loose. Not enough to be concerned about but something to think about. This will help once it gets to be bothersome. |
|
| Back to top |
|
|
|
|
|
You cannot post new topics in this forum
You cannot reply to topics in this forum
You cannot edit your posts in this forum
You cannot delete your posts in this forum
You cannot vote in polls in this forum
|