| View previous topic :: View next topic |
| Author |
Message |
GT
Joined: 23 Nov 2011
Posts: 11
Location: Italy
|
 Posted: Wed Nov 23, 2011 10:49 am Post subject: Meritar 2.9/50 disassembly Posted: Wed Nov 23, 2011 10:49 am Post subject: Meritar 2.9/50 disassembly |
 |
|
GT wrote:
Hallo everyone, new on this forum (have been lurking for a while though).
I'm stuck with a lens that I'm trying to clean from fungus. Decided to give it a try to learn the basics, since it's an old lens - not worth very much even if it was new, actually 
So far, I managed to disassemble the rear part and get to the iris blades, that I cleaned with Q-tips and alcohol (they were oily). But I seem to be stuck now, and I can't figure out how to go further on in order to free the central element. I still haven't managed to unscrew it from the front.
Does any of you know how to proceed, or have tips?
I'll post pictures as soon as I can.
Thanks a lot in the meanwhile : )
GT |
|
| Back to top |
|
 |
std


Joined: 09 Feb 2010
Posts: 1827
Location: Bulgaria
|
| Posted: Wed Nov 23, 2011 12:22 pm Post subject: |
|
|
std wrote:
Hi,
Maybe if you post a picture of the lens someone can help you better.
I'm not very good at lens disassembly but generally you should be able to unscrew the name ring in order to access the lens from the front.
Welcome to the forum and have fun.

_________________
Stefan
My lens list:
SLR MD: Rokkor 1,7/50 Exakta: Kilfitt-Makro-Kilar E 3.5/4cm; CZJ 2/50 Pancolar;M42: CZJ 2.8/50 Tessar; Mir-1B 2.8/37; Jupiter-9 2/85 T-mount: Tamron 5.9/200; Tamron 6.9/300; Tamron 7.5/400 C-mount: Cosmicar 1.8/50 Y/S: Sun 3.5/38-90, Sun 4/70-210 RF Contax RF: Jupiter-8 2/50; Contax G:CZ 2,8/21 Biogon T; CZ 2,8/28 Biogon T; CZ 2/35 Planar T; CZ 2/45 Planar T; CZ 2,8/90 Sonnar T |
|
| Back to top |
|
|
GT
Joined: 23 Nov 2011
Posts: 11
Location: Italy
|
| Posted: Wed Nov 23, 2011 12:34 pm Post subject: |
|
|
GT wrote:
Hi std,
thanks a lot for your reply. I'll try and post a picture in the afternoon (have to recharge my batteries first).
I know the front ring is the first thing to dismount, but I really can't understand how to do this. I don't seem to be able to unscrew it, and as a matter of fact I'm not even sure it unscrews.
If it does, it's going to be hard even if I succeed in unblocking it, because there's a dent that might prevent it from being unscrewed.
Speak to you soon, and thank you for welcoming me aboard  |
|
| Back to top |
|
|
GT
Joined: 23 Nov 2011
Posts: 11
Location: Italy
|
| Posted: Wed Nov 23, 2011 4:50 pm Post subject: |
|
|
GT wrote:
I'm trying to post pictures...
Ok, imageshack 
 |
|
| Back to top |
|
|
GT
Joined: 23 Nov 2011
Posts: 11
Location: Italy
|
| Posted: Wed Nov 23, 2011 4:59 pm Post subject: |
|
|
GT wrote:
 |
|
| Back to top |
|
|
GT
Joined: 23 Nov 2011
Posts: 11
Location: Italy
|
| Posted: Wed Nov 23, 2011 5:02 pm Post subject: |
|
|
GT wrote:
 |
|
| Back to top |
|
|
GT
Joined: 23 Nov 2011
Posts: 11
Location: Italy
|
| Posted: Wed Nov 23, 2011 5:05 pm Post subject: |
|
|
GT wrote:

 |
|
| Back to top |
|
|
GT
Joined: 23 Nov 2011
Posts: 11
Location: Italy
|
| Posted: Wed Nov 23, 2011 11:09 pm Post subject: |
|
|
GT wrote:
... and if nobody has an answer on this, do I get a second chance question? 
I also need to clean the rear part of a Canon FD 35-105 and 10-200 (I bought a whole set of ill lenses lately...)
So if you know where to get schemes, I'm all ears.
Thank you again! |
|
| Back to top |
|
|
std
Joined: 09 Feb 2010
Posts: 1827
Location: Bulgaria
|
| Posted: Thu Nov 24, 2011 8:09 am Post subject: |
|
|
std wrote:
First you need to fix the bump on the filter thread - a piece of wood and a hammer will do.
Then unscrew the name ring - you will need spanner wrench (also a small screwdriver will do if you do not have it, just be careful not to scratch the glass) if the name ring doesn't want to unscrew you may need to make small holes in it in order to grip it better.
After the name ring is removed you will see how to unscrew the optical block.
_________________
Stefan
My lens list:
SLR MD: Rokkor 1,7/50 Exakta: Kilfitt-Makro-Kilar E 3.5/4cm; CZJ 2/50 Pancolar;M42: CZJ 2.8/50 Tessar; Mir-1B 2.8/37; Jupiter-9 2/85 T-mount: Tamron 5.9/200; Tamron 6.9/300; Tamron 7.5/400 C-mount: Cosmicar 1.8/50 Y/S: Sun 3.5/38-90, Sun 4/70-210 RF Contax RF: Jupiter-8 2/50; Contax G:CZ 2,8/21 Biogon T; CZ 2,8/28 Biogon T; CZ 2/35 Planar T; CZ 2/45 Planar T; CZ 2,8/90 Sonnar T |
|
| Back to top |
|
|
GT
Joined: 23 Nov 2011
Posts: 11
Location: Italy
|
| Posted: Thu Nov 24, 2011 9:36 am Post subject: |
|
|
GT wrote:
Thank you very much, Stefan.
So the name ring does unscrew. I'll try and do as you suggest, hoping I can get the bump straight without ruining the thread.
Thanks again, it's nice to have spiritual support  |
|
| Back to top |
|
|
Fatboy72
Joined: 03 Apr 2013
Posts: 1
Location: Ireland
|
| Posted: Wed Apr 03, 2013 11:27 pm Post subject: Same problem as other poster |
|
|
Fatboy72 wrote:
I have encountered the same issue in trying to clean one of these lenses. It is badly effected with fungus and I can't get in between the first two elements though I have been able to get the back element off.
I know it's an old post but a search of the net keeps bringing me back here.
Regards |
|
| Back to top |
|
|
Attila


Joined: 24 Feb 2007
Posts: 57849
Location: Hungary
Expire: 2025-11-18
|
| Posted: Wed Apr 03, 2013 11:35 pm Post subject: |
|
|
Attila wrote:
Welcome!
Meritar is simple lens what you find instruction on Helios, any Carl Zeiss Jena shoould apply here too. Zooms are difficult many elements are in, not DIY job, hard even for experts.
_________________
-------------------------------
Items on sale on Ebay
Sony NEX-7 Carl Zeiss Planar 85mm f1.4, Minolta MD 35mm f1.8, Konica 135mm f2.5, Minolta MD 50mm f1.2, Minolta MD 250mm f5.6, Carl Zeiss Sonnar 180mm f2.8
|
|
| Back to top |
|
|
emiliano
Joined: 01 May 2020
Posts: 2
|
| Posted: Fri May 01, 2020 5:55 pm Post subject: |
|
|
emiliano wrote:
I resurrect this old post since it's been very useful to me, and also because I spent so much energy on it and it will be useful to give some more information for other people.
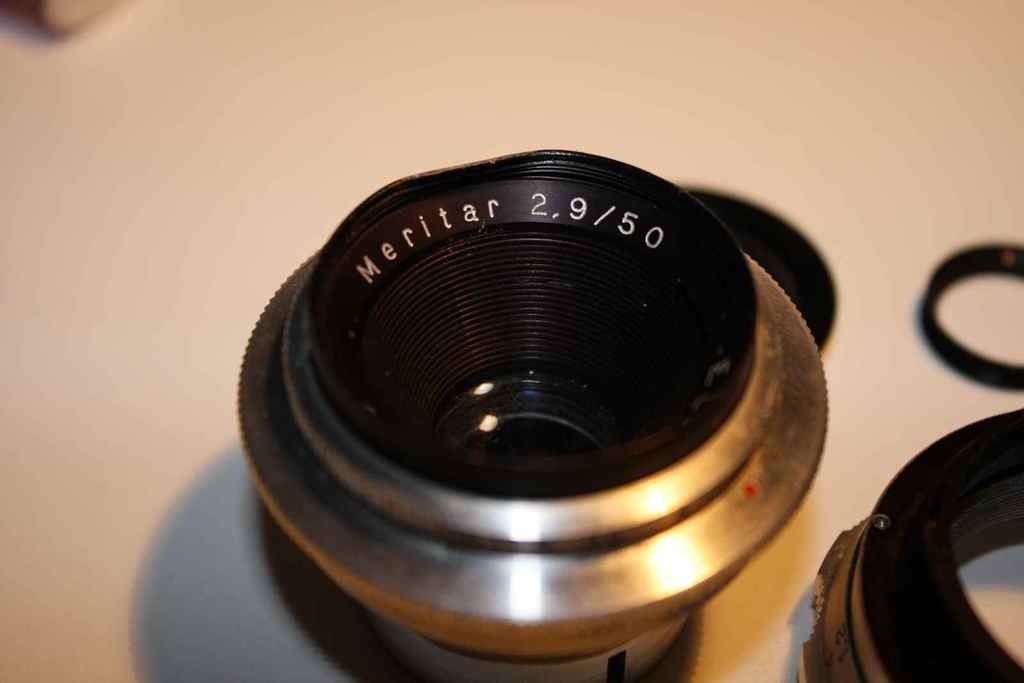
First of all: Meritar optical block does not unscrew from the front, name ring doesn't unscrew this way.
Everything has to be done from the back.
I have an M42 mount version: in this version there is a ring around the back element, just unscrew it pressing gently the whole lens against your hand and turning. I don't know nothing about Exakta mount, sorry but from now on I think the process is very similar if not exactly the same.
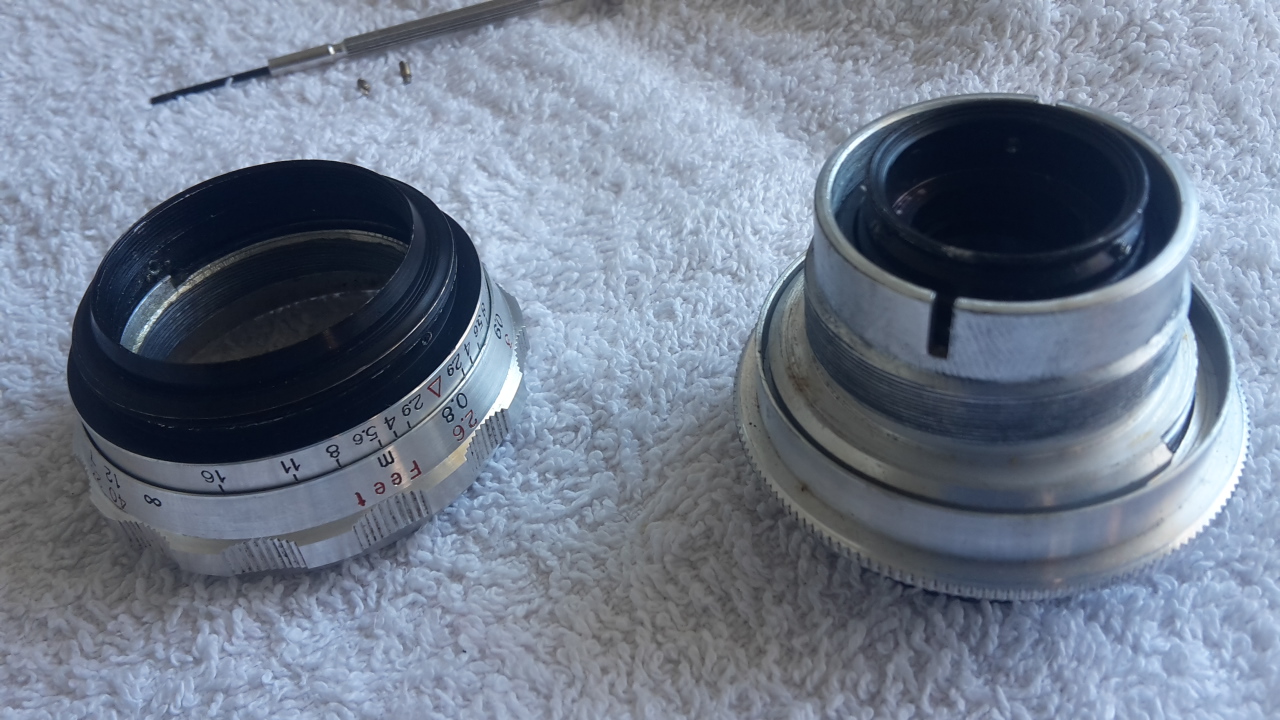
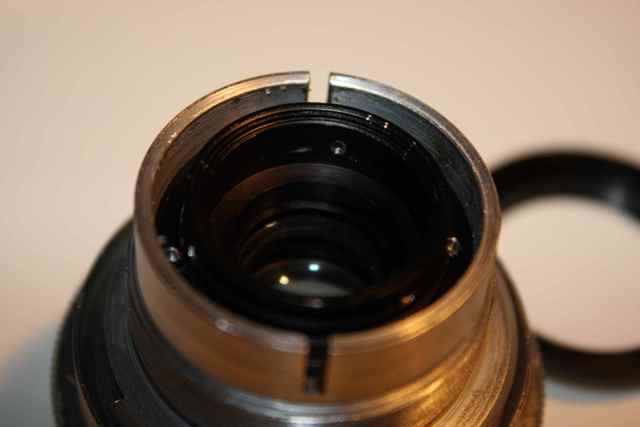
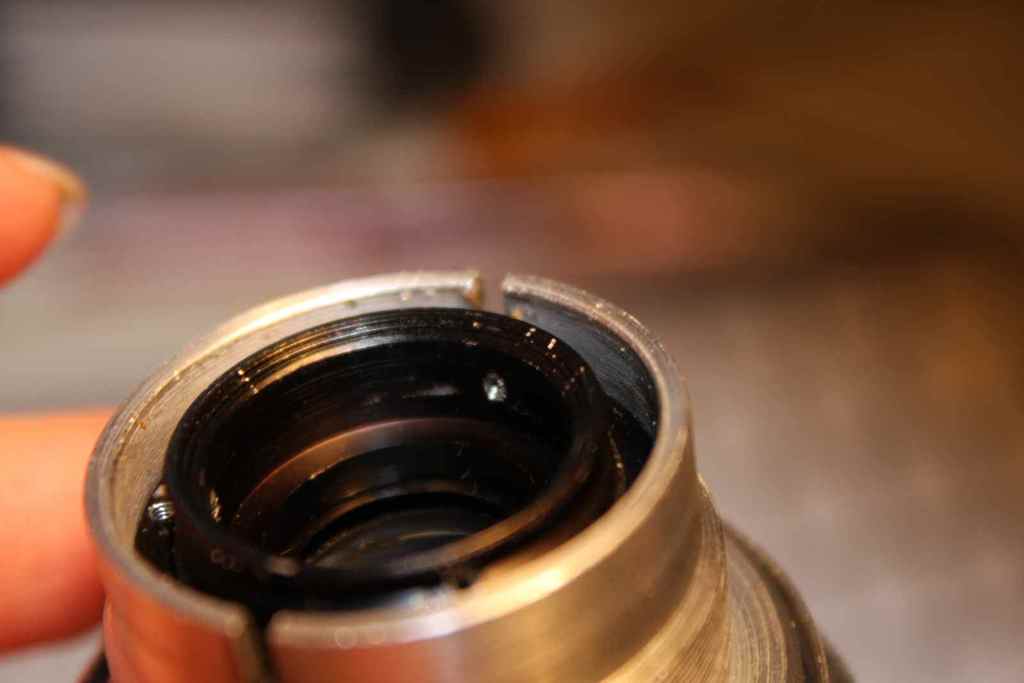
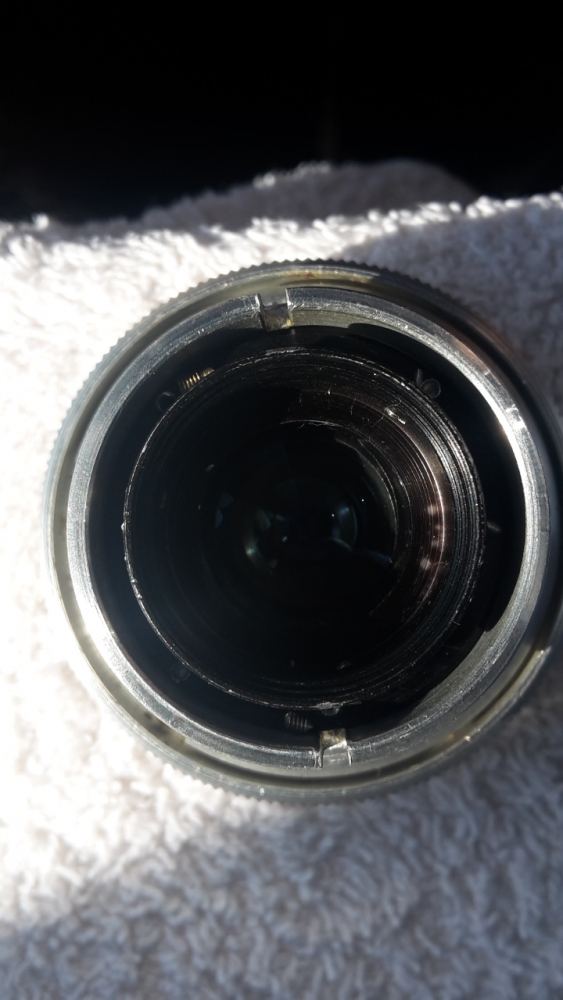
Then the back lens will be accessible: just loose (do not unscrew completely, as Zenography wisely says, minimal dismantling is good!) three screws and another ring together with the back glass will come off.
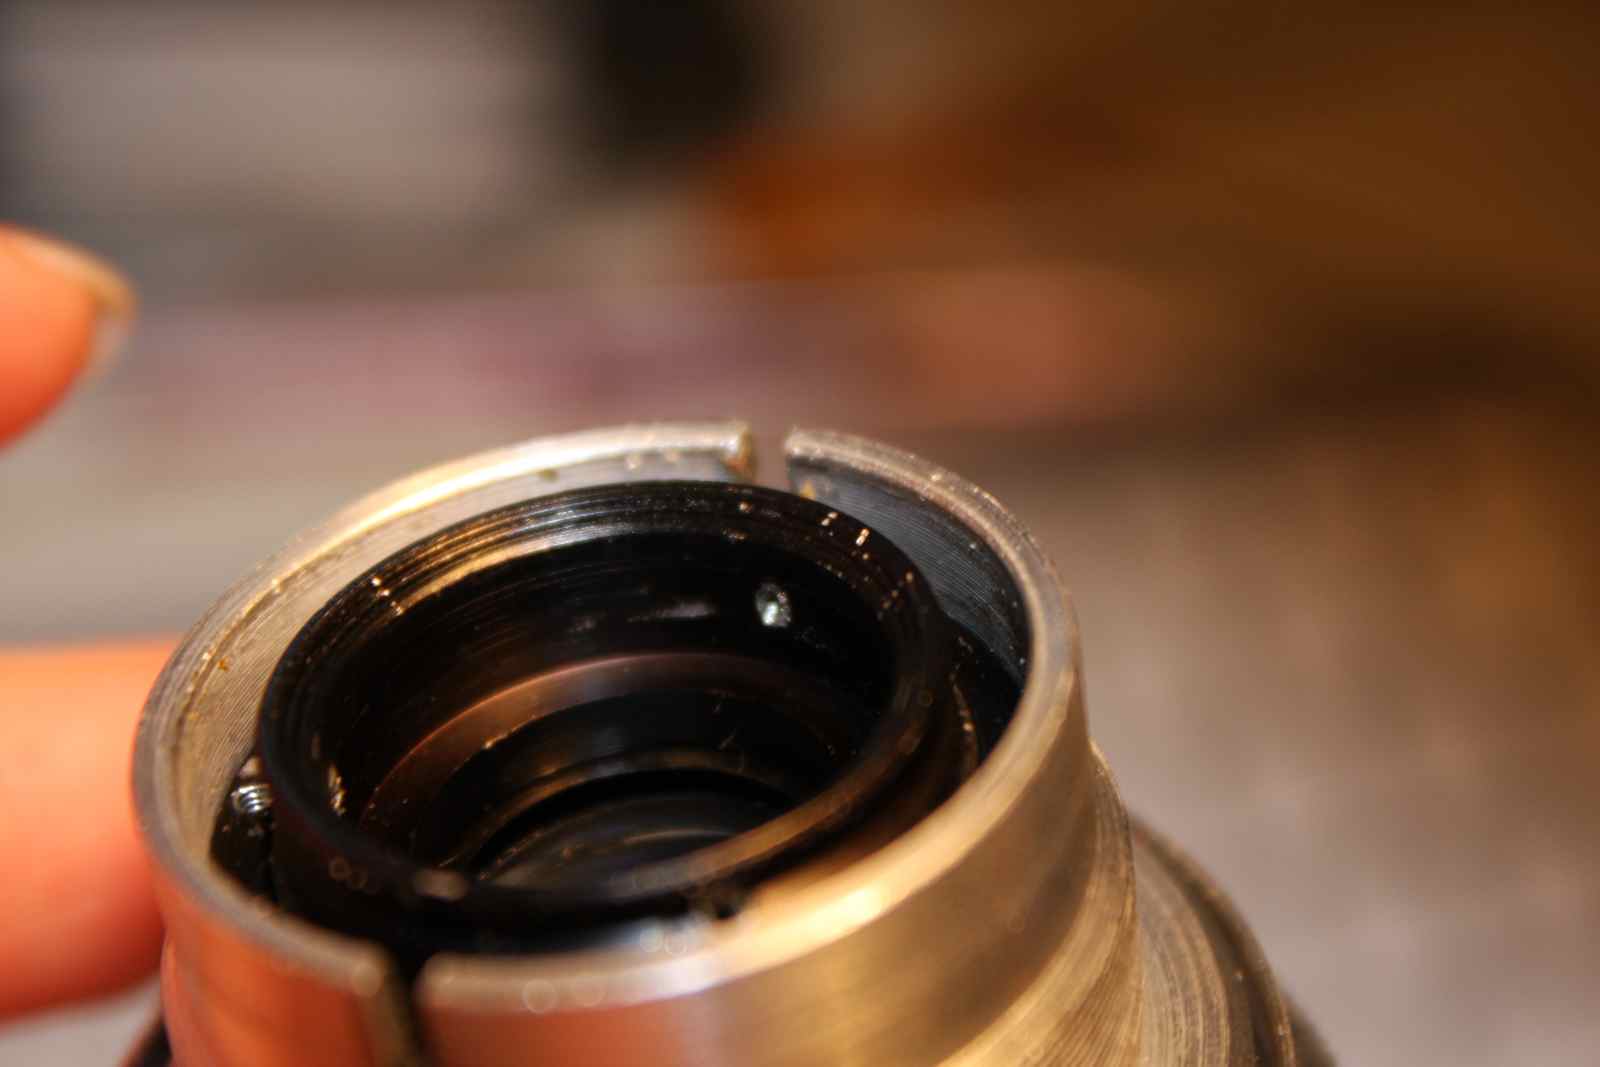
That's the easiest part, after that the lens will be like that (you can see the three screws at 120° partially unscrewed):

Then the most difficult part: put the focusing block on 0,8m (all the way to the minimum focusing distance), so you'll have access to two screws very hard to unscrew and even worse to screw back:
I used the previous photos to keep track of the correct position of the focusing helicoid, very useful in the assembly (hint: always do a lot of photos especially of the position of the focusing helicoid together with some other element of the lens that later can guide you understanding the correct position).
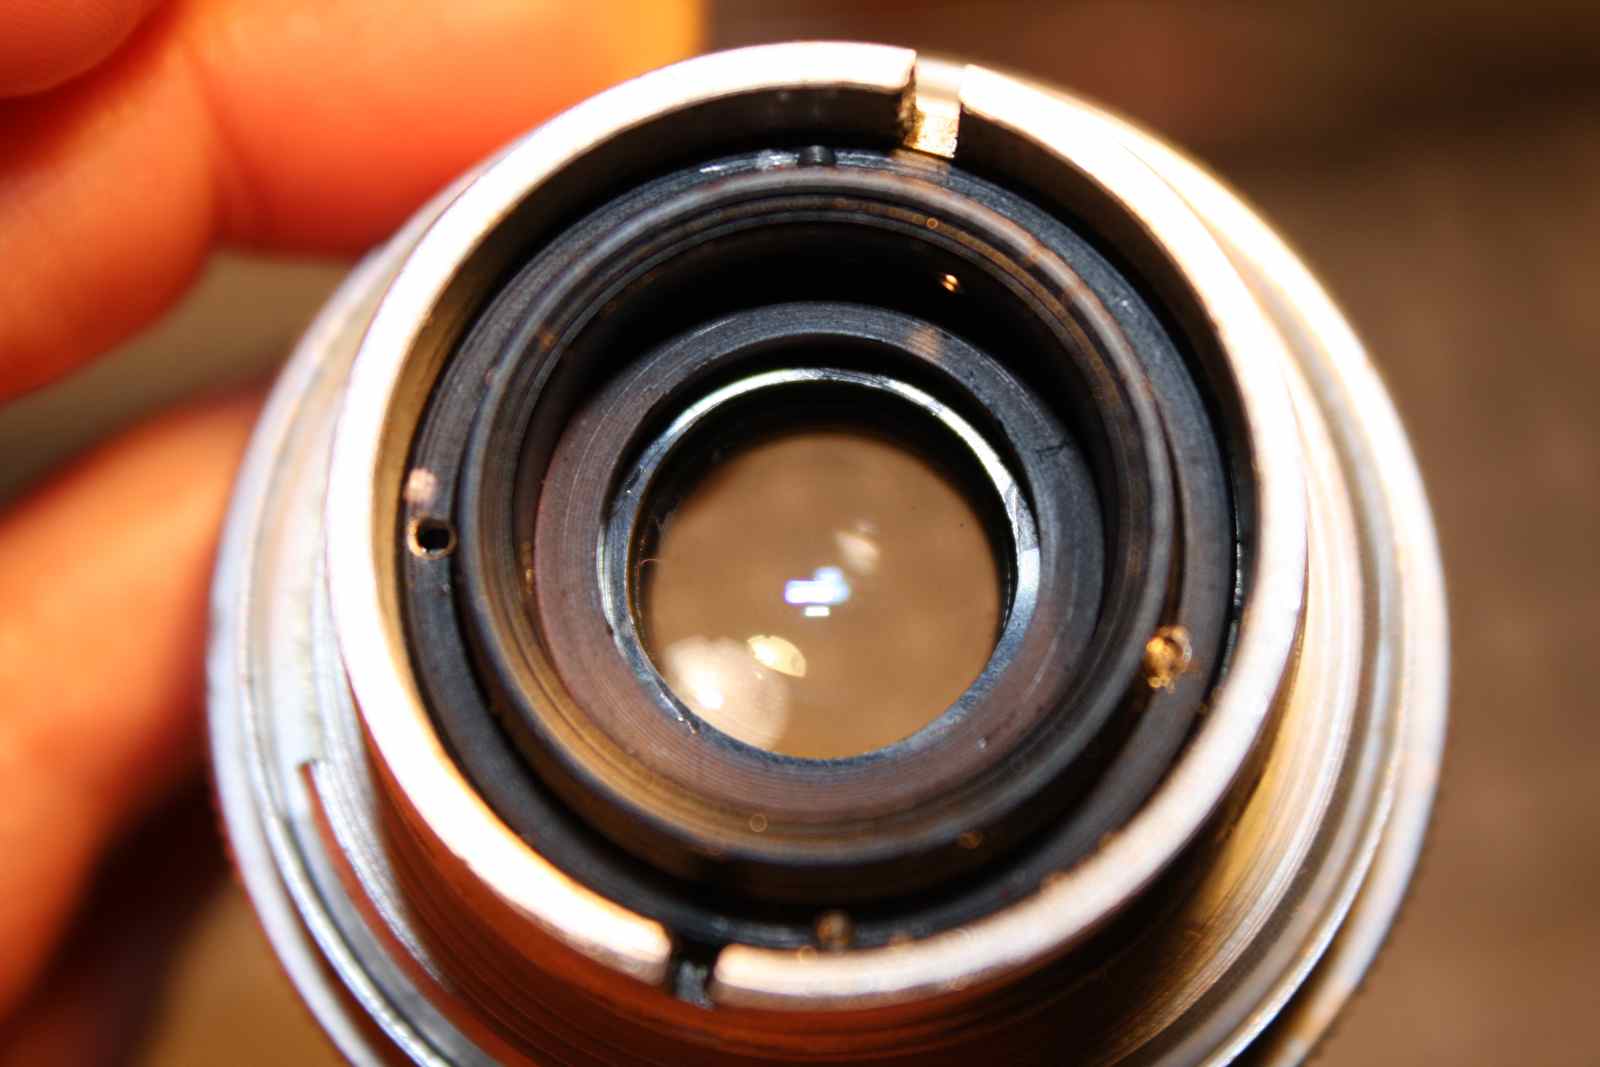
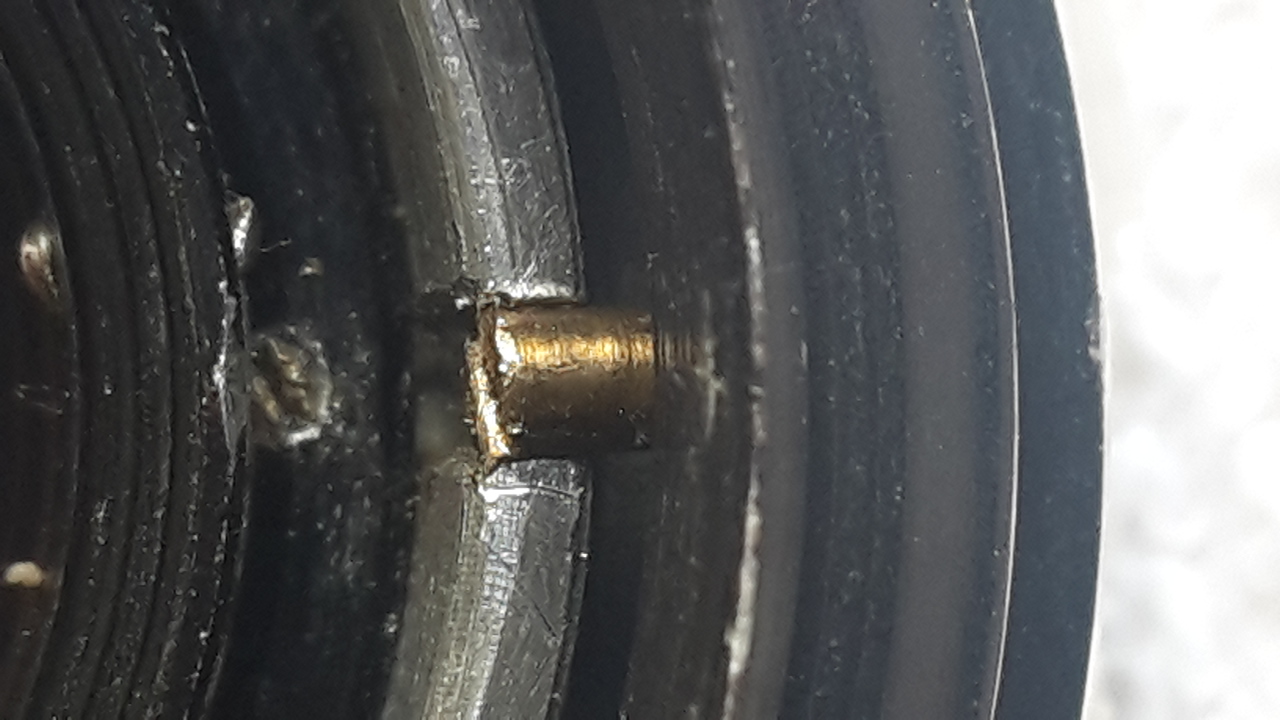
Zoom of one of the screws:
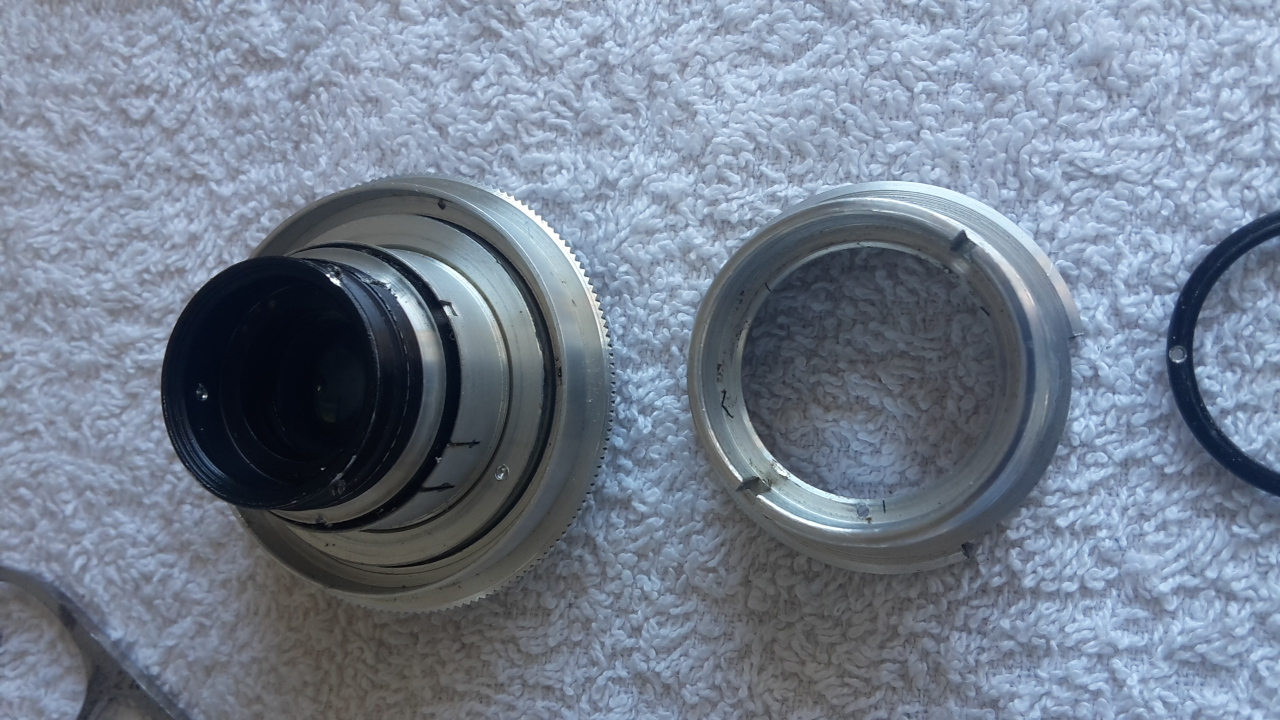
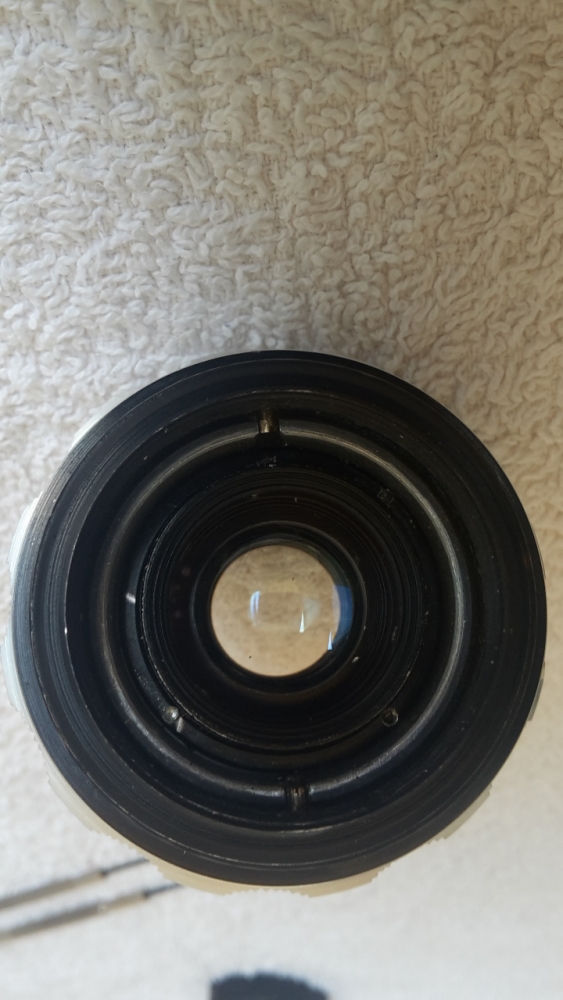
After that you will have this:

Now you have to unscrew a black ring that keeps the aluminium cilinder where the focusing helicoid was screwed in.
There are two screws that keep the ring in position, I kept track of position with that photo:
Now you can unscrew it with a spanner wrench.

You're about to have the optical block in your hands!

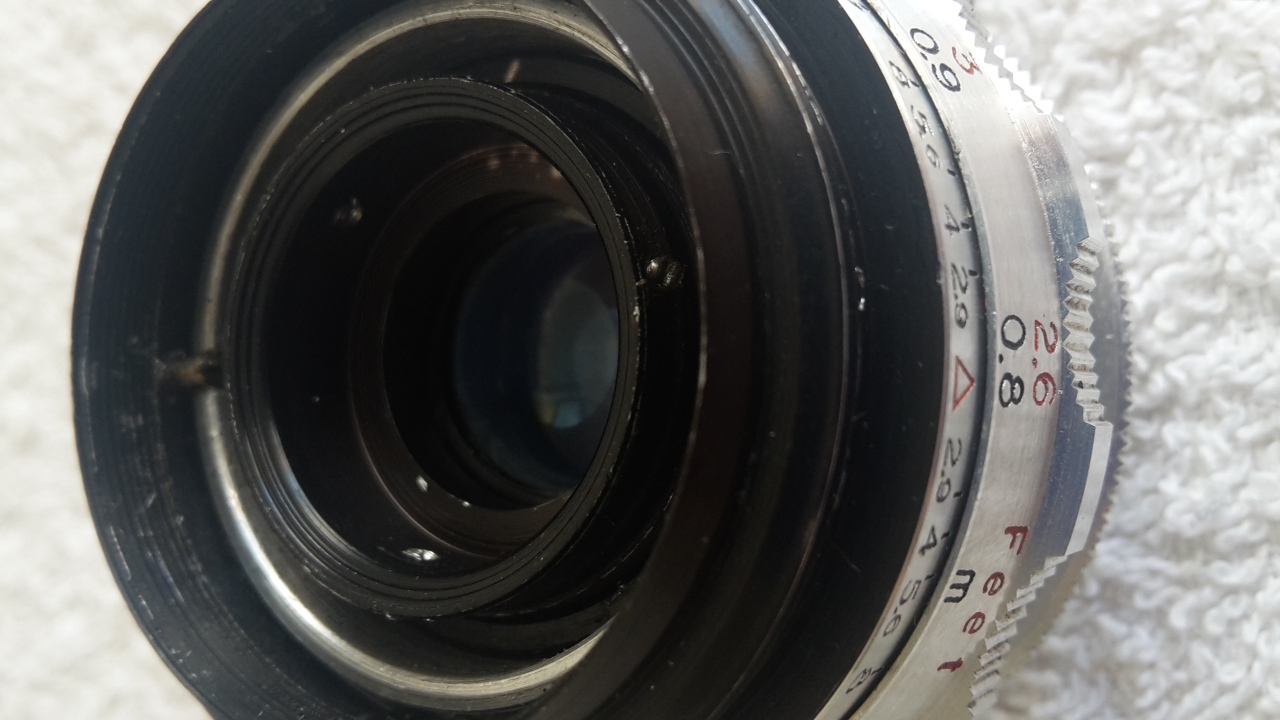
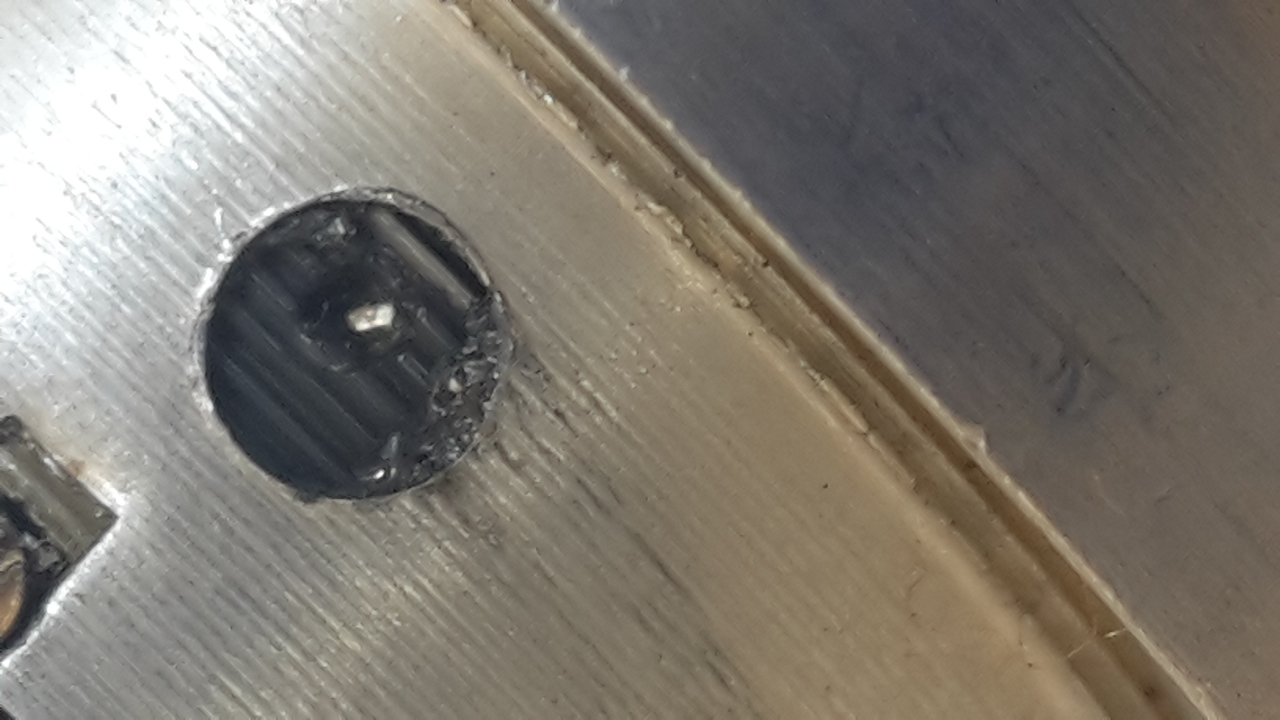
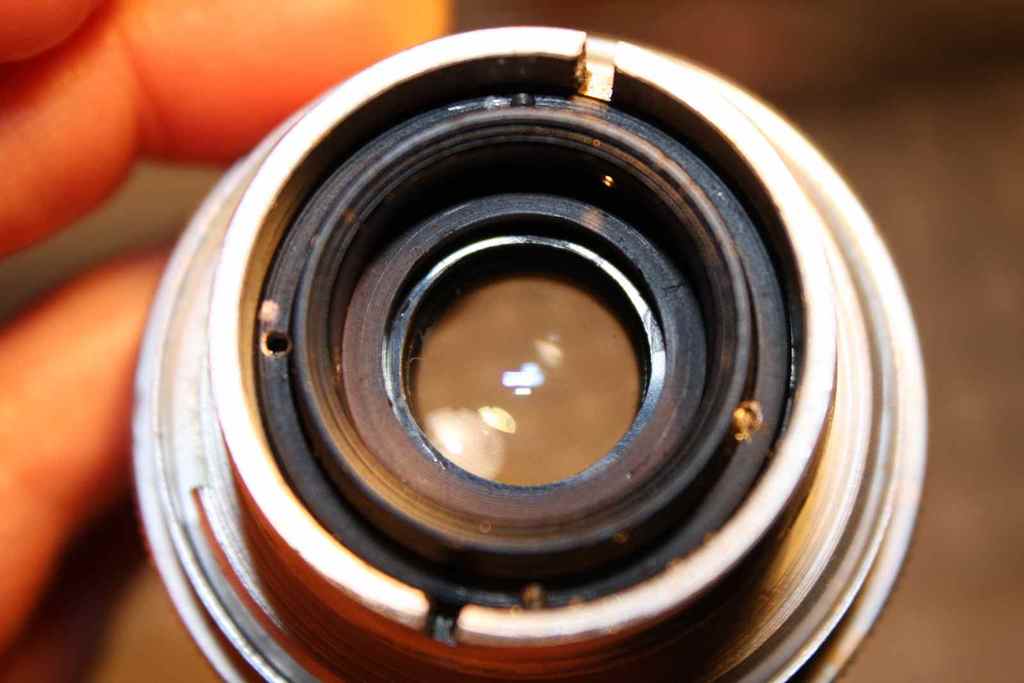
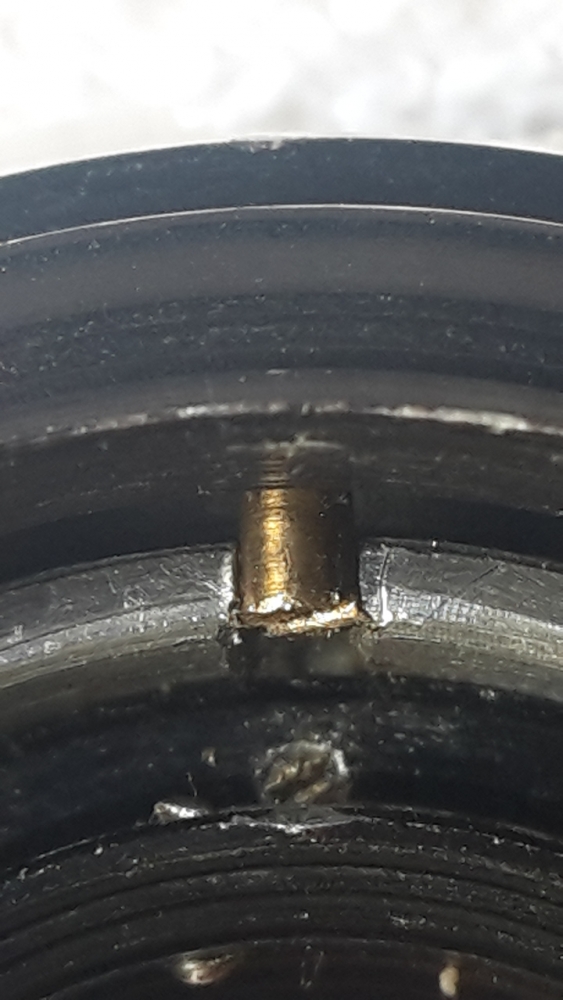
From the image above the aperture is set at F2.9, turn it at F16 and... you'll see something in the hole of the aluminium part:

That's the screw that prevents the front block to be unscrewed from the front!
In my opinion that is due to the fact that, since the lens is a very little one and the aperture ring is quite hard (even after lubrification...), without this screw you'll unscrew the optical block while changing the aperture
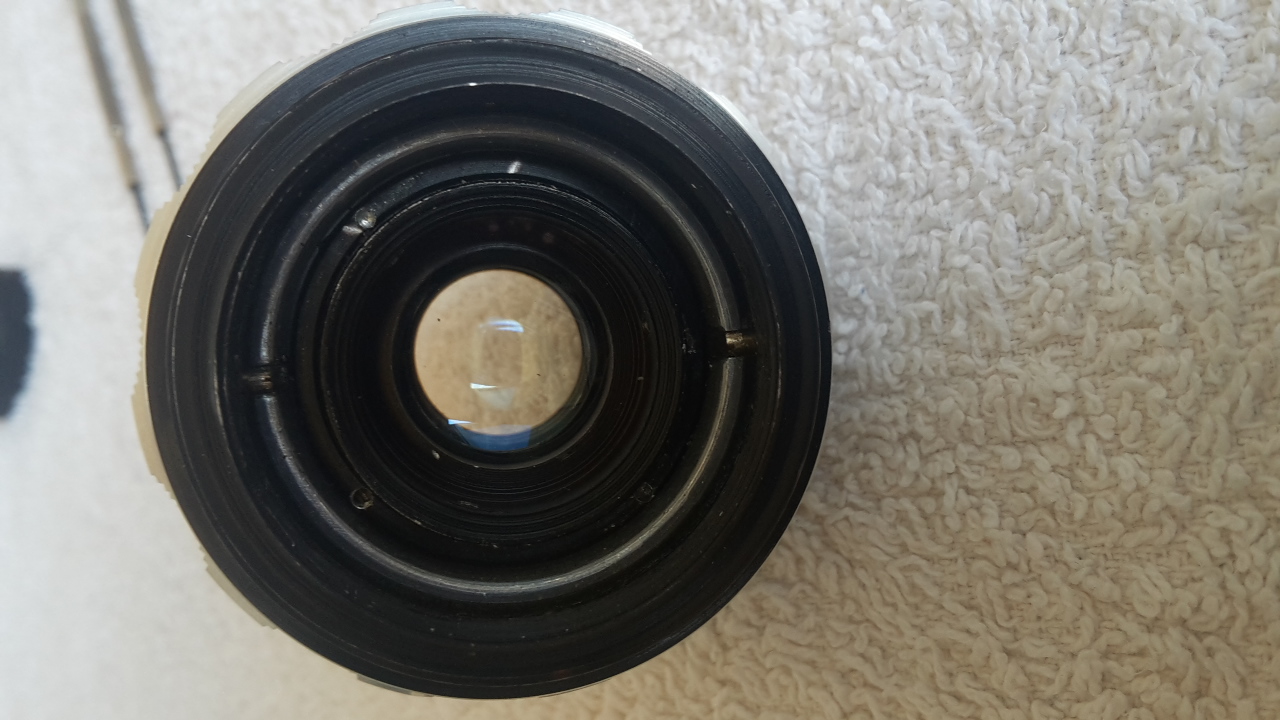
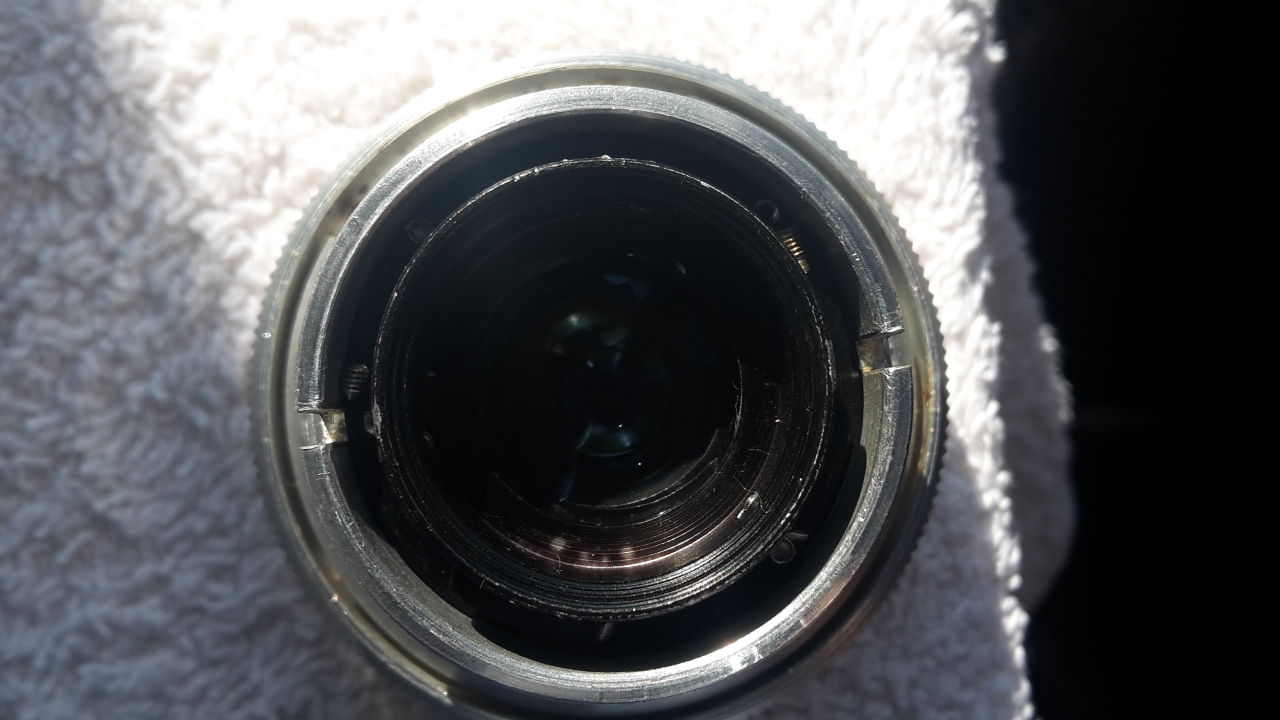
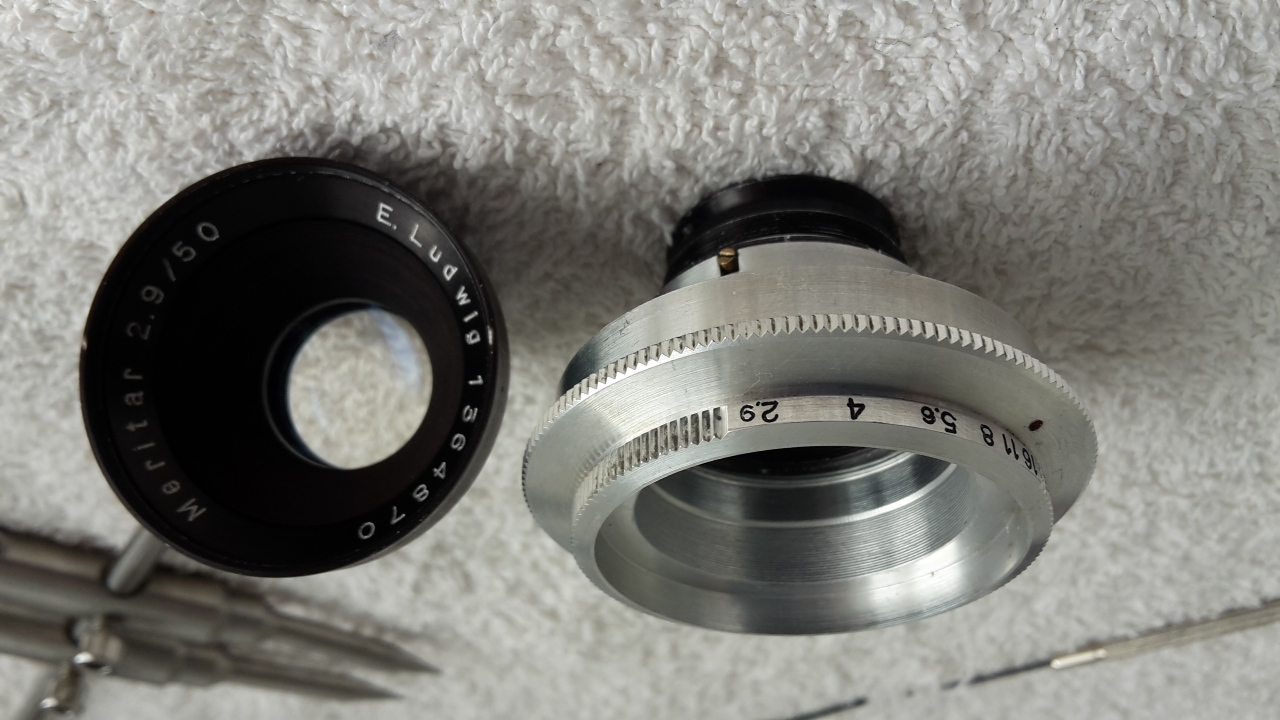
Now simply unscrew the whole front aluminium part:
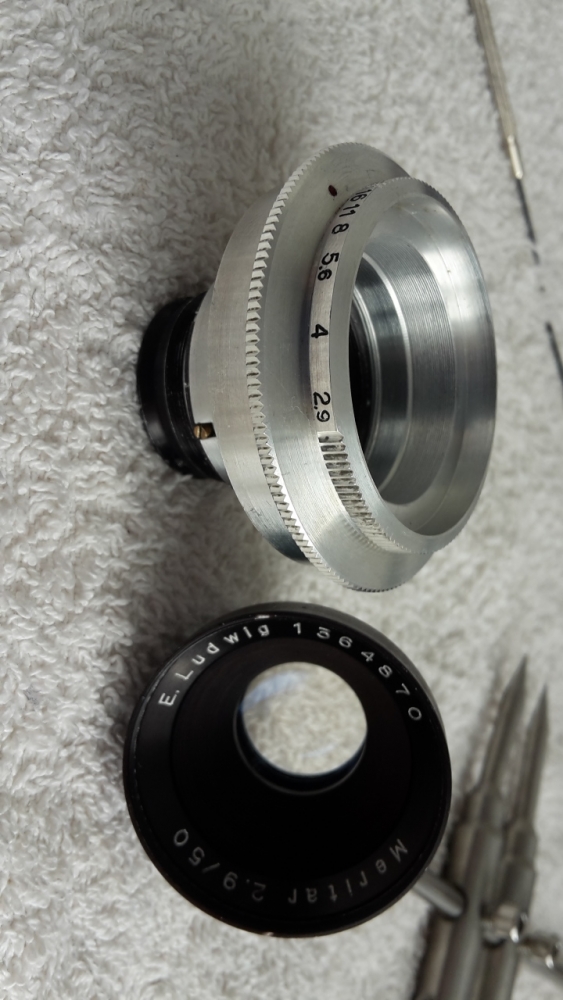
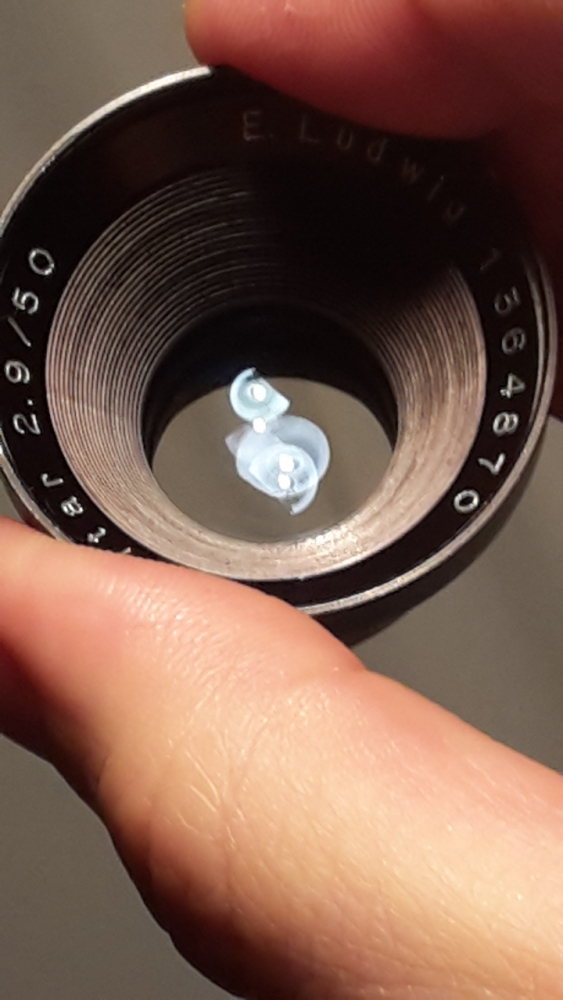
Use the spanner wrench to get to the two front glasses, you will have access always from the back side of the block.
At this point you can also easily clean the aperture blades on both sides with some cleaning fluid and a brush (very carefully!).
And good luck with the assembly!
 |
|
| Back to top |
|
|
emiliano
Joined: 01 May 2020
Posts: 2
|
| Posted: Fri May 01, 2020 7:42 pm Post subject: |
|
|
emiliano wrote:
I forgot to mention one thing: you can keep the bump on the filter thread... |
|
| Back to top |
|
|
|
|
|
You cannot post new topics in this forum
You cannot reply to topics in this forum
You cannot edit your posts in this forum
You cannot delete your posts in this forum
You cannot vote in polls in this forum
|