| View previous topic :: View next topic |
| Author |
Message |
Scheimpflug


Joined: 06 Feb 2010
Posts: 1888
Location: New Zealand / USA
Expire: 2011-11-18
|
 Posted: Sat Feb 06, 2010 2:29 pm Post subject: Soligor 28mm f2.8 - Canon FL to Nikon F Conversion Guide Posted: Sat Feb 06, 2010 2:29 pm Post subject: Soligor 28mm f2.8 - Canon FL to Nikon F Conversion Guide |
 |
|
Scheimpflug wrote:
Hello everyone. This is my first post here - I'm hoping to both share a bit of information and get a few questions answered. 
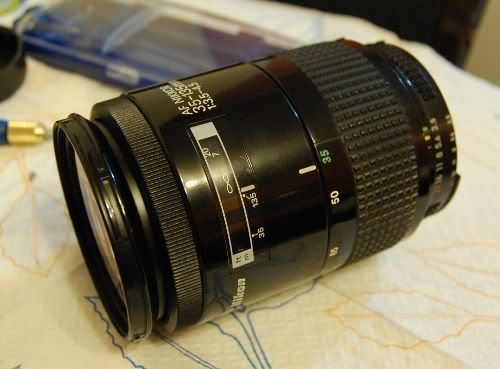
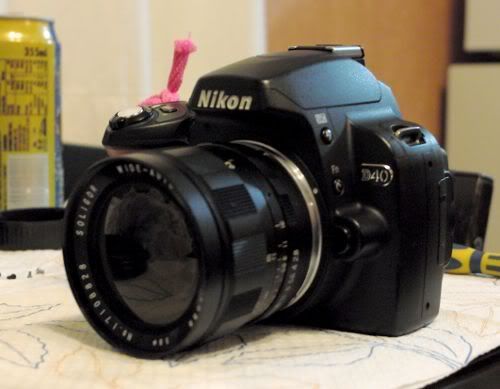
I recently acquired a small pile of old lenses, one of which was this Soligor 28mm f2.8. It had a Canon FL mount, which I couldn't use, so with the help (parts) of a reject Nikon 35-135 zoom, I was able to complete the conversion to a Nikon F mount. Below are the steps.
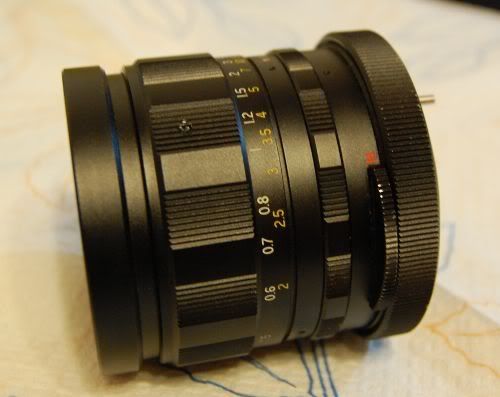
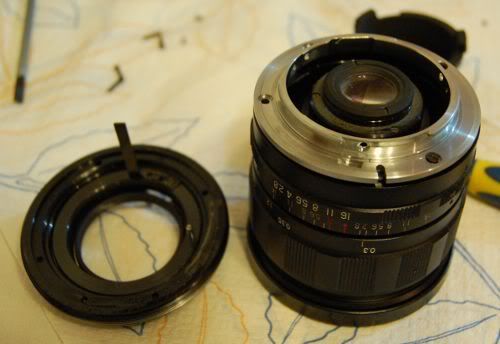
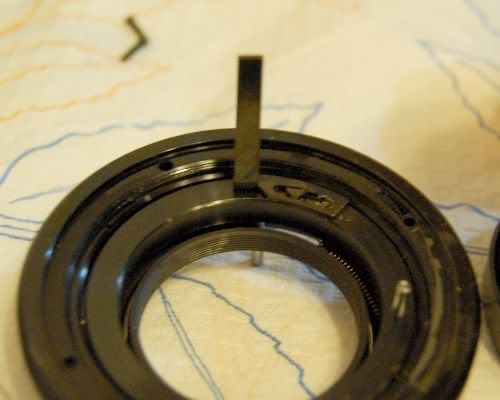
First up was the removal of the bayonet ring. One screw (the silver one) was removed, and the ring simply unscrewed off of the end.
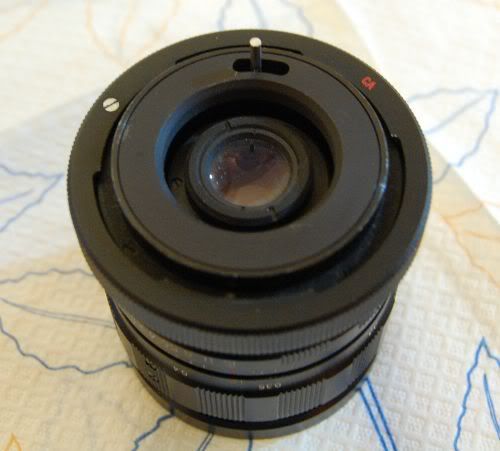
I then had to remove the thick base of the Canon FL mount, which was accomplished by removing five long black screws around the perimeter. The aperture stop-down pin & linkage came off with the mount, and the auto/manual slider from the side of the mount also came free.

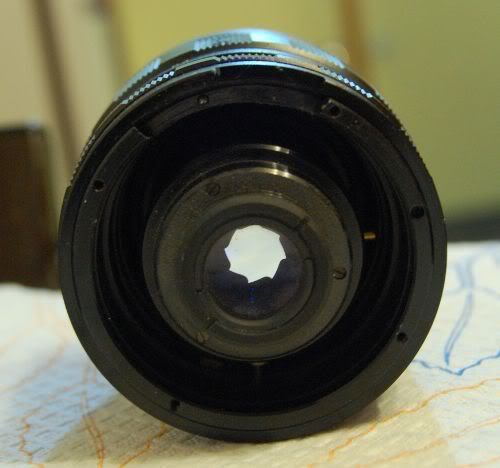
With the auto/manual slide switch removed, the lens was spring loaded to switch into the manual mode, with the aperture always reflecting the setting on the aperture ring. I've never seen a lens with this star-shaped aperture before, but from what I gather it is normal for this particular lens? It is round when wide open, and also when stopped down to f16.
Next, I switched to the donor lens for the Nikon F mount - a 35-135 with a gummed up zoom.
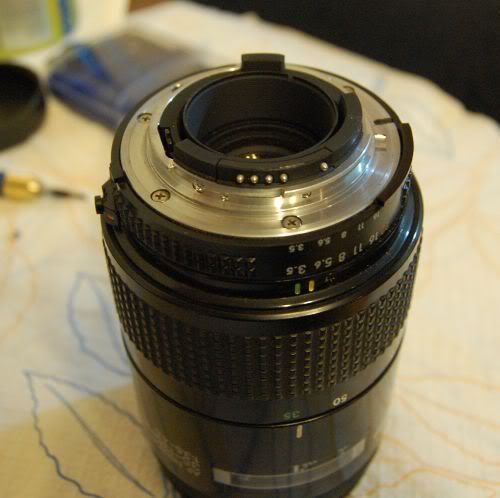
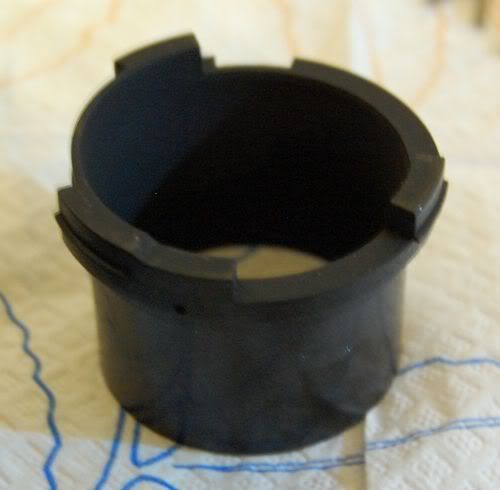
Removal of the four silver philips screws loosened the mount assembly, but did not let it come off due to the electrical connections. The black plastic light baffle had to come out first, which was accomplished by removing the small screws around its perimeter and pulling it straight out. The electrical contacts could then be pushed out of the way (inward), freeing the aluminum mount.

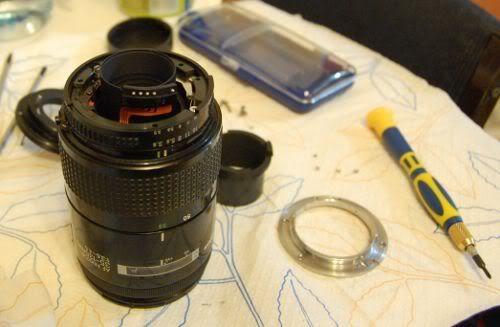

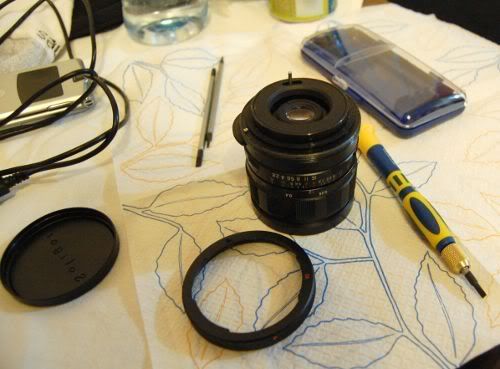
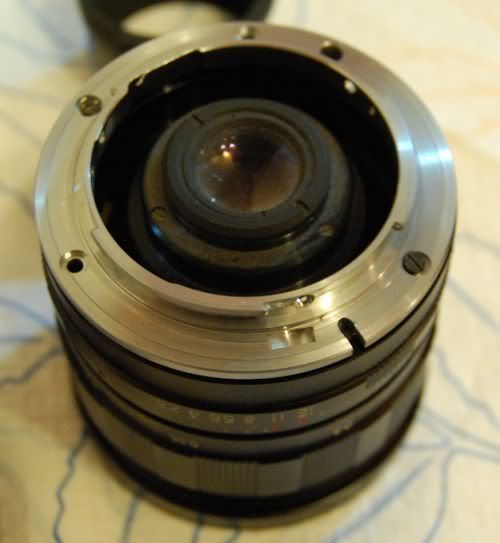
Now it was time to put the pieces back together. The two lens mounts had different hole patterns, used different size screws, and were arranged at a different radius... but to my surprise, they were actually close enough that I could attach the mount with two screws on opposite sides! The original Soligor screws were much too long for the thin Nikon mount, but two screws from the now unused stop-down mechanism happened to be the right threads. In the first two pictures here, I have already removed one of the two screws and installed it into the lens mount.
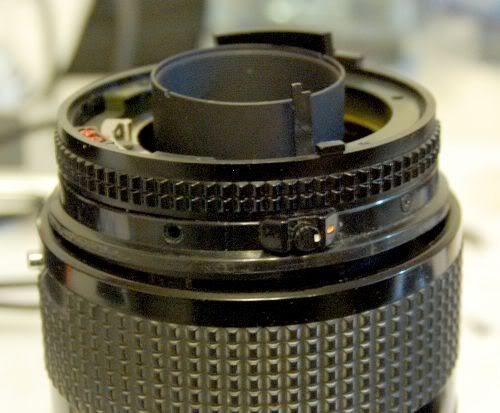
This looked great, but it turns out that the screw heads were slightly too thick, and protruded enough above the recesses in the Nikon mount plate to prevent the lens from latching to the camera. The search was on for alternate screws, and once again the Nikon 35-135 provided the parts. The small black screws holding the aperture ring to the lens body had the same threads, in the correct length, and with short screw heads! What a coincidence! Here is the Nikon lens with one of the screws already removed.
And that was it! With those two screws installed, the lens now mounts perfectly to the Nikon D40. 
Additional Comments:
* The mount can be rotate to several positions and still pick up two screws. I placed it in the orientation which put the aperture settings visible from the top. It is rotated slightly to one side, but is still perfectly usable. (Note that it is at the wrong orientation in the photo above, as the aperture settings are on the side.)
* I did not reinstall the A/M slider, as the mechanism behind it is gone. This left a small slot in the side of the lens which was open to the inside. To avoid light leaks, I wrapped a slim piece of electrical tape around the joint between the lens body and the mount. (I'll try to get a picture, it is hardly noticeable.) I would like to install the plastic baffle from the Nikon, but it will need some trimming to fit.
* The lens can't focus to infinity - it stops somewhere around 20 feet. However, at f16 the depth of field is great enough that it seems to be usable for landscapes if there is enough light. I don't have the tools to machine the lens barrel down, so I'm not quite sure how to resolve this? Does anyone know if the hard stop at infinity focus can be adjusted on the Soligor lenses?
I'll try to post some samples once I have had more time with this lens. |
|
| Back to top |
|
 |
poilu

Joined: 26 Aug 2007
Posts: 10471
Location: Greece
Expire: 2019-08-29
|
| Posted: Sat Feb 06, 2010 2:42 pm Post subject: Re: Soligor 28mm f2.8 - Canon FL to Nikon F Conversion Guide |
|
|
poilu wrote:
| Scheimpflug wrote: |
Hello everyone. This is my first post here - I'm hoping to both share a bit of information and get a few questions answered.
I recently acquired a small pile of old lenses, one of which was this Soligor 28mm f2.8. It had a Canon FL mount, which I couldn't use, so with the help (parts) of a reject Nikon 35-135 zoom, I was able to complete the conversion to a Nikon F mount. Below are the steps.
First up was the removal of the bayonet ring. One screw (the silver one) was removed, and the ring simply unscrewed off of the end.
I then had to remove the thick base of the Canon FL mount, which was accomplished by removing five long black screws around the perimeter. The aperture stop-down pin & linkage came off with the mount, and the auto/manual slider from the side of the mount also came free.
With the auto/manual slide switch removed, the lens was spring loaded to switch into the manual mode, with the aperture always reflecting the setting on the aperture ring. I've never seen a lens with this star-shaped aperture before, but from what I gather it is normal for this particular lens? It is round when wide open, and also when stopped down to f16.
Next, I switched to the donor lens for the Nikon F mount - a 35-135 with a gummed up zoom.
Removal of the four silver philips screws loosened the mount assembly, but did not let it come off due to the electrical connections. The black plastic light baffle had to come out first, which was accomplished by removing the small screws around its perimeter and pulling it straight out. The electrical contacts could then be pushed out of the way (inward), freeing the aluminum mount.
Now it was time to put the pieces back together. The two lens mounts had different hole patterns, used different size screws, and were arranged at a different radius... but to my surprise, they were actually close enough that I could attach the mount with two screws on opposite sides! The original Soligor screws were much too long for the thin Nikon mount, but two screws from the now unused stop-down mechanism happened to be the right threads. In the first two pictures here, I have already removed one of the two screws and installed it into the lens mount.
This looked great, but it turns out that the screw heads were slightly too thick, and protruded enough above the recesses in the Nikon mount plate to prevent the lens from latching to the camera. The search was on for alternate screws, and once again the Nikon 35-135 provided the parts. The small black screws holding the aperture ring to the lens body had the same threads, in the correct length, and with short screw heads! What a coincidence! Here is the Nikon lens with one of the screws already removed.
And that was it! With those two screws installed, the lens now mounts perfectly to the Nikon D40.
Additional Comments:
* The mount can be rotate to several positions and still pick up two screws. I placed it in the orientation which put the aperture settings visible from the top. It is rotated slightly to one side, but is still perfectly usable. (Note that it is at the wrong orientation in the photo above, as the aperture settings are on the side.)
* I did not reinstall the A/M slider, as the mechanism behind it is gone. This left a small slot in the side of the lens which was open to the inside. To avoid light leaks, I wrapped a slim piece of electrical tape around the joint between the lens body and the mount. (I'll try to get a picture, it is hardly noticeable.) I would like to install the plastic baffle from the Nikon, but it will need some trimming to fit.
* The lens can't focus to infinity - it stops somewhere around 20 feet. However, at f16 the depth of field is great enough that it seems to be usable for landscapes if there is enough light. I don't have the tools to machine the lens barrel down, so I'm not quite sure how to resolve this? Does anyone know if the hard stop at infinity focus can be adjusted on the Soligor lenses?
I'll try to post some samples once I have had more time with this lens. |
welcome Scheimpflug
have a nice stay with us |
|
| Back to top |
|
|
djmike

Joined: 01 Apr 2009
Posts: 930
Location: Taiwan
|
| Posted: Sat Feb 06, 2010 4:17 pm Post subject: |
|
|
djmike wrote:
Scheimpflug, thanks for sharing~ Mike
_________________
DSLR: Canon 400D
SLR: Nikon FM2 + Canon A-1 + Canon AE1-P + Praktica MTL-5B + Pentax Spotmatic F + Fujica ST801 + Voigtlander Bassematic + Voigtlander Vito + Rollei 35S + Rolleiflex SL35 ME + Canon QL17 GIII + Olympus Pen EE-3
Lenses
M42: CZJ Flektogon 35/2.4 + CZJ Flektogon Zebra 35/2.8 + CZJ Pancolar 50/1.8 + CZJ Sonnar 135/3.5 + CZJ Tessar 50/2.8 Chrome + Pentacon 135/2.8 + Pentacon 50/1.8 + SMC Takumar 50/1.4 + SMC Takumar 55/2 + SMC Takumar 135/3.5 + Fujinon 55/1.8 + Jupiter-9 85/2 + Jupiter-37A 135/3.5 + Helios 44-6 58/2
Nikor: Nikkor 50/1.4 + Nikkor 28/3.5 + Nikkor 35-105 Zoom + 36-72 Series E Zoom
Canon: Canon FD + 28/2.8 + 50/1.8 + Canon 35-105 Macro Zoom
Other: Rollei Planar HFT 50/1.8
|
|
| Back to top |
|
|
supahmario

Joined: 18 Mar 2009
Posts: 615
Location: Berlin, Germany
|
| Posted: Sat Feb 06, 2010 7:16 pm Post subject: |
|
|
supahmario wrote:
hey scheimpflug, welcome to the forum.
_________________
EOS 5D, EOS 30
Leica-R: Summicron 2/50
QBM: Distagon 2.8/35
PK: Tokina 3.5/17, Porst 1.2/55
M42: S-M-C Takumar 3.5/24, S-M-C Takumar 1.8/55, CZJ MC Sonnar 3.5/135, Jupiter 21M 4/200
|
|
| Back to top |
|
|
indianadinos

Joined: 06 Jul 2008
Posts: 1310
Location: Toulouse, France
Expire: 2011-12-05
|
| Posted: Sat Feb 06, 2010 7:28 pm Post subject: |
|
|
indianadinos wrote:
Hi, welcome to the forum and thanks for sharing your hints ...
Cheers
_________________
Please visit my blogs Shooting with a Pentax K10D / FF Visions
Takumar: 24/3.5, 28/3.5, 35/2, 35/3.5, 50/1.4, 55/1.8, 85/1.8, 105/2.8, 120/2.8, 135/3.5, 150/4, 200/4
Pentax-K: M28/2.8, K28/3.5, M50/1.4, A50/1.7, M50/4 Macro, K85/1.8, K105/2.8, K135/2.5, M200/4, M70-150/4
Zeiss: Flektogon 20/2.8, 20/4, 35/2.4, 35/2.8, Tessar 50/2.8, Pancolar 50/1.8, Biotar 58/2, Sonnar 135/3.5, Sonnar 180/2.8
Meyer: Primagon 35/4.5, Domiplan 50/2.8, Oreston 50/1.8, Primoplan 58/1.9, Trioplan 100/2.8, Orestor 100/2.8, Orestor 135/2.8
Schacht/Steinheil: Travenar 90/2.8, Travenon 135/4.5, Quinar 135/2.8, Quinar 135/3.5
Russian: MIR 37B, Industar 50/3.5, Helios 44M & 44M-2, Jupiter 37A
P6: Flektogon 50/4, Biometar 80/2.8, Orestor 300/4
Nikkor: Nikkor-O 35/2, Micro 55/3.5, Nikkor-S 50/1.4, Nikkor-Q 135/2.8
Fuji: EBC 28/3.5, EBC 55/3.5 Macro, EBC 135/2.5
Misc Lenses: Kiron 105/2.8 Macro, Tamron SP90/2.5
... and a few other Vivitar, Tamron, Sigma and Soligor lenses ...
|
|
| Back to top |
|
|
Scheimpflug
Joined: 06 Feb 2010
Posts: 1888
Location: New Zealand / USA
Expire: 2011-11-18
|
| Posted: Mon Feb 08, 2010 9:55 am Post subject: |
|
|
Scheimpflug wrote:
Thanks everyone.
I didn't catch it when I posted, but does anyone have any ideas why the images didn't work in my first post? They appeared fine when I previewed the post, and show up just fine if I edit the post and preview it again from there. They also show up in poilu's quote of my post, although I can't see anything different in the code... 
I have the pictures hosted on Photobucket, and inserted into the post using the standard "img" tags...
Are new users restricted from placing images in their posts? |
|
| Back to top |
|
|
Attila

Joined: 24 Feb 2007
Posts: 57849
Location: Hungary
Expire: 2025-11-18
|
| Posted: Mon Feb 08, 2010 10:11 am Post subject: |
|
|
Attila wrote:
Welcome! Thank you for this nice entry! Yes, new users can't publish links, images this is a spam prevention.
_________________
-------------------------------
Items on sale on Ebay
Sony NEX-7 Carl Zeiss Planar 85mm f1.4, Minolta MD 35mm f1.8, Konica 135mm f2.5, Minolta MD 50mm f1.2, Minolta MD 250mm f5.6, Carl Zeiss Sonnar 180mm f2.8
|
|
| Back to top |
|
|
Scheimpflug
Joined: 06 Feb 2010
Posts: 1888
Location: New Zealand / USA
Expire: 2011-11-18
|
| Posted: Tue Feb 16, 2010 5:44 am Post subject: |
|
|
Scheimpflug wrote:
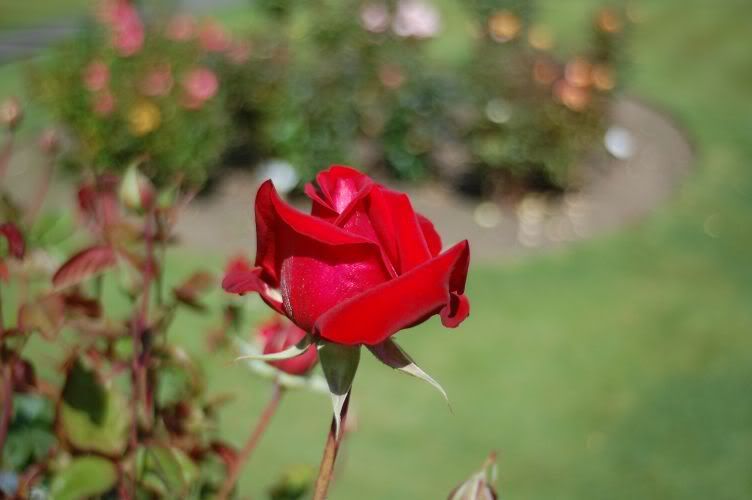
As promised, here are a few quick samples with this lens on a Nikon D40.
Roses at f2.8:

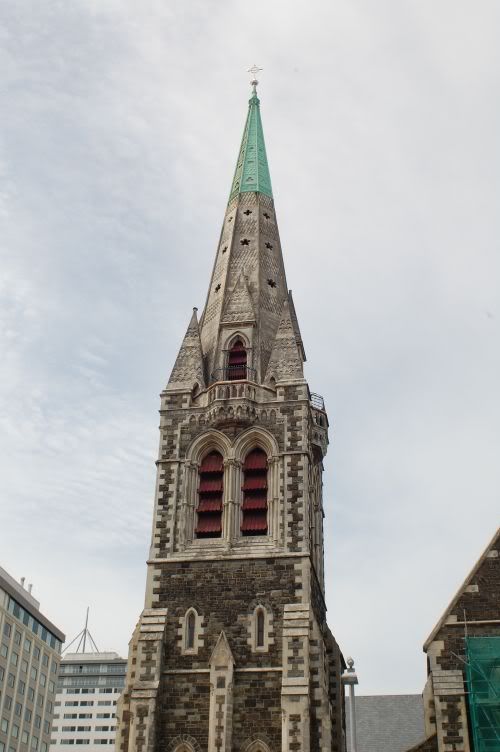
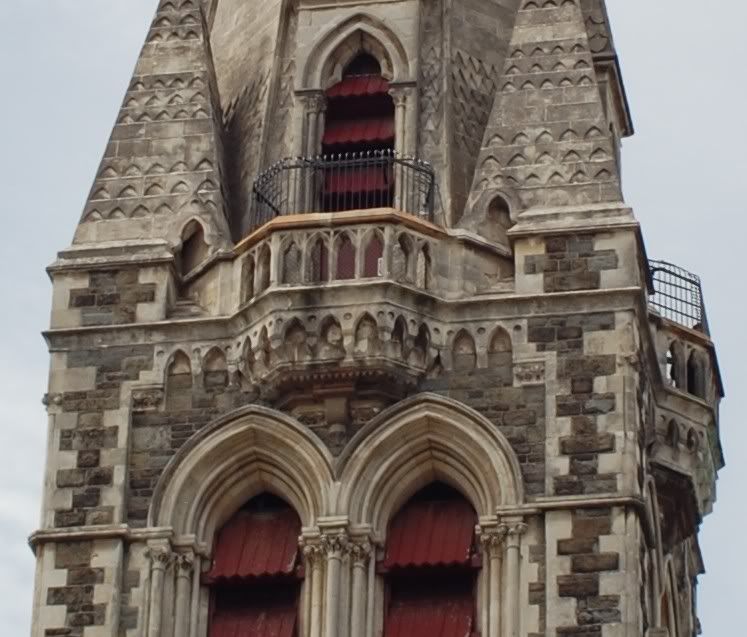
A cathedral tower at f16 - bonus points to whoever can name it. 
Essentially, this was the test of the practicality of making up for the "not quite infinity" focus using depth of field. For what it is worth, the camera would not give a focus confirmation for this shot, while it did for the previous shots. The second photo is a 100% crop from the center of the first.
These aren't very artistic, just some quick examples to show that the lens actually works. I didn't do any post-processing other than the resizing and that one crop. |
|
| Back to top |
|
|
greg

Joined: 21 Mar 2009
Posts: 683
Expire: 2012-12-03
|
| Posted: Tue Feb 16, 2010 4:01 pm Post subject: |
|
|
greg wrote:
Welcome to the group and thank you for your well documented work. |
|
| Back to top |
|
|
mo

Joined: 27 Aug 2009
Posts: 8982
Location: Australia
Expire: 2016-07-30
|
| Posted: Tue Feb 16, 2010 8:31 pm Post subject: |
|
|
mo wrote:
Christchurch or Dunedin for the cathedral? Nice job on the lens.
_________________
Moira, Moderator 
Fuji XE-1,Pentax K-01,Panasonic G1,Panasonic G5,Pentax MX
Ricoh Singlex TLS,KR-5,KR-5Super,XR-10
Lenses
Auto Rikenon's 55/1.4, 1.8, 2.8... 50/1.7 Takumar 2/58 Preset Takumar 2.8/105 Auto Takumar 2.2/55, 3.5/35 Super Takumar 1.8/55...Macro Takumar F4/50... CZJ Biotar ALU M42 2/58 CZJ Tessar ALU M42 2.8/50
CZJ DDR Flektogon Zebra M42 2.8/35 CZJ Pancolar M42 2/50 CZJ Pancolar Exakta 2/50
Auto Mamiya/Sekor 1.8/55 ...Auto Mamiya/Sekor 2/50 Auto Mamiya/Sekor 2.8/50 Auto Mamiya/Sekor 200/3.5 Tamron SP500/8 Tamron SP350/5.6 Tamron SP90/2.5
Primoplan 1.9/58 Primagon 4.5/35 Telemegor 5.5/150 Angenieux 3.5/28 Angenieux 3,5/135 Y 2
Canon FL 58/1.2,Canon FL85/1.8,Canon FL 100/3.5,Canon SSC 2.8/100 ,Konica AR 100/2.8, Nikkor P 105/2.5
|
|
| Back to top |
|
|
Scheimpflug
Joined: 06 Feb 2010
Posts: 1888
Location: New Zealand / USA
Expire: 2011-11-18
|
| Posted: Tue Feb 16, 2010 10:30 pm Post subject: |
|
|
Scheimpflug wrote:
| Mo-Fo wrote: |
| Christchurch or Dunedin for the cathedral? Nice job on the lens. |
Christchurch, you got it.
I should have changed my location to "Europe" to make it harder. |
|
| Back to top |
|
|
mo
Joined: 27 Aug 2009
Posts: 8982
Location: Australia
Expire: 2016-07-30
|
| Posted: Wed Feb 17, 2010 1:02 am Post subject: |
|
|
mo wrote:
When the rugby is played there they nearly always include a shot of this landmark
_________________
Moira, Moderator
Fuji XE-1,Pentax K-01,Panasonic G1,Panasonic G5,Pentax MX
Ricoh Singlex TLS,KR-5,KR-5Super,XR-10
Lenses
Auto Rikenon's 55/1.4, 1.8, 2.8... 50/1.7 Takumar 2/58 Preset Takumar 2.8/105 Auto Takumar 2.2/55, 3.5/35 Super Takumar 1.8/55...Macro Takumar F4/50... CZJ Biotar ALU M42 2/58 CZJ Tessar ALU M42 2.8/50
CZJ DDR Flektogon Zebra M42 2.8/35 CZJ Pancolar M42 2/50 CZJ Pancolar Exakta 2/50
Auto Mamiya/Sekor 1.8/55 ...Auto Mamiya/Sekor 2/50 Auto Mamiya/Sekor 2.8/50 Auto Mamiya/Sekor 200/3.5 Tamron SP500/8 Tamron SP350/5.6 Tamron SP90/2.5
Primoplan 1.9/58 Primagon 4.5/35 Telemegor 5.5/150 Angenieux 3.5/28 Angenieux 3,5/135 Y 2
Canon FL 58/1.2,Canon FL85/1.8,Canon FL 100/3.5,Canon SSC 2.8/100 ,Konica AR 100/2.8, Nikkor P 105/2.5
|
|
| Back to top |
|
|
|
|


