| View previous topic :: View next topic |
| Author |
Message |
sichko


Joined: 20 Jun 2008
Posts: 2475
Location: South West UK
|
 Posted: Thu Aug 21, 2008 9:59 am Post subject: Pentacon auto 2.8/135 - partial disassembly and cleaning Posted: Thu Aug 21, 2008 9:59 am Post subject: Pentacon auto 2.8/135 - partial disassembly and cleaning |
 |
|
sichko wrote:

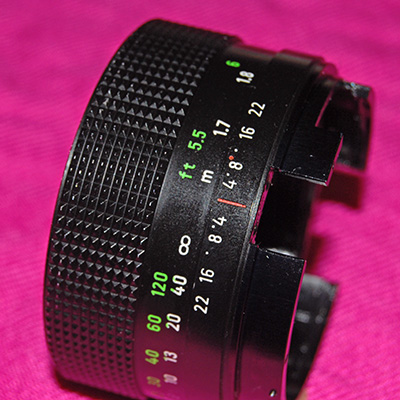
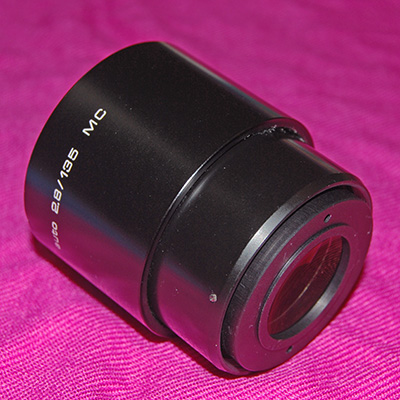
The lens.
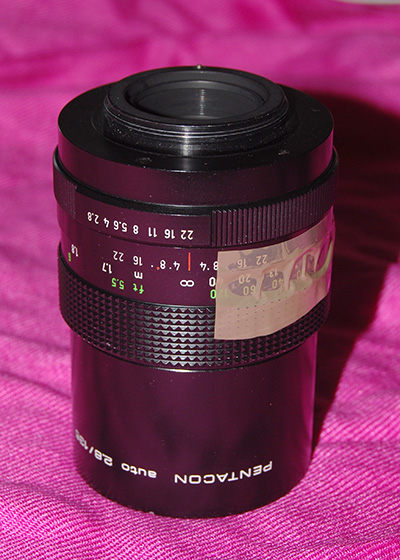
Now placed on a light coloured cloth so that any bits (screws, springs, ball bearings, etc) can be seen. Focus has been set to infinity and the two barrels mount/base barrel and focus barrel taped together.

The back element has been protected. The 4 screws can be removed and the mount lifted off. Don'y worry about orientation - it can only go back one way.
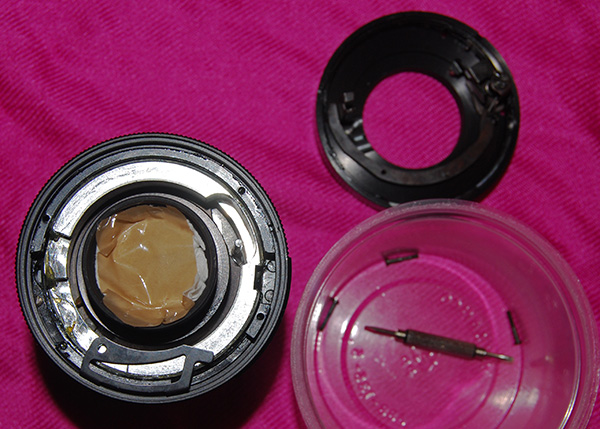
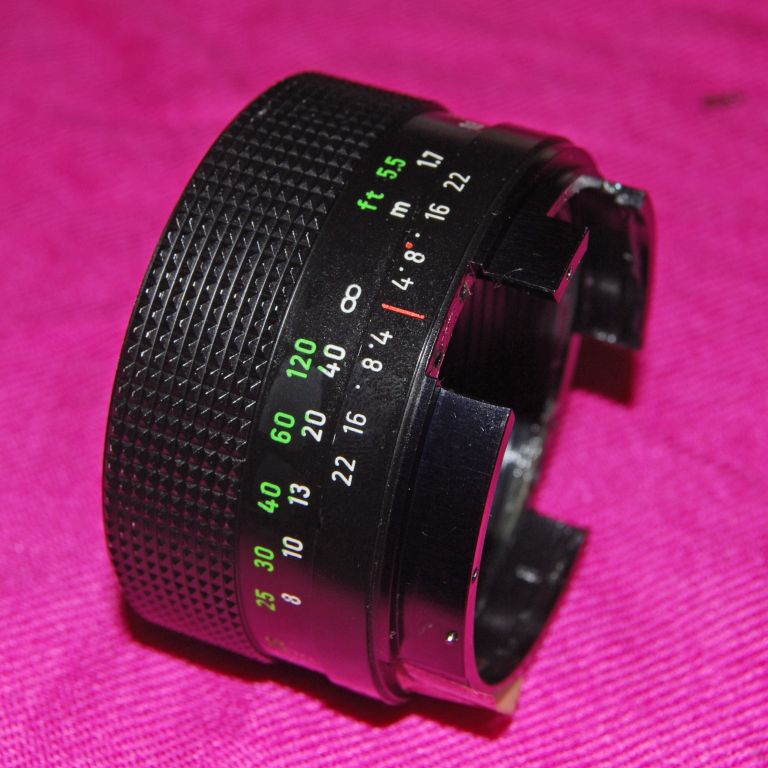
Mount removed, screws safe and the inside of the lens. The mount can be cleaned now but there's usually not much to do.

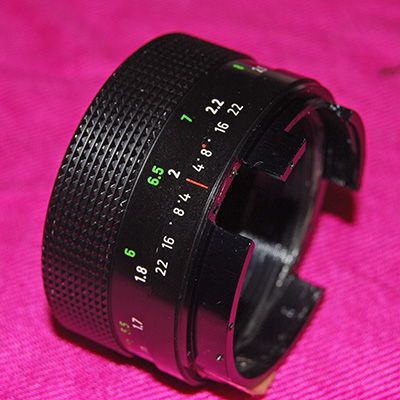
Inside the lens.
Ball bearing after removal of the aperture ring. This time it stayed put - but it's very easy to lose it.

Aperture ring.

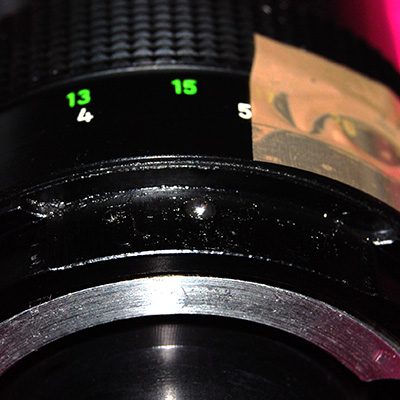
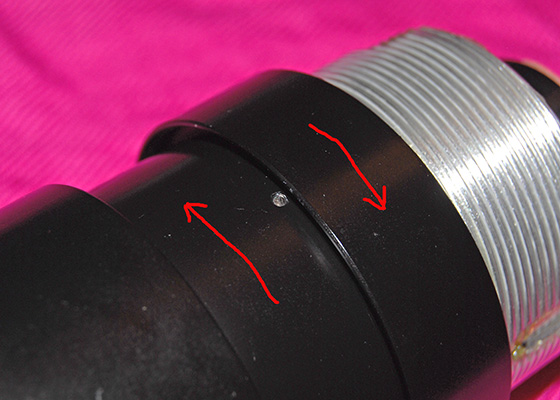
Close-up of the slot in the main helicoid and the guide rod. We need to mark the position of the helicoid relative to the guide rod. This was done with a scratch on the metal. The scratch is under the redline which has been added in editing.

Another view of the slot and guide rod.
Screws and guide rod after removal.
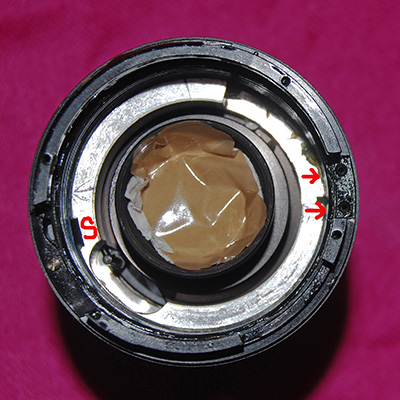
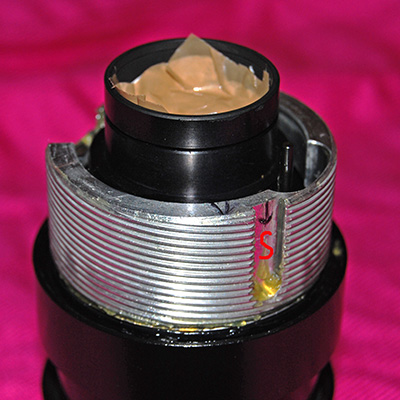
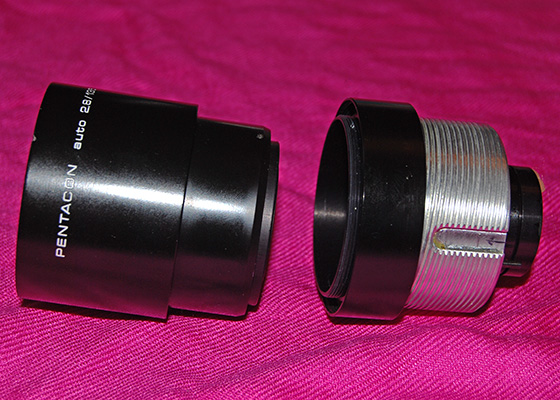
We can now unscrew the focussing helicod (which is fixed relative to the base/mount helicoid by the tape) from the main helicoid. When we started the slot (marked S) was directly opposite the two holes now indicated by red arrows. In the photograph above the focussing helicoid has been turned by just over one and one half turns and can now be lifted from the main helicoid. The position at which the two parts become separated is important and should be marked in some way. We need to start from that position when we put them back together again.
The main helicoid now exposed.

The focussing helicoid (with the base/mount helicoid) and the two pieces of tape. One piece of tape retains the ball bearing - did I mention this earlier ?
The next sequence is quite tricky to describe so I'll pause and restart after a break.
_________________
John |
|
| Back to top |
|
 |
Attila


Joined: 24 Feb 2007
Posts: 57849
Location: Hungary
Expire: 2025-11-18
|
| Posted: Thu Aug 21, 2008 10:52 am Post subject: |
|
|
Attila wrote:
Many thanks John for this nice detailed guide!
_________________
-------------------------------
Items on sale on Ebay
Sony NEX-7 Carl Zeiss Planar 85mm f1.4, Minolta MD 35mm f1.8, Konica 135mm f2.5, Minolta MD 50mm f1.2, Minolta MD 250mm f5.6, Carl Zeiss Sonnar 180mm f2.8
|
|
| Back to top |
|
|
Prometheus

Joined: 27 Feb 2008
Posts: 878
Location: Garphyttan, Sweden
|
| Posted: Thu Aug 21, 2008 11:21 am Post subject: |
|
|
Prometheus wrote:
Yes, thanks this is great!! 
I think many will find this useful, since all descriptions I could find on the net was for the older version which don't look very similar.
_________________
Retrocamera.net |
|
| Back to top |
|
|
sichko
Joined: 20 Jun 2008
Posts: 2475
Location: South West UK
|
| Posted: Thu Aug 21, 2008 1:56 pm Post subject: |
|
|
sichko wrote:
Restart.
Remember that the focus was set to infinity. We can't focus beyond infinity but we can remove the tape and focus a little before infinity (see above).
Here's the screw which stopped us focussing beyond infinity - we can now remove it...

and focus beyond infinity ....
... and this is after one whole turn and a bit ...
and this is as far as we can go.
So when we have separated the two barrels we can clean them, relubricate them and aim to reach this position when we reassemble. We then work backwards to reach the normal infinity position for the working lens.
So back to infinity and then back a whole turn we reach the position below :
This is the normal infinity position. We now work in the opposite direction and start counting COUNT=0 (above).

COUNT=1 Its beginning to come apart although you can't see it yet.

COUNT=5 Nearly there.

And this is where the two barrels come apart - this is where we start when we want to put them back together again.
Separated.
The two barrels can now be cleaned using whatever method you choose - I use petrol to remove the grease and concentrated detergent (washing up liquid) to wash away traces of petrol and grease followed by rinsing and drying in warm air (hair-dryer or fan heater). I then lightly regrease and reassemble.
I have seen some sites where the repairers (working on different lenses) do not actually grease this helicoid pair. I think that it's helpful.
You may have spotted a considerable amount of redundancy, or un-necessary description, in the account given above. However when I started disassembly I didn't know what I would find and I took down too much information rather than too little.
One more section - back in ten minutes.
_________________
John |
|
| Back to top |
|
|
sichko
Joined: 20 Jun 2008
Posts: 2475
Location: South West UK
|
| Posted: Thu Aug 21, 2008 3:02 pm Post subject: |
|
|
sichko wrote:
Last lap - as far as my contribution is concerned.
First of all de-grease and clean the main helicoid since we are going to handle it.
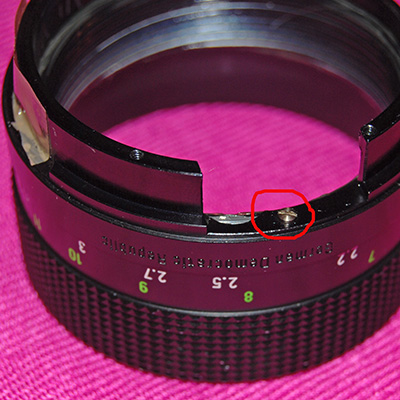
Locate grub-screw and loosen. You can take it out completely but its a little difficult to put it back. If you do leave it in make sure it doesn't fall out by accident.
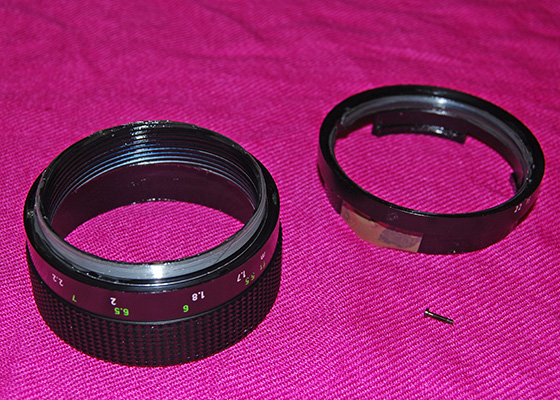
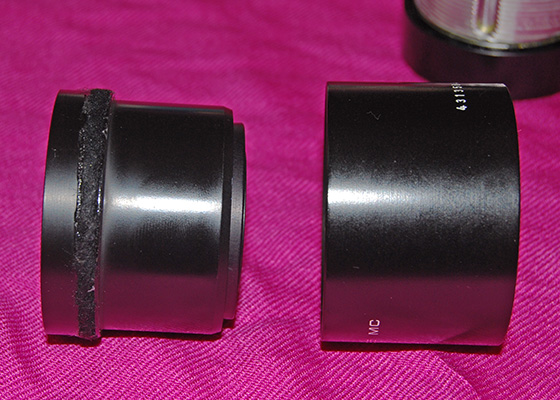
Unnscrew the two main sections as indicated by the arrows.
Separated.
Details of the grub-screw and the "pit" it screws into.
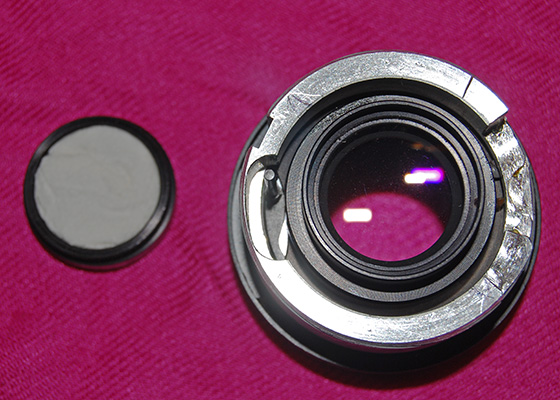
I was getting tired at this point so I missed a couple of pictures. Here's a picture of the cap which holds the rear element. It has been unscrewed - the element is still in place.

Here the rear element has been removed. There is another element in front of the diaphragm. I simply used a blower to blow any dust from this cavity. I cleaned the rear element replaced it and screwed the cap on. Make sure that you put the rear element back the right way round - if you know what that is - someone may have been there before you and put it back the wrong way round !

Front of the diaphragm cavity. I simply used a blower to clean it.
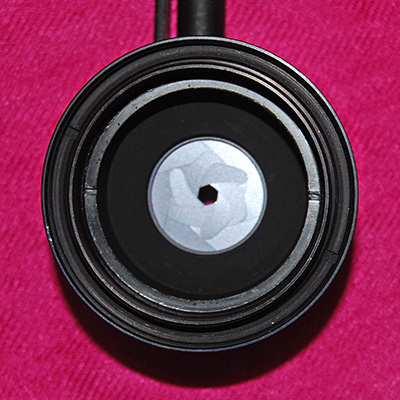
The pen behind this assembly is simply there to hold the lever which closes the diaphragm - so that we can see the blades. Mine were extremely clean and required no attention.
Front lens block + hood. You will need to screw in the grub screw so that they can be pushed .....
....apart.
Reassembly is obvious with re-greasing where appropriate.

Back together again.
_________________
John |
|
| Back to top |
|
|
Schnauzer

Joined: 09 Apr 2008
Posts: 2155
Location: Maine, USA
Expire: 2012-03-08
|
| Posted: Thu Aug 21, 2008 3:59 pm Post subject: |
|
|
Schnauzer wrote:
That was a very interesting and well done cleaning tutorial.
_________________
Ron |
|
| Back to top |
|
|
Prometheus
Joined: 27 Feb 2008
Posts: 878
Location: Garphyttan, Sweden
|
| Posted: Thu Aug 21, 2008 4:02 pm Post subject: |
|
|
Prometheus wrote:
Many thanks again! I will try this soon! Now when this lens aperture works better I will probably use the lens more.
Uh, that grub-screw look reeeeally tiny on the lens.
I wonder, would I be seen as a blasphemer if I detach the hood and replace it with a rubber one?  Don't get me wrong, I appriciate to keep things original and the right one looks pretty, but it's in the way sometimes. Don't get me wrong, I appriciate to keep things original and the right one looks pretty, but it's in the way sometimes.
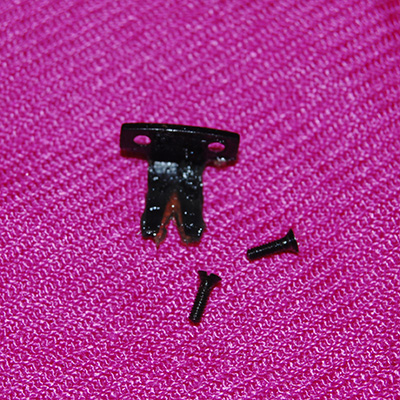
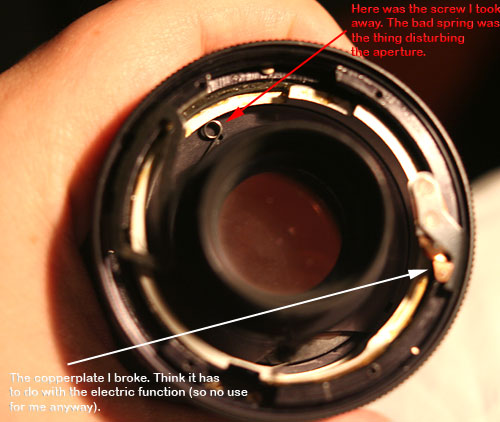
By the way, here's the two things I did on mine. I took away the screw holding the spring which opens the aperture in auto-mode, and broke (by mistake) the copperplate on the auto/manual-switch thingie.
_________________
Retrocamera.net |
|
| Back to top |
|
|
sichko
Joined: 20 Jun 2008
Posts: 2475
Location: South West UK
|
| Posted: Thu Aug 21, 2008 5:12 pm Post subject: |
|
|
sichko wrote:
Thanks to everyone for their comments.
I can't help with the spring or the copper tab in the "electric". There don't seem to be exact equivalents in the "auto".
The grub screw is small - but I've seen smaller on early Russians and an early Steinheill. You need a screwdriver of the right size. Too large or too small and you will strip it. You also need confidence - press hard into the slot before you attempt to turn it. If it doesn't turn try adding a drop of "WD40" and waiting a couple of hours before trying again.
I understand the reluctance to modify lenses. However I take the view that they are there to take pictures with. I have a number of lenses which I'm looking at with a view to serious surgery - replacing M42 mounts with Nikon F mounts.
_________________
John |
|
| Back to top |
|
|
mahojazz
Joined: 30 Aug 2008
Posts: 20
|
| Posted: Mon Sep 01, 2008 2:54 pm Post subject: |
|
|
mahojazz wrote:
wow, sichko, that was a very detailed guide. BTW, what is the grease u used to regrease? if, the focus to infinity was not properly taped, will it be misaligned? Any way to recover from it? |
|
| Back to top |
|
|
sichko
Joined: 20 Jun 2008
Posts: 2475
Location: South West UK
|
| Posted: Mon Sep 01, 2008 6:46 pm Post subject: |
|
|
sichko wrote:
Thanks for your comments. I bought the grease a few months ago on a cold rainy Sunday afternoon (when most of the shops were closed) at a local store. It was sold under the name of "Comma" and described as "Multipurpose Grease". About 5 GBP for 500 g. Looking on the back of the pot it's described as NLGI No 2. Google will help you further.
As for the infinity taping - that's simply how I did it. It's not necessarily a disaster if you don't do it that way. But you need some way of knowing the positions of the three barrels.
_________________
John |
|
| Back to top |
|
|
|
|
|
You cannot post new topics in this forum
You cannot reply to topics in this forum
You cannot edit your posts in this forum
You cannot delete your posts in this forum
You cannot vote in polls in this forum
|


