| View previous topic :: View next topic |
| Author |
Message |
WolverineX


Joined: 19 Apr 2009
Posts: 1694
Location: Zagreb , Croatia , Europe
|
 Posted: Sat Feb 05, 2011 4:06 pm Post subject: How to repair Kodak Beau Brownie (also pix of it's insides) Posted: Sat Feb 05, 2011 4:06 pm Post subject: How to repair Kodak Beau Brownie (also pix of it's insides) |
 |
|
WolverineX wrote:
Year and a half ago my grandmother gave me Kodak Beau Brownie camera that was for years in her cupboard.
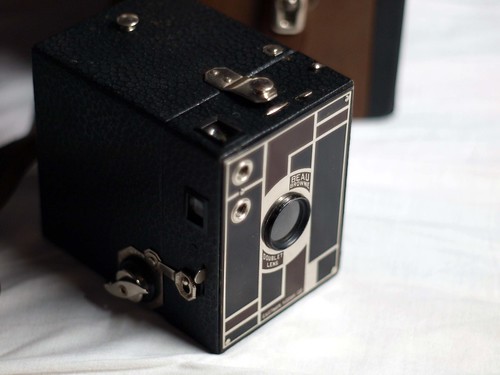
due to it's age lens of the camera had dirt (or something) on inner side of the front lens:

at the time i didn't know how to open the camera and clean it, and because i got this from my grandmother i was hesitant to do anything, so i put a film to test how the dirt affects the photos, and today finally got around to shoot last frames so i could try to clean it. on one other forum i got a hint how to gain the access to the inside of the lens so that made me to finish that film.
as i couldn't find a real how-to manual on the web, i'll do it here so others can profit from my experience
to gain access to the inside of the camera where the lens and aperture mechanism is you need to remove the front metal plate...and that is done by removing 2 NAILS (yes NAILS! why nails? because the camera is made of wood inside) located on the sides of the camera


use the flat screwdriver to lift nails a bit then pliers to pull them out
now you can use flat screwdriver to lift up the front metal plate out of the camera. on that metal plate is main front lens and two little finder lenses and you can clean them now easy. i've used my contact lenses cleaning liquid to clean the dirt from the main lens and the little lenses.
while the camera is so exposed i took the opportunity to clean portrait and landscape finder lenses and mirrors (on the top left of the next pictures)

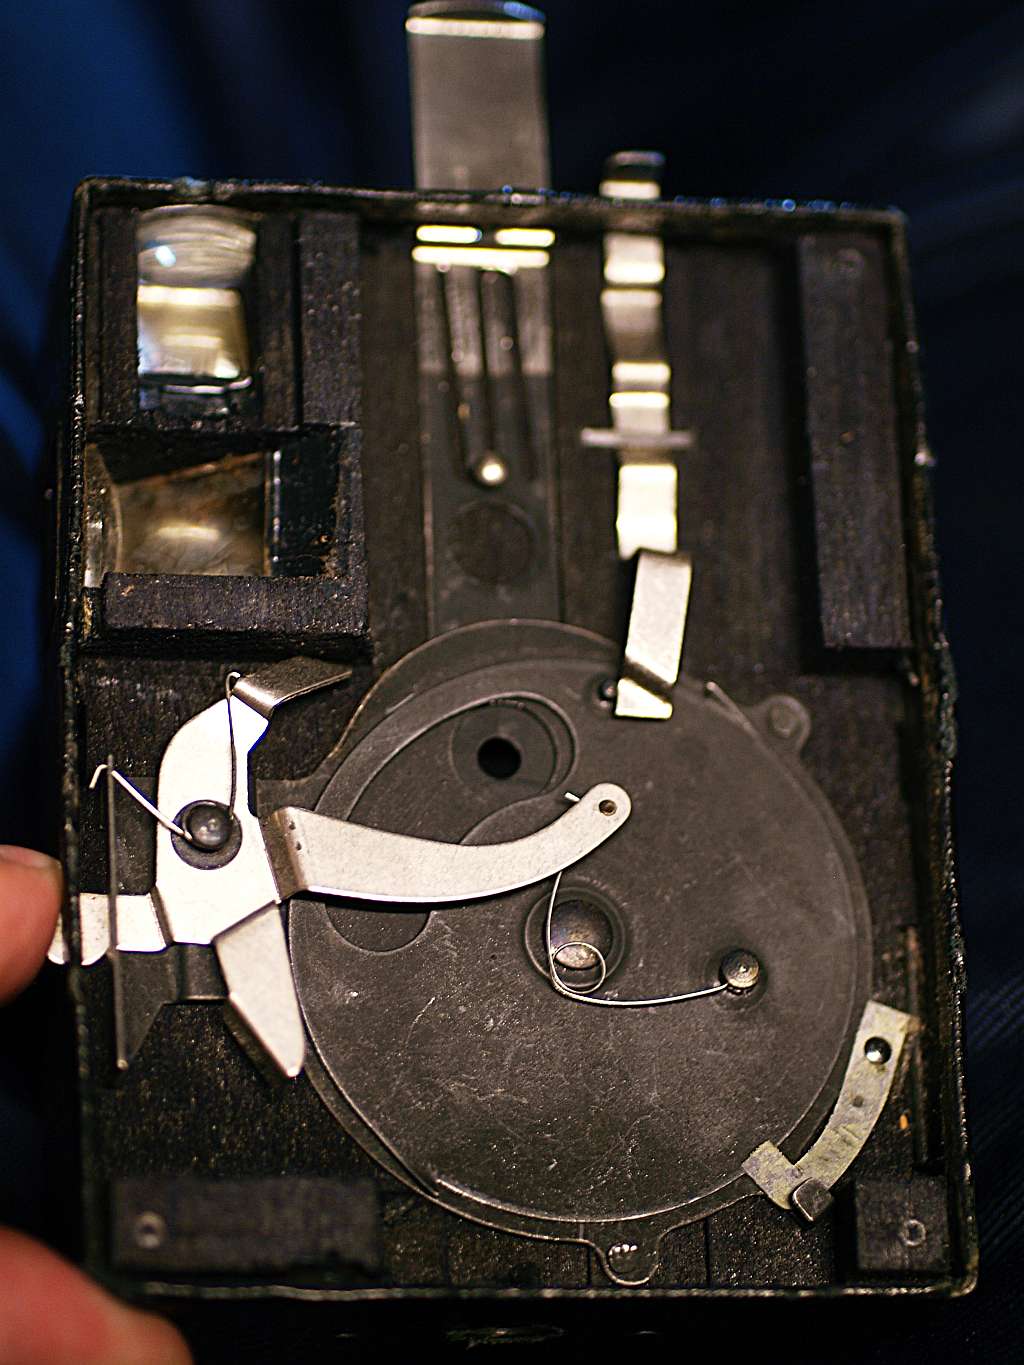
to clean inner main lens that is behind the aperture plates, first be sure the aperture metal strip ( wide strip on the top of the camera that has 3 holes of different sizes ) is set so that the biggest hole (widest aperture) is in front of the lens, the you have to pull out the thinner metal strip so it stops the aperture plates from spinning thus exposing the way to the inner lens (by the way this is the bulb settinng on this camera), now you can clean the inner lens with q-tip.

and that's all
all you have to do now is put the front metal plate back on the camera and put the nails back in their place and your Kodak Beau Brownie is cleaned and ready for use
hope this will help someone
_________________
my tools:Oly E-M5 + 45mm/1.8 + Oly E-520 + 12-60 + 14-42 + 70-300 + Sigma 105mm + FL-50R + EC20 + SRF-11 ring flash
http://forum.mflenses.com/wolverinex-testing-my-lenses-series-link-list-t39524.html |
|
| Back to top |
|
 |
Scheimpflug

Joined: 06 Feb 2010
Posts: 1888
Location: New Zealand / USA
Expire: 2011-11-18
|
| Posted: Wed Feb 16, 2011 11:59 am Post subject: Re: How to repair Kodak Beau Brownie (also pix of it's insid |
|
|
Scheimpflug wrote:
| WolverineX wrote: |
| hope this will help someone |
I'm sure it will! Thanks for taking the time to post this step-by-step procedure! 
_________________
Sigma DP1, Nikon D40 (hers  ), Polaroid x530, Pentax P30t, Pentax P50, (P30t/P50 K-A to Nikon F body mount conversion) ), Polaroid x530, Pentax P30t, Pentax P50, (P30t/P50 K-A to Nikon F body mount conversion)
Nikon: 18-55/3.5-5.6 "G ED II DX" (F) Soligor: 28/2.8 (FL->F converted), 135/3.5 (F), 3x TC (F, modified) Kalimar: 28-85/3.5 (F)
Vivitar: 70-210/2.8-4.0 Version 3 (F), Tele 500/6.3 Preset (F), 19/3.8 (F) Minolta: 300/5.6 (SR/MC/MD pending F conversion)
Tamron: 28/2.8 (Adaptall) Panagor: 28/2.5 (FD) Aetna: 300/5.6 (F) Osawa: MC 28/2.8 (F)
Vintage Lenses: Dallmeyer: 1940s A.M. 14in 356mm f4 (ULF->M42) 1930s Adon Telephoto Taylor, Taylor & Hobson: 1880s Rapid Rectilinear 8 1/2 x 6 1/2 11.31in f/8 (LF->?)
Parts Lenses: Nikon 35-135/3.5-4.5 (F), Sigma 70-210/4.5 (F), Nikon 50/1.8 Series E (F) |
|
| Back to top |
|
|
WolverineX
Joined: 19 Apr 2009
Posts: 1694
Location: Zagreb , Croatia , Europe
|
| Posted: Sun Apr 03, 2011 7:25 pm Post subject: |
|
|
WolverineX wrote:
after finally developing first film taken with this camera, one more info...this camera is 6X9 medium format
_________________
my tools:Oly E-M5 + 45mm/1.8 + Oly E-520 + 12-60 + 14-42 + 70-300 + Sigma 105mm + FL-50R + EC20 + SRF-11 ring flash
http://forum.mflenses.com/wolverinex-testing-my-lenses-series-link-list-t39524.html |
|
| Back to top |
|
|
martyn_bannister

Joined: 23 May 2010
Posts: 1151
|
| Posted: Sun Apr 03, 2011 7:45 pm Post subject: |
|
|
martyn_bannister wrote:
Thanks for the info. I know it's a lot of effort to compile a procedure like this.
Can we see the pictures from this camera?  |
|
| Back to top |
|
|
WolverineX
Joined: 19 Apr 2009
Posts: 1694
Location: Zagreb , Croatia , Europe
|
| Posted: Sun Apr 03, 2011 7:52 pm Post subject: |
|
|
WolverineX wrote:
i'll post some results from the next film i shoot, this one was a test of how dirt that was on the lens impacted the images, now the lens is clean so i'll test it again
_________________
my tools:Oly E-M5 + 45mm/1.8 + Oly E-520 + 12-60 + 14-42 + 70-300 + Sigma 105mm + FL-50R + EC20 + SRF-11 ring flash
http://forum.mflenses.com/wolverinex-testing-my-lenses-series-link-list-t39524.html |
|
| Back to top |
|
|
|
|
|
You cannot post new topics in this forum
You cannot reply to topics in this forum
You cannot edit your posts in this forum
You cannot delete your posts in this forum
You cannot vote in polls in this forum
|


