| View previous topic :: View next topic |
| Author |
Message |
Colorado CJ

Joined: 29 Jul 2012
Posts: 210
Location: Northern Colorado
|
 Posted: Fri Aug 21, 2015 5:24 am Post subject: First Home Processed Slide Film Posted: Fri Aug 21, 2015 5:24 am Post subject: First Home Processed Slide Film |
 |
|
Colorado CJ wrote:
Here's my first home processed slide film (or color film for that matter). I used the Arista Rapid E-6 kit to develop it.
Just a shot of one of the lakes in my town.
Taken with a Zone VI 4x5 camera and Fujinon W 125mm F5.6 lens, using a 2 stop graduated ND filter. Shot on Velvia 100 and processed with Arista E-6 chemicals.
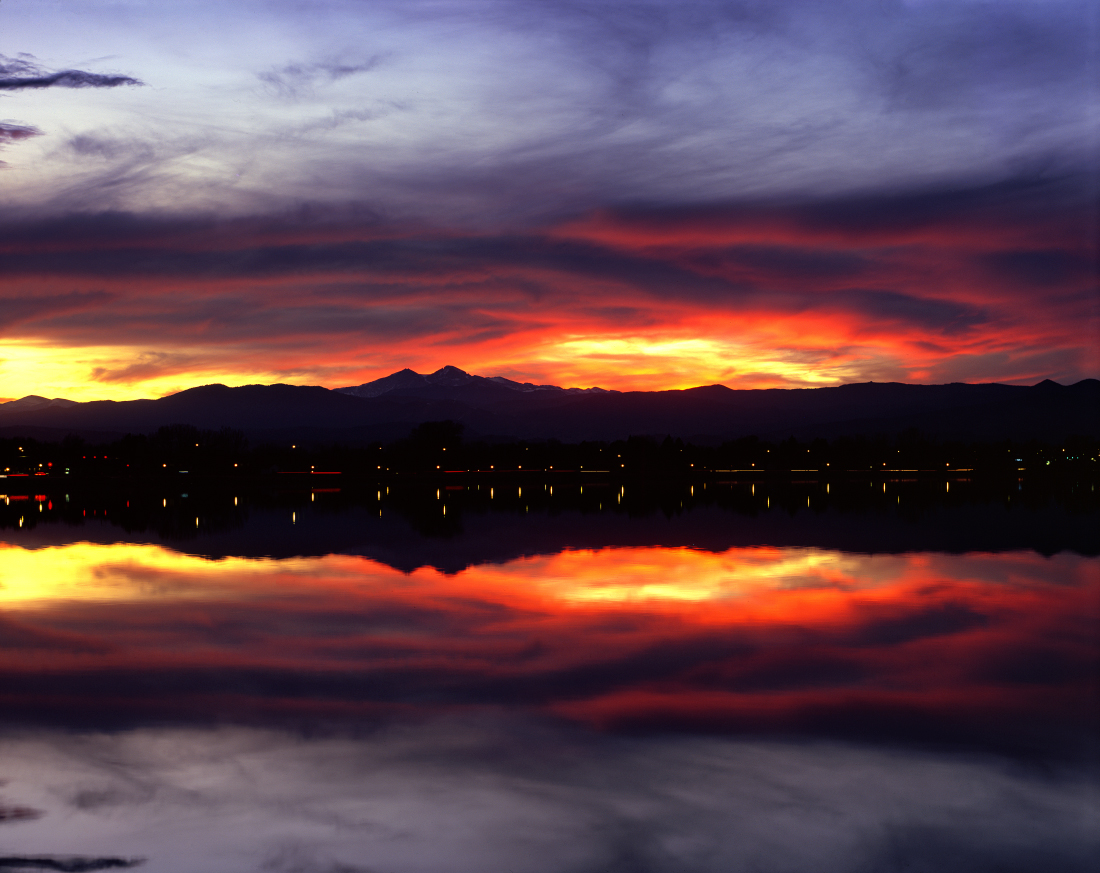 Lake Loveland - Velvia - 4x5 by Andrew Marjama, on Flickr Lake Loveland - Velvia - 4x5 by Andrew Marjama, on Flickr
I'll add more as I have time to scan in the slides. I developed 6 sheets at once in a Jobo Daylight tank.
_________________
http://andrewmarjamaphotography.com |
|
| Back to top |
|
 |
uddhava


Joined: 22 Aug 2012
Posts: 3071
Location: Hungary
Expire: 2021-06-21
|
| Posted: Fri Aug 21, 2015 6:27 am Post subject: |
|
|
uddhava wrote:
Congratulations! Looks nice to me, but I don't know anything about developing film.
I guess you have already done B&W film developing. |
|
| Back to top |
|
|
Excalibur

Joined: 19 Jul 2009
Posts: 5019
Location: UK
Expire: 2014-04-21
|
| Posted: Fri Aug 21, 2015 8:09 am Post subject: |
|
|
Excalibur wrote:
Very good...lucky you were in the right place to capture the view.
_________________
Canon A1, AV1, T70 & T90, EOS 300 and EOS300v, Chinon CE and CP-7M. Contax 139, Fuji STX-2, Konica Autoreflex TC, FS-1, FT-1, Minolta X-700, X-300, XD-11, SRT101b, Nikon EM, FM, F4, F90X, Olympus OM2, Pentax S3, Spotmatic, Pentax ME super, Praktica TL 5B, & BC1, , Ricoh KR10super, Yashica T5D, Bronica Etrs, Mamiya RB67 pro AND drum roll:- a Sony Nex 3
.........past gear Tele Rolleiflex and Rollei SL66.
Many lenses from good to excellent. |
|
| Back to top |
|
|
mo

Joined: 27 Aug 2009
Posts: 8982
Location: Australia
Expire: 2016-07-30
|
| Posted: Fri Aug 21, 2015 8:15 am Post subject: |
|
|
mo wrote:
I love the colors,beautiful.
_________________
Moira, Moderator 
Fuji XE-1,Pentax K-01,Panasonic G1,Panasonic G5,Pentax MX
Ricoh Singlex TLS,KR-5,KR-5Super,XR-10
Lenses
Auto Rikenon's 55/1.4, 1.8, 2.8... 50/1.7 Takumar 2/58 Preset Takumar 2.8/105 Auto Takumar 2.2/55, 3.5/35 Super Takumar 1.8/55...Macro Takumar F4/50... CZJ Biotar ALU M42 2/58 CZJ Tessar ALU M42 2.8/50
CZJ DDR Flektogon Zebra M42 2.8/35 CZJ Pancolar M42 2/50 CZJ Pancolar Exakta 2/50
Auto Mamiya/Sekor 1.8/55 ...Auto Mamiya/Sekor 2/50 Auto Mamiya/Sekor 2.8/50 Auto Mamiya/Sekor 200/3.5 Tamron SP500/8 Tamron SP350/5.6 Tamron SP90/2.5
Primoplan 1.9/58 Primagon 4.5/35 Telemegor 5.5/150 Angenieux 3.5/28 Angenieux 3,5/135 Y 2
Canon FL 58/1.2,Canon FL85/1.8,Canon FL 100/3.5,Canon SSC 2.8/100 ,Konica AR 100/2.8, Nikkor P 105/2.5
|
|
| Back to top |
|
|
Rick1779


Joined: 17 May 2013
Posts: 1207
Location: Italy
Expire: 2014-06-06
|
| Posted: Fri Aug 21, 2015 8:17 am Post subject: |
|
|
Rick1779 wrote:
| mo wrote: |
| I love the colors,beautiful. |
+1
_________________
TELLTALE
 |
|
| Back to top |
|
|
miran

Joined: 01 Aug 2012
Posts: 1364
Location: Slovenia
|
| Posted: Fri Aug 21, 2015 10:43 am Post subject: |
|
|
miran wrote:
Amazing colours! 
_________________
my flickr stream |
|
| Back to top |
|
|
Attila

Joined: 24 Feb 2007
Posts: 57849
Location: Hungary
Expire: 2025-11-18
|
| Posted: Fri Aug 21, 2015 2:04 pm Post subject: |
|
|
Attila wrote:
Great success , congrats!!
_________________
-------------------------------
Items on sale on Ebay
Sony NEX-7 Carl Zeiss Planar 85mm f1.4, Minolta MD 35mm f1.8, Konica 135mm f2.5, Minolta MD 50mm f1.2, Minolta MD 250mm f5.6, Carl Zeiss Sonnar 180mm f2.8
|
|
| Back to top |
|
|
cooltouch

Joined: 15 Jan 2009
Posts: 9097
Location: Houston, Texas
|
| Posted: Fri Aug 21, 2015 7:44 pm Post subject: |
|
|
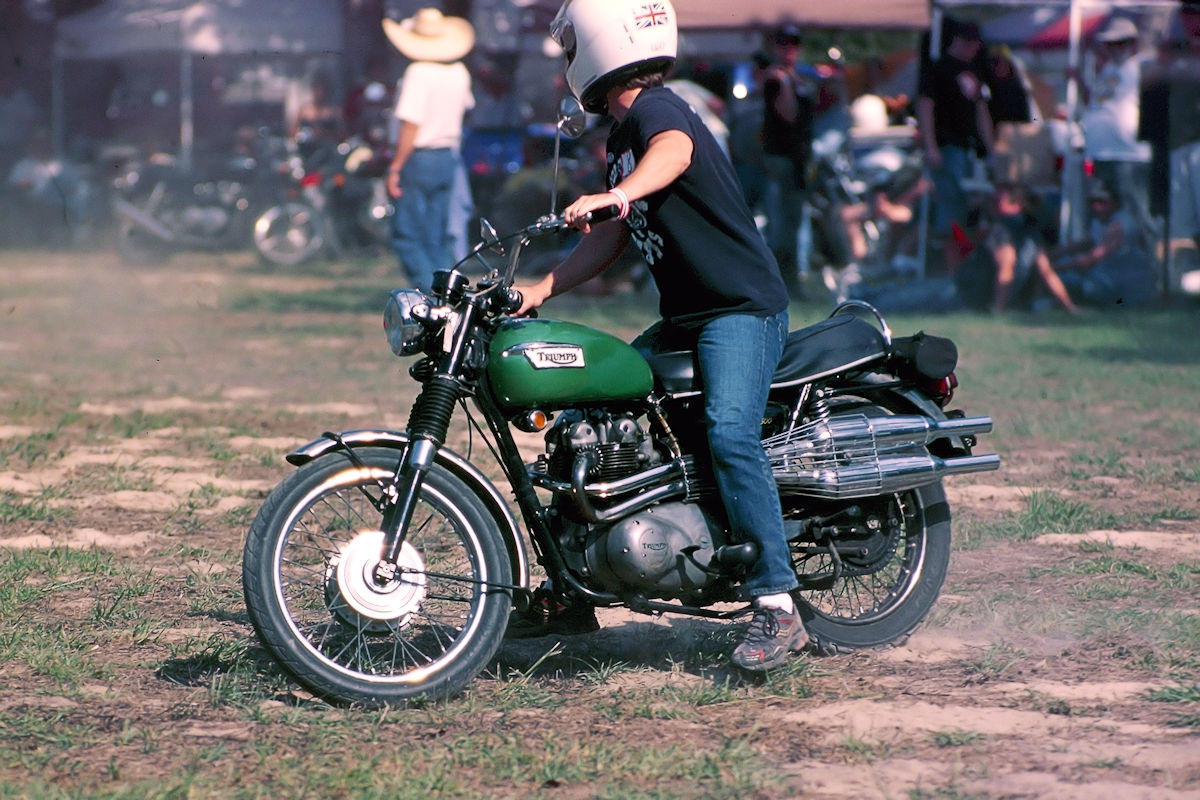
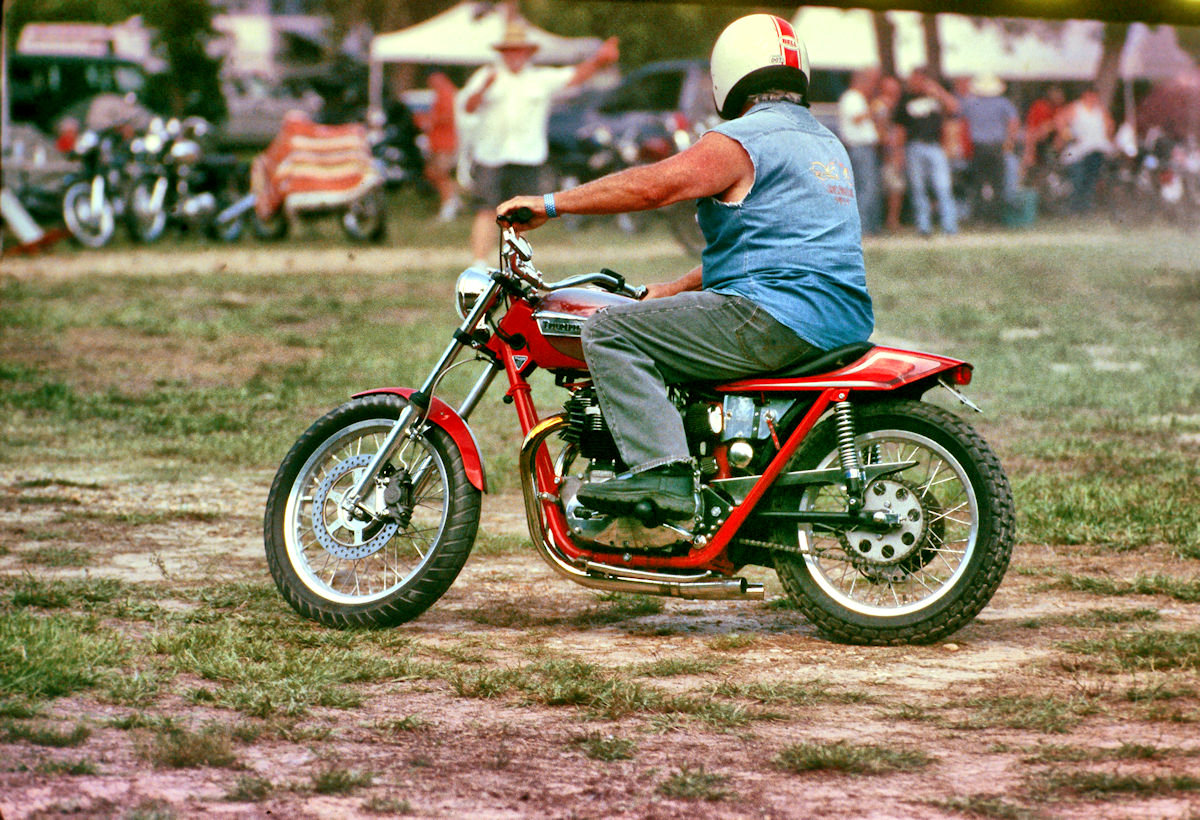
cooltouch wrote:
Very nice, Andrew! I too have been using the Arista kits from Freestyle and I've been very happy with the results. I don't have anything as great as a large format image to show, just small stuff. Here are a couple 35mm shots I took while visiting a Brit Bike rally a while back. Sorry, I don't recall the camera(s) or lens(es) I used.


And a shot of my old BMW R90/6:

The film was Kodak's Elite Chrome 100, purchased before it was discontinued. Too bad, it was great .
_________________
Michael
My Gear List: http://michaelmcbroom.com/photo/gear.html
My Gallery: http://michaelmcbroom.com/gallery3/index.php/
My Flickr Page: https://www.flickr.com/photos/11308754@N08/albums
My Music: https://soundcloud.com/michaelmcbroom/albums
My Blog: http://michaelmcbroom.com/blogistan/ |
|
| Back to top |
|
|
Colorado CJ
Joined: 29 Jul 2012
Posts: 210
Location: Northern Colorado
|
| Posted: Fri Aug 28, 2015 2:45 am Post subject: |
|
|
Colorado CJ wrote:
Thanks everyone!
Here's a couple I just finished scanning, taken this weekend while on a camping/hiking trip in the Glenwood Canyon area of Colorado.
Both shot on Velvia 50 slide film and developed with the Arista Rapid E-6 kit.
Shot with a Zone VI 4x5 camera and Fujinon W 125mm F5.6 lens.
This first one was the view I had while I was cooking some dinner over the fire in the White River National Forest.
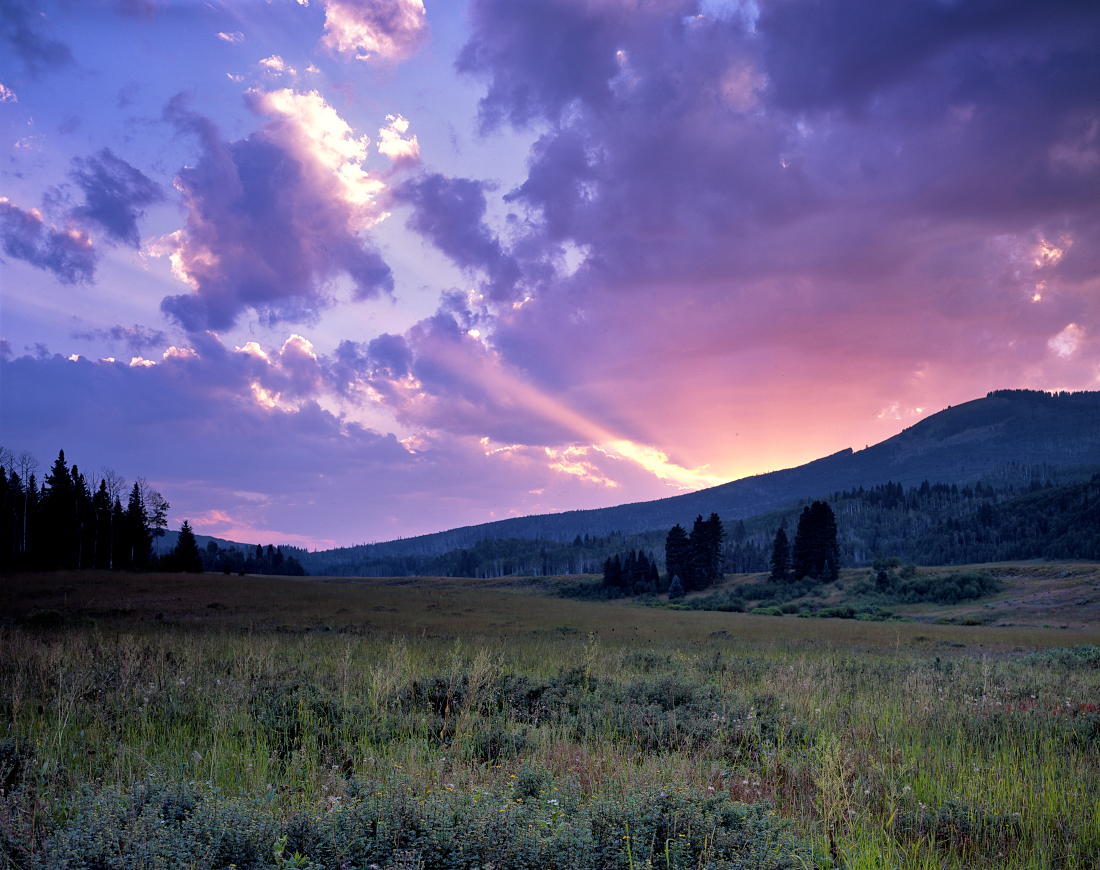 White River Wilderness - Velvia - 4x5 by Andrew Marjama, on Flickr White River Wilderness - Velvia - 4x5 by Andrew Marjama, on Flickr
This one is of "Sprouting Rock", the waterfall that created the Hanging Lake in the Glenwood Canyon of the Colorado. The waterfall is coming out of a hole in the cliff face, not from a normal above ground river.
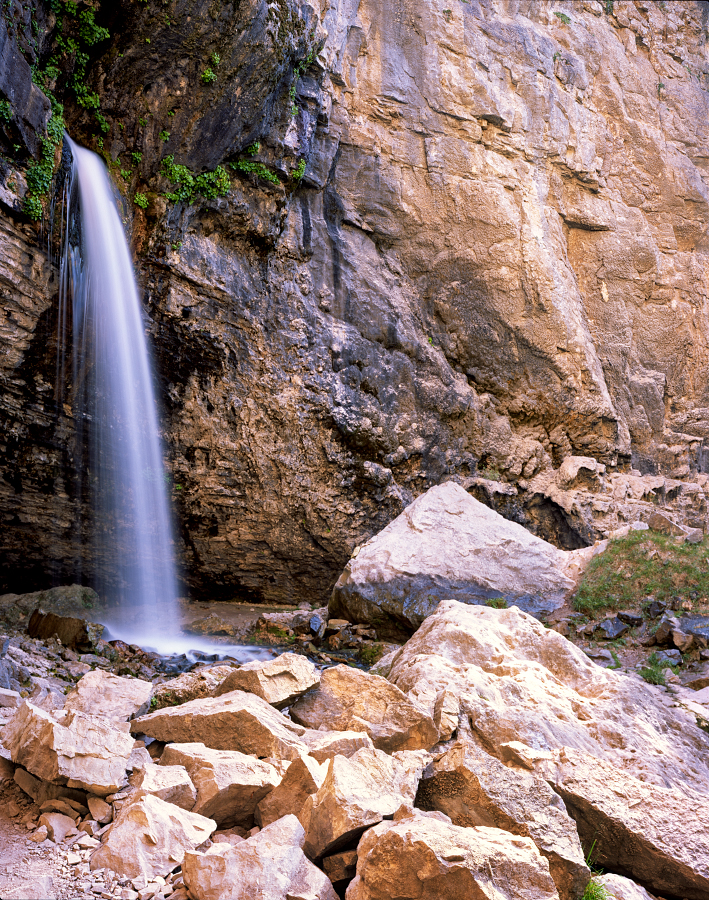 Spouting Rock - Velvia - 4x5 by Andrew Marjama, on Flickr Spouting Rock - Velvia - 4x5 by Andrew Marjama, on Flickr
I'll add some more tomorrow of the Hanging Lake once I develop and scan in the slides.
_________________
http://andrewmarjamaphotography.com |
|
| Back to top |
|
|
miran
Joined: 01 Aug 2012
Posts: 1364
Location: Slovenia
|
| Posted: Fri Aug 28, 2015 5:17 am Post subject: |
|
|
miran wrote:
Great images again! Btw, do you have any large ones to show off with detail and resolution? 
_________________
my flickr stream |
|
| Back to top |
|
|
Attila
Joined: 24 Feb 2007
Posts: 57849
Location: Hungary
Expire: 2025-11-18
|
| Posted: Fri Aug 28, 2015 7:49 pm Post subject: |
|
|
Attila wrote:

_________________
-------------------------------
Items on sale on Ebay
Sony NEX-7 Carl Zeiss Planar 85mm f1.4, Minolta MD 35mm f1.8, Konica 135mm f2.5, Minolta MD 50mm f1.2, Minolta MD 250mm f5.6, Carl Zeiss Sonnar 180mm f2.8
|
|
| Back to top |
|
|
poilu
Joined: 26 Aug 2007
Posts: 10471
Location: Greece
Expire: 2019-08-29
|
| Posted: Sat Aug 29, 2015 12:09 pm Post subject: |
|
|
poilu wrote:
 
_________________
T* |
|
| Back to top |
|
|
tb_a

Joined: 26 Jan 2010
Posts: 3678
Location: Austria
Expire: 2019-08-28
|
| Posted: Sat Aug 29, 2015 1:59 pm Post subject: Re: First Home Processed Slide Film |
|
|
tb_a wrote:
| Colorado CJ wrote: |
Here's my first home processed slide film (or color film for that matter). I used the Arista Rapid E-6 kit to develop it.
......Shot on Velvia 100 and processed with Arista E-6 chemicals.
I'll add more as I have time to scan in the slides. I developed 6 sheets at once in a Jobo Daylight tank. |
Thank you for sharing, though I would also be interested in bigger views or crops to see the real potential of that combination.
How did you maintain the required temperature? Could you please tell something about the process?
I did a lot of B&W in the past but never tried color developing myself because of the temperature problem. So the basic process is clear for me.
However, when I see your results then I might try it myself as well.
I still have many rolls of Velvia 50 in 120/220 and 135 around and to send it to any labor is rather cumbersome and takes very long to see any result. My next labor is 1 hour car-drive away. My scanners are also only collecting dust nowadays. 
_________________
Thomas Bernardy
Manual focus lenses mainly from Minolta, Pentax, Voigtlaender, Leitz, Topcon and from Russia (too many to be listed here). |
|
| Back to top |
|
|
cooltouch
Joined: 15 Jan 2009
Posts: 9097
Location: Houston, Texas
|
| Posted: Sat Aug 29, 2015 8:05 pm Post subject: |
|
|
cooltouch wrote:
Thomas, it isn't very difficult to control temperature. One easy way is to get a small styrofoam cooler that's big enough to hold all the chemicals and use it for the bath. An accurate thermometer is required to monitor the temps.
What I do is heat water to above the required temperature level before I immerse the chem bottles, I just run the hot water tap for this. Then I take a cap off one of the chem bottles and insert the thermometer. Periodically, I check the bottle's temp, and then the temp of the bath. I might have to add more hot water to the bath once the bottles start heating up.
If the final equilibrium temperature is still too hot, I just wait til it cools down to where I need it. If it's too low, I add more hot water, then wait for equilibrium. Obviously, what I mean by 'equilibrium' is when both the bath and bottle temperature are the same.
When I add water, I prefer to replace rather than add, actually. That is, I bail out a cup of water from the bath then add a cup of hot water to it. Less dilution effect that way.
Then, once the equilibrium temperature has been reached, I start the process, keeping an eye on the bath temperature. It will slowly cool during the process, more than likely, and what I do is this. I have a cup handy and I use it to bail out a cup of water from the cooler, then add a cup of hot water. I might do this 3 or 4 times before I see the temp stabilize back to where I want it. If I need to perform this process of 3 or 4 exchanges of water, it's usually only once.
I'm not sure, but I suspect the blix process is not as sensitive to to temperature change as the developers are.
It sounds like a lot of fiddle work, but it's not so bad once you have everything set up and organized. I do my developing in my bathroom because I have a handy sink and hot water there. Obviously, the kitchen will work just as well.
_________________
Michael
My Gear List: http://michaelmcbroom.com/photo/gear.html
My Gallery: http://michaelmcbroom.com/gallery3/index.php/
My Flickr Page: https://www.flickr.com/photos/11308754@N08/albums
My Music: https://soundcloud.com/michaelmcbroom/albums
My Blog: http://michaelmcbroom.com/blogistan/ |
|
| Back to top |
|
|
tb_a
Joined: 26 Jan 2010
Posts: 3678
Location: Austria
Expire: 2019-08-28
|
| Posted: Sat Aug 29, 2015 10:26 pm Post subject: |
|
|
tb_a wrote:
Michael, thanks for your quite extensive explanation. Though, it's indeed sounding a little bit cumbersome for me.
I've read about a "cold" method for color which takes rather long in comparison. That should be less sensible for temperature variations comparable to B&W and works at room temperature. Did you ever try this?
_________________
Thomas Bernardy
Manual focus lenses mainly from Minolta, Pentax, Voigtlaender, Leitz, Topcon and from Russia (too many to be listed here). |
|
| Back to top |
|
|
Colorado CJ
Joined: 29 Jul 2012
Posts: 210
Location: Northern Colorado
|
| Posted: Sat Aug 29, 2015 10:52 pm Post subject: |
|
|
Colorado CJ wrote:
I use the exact same method Michael explained. It really is easy to do, and it gives you something to do while the developers are doing their thing in the daylight tank.
I add one thing though, I keep a gallon jug of water at the right temperature so that I can use it as a wash between the developers and blix. Got to wash the tank 7 times between each developer, then for 5 minutes after the blix.
It really is MUCH easier than I thought it would be and will save me tons of money in the process (I have 275 sheets of 4x5 Velvia and 60, 120 rolls left!)
_________________
http://andrewmarjamaphotography.com |
|
| Back to top |
|
|
cooltouch
Joined: 15 Jan 2009
Posts: 9097
Location: Houston, Texas
|
| Posted: Sun Aug 30, 2015 12:05 am Post subject: |
|
|
cooltouch wrote:
Keeping the gallon jug handy is a tip worth remembering. What I do is run the hot water tap enough so it stays hot when I need it. I do check and adjust temp with the cold to insure that it is close to the same temp when I do the washes, though.
Thomas, to answer your question, no I've never tried chems that work at lower temperatures. The Arista kit requires the higher temps. I wouldn't mind trying a kit that works at lower temps, but apparently it isn't one that Freestyle stocks and I haven't checked on other sources for E-6 emulsions.
_________________
Michael
My Gear List: http://michaelmcbroom.com/photo/gear.html
My Gallery: http://michaelmcbroom.com/gallery3/index.php/
My Flickr Page: https://www.flickr.com/photos/11308754@N08/albums
My Music: https://soundcloud.com/michaelmcbroom/albums
My Blog: http://michaelmcbroom.com/blogistan/
Last edited by cooltouch on Sun Aug 30, 2015 12:20 am; edited 1 time in total |
|
| Back to top |
|
|
tb_a
Joined: 26 Jan 2010
Posts: 3678
Location: Austria
Expire: 2019-08-28
|
| Posted: Sun Aug 30, 2015 12:20 am Post subject: |
|
|
tb_a wrote:
Thank you! Maybe I'll give it a try as well. Will see.
_________________
Thomas Bernardy
Manual focus lenses mainly from Minolta, Pentax, Voigtlaender, Leitz, Topcon and from Russia (too many to be listed here). |
|
| Back to top |
|
|
Colorado CJ
Joined: 29 Jul 2012
Posts: 210
Location: Northern Colorado
|
| Posted: Sun Aug 30, 2015 3:23 am Post subject: |
|
|
Colorado CJ wrote:
Yeah, I wouldn't use the lower temperatures. The developing times are greatly extended and the instructions say that there are large color shifts and density problems when not developed at the recommended temperatures.
It really is just about as easy as B&W processing and that first time you pull out a developed slide from the tank is a memorable experience. That and you can shoot a lot more slide film since processing will be SOOO much cheaper than having them developed at a lab.
_________________
http://andrewmarjamaphotography.com |
|
| Back to top |
|
|
tb_a
Joined: 26 Jan 2010
Posts: 3678
Location: Austria
Expire: 2019-08-28
|
| Posted: Sun Aug 30, 2015 6:25 am Post subject: |
|
|
tb_a wrote:
A nice accessory for something around 3.000 $:
http://www.jobo-usa.com/jobo-analog-products/jobo-cpp3-processor/1-jobo-cpp3-processor
Insane pricing! 
_________________
Thomas Bernardy
Manual focus lenses mainly from Minolta, Pentax, Voigtlaender, Leitz, Topcon and from Russia (too many to be listed here). |
|
| Back to top |
|
|
cooltouch
Joined: 15 Jan 2009
Posts: 9097
Location: Houston, Texas
|
| Posted: Sun Aug 30, 2015 6:48 am Post subject: |
|
|
cooltouch wrote:
Oh yeah. Known about the Jobo processor for years. If it were more like $300, it would be worth thinking about.
_________________
Michael
My Gear List: http://michaelmcbroom.com/photo/gear.html
My Gallery: http://michaelmcbroom.com/gallery3/index.php/
My Flickr Page: https://www.flickr.com/photos/11308754@N08/albums
My Music: https://soundcloud.com/michaelmcbroom/albums
My Blog: http://michaelmcbroom.com/blogistan/ |
|
| Back to top |
|
|
Attila
Joined: 24 Feb 2007
Posts: 57849
Location: Hungary
Expire: 2025-11-18
|
| Posted: Sun Aug 30, 2015 2:01 pm Post subject: |
|
|
Attila wrote:
I bought my Jobo for 100-200 usd , keep your eyes open.
_________________
-------------------------------
Items on sale on Ebay
Sony NEX-7 Carl Zeiss Planar 85mm f1.4, Minolta MD 35mm f1.8, Konica 135mm f2.5, Minolta MD 50mm f1.2, Minolta MD 250mm f5.6, Carl Zeiss Sonnar 180mm f2.8
|
|
| Back to top |
|
|
Colorado CJ
Joined: 29 Jul 2012
Posts: 210
Location: Northern Colorado
|
| Posted: Sun Aug 30, 2015 2:44 pm Post subject: |
|
|
Colorado CJ wrote:
| Attila wrote: |
| I bought my Jobo for 100-200 usd , keep your eyes open. |
Man, I wish I could find one for that price! The ones on Ebay seem to be going for $600.00 at the cheapest.
_________________
http://andrewmarjamaphotography.com |
|
| Back to top |
|
|
|
|