| View previous topic :: View next topic |
| Author |
Message |
j.lukow


Joined: 03 Oct 2007
Posts: 856
Location: Lindsay Ontario, Canada
Expire: 2021-11-25
|
 Posted: Thu Jun 26, 2008 3:19 am Post subject: Essential photo basics . . . Posted: Thu Jun 26, 2008 3:19 am Post subject: Essential photo basics . . . |
 |
|
j.lukow wrote:
This thread was inspired by an email exchange with Larry.
I'm not asking about basics we've forgotten or should have remembered. I was hoping to share some tips with members out there - to refresh the memory or teach the members newer to photography (especially MF).
Tripod use . . .
Use one if you're using a telephoto and slower shutter speed. Larry mentioned that the shutter speed should be faster than the focal length of the lens - for a 400mm lens, minimum of 1/500th - if I understand what he said. this is because shake is easily seen when using telephotos and zooms.
I think this is an essential basic because so many digitals have anti-shake mechanisms, so if you're using film or I guess a manual lens - shake/blur can pop up.
If you don't have a tripod or room for a tripod set it on something solid - a bean bag on the ground, a log, a rock, a low wall or a car roof.
So guys if you can think of an essential tip post it.
Jim
ps - When using a RF camera make sure the lens cap is off - doesn't count 
_________________
EMPLOYMENT: That which funded photography and my new woodworking business.j.lukow
Jim's Kit:
Minolta Kit: Minolta X570 & Autowinder G, Minolta SRT200
LENSES:Minolta - 45mm & 50mm F1:2, PF 58mm F1:1.4, Tamron 28mm f1:2.5, Tamron SP 35-80mm f1:2.8/3.8 & CF TeleMacro zoom 80-210 f1:3.8, Vivitar f3.0~4.5 35-200mm macro focusing zoom, f 2.8 28mm CF Wide angle, 2x macro focus teleconverter,Sigma F4 25-250, f 2.8~4 35-70mm zoom master,Tokina SD f4-5.6 70-210 zoom, f4.5 80-200 "Ultra" Zoom,AutoImage 135mm F1:2.8, Spiratone 400mm f1:6.3, Magicon f3.5-4.8 35-70mm macro zoom,Quantary f8-500 Mirror/macro lens, Accura MD mount Macro bellows
M42 Kit:Praktica PLC2,Yashica TL Electro X
LENSES:Meyer Goerlitz Oreston 50mm f1:1.8 , Auto Yashinon DX 1:1.7 50mm,Steinheil Munchen Culminar 135mm f4.5, Adaptall-2 M42 adapter
Zeiss . . . Zeiss Contaflex 126 system, Zeiss Contaflex Super
Medium Format: Pentacon sixTL
Hasselblad 500c/m - CZ 2.8-80mm planar, CZ 4-150mm sonnarCF |
|
| Back to top |
|
 |
Laurence


Joined: 26 Mar 2007
Posts: 4809
Location: Western Washington State
Expire: 2016-06-19
|
| Posted: Thu Jun 26, 2008 4:38 am Post subject: |
|
|
Laurence wrote:
Don't hesitate to bracket! Especially if you come to a scene that is inspiring, and you want to make sure you have nailed it. This holds true especially with slide film, and even more if you are using the Sunny 16 rules.
If I am at a really nice position with slide film, and think that the image will probably worth it, I bracket 5 shots if using the Sunny 16 procedure, and 3 shots if I'm using a meter.
For print film, I've never bothered bracketing, and have always been "in the ballpark" to get a decent image, because the print film is forgiving.
I take my time when bracketing, and sometimes this results in "seeing" that the image could be improved in some way...so this can be a benefit from the "slowing down"....
_________________
Assent, and you are sane;
Demur,�you �re straightway dangerous,
And handled with a chain.
Emily Dickinson
Cameras and Lenses in Use:
Yashica Mat 124 w/ Yashinon 80/3.5,
CV Apo-Lanthar 90/3.5SL, (Thank you Klaus),
Pentax 645,
Flek 50,
Pentax-A 150
Pentax-A 120 Macro
Voigtlander Vitomatic I w/Color Skopar 50/2.8
Konica TC and zoom lenses (thanks Carsten)
Contax AX
Yashica ML 50/2
Yashica ML 35/2.8
Carl Zeiss Contax 50/1.4
Tamron Adaptall SP 17/3.5
Tamron Adaptall 28/2.5
Tamron Adaptall SP 300/2.8 LD (IF)
|
|
| Back to top |
|
|
Bruce
Joined: 15 Jan 2008
Posts: 842
Location: Boston, Ma USA
Expire: 2014-11-22
|
| Posted: Thu Jun 26, 2008 6:06 am Post subject: |
|
|
Bruce wrote:
be sure to consider crop factor when determining tripod use with your focal length and shutter speeds in use. A 50mm Zeiss is going to need an 80ish shutter speed before you can go handheld with it on your Canon [digital].
I was wondering why my 50th sec shutters were getting motion blur before I stumbled on this little extra detail. |
|
| Back to top |
|
|
Orio

Joined: 24 Feb 2007
Posts: 29545
Location: West Emilia
Expire: 2012-12-04
|
| Posted: Thu Jun 26, 2008 7:36 am Post subject: |
|
|
Orio wrote:
| Bruce wrote: |
be sure to consider crop factor when determining tripod use with your focal length and shutter speeds in use. A 50mm Zeiss is going to need an 80ish shutter speed before you can go handheld with it on your Canon [digital].
|
I don't think so, because you are still using a 50mm lens. You are just recording a smaller part of it.
_________________
Orio, Administrator
T*
NE CEDE MALIS AUDENTIOR ITO
Ferrania film is reborn! http://www.filmferrania.it/
Support the Ornano film chemicals company and help them survive!
http://forum.mflenses.com/ornano-chemical-products-t55525.html |
|
| Back to top |
|
|
Bruce
Joined: 15 Jan 2008
Posts: 842
Location: Boston, Ma USA
Expire: 2014-11-22
|
| Posted: Thu Jun 26, 2008 4:19 pm Post subject: |
|
|
Bruce wrote:
Well, I just Googled "crop camera and shutter speeds" and realized this is a very controversial subject, so I defer to you Orio. But after viewing many of your works, I often concluded you must have the steadiness of a bronze sculpture with the hands of gold. |
|
| Back to top |
|
|
Orio
Joined: 24 Feb 2007
Posts: 29545
Location: West Emilia
Expire: 2012-12-04
|
| Posted: Thu Jun 26, 2008 4:28 pm Post subject: |
|
|
Orio wrote:
| Bruce wrote: |
| Well, I just Googled "crop camera and shutter speeds" and realized this is a very controversial subject, so I defer to you Orio. But after viewing many of your works, I often concluded you must have the steadiness of a bronze sculpture with the hands of gold. |
I have my share of misses, like everyone, it's just that I don't show them 
_________________
Orio, Administrator
T*
NE CEDE MALIS AUDENTIOR ITO
Ferrania film is reborn! http://www.filmferrania.it/
Support the Ornano film chemicals company and help them survive!
http://forum.mflenses.com/ornano-chemical-products-t55525.html |
|
| Back to top |
|
|
Richard_D

Joined: 21 Oct 2007
Posts: 2378
Location: Faversham Kent UK
|
| Posted: Thu Jun 26, 2008 7:57 pm Post subject: |
|
|
Richard_D wrote:
More of a useful tip than essential:
If you use a reversing ring for macro stick a short extension tube on the rear end - it helps reduce flare, and protects the rear element from close encounters with the subject.
_________________
Richard
The interesting bit:
Nikkors: 20mm f2.8 AIS, 24mm f2.8 AIS, 28mm f2.8 AIS, 35mm f2 AIS, 50mm f1.4 AI, 50mm f1.48AI, 50m f2 AI,
55mm f3.5 AI'd, 105mm f4 AI, 135mm f2.8 AI'd, 135mm f3.5 AI'd, 200mm f4 AI'd .
Nikon E Series: 100mm f2.8 .
Soviet Nikon Mount: Zenitar 16mm f2.8, Arsat/arax/photex 85mm T&S f2.8 .
Other: Asahi Super Takumar 55 mm f2 (M42) ,Tamron 300mm f5.6 SP, Tamron 500mm f8 SP.
DSLR: Nikon D700. 35mm SLRsNikon FE, Pentax S1a.
TLR: Rolliecord II.
Sub-Minature: Pentax Auto 110, 18mm f2.8, 24mm f2.8, 50mm f2.8.
More to come... |
|
| Back to top |
|
|
Orio
Joined: 24 Feb 2007
Posts: 29545
Location: West Emilia
Expire: 2012-12-04
|
| Posted: Thu Jun 26, 2008 8:14 pm Post subject: |
|
|
Orio wrote:
Great tip, Richard!
I never thought of that.
_________________
Orio, Administrator
T*
NE CEDE MALIS AUDENTIOR ITO
Ferrania film is reborn! http://www.filmferrania.it/
Support the Ornano film chemicals company and help them survive!
http://forum.mflenses.com/ornano-chemical-products-t55525.html |
|
| Back to top |
|
|
F16SUNSHINE

Joined: 20 Aug 2007
Posts: 5486
Location: Left Coast
Expire: 2011-11-18
|
| Posted: Thu Jun 26, 2008 8:32 pm Post subject: |
|
|
F16SUNSHINE wrote:
This is less a Technique tip and more a equipment tip. Use black tape or glue to attach two rear lens caps together back to back. This way when changing lenses in the field you can quickly remove the lens from the cam, attach it to the "open" end of the cap, and then install the new lens. It saves time and you will not be fumbling for a a cap while your lenses rear element is exposed. We all only have two hands after all
Now for a technique tip for new manual focus users. When focusing with a split image screen. Don't be afraid to twist and turn the camera to position the split image on a crossing line in your subject. Often you will find the split is parallel with your subject rendering no use for focusing. Move the camera for focus and then once focused, re-compose the shot. This is also very useful for contrast spot rangefinder users.
I will add more later if anyone is interested. 
_________________
Moderator |
|
| Back to top |
|
|
poilu
Joined: 26 Aug 2007
Posts: 10471
Location: Greece
Expire: 2019-08-29
|
| Posted: Thu Jun 26, 2008 8:35 pm Post subject: |
|
|
poilu wrote:
yes sunshine! give us more crazy tips like the glued caps 
_________________
T* |
|
| Back to top |
|
|
F16SUNSHINE
Joined: 20 Aug 2007
Posts: 5486
Location: Left Coast
Expire: 2011-11-18
|
| Posted: Thu Jun 26, 2008 9:02 pm Post subject: |
|
|
F16SUNSHINE wrote:
Well how about this wild one
Always use a hood. A proper lens hood is more important than multi-coating in many lighting situations. Also a hood and in particular a metal one will provide protection for your lenses. Many photogs overlook this and find hoods cumbersome and inconvenient. Well I don't think more keepers is inconvenient or cumbersome I long ago invested in the fantastic Contax lens hood system. All the hoods are oversized diameter which allows for greater depth. The parts for this system are now becoming quite expensive. However, often they go overlooked at camera shows and can be had for a song so keep your eyes open.
_________________
Moderator |
|
| Back to top |
|
|
Orio
Joined: 24 Feb 2007
Posts: 29545
Location: West Emilia
Expire: 2012-12-04
|
| Posted: Thu Jun 26, 2008 9:19 pm Post subject: |
|
|
Orio wrote:
| F16SUNSHINE wrote: |
| Also a hood and in particular a metal one will provide protection for your lenses. |
I can not underscore this enough. If I had a metal hood on last Xmas, I would not have damaged my Planar 2/135.
Besides... Andy made me a gift of one of his Contax rings+hood
_________________
Orio, Administrator
T*
NE CEDE MALIS AUDENTIOR ITO
Ferrania film is reborn! http://www.filmferrania.it/
Support the Ornano film chemicals company and help them survive!
http://forum.mflenses.com/ornano-chemical-products-t55525.html |
|
| Back to top |
|
|
LucisPictor

Joined: 26 Feb 2007
Posts: 17633
Location: Oberhessen, Germany / Maidstone ('95-'96)
Expire: 2013-12-03
|
| Posted: Thu Jun 26, 2008 9:36 pm Post subject: |
|
|
LucisPictor wrote:
| Orio wrote: |
| Bruce wrote: |
be sure to consider crop factor when determining tripod use with your focal length and shutter speeds in use. A 50mm Zeiss is going to need an 80ish shutter speed before you can go handheld with it on your Canon [digital].
|
I don't think so, because you are still using a 50mm lens. You are just recording a smaller part of it. |
Exactly, you are using a smaller part, so to cover the same frame you need to enlarge higher and thus camera shake gets visible easier. That's the reason why you should calculate with the "effective" 35mm equivalent.
_________________
Personal forum activity on pause every now and again (due to job obligations)!
Carsten, former Moderator 
Things ON SALE
Carsten = "KAPCTEH" = "Karusutenu" | T-shirt?.........................My photos from Emilia: http://www.schouler.net/emilia/emilia2011.html
My gear: http://retrocameracs.wordpress.com/ausrustung/
Old list: http://forum.mflenses.com/viewtopic.php?t=65 (Not up-to-date, sorry!) | http://www.lucispictor.de | http://www.alensaweek.wordpress.com |
http://www.retrocamera.de |
|
| Back to top |
|
|
LucisPictor
Joined: 26 Feb 2007
Posts: 17633
Location: Oberhessen, Germany / Maidstone ('95-'96)
Expire: 2013-12-03
|
| Posted: Thu Jun 26, 2008 9:37 pm Post subject: |
|
|
LucisPictor wrote:
| F16SUNSHINE wrote: |
This is less a Technique tip and more a equipment tip. Use black tape or glue to attach two rear lens caps together back to back. This way when changing lenses in the field you can quickly remove the lens from the cam, attach it to the "open" end of the cap, and then install the new lens. It saves time and you will not be fumbling for a a cap while your lenses rear element is exposed. We all only have two hands after all
Now for a technique tip for new manual focus users. When focusing with a split image screen. Don't be afraid to twist and turn the camera to position the split image on a crossing line in your subject. Often you will find the split is parallel with your subject rendering no use for focusing. Move the camera for focus and then once focused, re-compose the shot. This is also very useful for contrast spot rangefinder users.
I will add more later if anyone is interested. |
For EOS it looks like this:
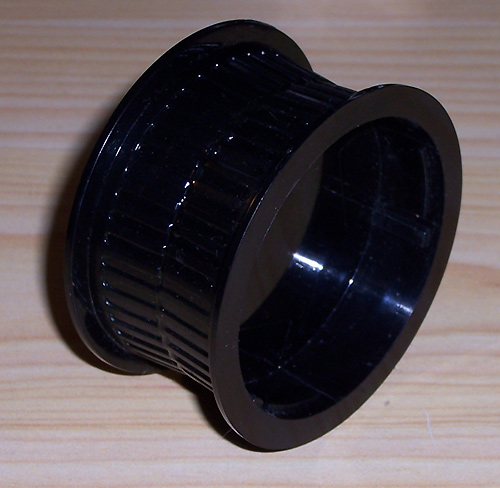
Very useful, indeed!
_________________
Personal forum activity on pause every now and again (due to job obligations)!
Carsten, former Moderator
Things ON SALE
Carsten = "KAPCTEH" = "Karusutenu" | T-shirt?.........................My photos from Emilia: http://www.schouler.net/emilia/emilia2011.html
My gear: http://retrocameracs.wordpress.com/ausrustung/
Old list: http://forum.mflenses.com/viewtopic.php?t=65 (Not up-to-date, sorry!) | http://www.lucispictor.de | http://www.alensaweek.wordpress.com |
http://www.retrocamera.de |
|
| Back to top |
|
|
Orio
Joined: 24 Feb 2007
Posts: 29545
Location: West Emilia
Expire: 2012-12-04
|
| Posted: Thu Jun 26, 2008 10:16 pm Post subject: |
|
|
Orio wrote:
| LucisPictor wrote: |
Exactly, you are using a smaller part, so to cover the same frame you need to enlarge higher and thus camera shake gets visible easier. That's the reason why you should calculate with the "effective" 35mm equivalent. |
It's too complicated for me
_________________
Orio, Administrator
T*
NE CEDE MALIS AUDENTIOR ITO
Ferrania film is reborn! http://www.filmferrania.it/
Support the Ornano film chemicals company and help them survive!
http://forum.mflenses.com/ornano-chemical-products-t55525.html |
|
| Back to top |
|
|
F16SUNSHINE
Joined: 20 Aug 2007
Posts: 5486
Location: Left Coast
Expire: 2011-11-18
|
| Posted: Thu Jun 26, 2008 10:27 pm Post subject: |
|
|
F16SUNSHINE wrote:
| Quote: |
| Exactly, you are using a smaller part, so to cover the same frame you need to enlarge higher and thus camera shake gets visible easier. That's the reason why you should calculate with the "effective" 35mm equivalent. |
I think this is the most confusing thing for people in regards to crop cams. Here is the simplest way to put it. Magnification does not change no matter the sensor or film size. For a visual here is an example. Think of it as "reach". If you have two ladders that are 2 meters tall. One could be half a meter wide the other 3/4 of a meter wide (fat guy and skinny guy ladders ). They both still reach 2 meters. So a 50mm has the same magnification or "reach" regardless of the sensor it is covering. Therefore camera shake is not more sensitive for a smaller sensor or less for a larger one for a given focal length.
_________________
Moderator |
|
| Back to top |
|
|
Orio
Joined: 24 Feb 2007
Posts: 29545
Location: West Emilia
Expire: 2012-12-04
|
| Posted: Thu Jun 26, 2008 10:31 pm Post subject: |
|
|
Orio wrote:
| F16SUNSHINE wrote: |
| Therefore camera shake is not more sensitive for a smaller sensor or less for a larger one for a given focal length. |
So, I have right ?
_________________
Orio, Administrator
T*
NE CEDE MALIS AUDENTIOR ITO
Ferrania film is reborn! http://www.filmferrania.it/
Support the Ornano film chemicals company and help them survive!
http://forum.mflenses.com/ornano-chemical-products-t55525.html |
|
| Back to top |
|
|
LucisPictor
Joined: 26 Feb 2007
Posts: 17633
Location: Oberhessen, Germany / Maidstone ('95-'96)
Expire: 2013-12-03
|
| Posted: Thu Jun 26, 2008 10:38 pm Post subject: |
|
|
LucisPictor wrote:
| LucisPictor wrote: |
| ... you need to enlarge higher and thus camera shake gets visible easier... |
What I mean with that is that you need to enlarge the "negative" more often to get a "print" of a certain size.
In the same way, the medium size plays a role for sharpness (circle of confusion), it plays a role for the prevention of camera shake.
That's how I have learned it:
Visible camera shake means that sharpness is reduced (of course!).
If you want to get, say, a 20x30cm print from a sensor sized 24x36mm, you need to "enlarge" the picture by about 8 times.
If you crop out the central part of the 24x36mm frame (which is done by a "crop sensor") you need to enlarge by about 13 times to get a 20x30cm print.
Thus camera shake (or any other lack of sharpness) also is "enlarged" 13 times (instead of 8 times) and ergo easier visible.
Where is the mistake in my thoughts?
Anyway, if you calculate with a minimum shutter speed of 1/(focal length * 1.6), you are on the safe side.
_________________
Personal forum activity on pause every now and again (due to job obligations)!
Carsten, former Moderator
Things ON SALE
Carsten = "KAPCTEH" = "Karusutenu" | T-shirt?.........................My photos from Emilia: http://www.schouler.net/emilia/emilia2011.html
My gear: http://retrocameracs.wordpress.com/ausrustung/
Old list: http://forum.mflenses.com/viewtopic.php?t=65 (Not up-to-date, sorry!) | http://www.lucispictor.de | http://www.alensaweek.wordpress.com |
http://www.retrocamera.de |
|
| Back to top |
|
|
lulalake

Joined: 22 Apr 2007
Posts: 1191
Location: Near Austin Texas
Expire: 2011-11-18
|
| Posted: Thu Jun 26, 2008 11:08 pm Post subject: Turn Around |
|
|
lulalake wrote:
A technique that I always use on almost every shot. It was told to me by an old photo mentor many years ago. It's very simple and should be done by everyone shooting anytime.
Whenever you're shooting, almost anything, almost anytime, turn around and look at whats behind and at your side. You may, and many times will, find an absolutely astounding shot.
Jules |
|
| Back to top |
|
|
Orio
Joined: 24 Feb 2007
Posts: 29545
Location: West Emilia
Expire: 2012-12-04
|
| Posted: Thu Jun 26, 2008 11:20 pm Post subject: Re: Turn Around |
|
|
Orio wrote:
| lulalake wrote: |
A technique that I always use on almost every shot. It was told to me by an old photo mentor many years ago. It's very simple and should be done by everyone shooting anytime.
Whenever you're shooting, almost anything, almost anytime, turn around and look at whats behind and at your side. You may, and many times will, find an absolutely astounding shot.
Jules |
This is one of the best advices ever for a street photographer.
I do this, but, not enough, and sometimes I am captured by the action and forget the surroundings.
It really takes a lot of discipline to keep this control all the time.
But practising it will improve - hopefully
_________________
Orio, Administrator
T*
NE CEDE MALIS AUDENTIOR ITO
Ferrania film is reborn! http://www.filmferrania.it/
Support the Ornano film chemicals company and help them survive!
http://forum.mflenses.com/ornano-chemical-products-t55525.html |
|
| Back to top |
|
|
lulalake
Joined: 22 Apr 2007
Posts: 1191
Location: Near Austin Texas
Expire: 2011-11-18
|
| Posted: Fri Jun 27, 2008 12:48 am Post subject: Re: Turn Around |
|
|
lulalake wrote:
| Orio wrote: |
| lulalake wrote: |
A technique that I always use on almost every shot. It was told to me by an old photo mentor many years ago. It's very simple and should be done by everyone shooting anytime.
Whenever you're shooting, almost anything, almost anytime, turn around and look at whats behind and at your side. You may, and many times will, find an absolutely astounding shot.
Jules |
This is one of the best advices ever for a street photographer.
I do this, but, not enough, and sometimes I am captured by the action and forget the surroundings.
It really takes a lot of discipline to keep this control all the time.
But practising it will improve - hopefully |
Yes, that advice has served me well. One more . .
Tonight, say to your wife or girl or boyfriend, (very seriously) "Baby, something's different about you. Are you losing weight or something?"
Guaranteed to make points!
|
|
| Back to top |
|
|
F16SUNSHINE
Joined: 20 Aug 2007
Posts: 5486
Location: Left Coast
Expire: 2011-11-18
|
| Posted: Fri Jun 27, 2008 4:23 am Post subject: |
|
|
F16SUNSHINE wrote:
| Quote: |
Where is the mistake in my thoughts?
Anyway, if you calculate with a minimum shutter speed of 1/(focal length * 1.6), you are on the safe side. Wink |
Carsten
There is no mistake in your thought. This is absolutely on the safe side. |
|
| Back to top |
|
|
Rob Leslie
Joined: 20 Mar 2007
Posts: 1103
Location: UK Swindon
|
| Posted: Fri Jun 27, 2008 9:08 am Post subject: |
|
|
Rob Leslie wrote:
I am not convinced the written word can ever help a beginner or a mediocre experienced user good basics. The tripod is a great example.
Every good book, many forum posts and loads of magazine articles will stress a good Tripod is a more essential bit of kit than another new lens yet how many bother.
I see more bird watchers carrying quality tripods than I do photographers?
My Photo basic tip is to join a club
Being in a club is the ONLY way to get honest feed back on your work and to compare your own standards with better photographers.
Also everybody with a real interest should do courses.
The essential first is the Adobe approved Photoshop Basics course which is run by virtually every College in the UK.
Also in the UK consider the very easy but good City and Guilds Photography course
Both of these can be taken as Night school course and take up just a few hours a week.
_________________
Pentax K10D & K100D. Many Tamron Adaptall SP lenses, Fujinon f4.5 400mm. A loved Lens Baby 2, Lubitel triplet +++ and many film cameras. Mainly a Digital user inc G5, GR2
http://robstreet.blogspot.com/
http://robleslie.blogspot.com/
http://roblesliephotography.blogspot.com/
http://www.flickr.com/photos/64956578@N00/ |
|
| Back to top |
|
|
Rob Leslie
Joined: 20 Mar 2007
Posts: 1103
Location: UK Swindon
|
| Posted: Fri Jun 27, 2008 10:12 am Post subject: |
|
|
Rob Leslie wrote:
| LucisPictor wrote: |
| Orio wrote: |
| Bruce wrote: |
be sure to consider crop factor when determining tripod use with your focal length and shutter speeds in use. A 50mm Zeiss is going to need an 80ish shutter speed before you can go handheld with it on your Canon [digital].
|
I don't think so, because you are still using a 50mm lens. You are just recording a smaller part of it. |
Exactly, you are using a smaller part, so to cover the same frame you need to enlarge higher and thus camera shake gets visible easier. That's the reason why you should calculate with the "effective" 35mm equivalent. |
As usual a very good and insightful discussion.
The answer is of course to test the theory.
Take an ordinary PS digital and set it to the equivalent of a 35mm 50mm lens FOV which should be around 10/12mm. Set your shutter to 1/15th and see how many shake free shots you get.
_________________
Pentax K10D & K100D. Many Tamron Adaptall SP lenses, Fujinon f4.5 400mm. A loved Lens Baby 2, Lubitel triplet +++ and many film cameras. Mainly a Digital user inc G5, GR2
http://robstreet.blogspot.com/
http://robleslie.blogspot.com/
http://roblesliephotography.blogspot.com/
http://www.flickr.com/photos/64956578@N00/ |
|
| Back to top |
|
|
|
|


