Posted: Sun Sep 18, 2016 3:36 pm Post subject: Cleaning aperture CZJ Tessar 105mm f3,5 Posted: Sun Sep 18, 2016 3:36 pm Post subject: Cleaning aperture CZJ Tessar 105mm f3,5 |
 |
|
Gonzoo wrote:
A friend recently asked for my help with a modified Polaroid 340 folder camera mounting a Carl Zeiss Jena Tessar f3,5 105mm. I'd like to share with you my approach of dissasembly. There is additional info on cleaning similar lenses in this thread.
Lets start with the camera.
The lens holder has two screws in the back.
#1

Unscrew to get the lens holder open.
#2
Next, open the film compartment and lift out the filmholder.
#3

When the filmholder is gone, the back screws of the bellows become visible.
#4

Unscrew to release the bellows from the lens.
#5

#6

Next, the lensholder has to be deattached from the bellows extender. Therefore remove the plastic knob screw at top.
#7

There are two more metallic scews at the bottom rear of the lens holder, that need to be removed.
#8

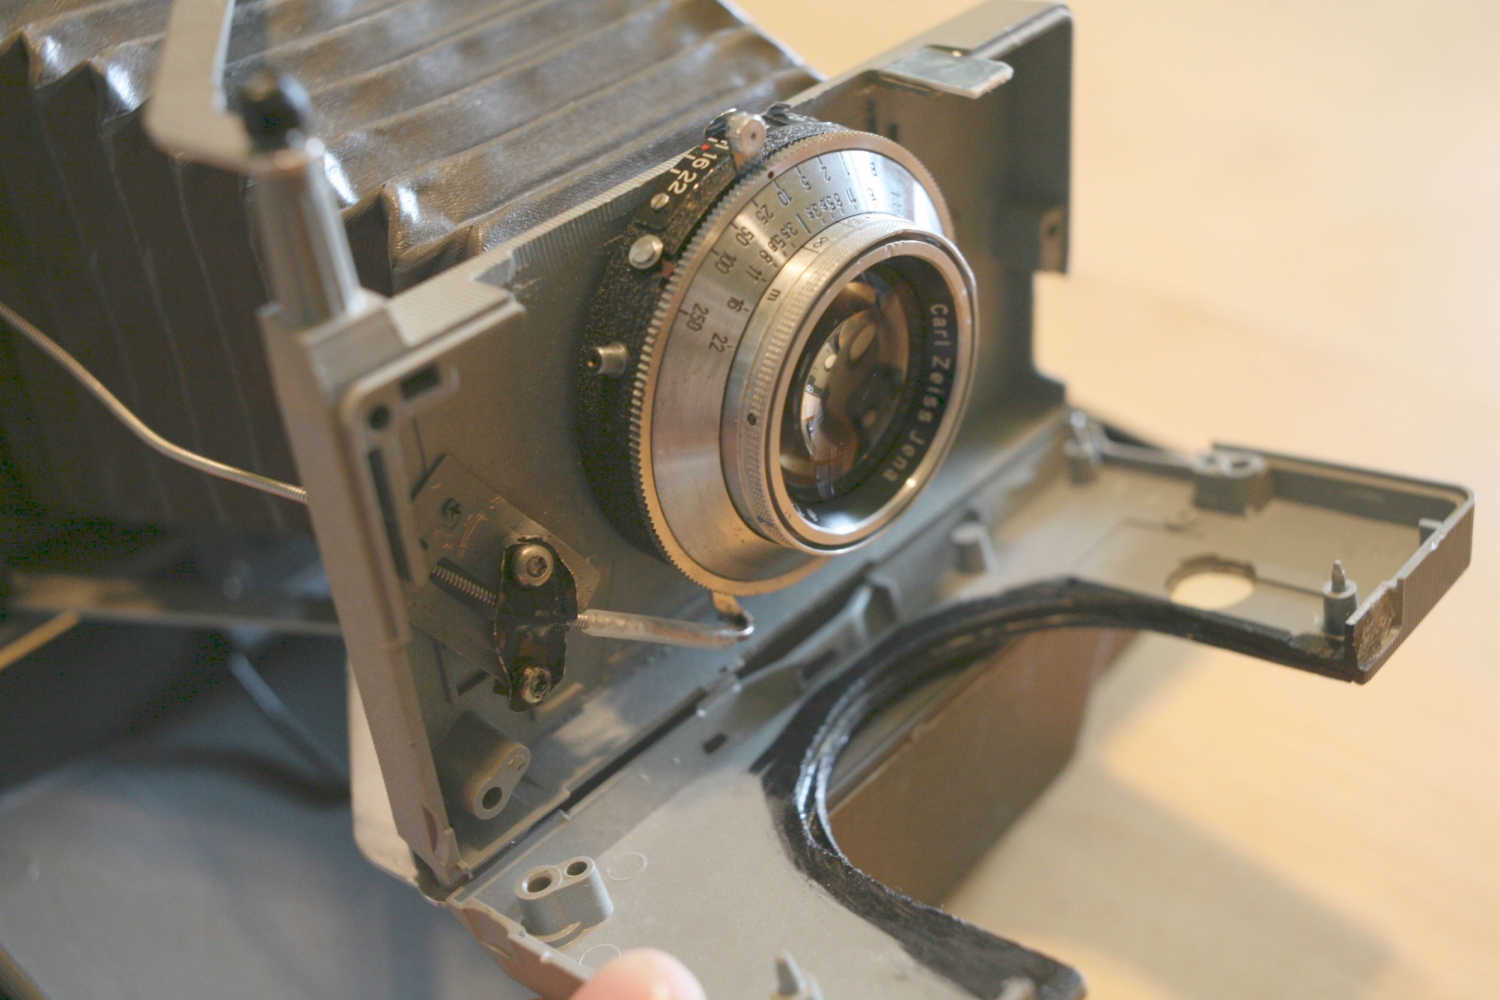
After all screws are gone, the lensholder can be rotated 180° and the retaining ring holding the lens against the lensholder becomes visible. Unscrew it.
#9

Afterwards detach the cable trigger from the lens.
#10

Now the lens can be lifted out of the holder.
#11

My problem were a sticky shutter and bent/disloged aperture blades.
#12

To reach both the shutter aswell the aperture blades the lens has to be opened. First remove four tiny screws at the outside of the front ring. Be extra careful, these are pretty damn small screws. This step might be optional to open up the lens, but it's needed if you want to remove the front lens.
#13

#14

The front ring can be lifted away now.
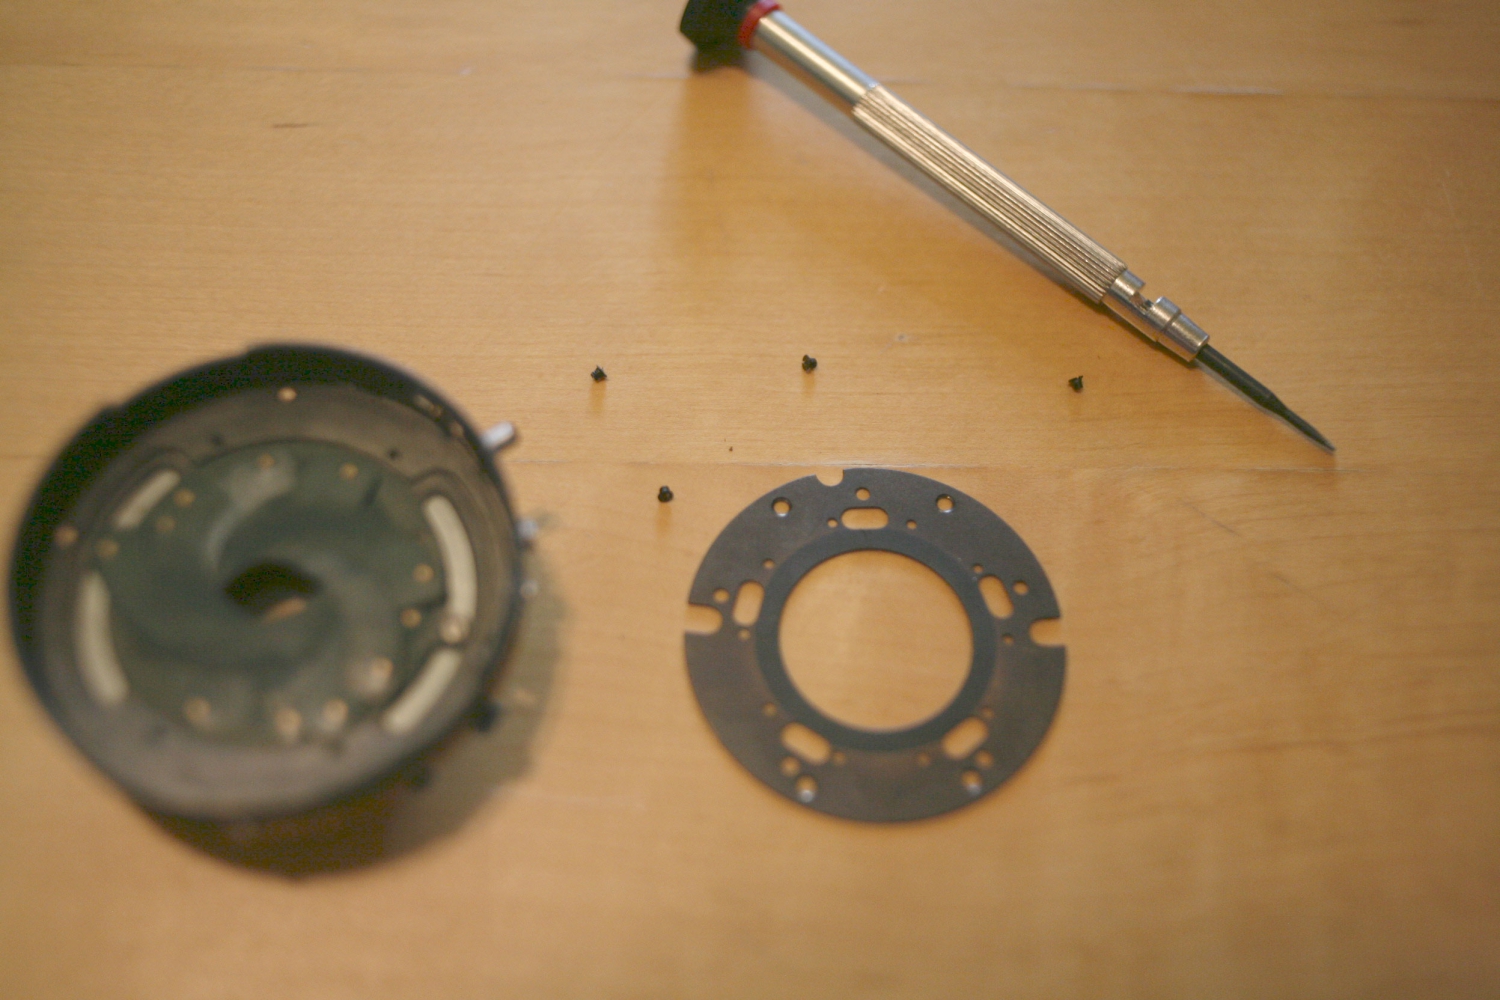
#15

In order to seperate front and back, three screws at the back have to be unscrewed.
#16

Front and back are coming apart now.
#17

#18

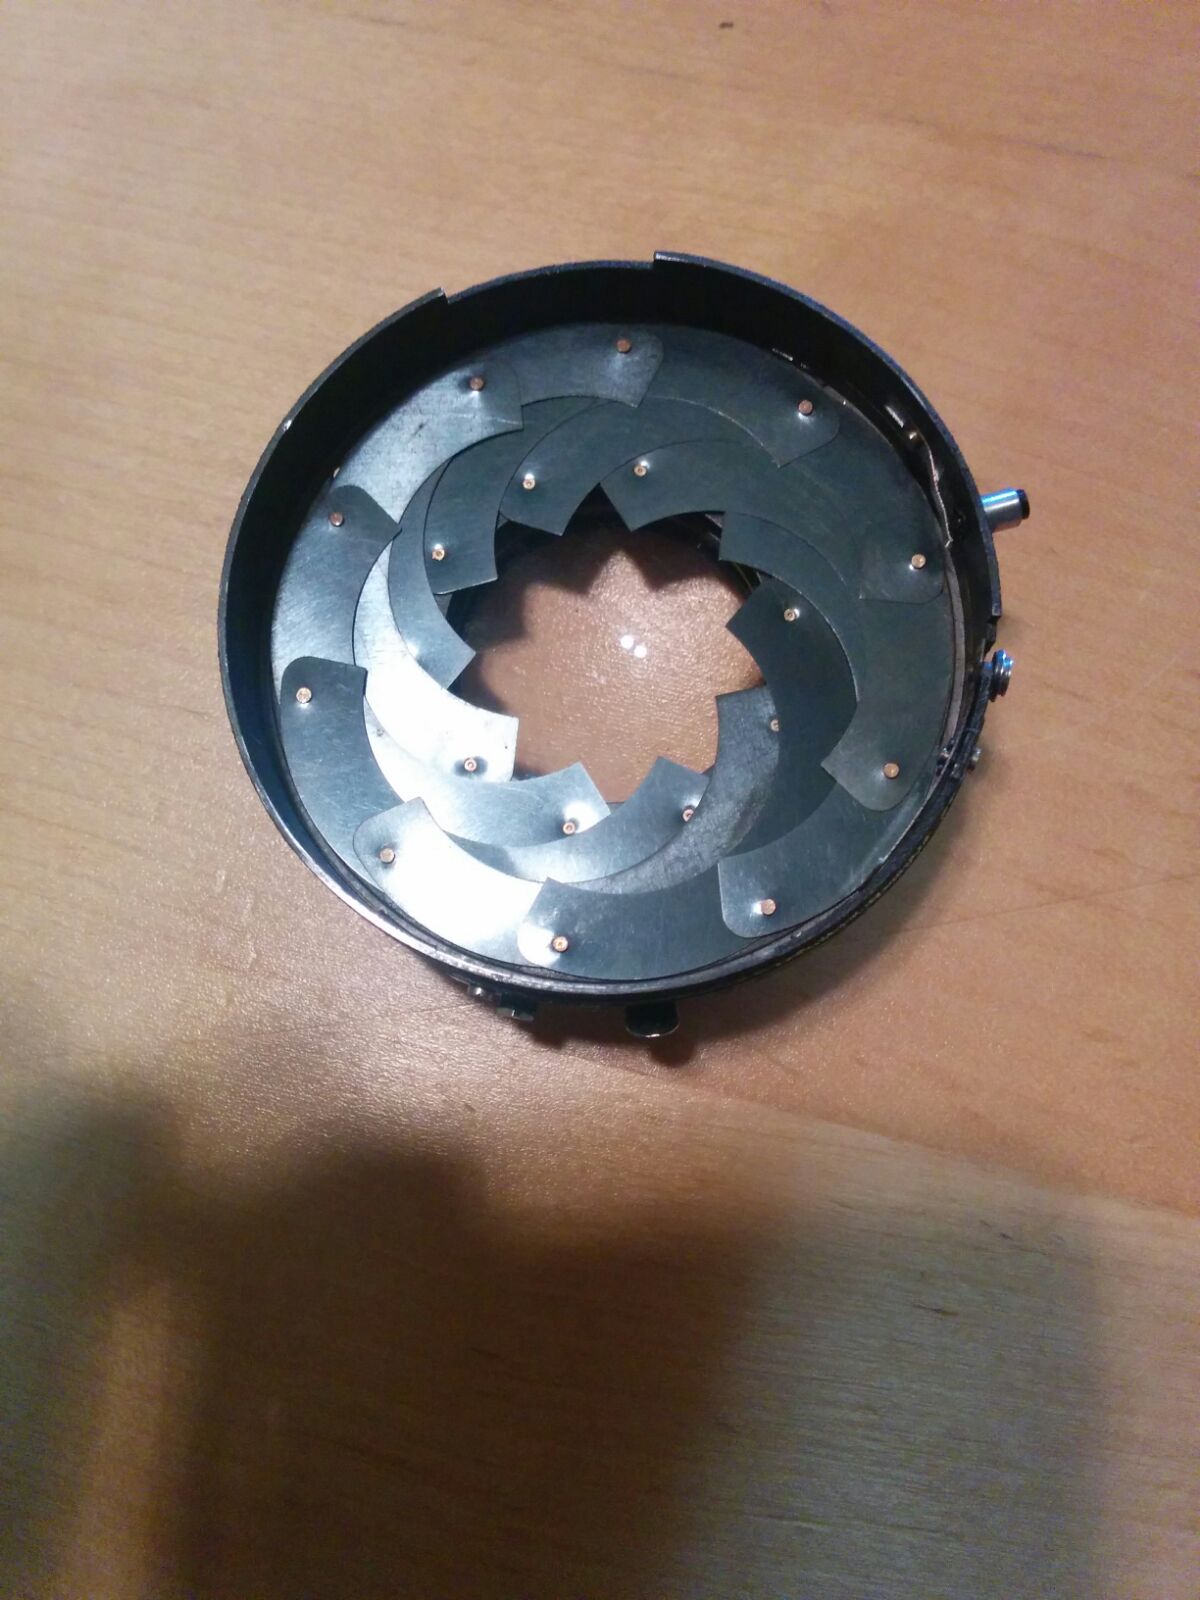
Cleaning the shutter blades is easy, just lift them off the mechanism and drop them into naptha or the like to dissolve and polish off old lubricant. The aperture is another story. This lens features ten blades. If they are not disloged, I stronly recommend to not disassemble the aperture. Putting it back together is a bitch. Trust me.
In my case there where a total of five disloged and one bent blade, so lets dive deeper. The blades are arc-shaped and have one nipple at each end, one facing up, the other down. One nipple sits tight in the first aperture ring, the other slides in a second ring, allowing the aperture to open and close. To get acces to the blades we remove the first ring.
#19

#20
Now the blades can be removed and cleaned.
#21

#22

#23

Voilà, shiny blades again 
#24

Now the shitty part. Reassembling the aperture. After a couple of failed attempts, I came up with his: Removing the second aperture ring (the one with the holes that hold the bottom nipples of the blades) and starting the reassemling process with this ring as bottom layer.
#25

Now, put one blade's nipple in the hole, the next blade in the next hole, below the first and so on. Arrange the blades in such a way, that they don't block any remaining holes. It's not tricky unless you have two blades left.
#26

Putting in the last two blades will strain your concentration. Put them below the last blade BUT above the first one. After that, put the other aperture ring (the one with the guides) on top and slide the blades in such a way, that they will position inside the guides.
#27

Now, put the two rings with the blades back into the aperture housing and fix the screws.
#28

Put together the lens and the cam in reverse order, done.
_________________
Canon 5d | Exa 500 | Pentacon Six + too much lenses |